Canvas Overview
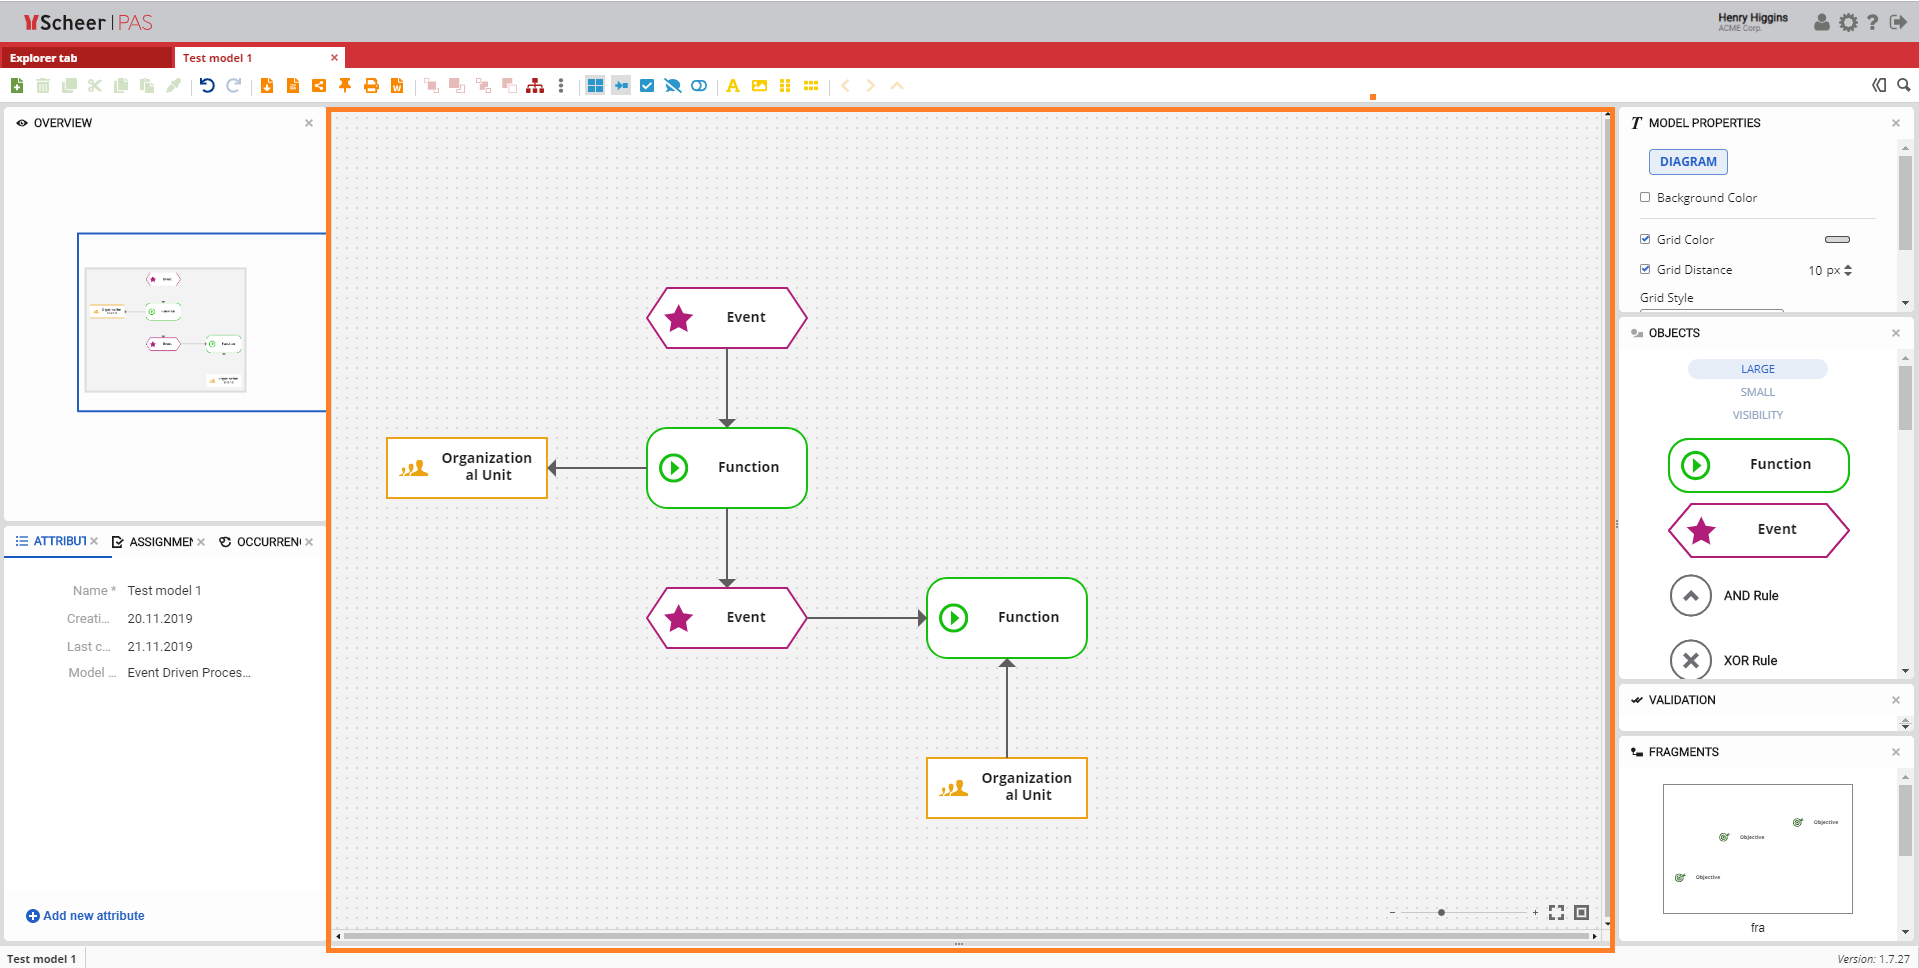
The Canvas is the primary workspace in the Scheer PAS Business Modeler where users create, edit, and structure models. It represents the visual modeling area in which objects are placed, connected, arranged, and refined to describe business processes, structures, or architectures.
Modeling on the Canvas is supported by various panels, which are separate windows (located on the left and right side next to the Canvas) providing tools and contextual information. These panels interact directly with the Canvas and enable actions such as adding objects via drag and drop, maintaining attributes, creating and reusing fragments, and managing object properties. Together, the Canvas and its supporting panels form the core modeling environment of the Business Modeler.
This chapter focuses on working with the Canvas itself and describes how users interact with models on the modeling surface, including navigation, object placement, visual adjustments, and direct editing. Detailed information about the available panels and their functionality is provided in the Panels section of the documentation.
The following sections describe the individual Canvas features and functionalities in more detail.
Working with Objects on the Canvas
Objects on the Canvas can be selected individually or as a group. Selected objects can be moved, resized, and connected to define the structure and flow of the model. Connections between objects are created and adjusted directly on the Canvas, allowing users to model relationships in an intuitive way.
Multiple objects can be selected to apply changes such as alignment or positioning collectively. The Canvas provides direct visual feedback for all changes, supporting precise and efficient model design.
Zooming and Scaling a Model
Zoom and scaling options are available in the bottom-right corner of the Canvas and allow users to adjust the view of the model.
-
Zoom Slider
The zoom slider on the left can be adjusted by dragging the slider handle or by using the + and − buttons to zoom in or out. -
Fit Area
The Fit Area icon automatically adjusts the zoom level so that the entire model fits within the visible area of the screen. -
Scale to 100%
The Scale to 100% icon resets the zoom level to its default value of 100%.
Creating Objects
Objects can be added to a model by dragging them from the Object Panel onto the Canvas. Drag-and-drop allows users to quickly place objects directly into the model and start modeling without additional dialogs.
When an object is dragged onto the Canvas while another object is selected, the new object is automatically connected to the selected object. This behavior supports fast creation of model structures and relationships.
Each object on the Canvas provides multiple connection points that can be used to create relationships to other objects. To create a connection manually, click on one of the connection points of an object and drag the connection to another object on the Canvas.
After an object is placed on the Canvas and selected, its attributes are displayed in the Attributes Panel. Attributes can be maintained directly in the panel and can also be added to the Canvas using drag-and-drop, allowing attribute information to be visualized directly within the model.
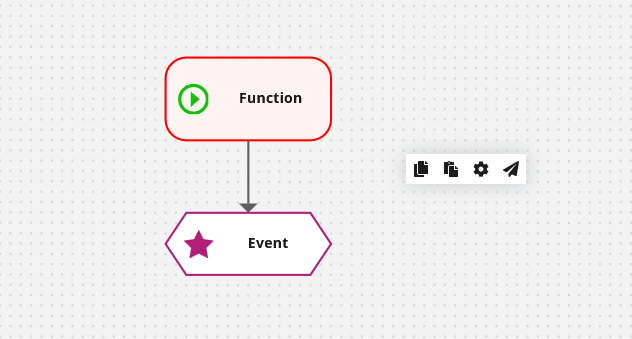
In addition to drag-and-drop, objects can also be created and connected directly on the Canvas. When an object on the Canvas is selected (left mouse click), a small menu appears next to the object, displaying a set of available object types.
By selecting an object type from this menu, a new object is automatically created and can be placed directly on the Canvas. At the same time, a relationship between the originally selected object and the newly created object is created automatically. This allows users to model quickly without switching to the Object Panel or using drag-and-drop.
The object types available in the context menu depend on the model type (for example EPC, BPMN) and the underlying modeling logic. Only objects that are valid in the current modeling context are offered, ensuring consistent and correct model structures.
This modeling approach supports fast and intuitive model creation and is especially useful for building process flows step by step directly on the Canvas.
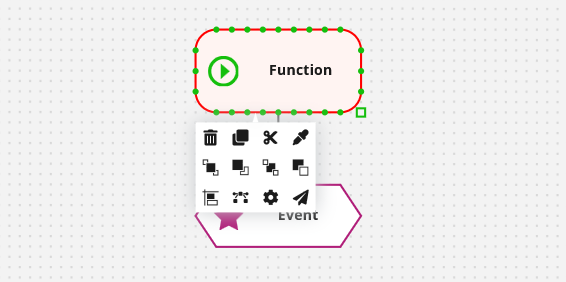
Object Context Menu
When right-clicking an object on the Canvas, a context menu is displayed that provides a set of actions which can be applied directly to the selected object or objects. This menu offers quick access to common modeling and layout operations without leaving the Canvas.
The following actions are available via the object context menu:
-
Delete – Removes the selected object(s) from the model
-
Copy / Cut – Copies or cuts the selected object(s) for reuse
-
Bring to Front / Bring Forward – Moves the selected object(s) forward in the visual stacking order
-
Send to Back / Send Backward – Moves the selected object(s) backward in the visual stacking order
-
Alignment options – Aligns selected objects horizontally or vertically
-
Auto Layout – Automatically arranges selected objects
-
Align Relations – Adjusts and straightens relations between objects
-
Create Fragment – Creates a fragment from the selected objects
-
Use as Template – Uses the selected object(s) as a template
-
New Message – Creates a new message related to the selected object
-
Apply Type – Applies the type of one object to other selected objects
Most actions available in the object context menu can also be executed via the Model Toolbar, provided that the corresponding object is selected on the Canvas using the left mouse button. Toolbar actions are context-sensitive and are only available when an object is selected.
The exceptions are Apply Type, Create Fragment, and New Message, which are only available through the object context menu.
For more information about the Model Toolbar and its available actions, see the Model Toolbar section of the documentation.
Canvas Context Menu
When right-clicking on an empty area of the Canvas (not on an object), a different context menu is displayed. This menu provides actions that apply to the model or the Canvas itself rather than to a specific object.
The following actions are available via the Canvas context menu:
-
Paste Object – Pastes a previously copied object onto the Canvas
-
Paste Object with New Definition – Pastes the object and creates a new object definition
-
Use as a Template – Uses the current selection or context as a template
-
New Message – Creates a new message related to the model
The available options depend on the current clipboard content and the modeling context.
Creating a New Fragment
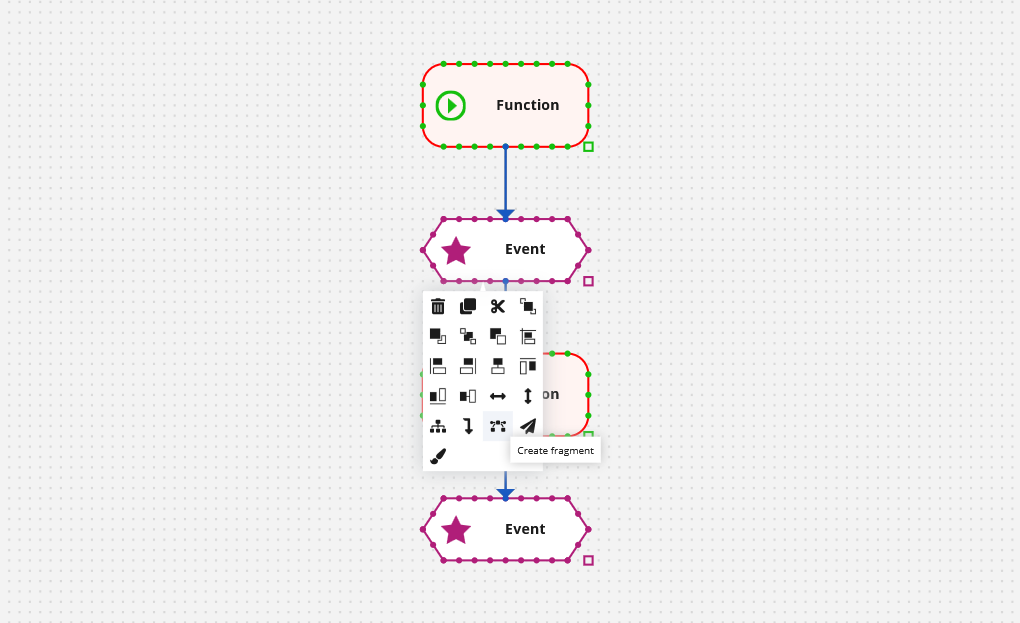
Fragments can be created from one or more objects on the Canvas to enable reuse of recurring model structures. To create a fragment, select one or more objects on the Canvas, right-click on one of the selected objects, and choose the Create Fragment icon from the context menu.
When creating a fragment, object attributes can optionally be included. In addition to objects, fragments can also be created from one or more model attributes.
After selecting the content of the fragment, enter a name in the Create New Fragment dialog and click Save. The newly created fragment is then available in the Fragments Panel, where it can be reused in other models.
For detailed information about managing and using fragments, see the Fragments section of the documentation.
Change Symbol And Object Type
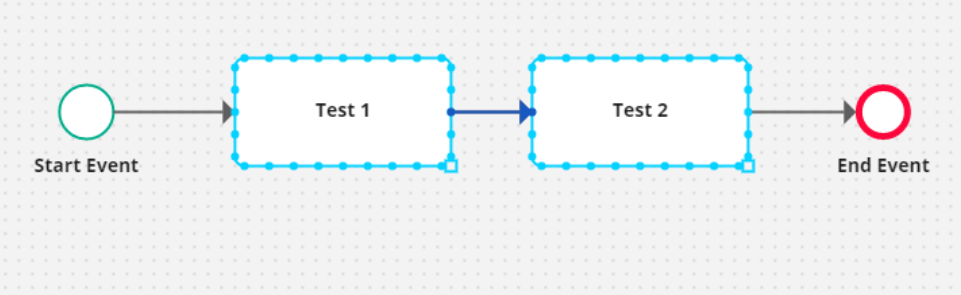
Select two or more objects, right-click an object whose type you want to apply to the remaining selected objects and when a pop-up window with icons appears, select Apply type icon.
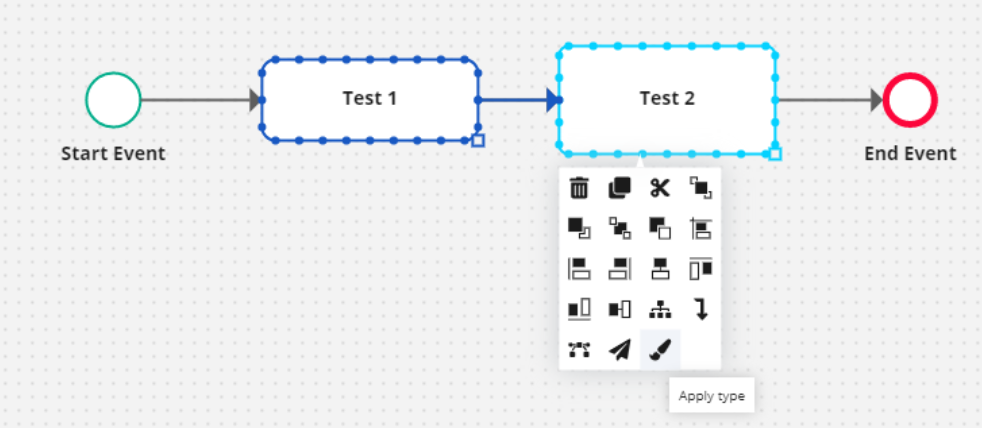
Apply Type option changes both symbol and object type.
Add Images from Computer or Web directly to Canvas
Images can be added directly to the Canvas from the web or from files stored on your computer. This allows visual references, illustrations, or additional information to be included directly within a model.
To add an image, first select the image you want to use. Right-click the image and choose Copy or Copy Image. The image is copied to the system clipboard (a type of temporary storage) on your computer).
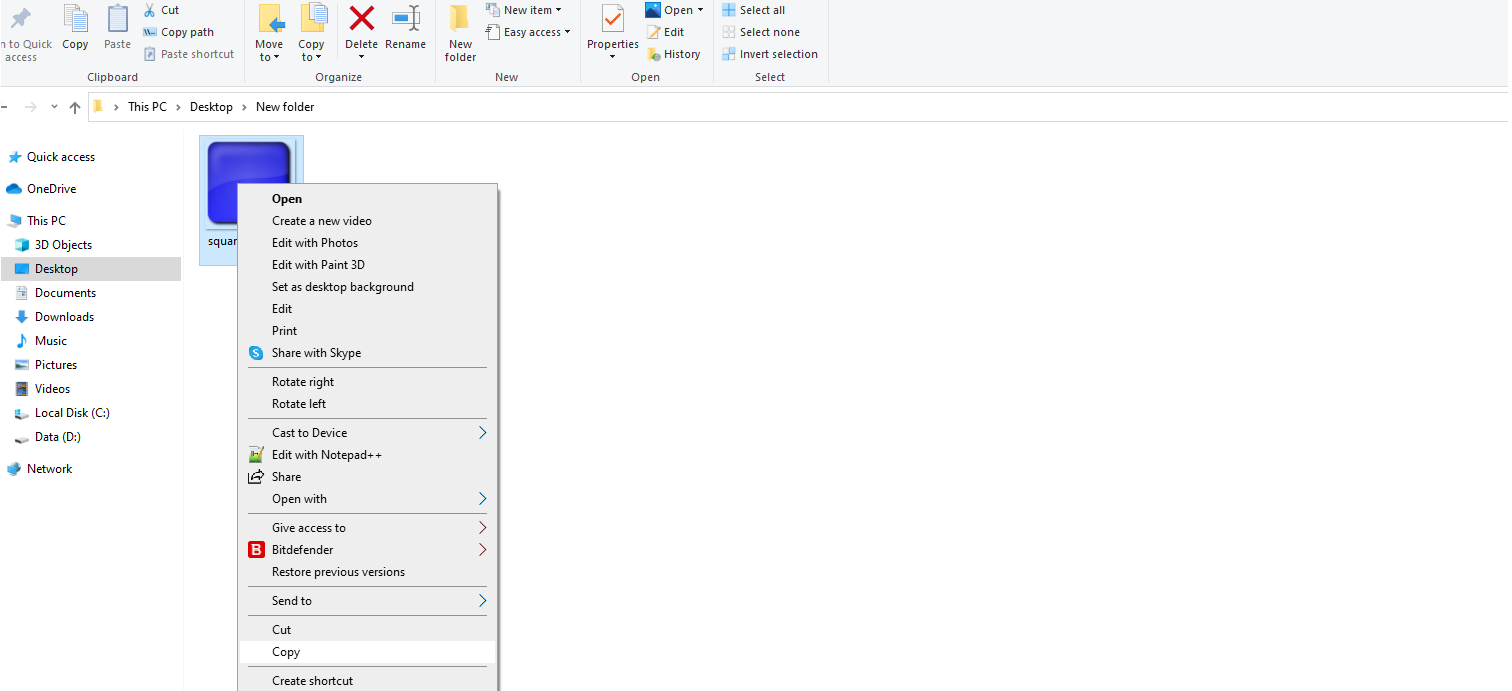
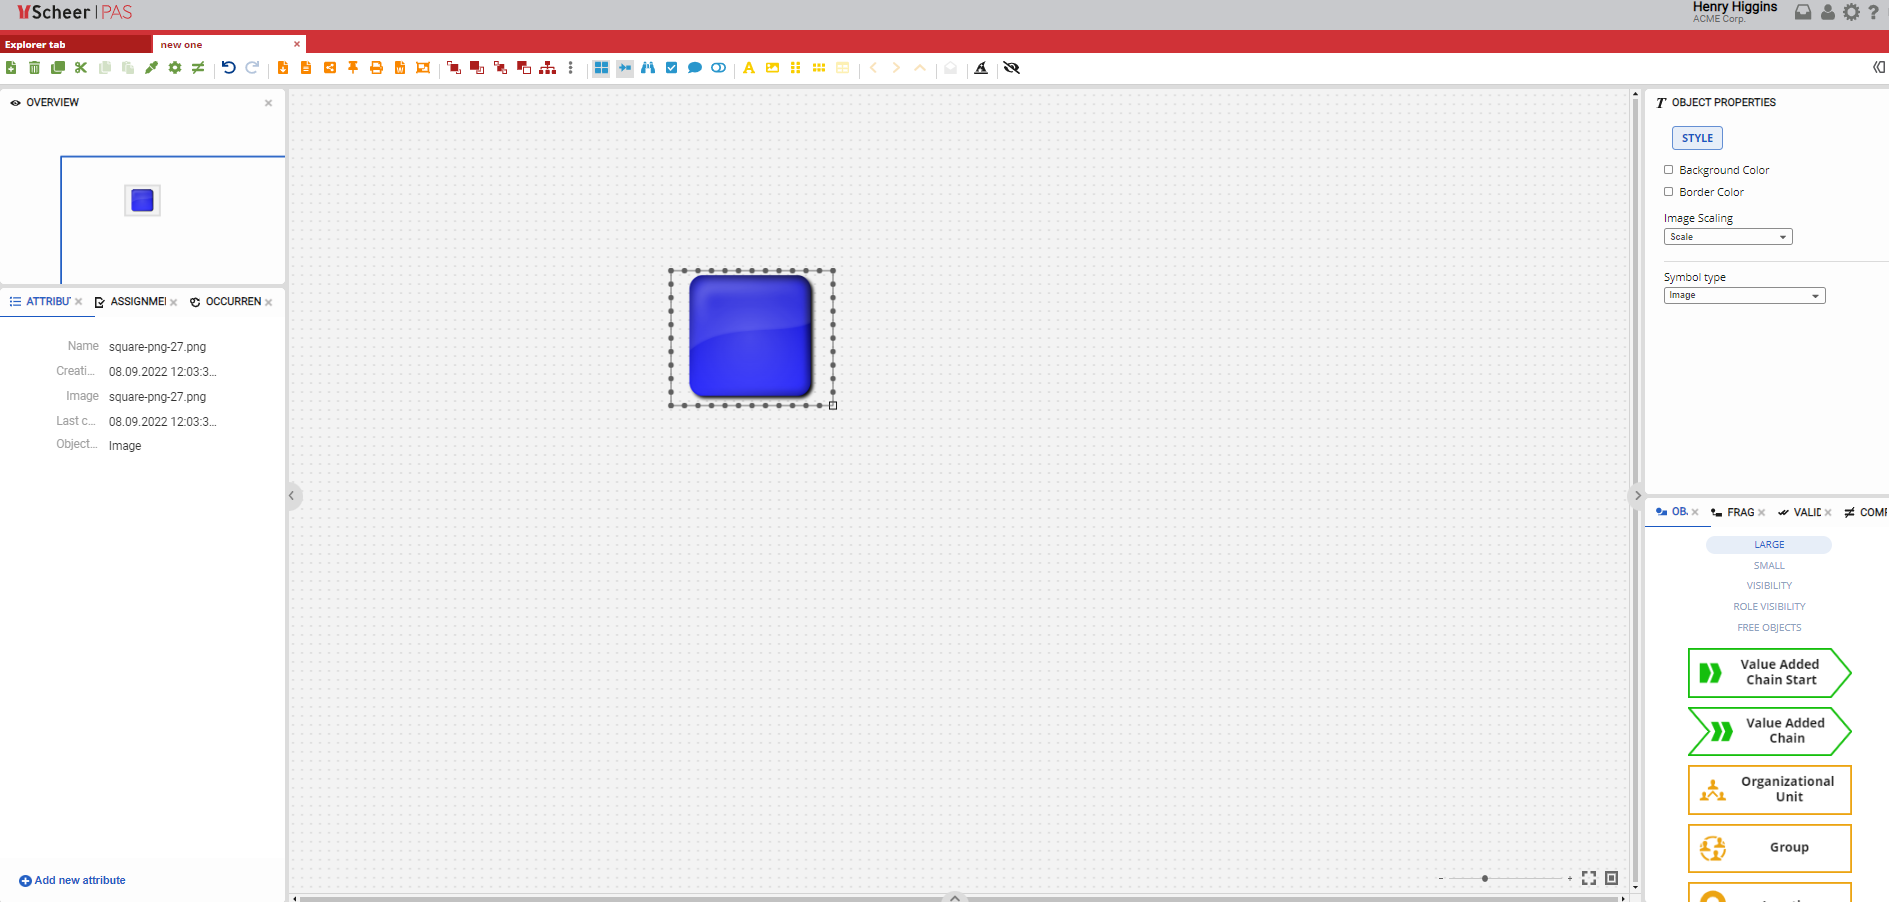
Navigate to the model where the image should be placed and press Ctrl + V to paste the image onto the Canvas.
Once pasted, the image becomes part of the model and is removed from the clipboard.
Supported browsers such as Edge and Chrome allow multiple images to be added at once. To select multiple images, click the first image, hold down the Ctrl key, and select additional images. All selected images can then be pasted onto the Canvas using Ctrl + V.
The Firefox browser does not support adding multiple images at once. In this case, images must be added individually.