Developers can create their own libraries in the Designer. They are also able to publish these libraries via the asset repository to share them with their whole team. Detailed documentation of your assets is important so that other team members can use your library quickly and easily. Use the Publish Asset wizard to easily document and publish your library to speed up collaborative development.
How to Publish a Library
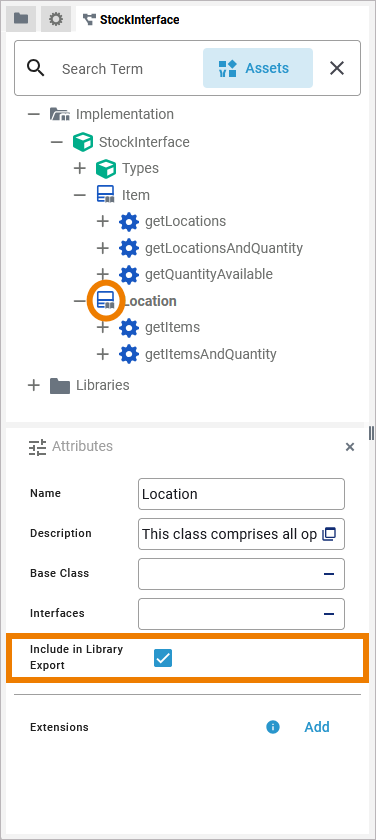
When you are done developing, check that you have enabled the Include in Library Export attribute for all elements that you want to include in your library:
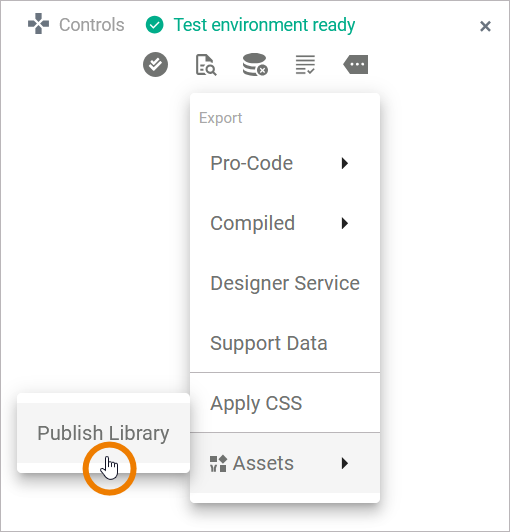
In the Controls panel, open Additional menu > Assets > Publish Library:
Working With the Publish Asset Wizard
The first window of the Publish Asset wizard will open:
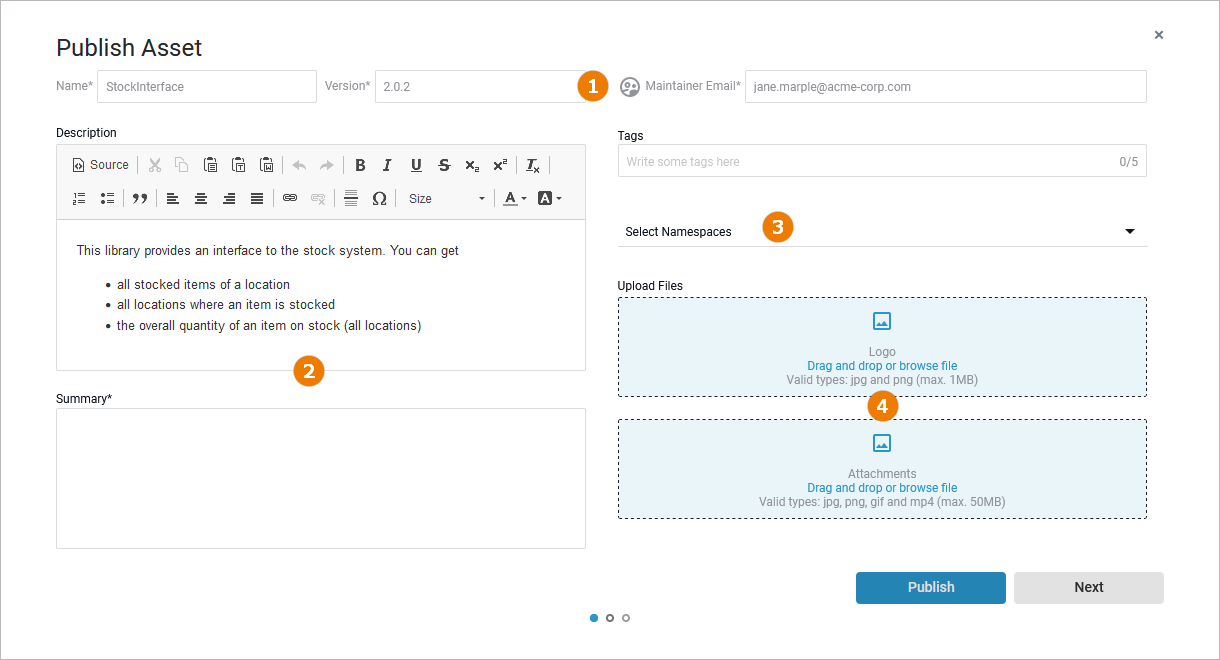
The Publish Asset wizard supports you during the publication. Follow the wizard step by step through the configuration process.
The wizard is also used to upload libraries in the Library administration.
|
Step |
Field |
Description |
Mandatory |
|
|---|---|---|---|---|
|
(1) |
Enter Meta Data
|
Name |
|
|
|
Version |
|
|
||
|
Maintainer E-Mail |
Enter the email address of the developer that is responsible to maintain the asset. By default, the address of current user is used. |
|
||
|
Tags |
Enter some tags that are related to the asset. This is optional, but well-chosen tags help users to find the right asset faster. |
|
||
|
(2) |
Describe Asset
|
Description |
Enter a description of the asset. The description can be much more extensive than the summary (see below). |
|
|
Summary |
Enter a brief description of the asset that summarizes its functionality. The summary is displayed in the Asset Drawer. |
|
||
|
(3) |
Select Namespaces
|
Select Namespaces |
Select the namespaces in which you want to publish the asset. Multiple selection is possible.
|
|
|
(4) |
Upload Additional Material
|
Upload Files: Logo |
If you want to display a logo for the asset in the Asset Drawer, you can upload it here. Valid file types are jpg and png. The maximum size is 1 MB. |
|
|
Upload Files: Attachments |
If you want to add some illustrations to your asset, you can upload them here. Valid file types are jpg, png, gif and mp4. The maximum size is 50 MB. Uploading multiple files is possible. |
|
||
If you have filled all mandatory fields, you can already Publish the asset. If you want to manage the asset's documentation first (see Documenting Assets for details), click Next. The second window of the Publish Asset wizard will open:
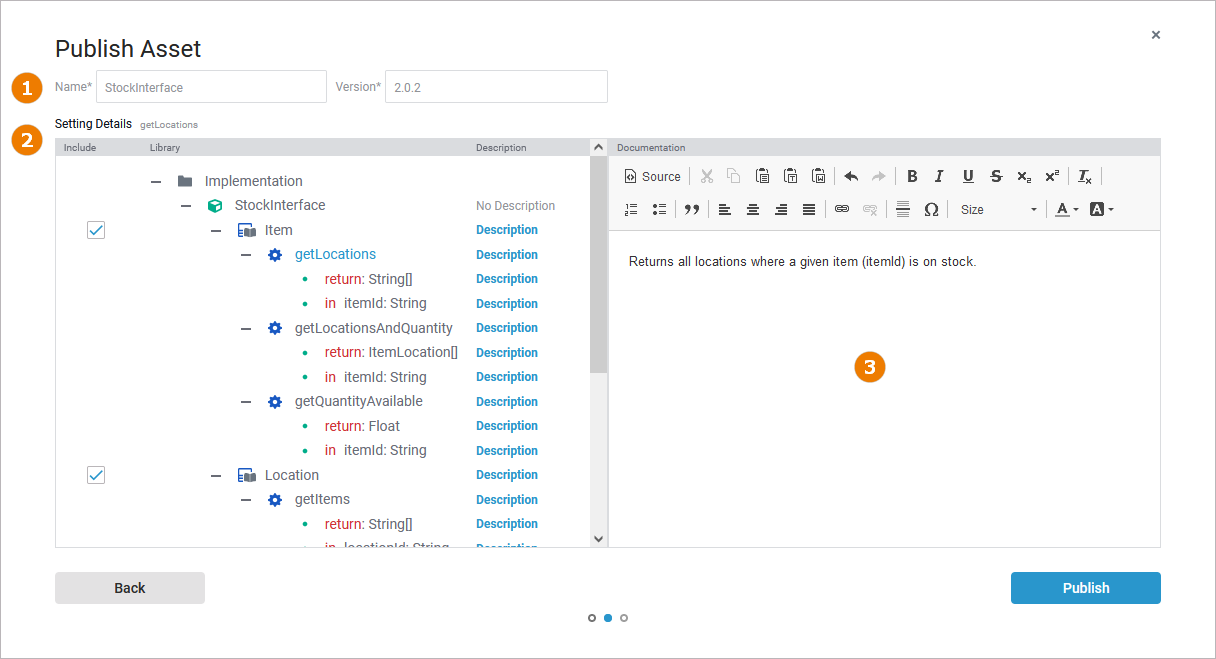
Use the second window of the wizard to add, remove or rework the documentation of your library content.
|
Step |
Field |
Description |
|
|---|---|---|---|
|
(1) |
Manage Meta Data |
Name |
In the second window of the wizard, you can still rework the name of your asset. By default, the name of the service is used. |
|
Version |
In the second window of the wizard, you can still rework the version number of your asset. By default, the version number from the deployment details is used. |
||
|
(2) |
Select Library Content
|
Include |
The Include checkbox corresponds to the element attribute Include in Library Export: Activate the checkbox for all elements that you want to include in your library. |
|
Library |
Column Library shows the content of the Implementation folder of your service. Expand and collapse the nodes to display all available items. Click an item name to activate the documentation field (see below) for the item on the right side of the window. |
||
|
No Description / Description |
The displayed name of the field indicates if a description for the element is already available or not. Click the field name to activate the documentation for the item on the right side of the window. |
||
|
(3) |
Manage Documentation
|
Documentation |
Enter your explanatory text for the corresponding element in this field. Use the various formatting features of the built-in text editor. |
When you have finished all entries, use the Publish button to upload your library to the chosen namespaces. If you publish a new library, the upload may take a while because the library must be compiled first. The third window of the wizard informs you about the current state of the publication:
Either the publication of your library is in preparation:
In that case, the library is now compiled and then uploaded. Since this can take some time, you can close the wizard. A toast message will be displayed on the screen after a successful publication.
Or your library was published successfully:
In that case, the library has been uploaded to your chosen namespace(s) and is available in the library administration as well as in the Asset Drawer.