In the Libraries menu you can upload and manage your libraries. Libraries are always uploaded to a dedicated namespace. If you want to use a library in several namespaces, you must upload it to each namespace separately.
Share Your Libraries
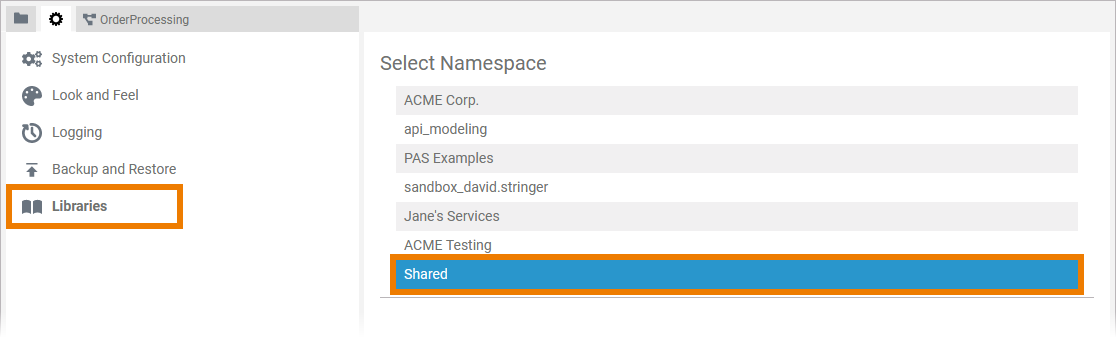
In addition to the individual profiles that can be assigned to a user, each Designer user also has access to a shared namespace. Namespace Shared is displayed by default in the library administration. Upload a library to namespace Shared to make it available to everyone working on your system:
Uploading Libraries
You can upload library files in .lrep or .xlib format. If you try to upload a file with a different format, the error message The file cannot be loaded will be displayed. When you download a library, it will always be in format .xlib.
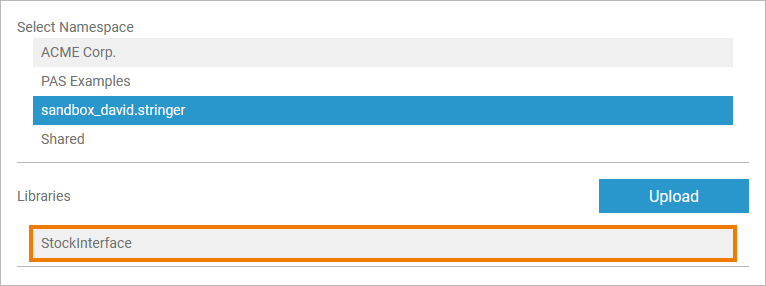
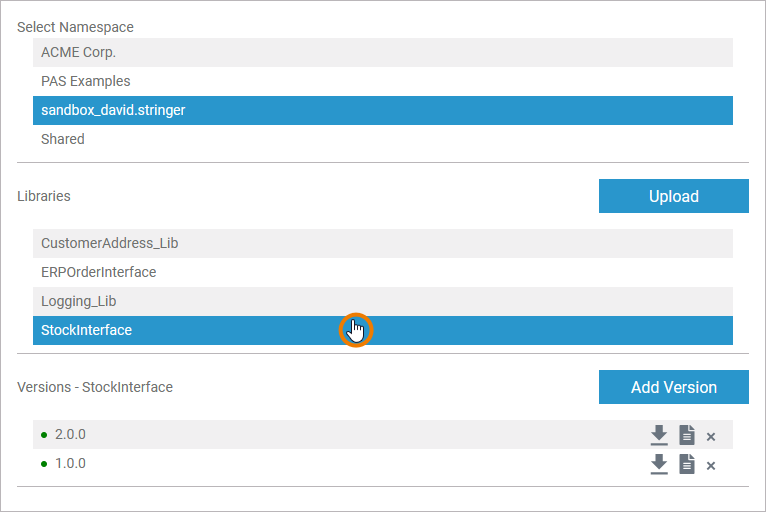
When you open menu Libraries, you must first select the namespace you want to edit:
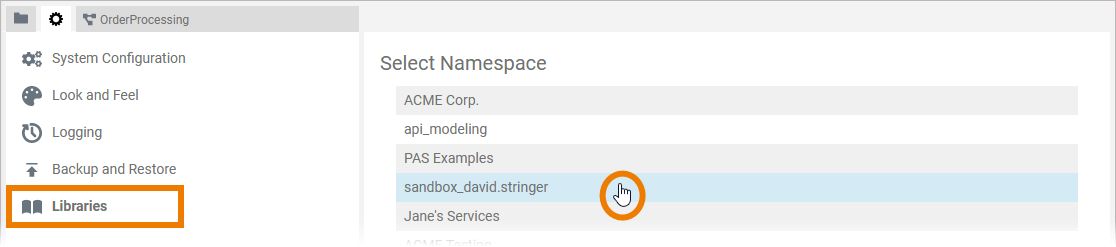
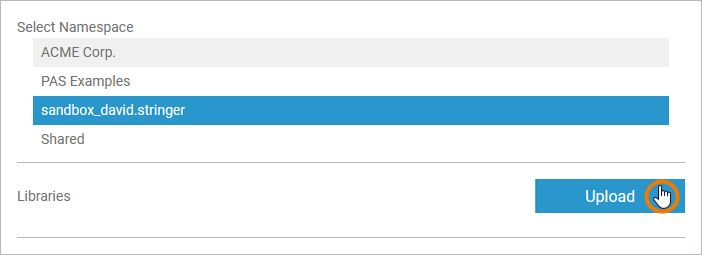
The selected namespace is highlighted in blue and section Libraries is displayed. You are now able to upload library files to the selected namespace. To start the upload process, click Upload:
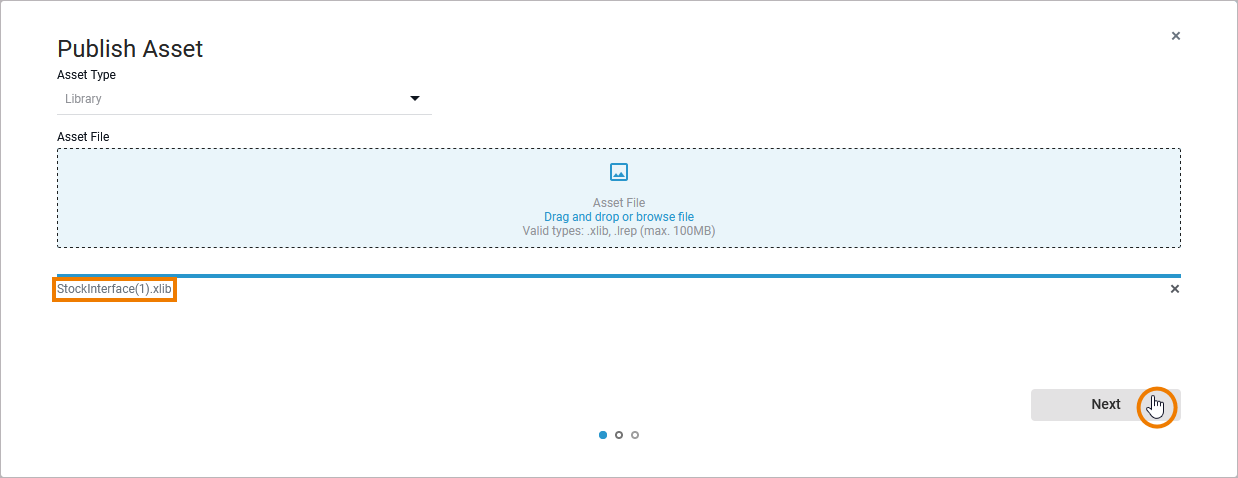
The Publish Asset Wizard opens. You can add the file you want to upload either by drag and drop or by browsing. The name of the selected file is displayed.
Allowed formats are:
-
.lrep
-
.xlib
Once you have selected a file, click Next:
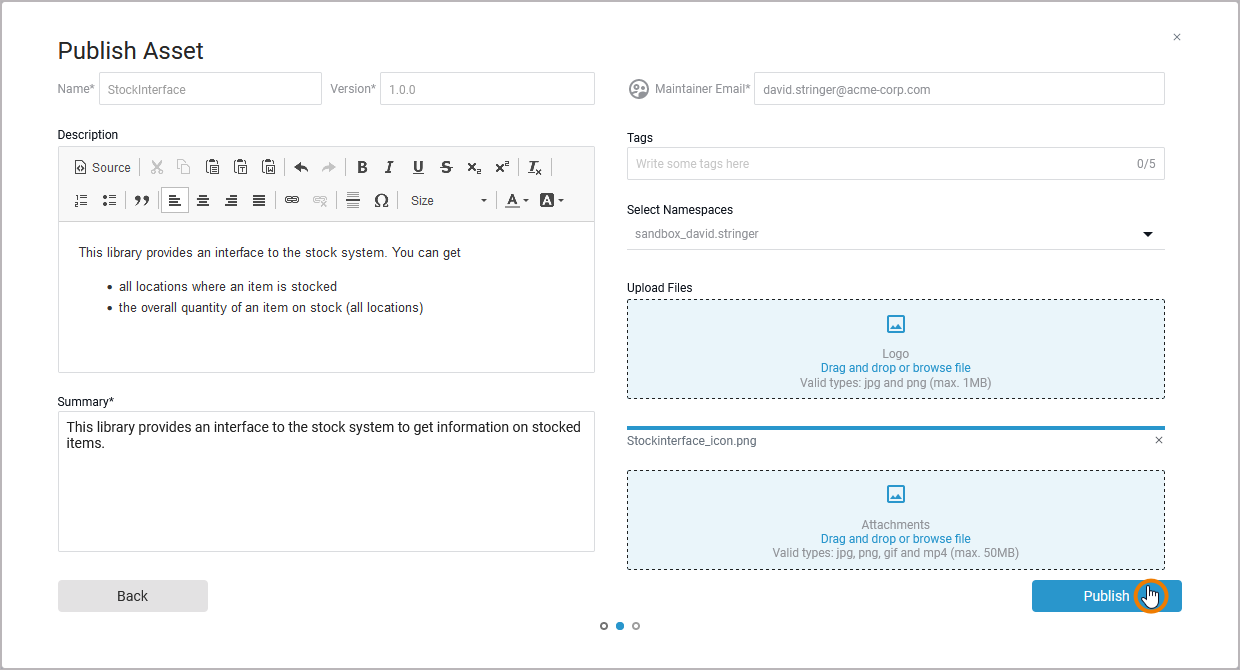
The second screen of the Publish Asset Wizard opens. The Name and Version are set automatically based on the selected file. For further information about the different input fields refer to Working With the Publish Asset Wizard. Click Publish to upload the file to the selected namespace(s) and publish the library:
The last screen of the Publish Asset dialog informs you whether the library has been successfully uploaded and published or not. Click Close to return to the libraries administration:

After a successful upload the library is displayed in the Libraries section. The library is now available within the selected namespace(s):
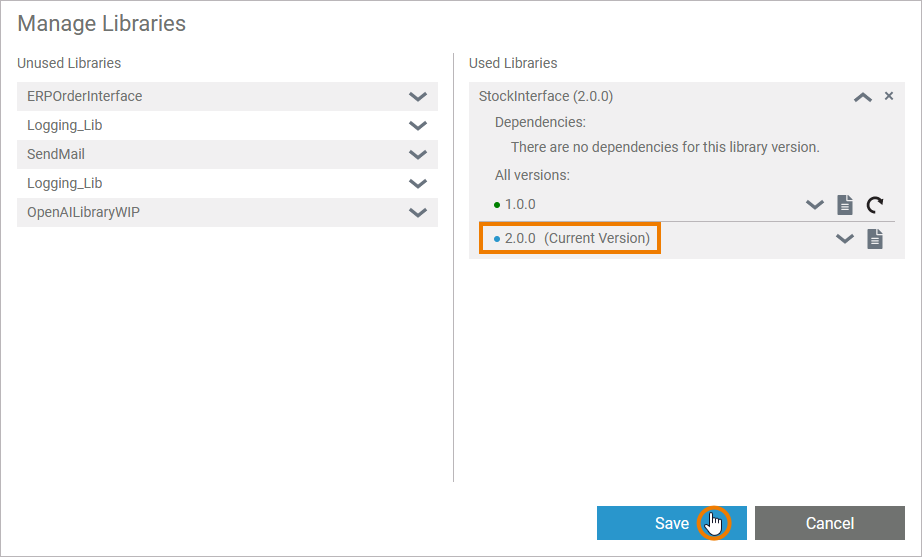
If you want to add the library to a Services, use the Asset Drawer or option Manage libraries on the Libraries folder in the service panel.
All uploaded libraries of the selected namespace are listed in section Libraries:

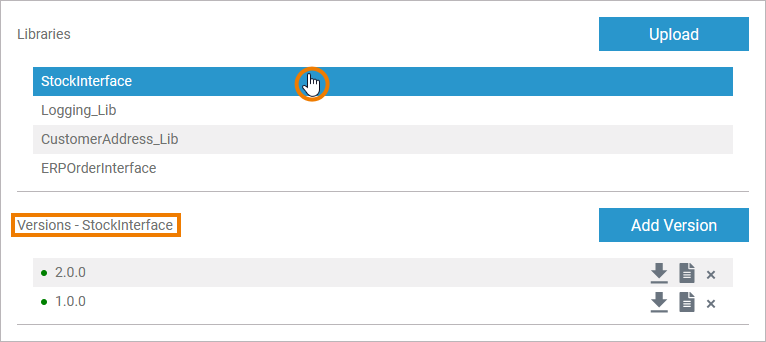
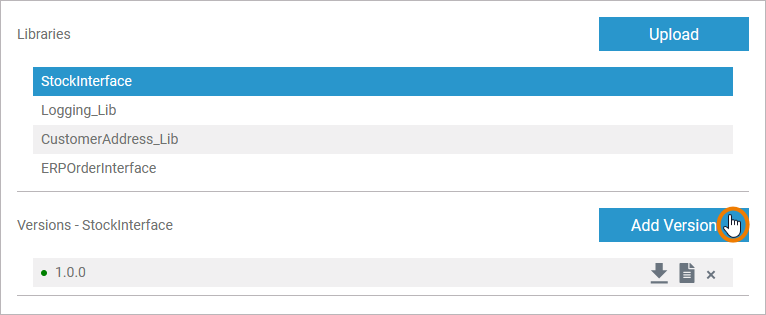
The Designer allows you to upload several versions of a library. Select a library in the list to display section Versions where all available versions of this library are displayed:
Updating a Library
The Designer allows you to upload a new file for the same version of a library to update an already existing version. The necessary steps to update an existing library are explained in this section.
However, the Designer also allows you to upload several versions of a library. We recommend that you prefer uploading new versions to updating libraries, and that you change the version number with each new version. This provides a better overview on the used libraries, especially if larger user groups cooperate.
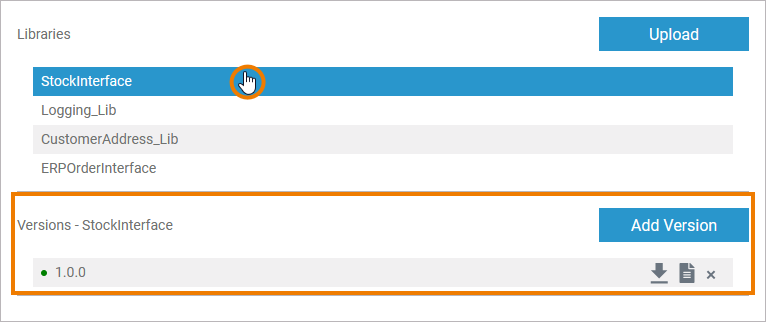
To add a new version or to update an already uploaded version of a library, mark the library in question. Section Versions opens below the library list. All versions of the library are listed in this section:
Adding a New Version of a Library
To add a new version of a library, click Add Version:
The Publish Asset wizard opens. The steps you need to perform now are identical to those when uploading a new library.
If you have added the new library version, it will be displayed in section Versions:

Updating an Existing Version of a Library
In the Versions section all versions of the library are listed. To update an existing version of a library, you need to delete that version and re-upload the updated version of the library via the Publish Asset wizard.
If you update a library in the Designer administration, it is not automatically updated in the services where you use it. If you update the version of a library that you are already using in a service, you need to save the library in the service again.
Refer to page Adding Libraries for further information.
Deleting a Library Version
You cannot delete an entire library but only individual versions of a library.
All uploaded libraries of the selected namespace are listed in the Libraries section. Select the library from which you want to delete a version. Section Versions opens:
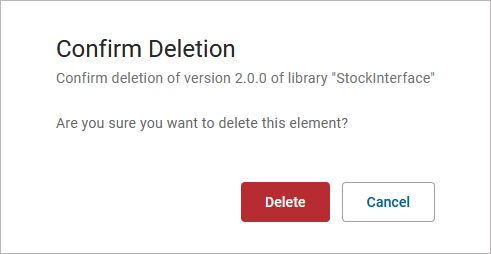
To delete a library version, click the corresponding Delete option:
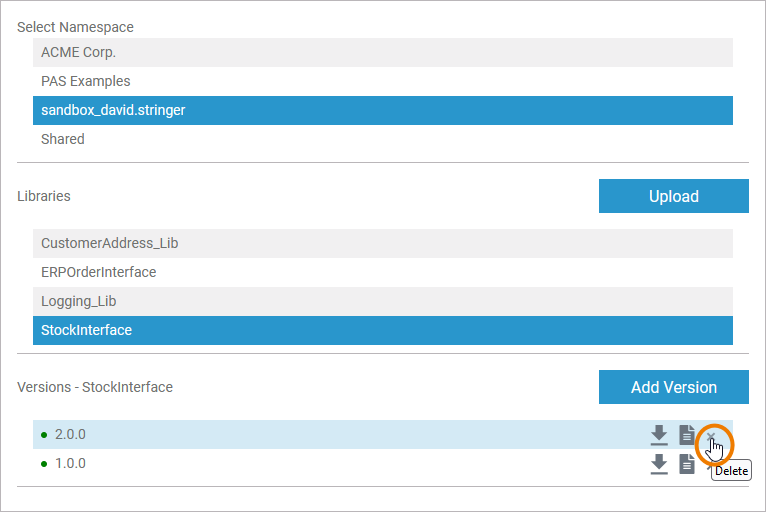
A confirmation dialog opens. Click Delete to remove the selected library version from the namespace:
If you delete a library version from a namespace in the administration, it will also no longer be available for services that are newly created to this namespace.
If you want to delete a library version that is still in use, a warning message will be displayed that lists all service(s) in which this version is currently in use. If you nevertheless want to delete the library version, confirm with Yes or click Cancel to abort:
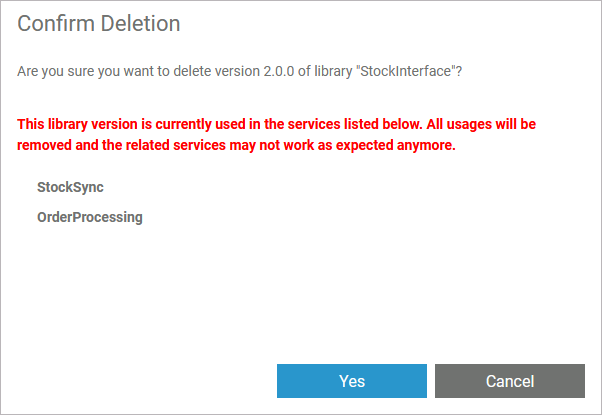
If you delete a library version in the administration that is still in use, the implementation of all affected services may become invalid.
Downloading a Library
You can also download a library from a selected namespace. Select the library to display all its versions. In section Versions use the corresponding download option for the version you want to download:

Downloaded libraries will always be in format .xlib.
Library Documentation
Developers can create their own libraries in the Designer and publish these libraries via the asset repository to share them with their whole team. Detailed documentation is important so that other team members can use your library quickly and easily. During the creation of your own libraries, you can insert explanatory documentation to the elements.
This applies to the creation of libraries with
-
the PAS Designer (refer to Documenting Assets for details)
-
MagicDraw (refer to the Builder User's Guide for details)
Related Content
Related Documentation: