The support center gives you access to tickets you have created yourself but also to all tickets of your organization as well as to tickets you have been added to as request participant.
Refer to Creating a Support Ticket for detailed information on how to open a support ticket.
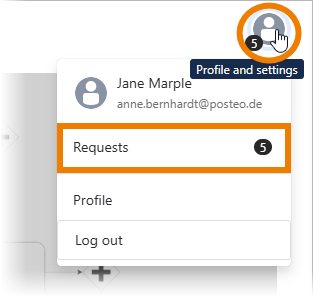
In the upper right corner of the support center page you will find the menu Profile and settings. Open it to access your Requests:
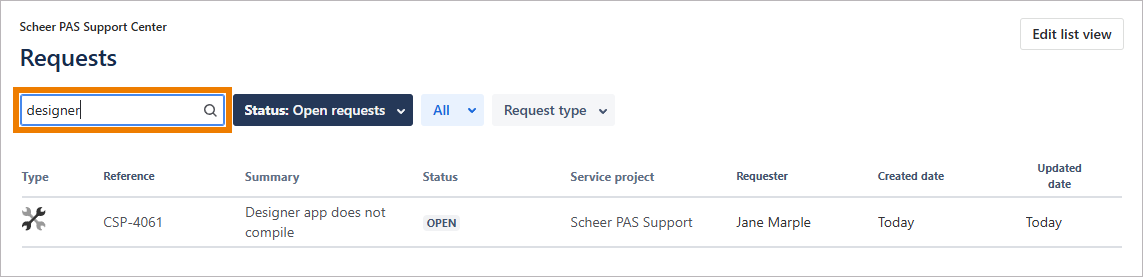
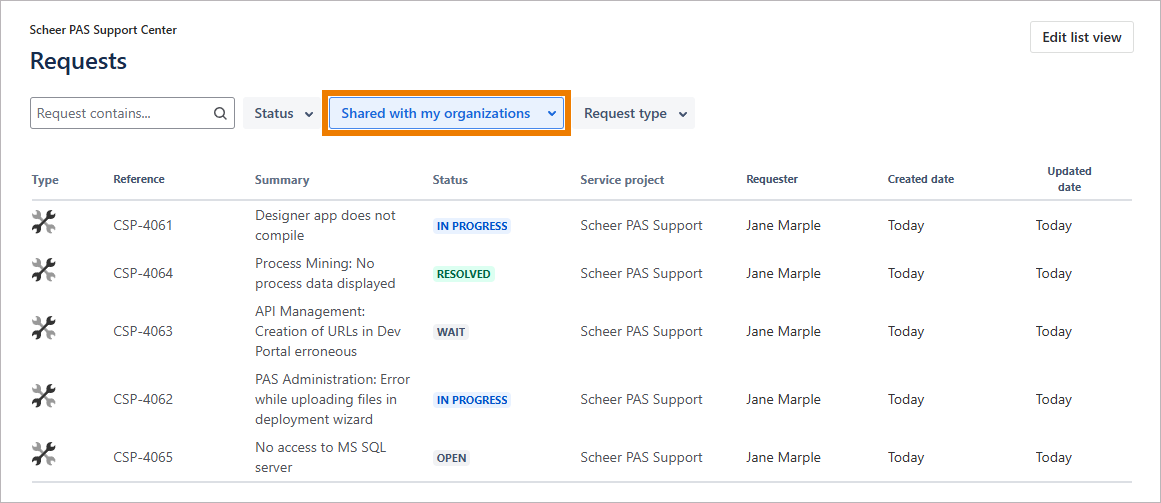
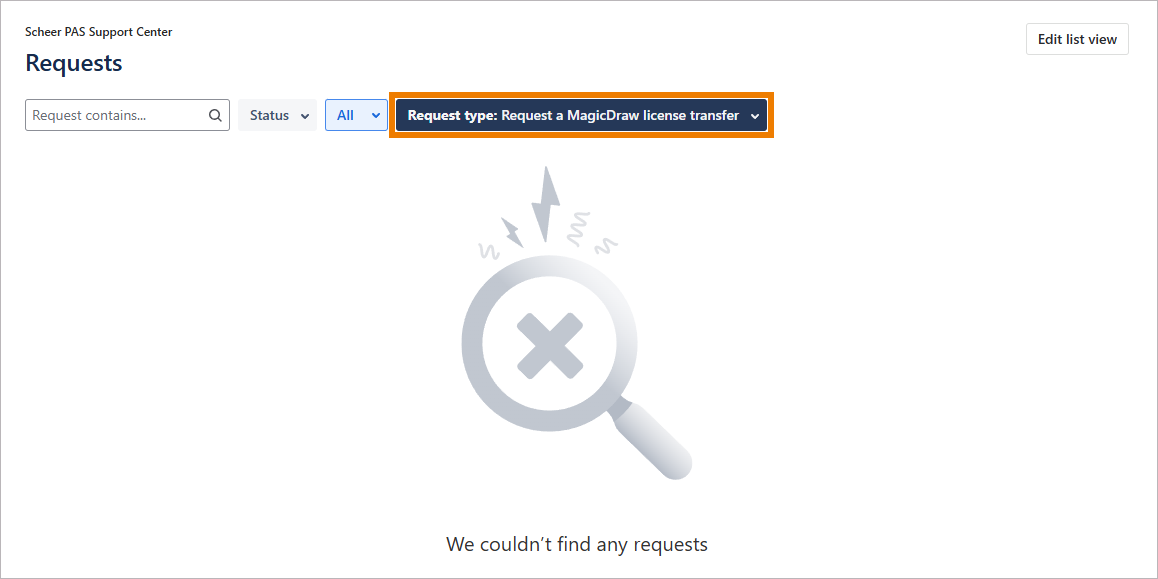
The list of requests shows all requests that your user has access to:

Filtering the List of Requests
Use the various filters to narrow down the list displayed.
Fulltext Filter: Search for a specific term.
Status Filter: Display only tickets in a specific status.

Request Filter: Use the request filter to filter by request assignment…
-
all tickets
-
only tickets that have been reported by you
-
tickets where you are a participant
-
tickets shared with your organizations
-
tickets by organization
Request Type Filter: Display all tickets of a specific request type, e.g. Report a problem, Request a new Bridge license or Request a new MagicDraw license.
Ticket Status
The status of a ticket shows the current processing step:
-
Open Requests: The ticket is waiting to be processed.
-
In Progress: Support started the analysis of your problem and will contact you as soon as first results are available.
-
Wait: The ticket has been marked as follow-up and will be further processed at a determined date (for example after another logging period or after a scheduled system update).
-
Waiting for Customer: The support team has contacted the reporter of the ticket because further information is needed for further action.
-
Resolved: The support team has proposed a solution and is waiting for your feedback whether this will solve the problem.
-
Closed Requests: The solution provided by support has been accepted by the customer, the problem has been solved.

Ticket Content
Click on a ticket in the list to open it.
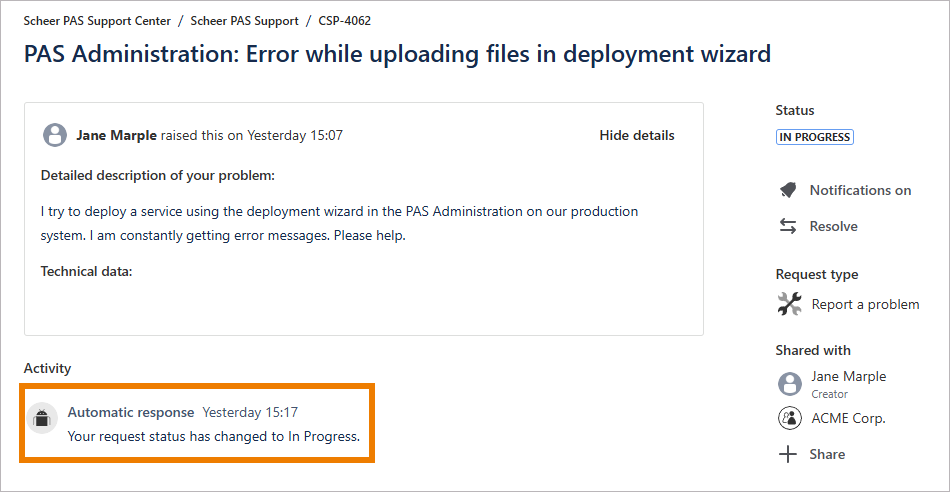
The ticket shows the following:
(1) Ticket number
(2) Ticket summary
(3) Detailed description
(4) Ticket activity
(5) Ticket status and further functionality (see below)
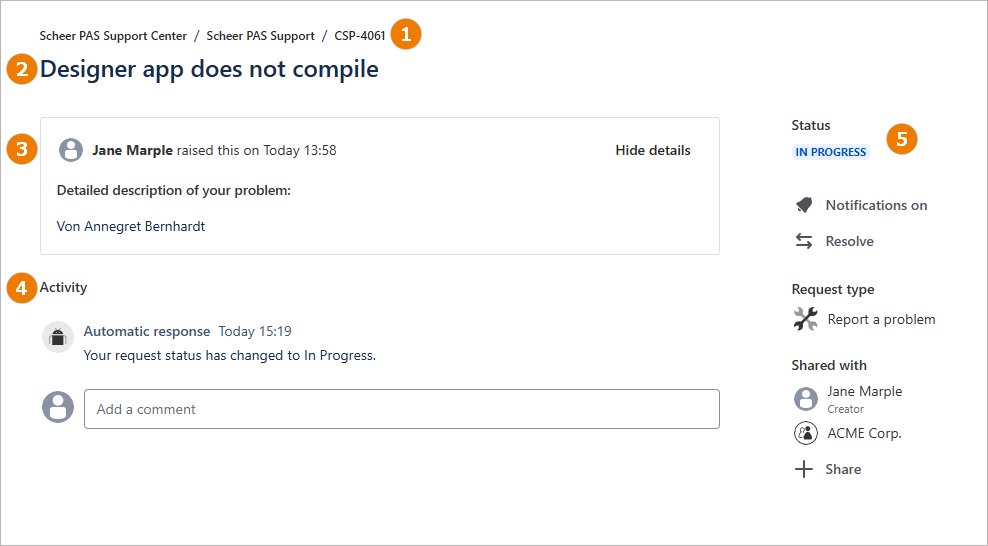
In section (4) Activity you can find all comments added to this ticket as well as information about status changes. You can also add a comment yourself: Click in the comment field and start typing, e.g. to add more information to your initial ticket description or to answer a question sent by the support team.
In section (5), the current ticket Status is diplayed and further functionality is available:
-
Notifications on: Click here if you do not want to receive notification emails for this ticket. By default, notifications are turned on.
-
Resolve: Click here if you want to close your request. A pop-up will open that allows you to add a related comment.
-
Request type: Displays the type of your request (read-only).
-
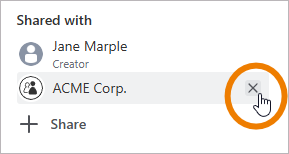
Shared with: Displays the creator of the ticket as well as all request participants and organizations.
-
If an organization name is displayed, you can remove it from the list of organization-wide shared tickets.
-
Click Share to add more request participants.

-
Adding Ticket Content
You have two options to add content to a ticket:
Answering to Email Notifications
If the notification functionality is enabled for your ticket, you will receive emails
-
when content is added to your ticket, and
-
when the ticket status changes.
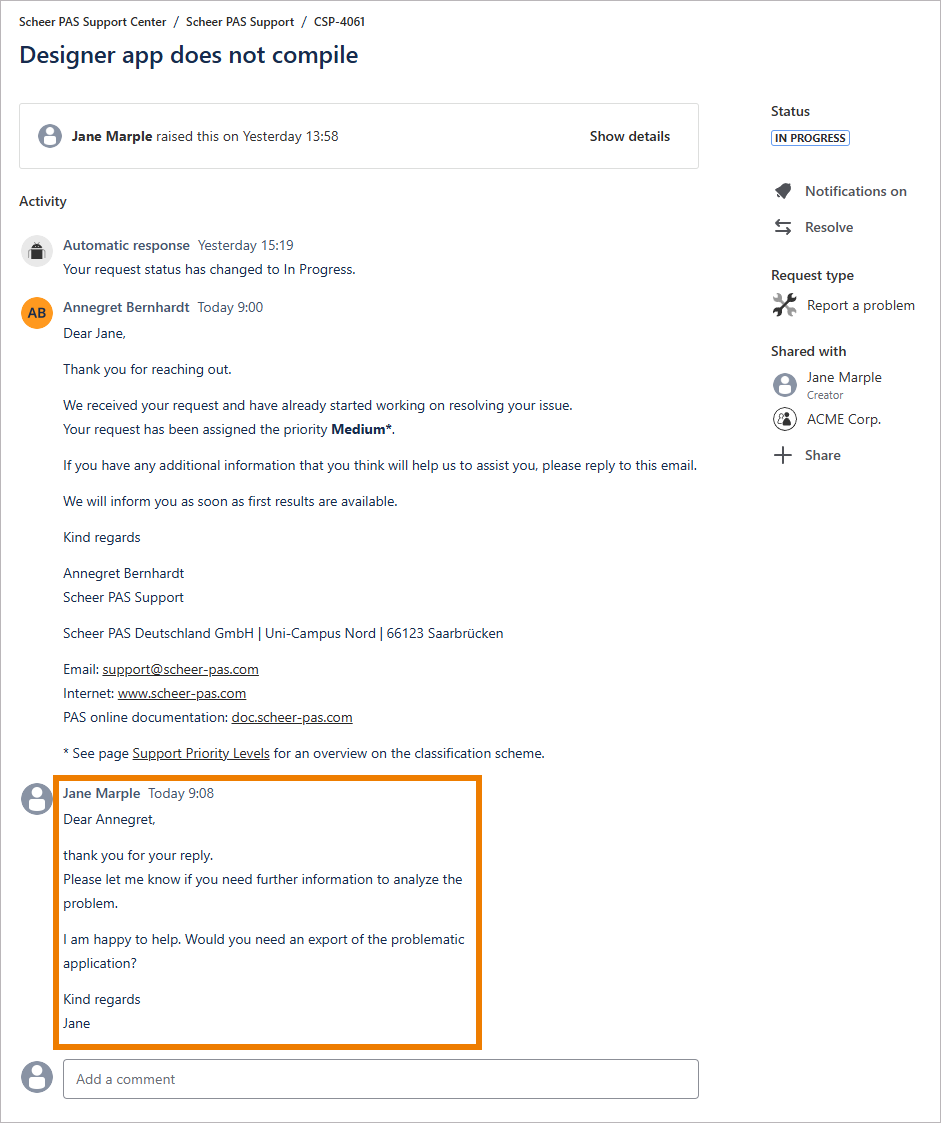
To add a comment to a ticket, you can just reply to one of those notification emails. Please make sure that your reply is placed above the line marked in the email:
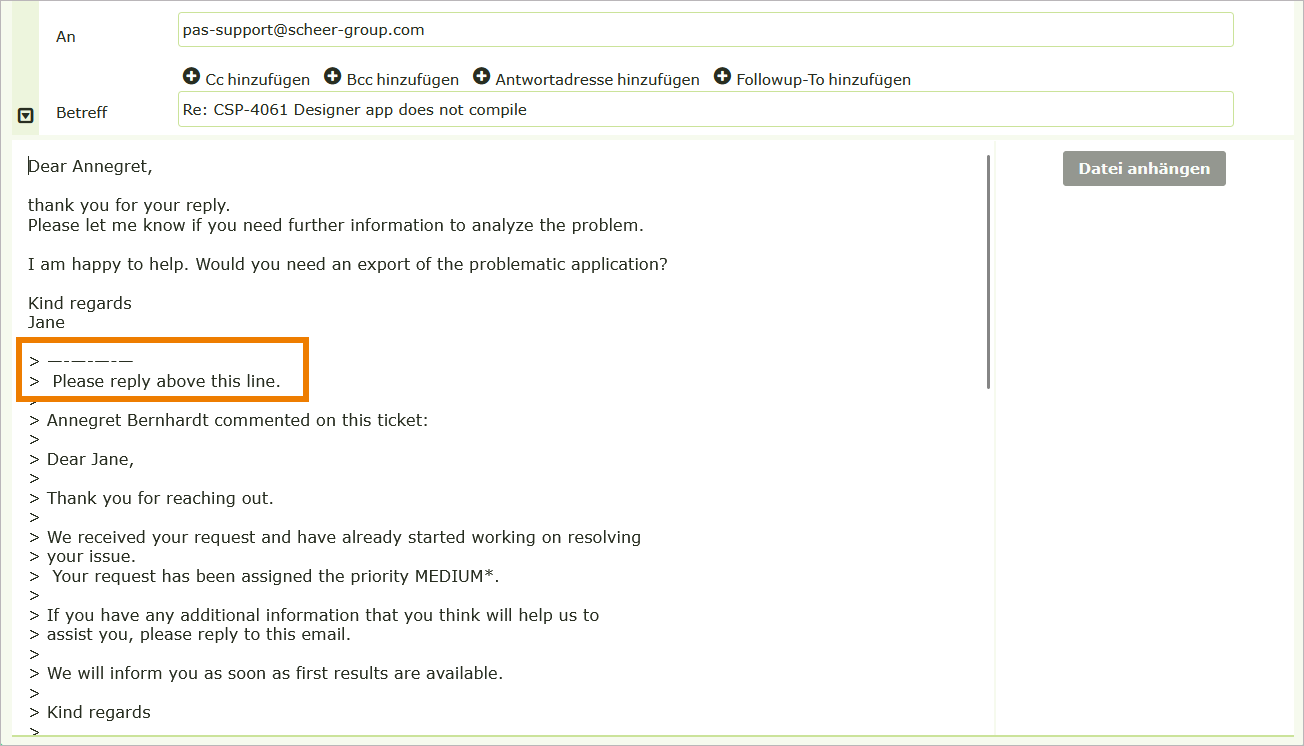
The content of your email is then added automatically to the associated ticket:
Adding Content in the Support Center
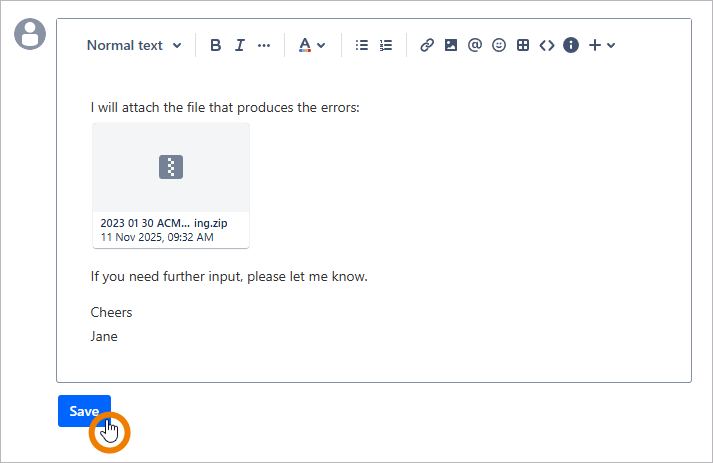
Once a ticket has been created, you can also add further content in the support center. Use the input field Add a comment to add further information to your ticket:

To add attachments, use option Add image, video, or file:
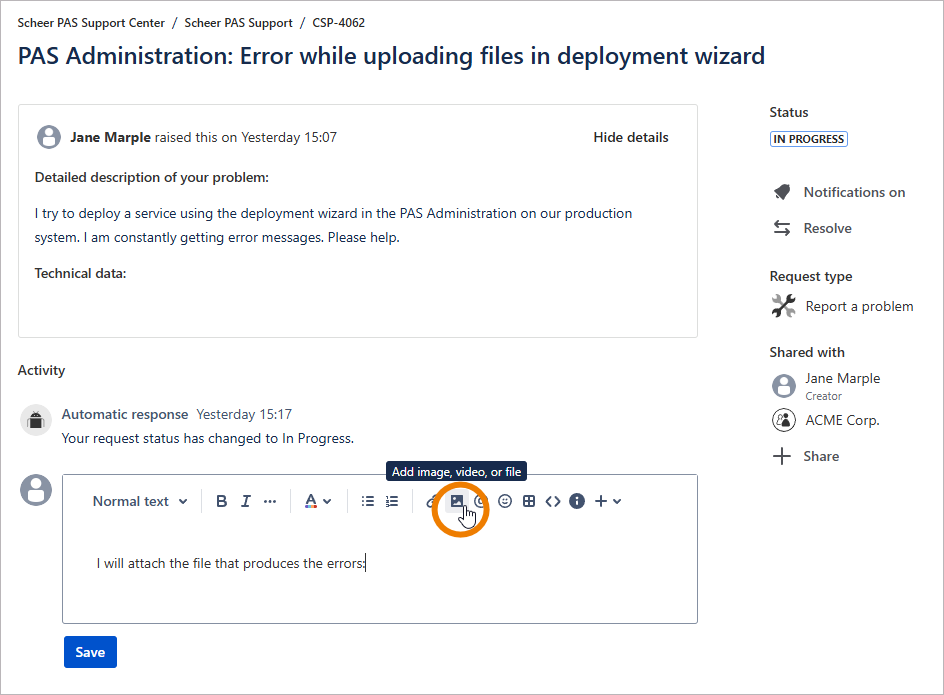
When you have finished, click Save to send your changes:
Every change of the ticket status is also displayed in the ticket content: