In the service panel, you can find the folder Implementation. You can add your own data model to this folder.
All elements inside the Implementation folder need to be created within packages. Add a new package via the quick action or the context menu.
Implementation Folder Options
In a newly created service, the Implementation folder is empty. If you hover over the Implementation folder, a quick action is displayed:
-
Create a new package
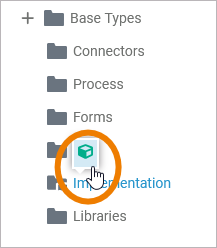
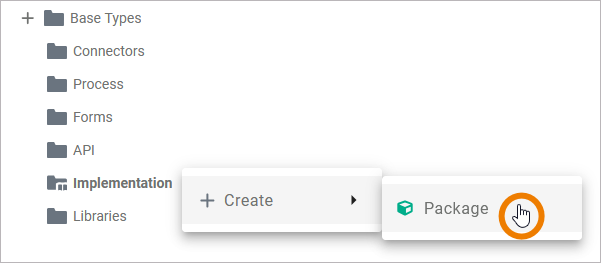
Right click an Implementation folder to open its context menu. The context menu displays all options available for the implementation folder:
-
Create > Package
A package is like a directory for the file system. It is used to group executable data model elements. Packages can have any depth of nesting: To structure your work, you can create packages within packages. Also, packages define a sort of namespace to the contained elements. The name of the package is part of the element path, e.g. Package1.Class is different from Package2.Class.
Expert Advice
Apply the same naming conventions to all your models. This makes reading a model much easier. Refer to Naming Conventions and Containment Tree Organization in the Builder User’s Guide for an overview on practice-approved naming conventions.
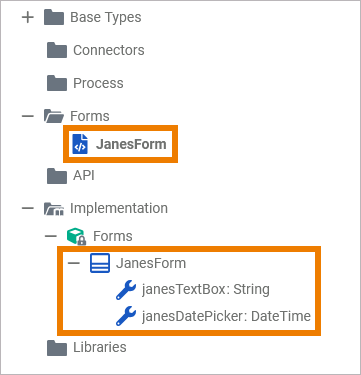
You can create your own data model in newly created packages now. But some content is also added automatically to the Implementation folder: The package Forms is a generated package. This package is locked - you cannot change the generated form classes. If you create a form, a corresponding class is automatically created in package Forms.
For each form element that you insert in the form, a corresponding property is added to the form's class:
Creating Elements
To create new elements in the implementation folder, hover over the element you want to add further content to and use one of the quick action icons that are displayed.
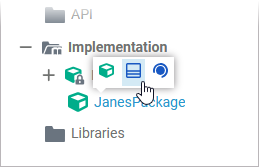
Alternatively you can open the context menu and select the element you want to create:
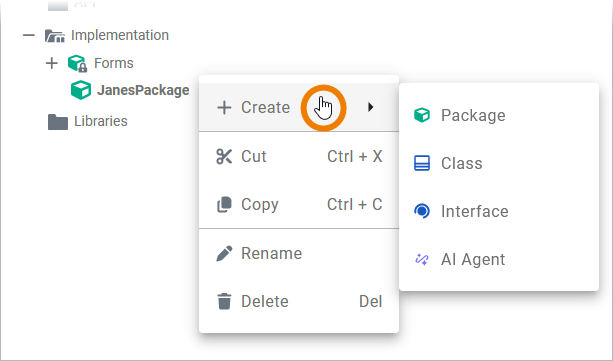
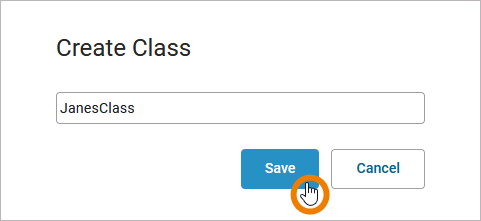
A pop-up window opens where you need to enter a name for the element. Click Save to create the new element:
Restrictions on Element Names
A process name must be unique within one service. In addition, the following name restrictions apply to all service panel elements:
Element names...
-
... must not be empty.
-
... must not contain spaces. Exception: Spaces are allowed in operation names.
-
... must not start with numbers.
-
... must not contain a dot ( . ).
-
... must not contain any special characters. Exception: Operation names may end with a slash ( / ).
-
In addition, Action Script commands and some system-relevant strings (refer to Reserved Words) cannot be used as element names.
Your input is validated: If the name you enter violates these restrictions, the field in the editor turns red and cannot be saved.
The element is added to the tree in the implementation folder. When you hover over the element, the quick actions icons show you, which other elements you can create within this element:
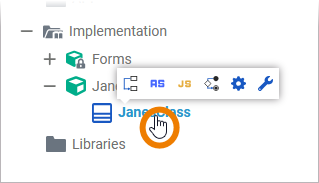
These are also displayed in the context menu of each element - along with other element options such as cutting, copying, pasting, renaming and deleting:
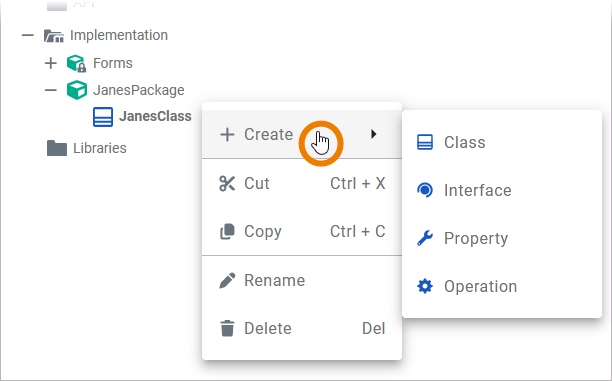
The possible quick actions and context menu options for all elements within an implementation folder are explained in detail on page Modeling Data Structures.
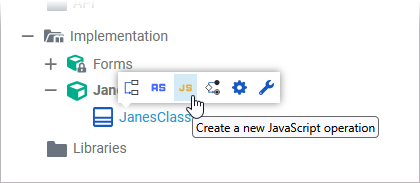
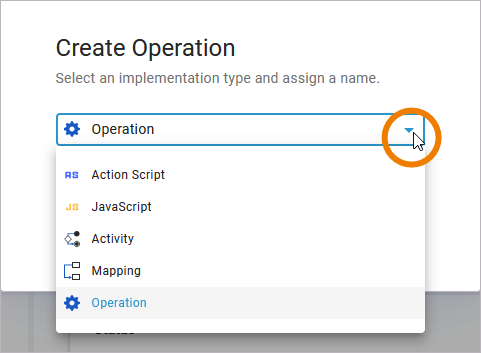
If you want to create an operation within a class, you have to possibilities:
-
The quick actions on a class already show all available operation types and you can directly select the type you want apply:
-
If you use the context menu option Create > Operation a dialog pops up where you can select the operation type you want to apply:
In the Implementation folder, you can undo or redo (after undo) your previous changes using the corresponding functions in the Designer editors or using the corresponding keyboard standard shortcuts (Ctrl+Z/Y).
Further Options
For detailed explanations of the item options in the Service panel, such as cut, copy, rename, and delete, refer to Service Panel.
Related Content
Related Pages:
