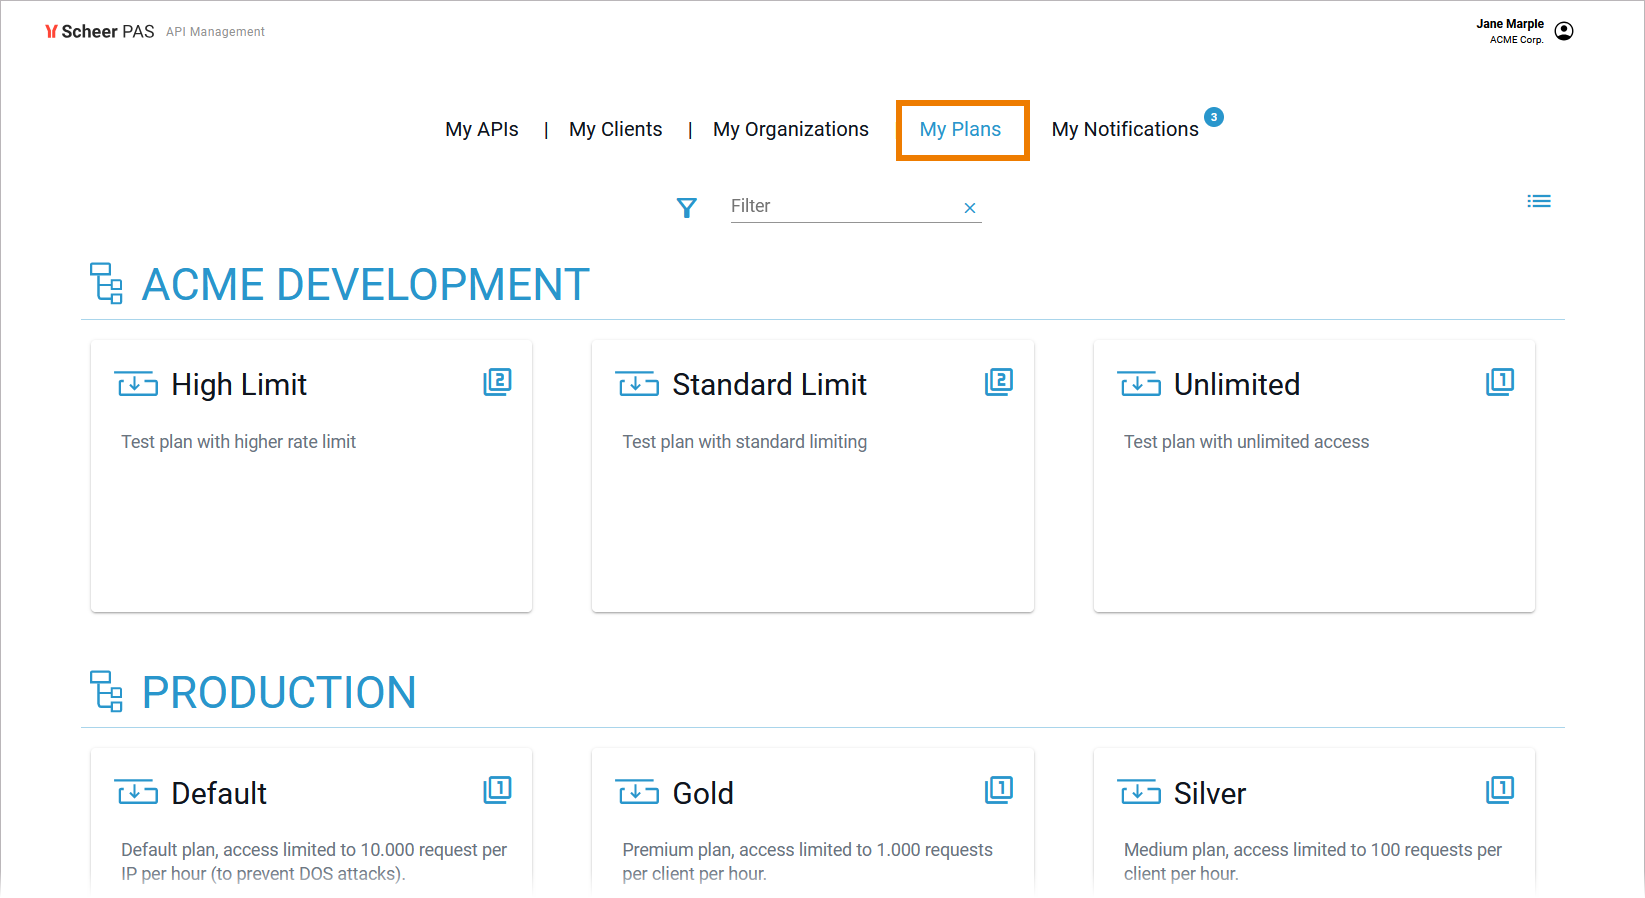
Plans must be managed within the scope of an organization. Once created, plans can be used for any API defined within that same organization. To view all plans your user is allowed to see, go to tab My Plans in the navigation bar. The plans are listed by organizations.
For detailed information about navigating and filtering the list refer to Working with the API Management.
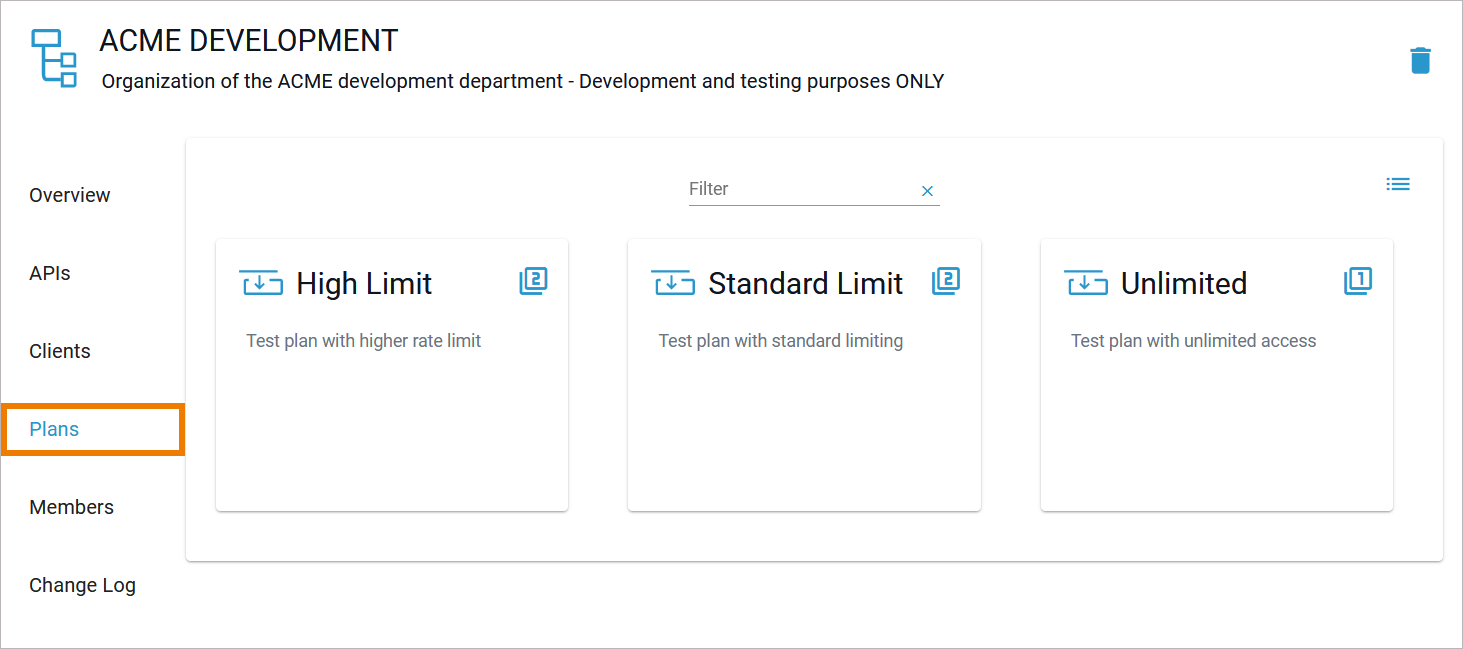
You can also view the list of existing plans for an organization by navigating to the Plans tab of the organization's details page. Click on a plan tile to open the plan's details page. Use the details page to modify the basic settings and assigned policies. Once you have fully configured the plan, you need to lock it.
Only locked plans can be used by APIs in the organization. Refer to Locking a Plan for detailed information.
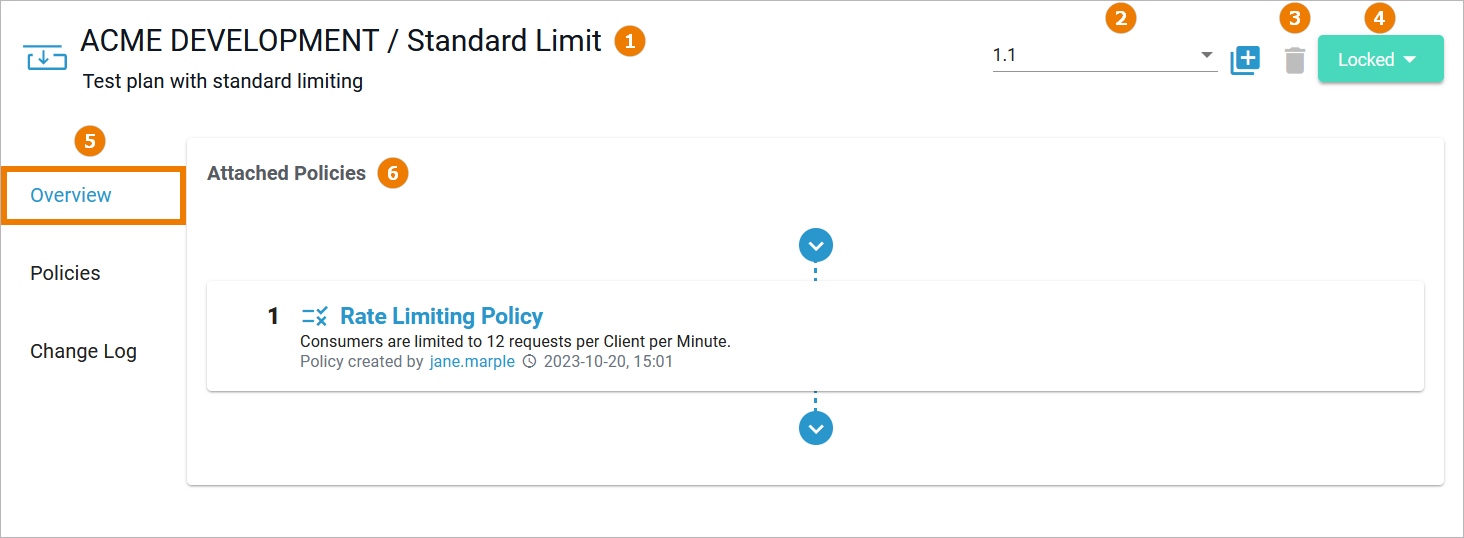
Basic Settings
The Overview tab displays the most important information of a plan and also offers various functionalities:
|
UI Element |
Name |
Description |
|---|---|---|
|
Basic Settings (available in all tabs) |
||
|
(1) |
Name / Description |
This setting is valid for all versions of the plan. |
|
(2) |
Version
|
In this field, the current version of the plan is displayed. Use the drop-down to switch between versions. To create a new version, click New Version (refer to The Concepts of API Management for detailed information). |
|
(3) |
Delete
|
Click Delete remove the plan. You will need to confirm the deletion in a separate pop-up window. This setting is valid for all versions of the plan. You cannot delete a locked plan. Locked plans are deleted only when the entire organization is deleted. |
|
(4) |
Status
|
In this field, the current status of the plan is displayed. Use the drop-down to change the status. A plan can have two different states: |
|
(5) |
Navigation Bar |
Use the navigation bar to access the various tabs of the plan's details page (details of all tabs see below). |
|
Overview Tab Settings (available only in tab Overview) |
||
|
(6) |
Attached Policies |
In this section, the user can see at a glance which policies are attached to this plan and in which order they will be executed. |
Plan Details
In the navigation bar of the details page, you will find several tabs where you can manage the various settings of the plan.
Policies
The Policies tab allows you to manage the policies that should be applied whenever a request is made to an API via this plan:
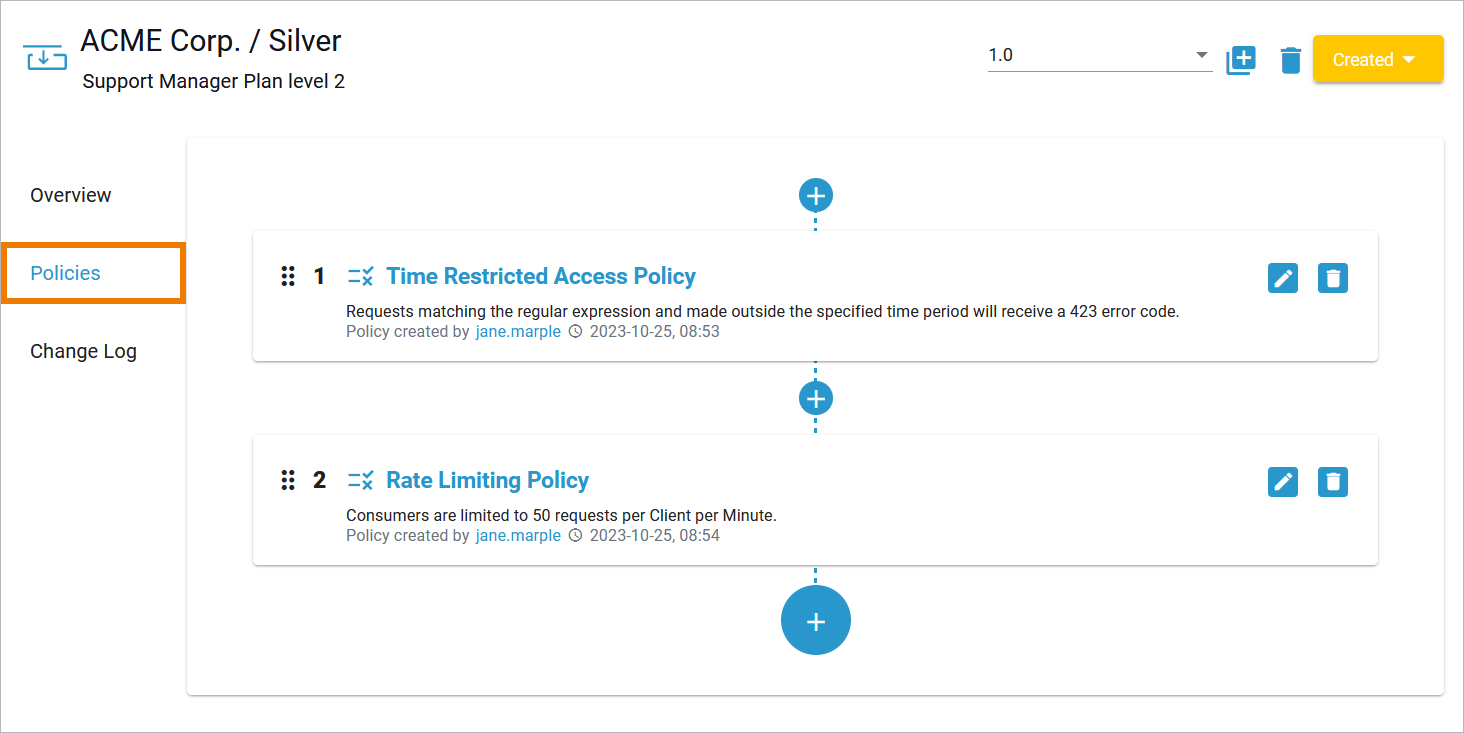
The order of the policies is important: The order in which the policies appear in the user interface determines the order they will be applied at runtime (refer to Policies > Policy Chain for details).
|
Option |
Icon |
Description |
|---|---|---|
|
Add |
|
To add another policy to this plan, click one of the Plus buttons.
|
|
Reorder |
|
Drag the policy and drop it on the desired new place in the hierarchy. |
|
Edit |
|
If you want to adapt an attached policy, click Edit to open the policy configuration. |
|
Delete |
|
If you want to delete a policy from this plan, click Delete. |
Refer to chapter Policies for an overview of the standard policies supplied with Scheer PAS API Management. Page Attaching Policies explains how to attach and configure a policy.
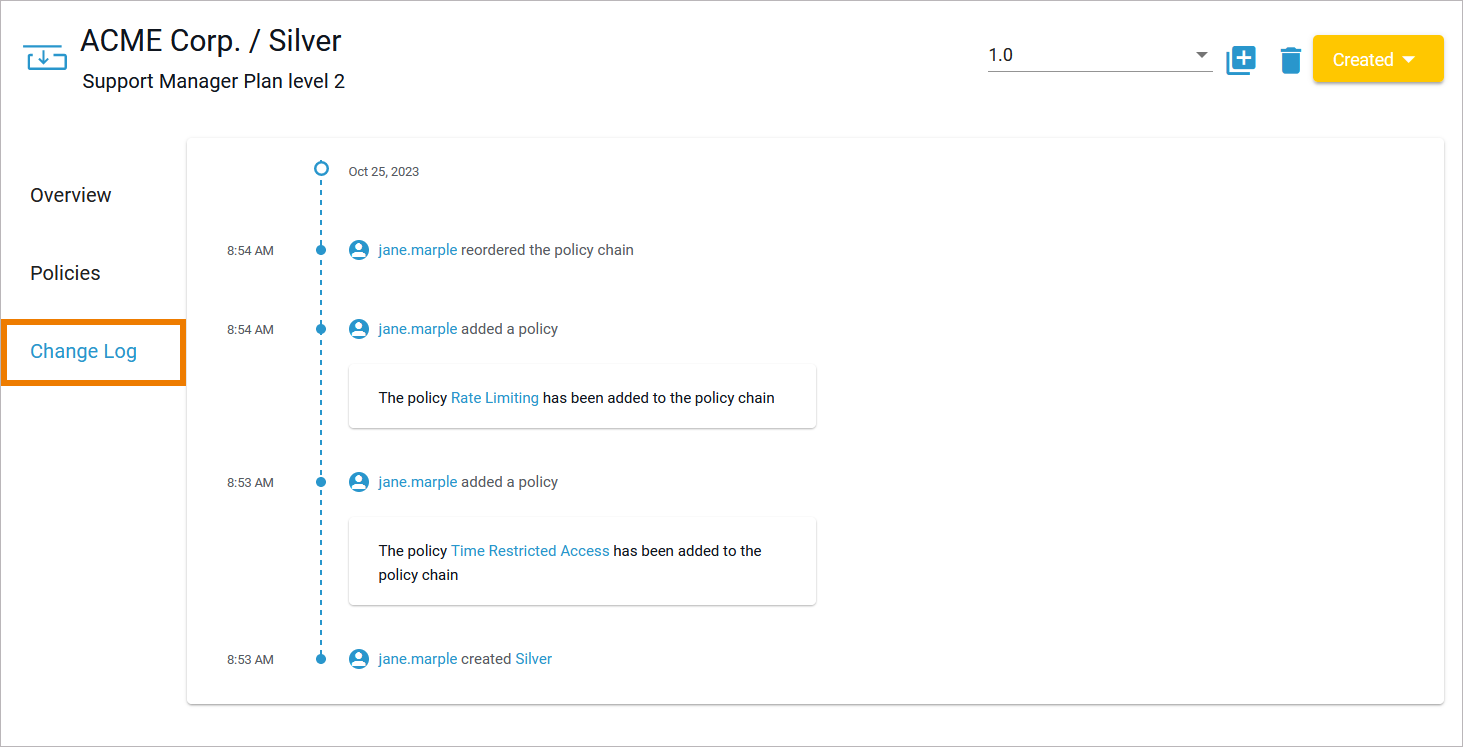
Change Log
Navigate to the Change Log tab if you want to see an overview of the plan activity. All configuration changes made by API Management users associated with this plan version are listed here: