BPaaS processes a workflow along the principles of an assembly line. During conventional assembly line processing containers pass through a production line. In earlier days the to be assembled product (for example a camera) was transported in trays.
Symbolically an event driven process chain (EPC) presents the assembly line, on which the data containers run. Each data container contains multiple data areas:
-
Tracking: "Routing Slips" where all previous as well as future stations are noted.
-
Workspace: Common area where any kind of data may be saved. This area is also used by the system to file system-relevant data.
-
Instance: Subarea of the workspace and the area where steadily events are filed to be saved in the database later on.
The Container
Data that is generated when an app is called and process steps are executed is referred to as instances. Instances are consequently datasets created during app execution. They are saved and managed in a so-called Container.
The value of a form field is in any case saved in the container. Therefore all values of the container are temporarily available during the runtime of the app. If the values are not saved to the database as well, the container values are lost after the process ends.
Each form field offers the option Save Value in Instance. Activate this option if you want to save the value of the field permanently in the database once the form is completed and saved. The values of a form field are also saved in container if the option Save Value in Instance remains deactivated.
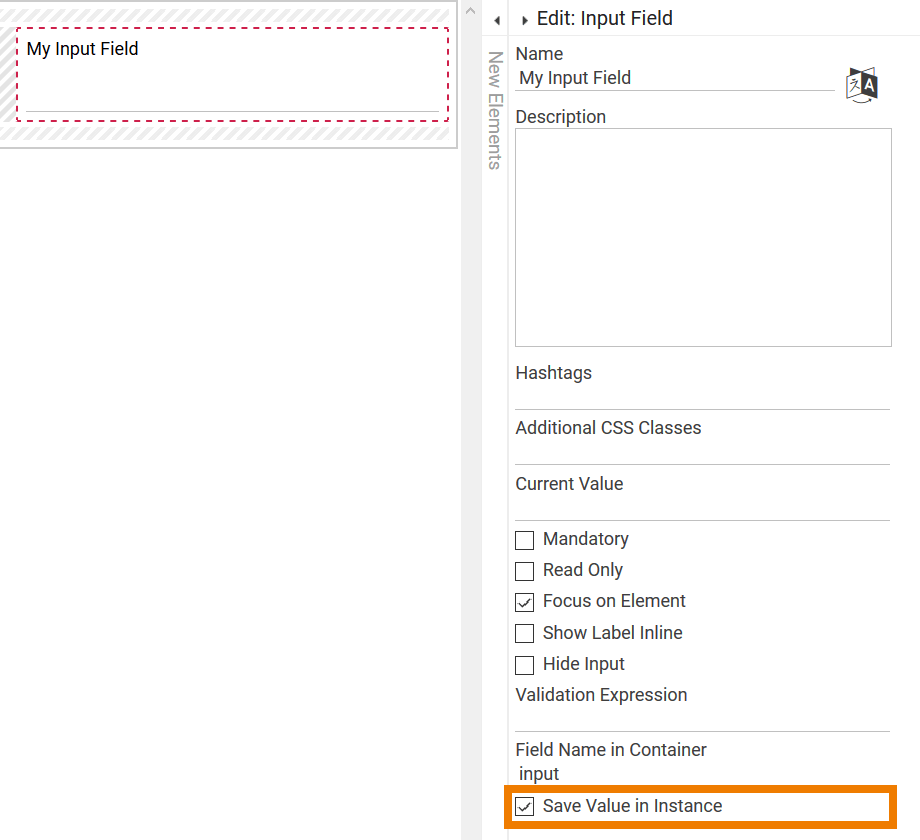
Since container values are only available temporarily, you need to save an instance to store it permanently in the database. This can be done either via a preconfigured Save button or programmatically.
Additional information can be found at page Saving and Deleting Instances.
Field Name in Container
Each form element is saved to the database by a unique, technical key. Generally an element is saved in the container by its name. This may however not always be desirable, since it could for example lead to doubling. Therefore form elements contain the additional option to insert a separate Field Name in Container:
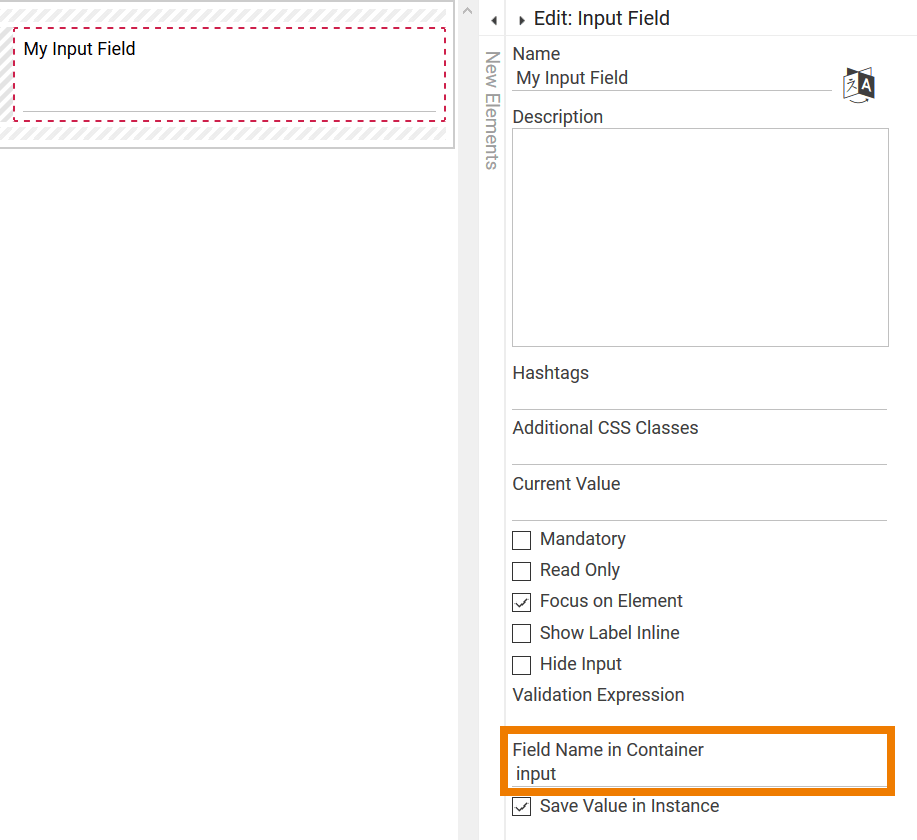
You can find the field Field Name in Container in the Edit Sidebar of a form element. Here you can enter a key different from the element's name by which the values will be saved in the container. If a Field Name in Container is defined, you always need to use the Field Name in Container instead of the element's name to enable access to the corresponding data.
Inserting a Field Name in Container is especially useful if the element's name is very long, contains special characters or spaces. Using a shorter Field Name in Container makes it much easier to reference the value, for example in Worker coding.
The content of the Field Name in Container is a JSON dot notation, therefore hierarchic in its structure. This means: Using dots in the Field Name in Container creates substructures.
Example: Creating a section with substructures
|
Field Name in Container |
Possible Content |
|---|---|
|
Invoice |
Creates a section Invoice in the container which can contain complex data or primitive data types. |
|
Invoice.Number |
Creates the substructure Number which itself can contain complex data or primitive data types. |
|
Invoice.Date |
Creates the substructure Date which itself can contain complex data or primitive data types. |
The Field Name in Container is a technical identifier often used for additional coding. Therefore the Field Name in Container should not contain any spaces, special cases or umlauts.
Make sure that an element's key is always unique. If multiple fields are named alike or were assigned the same Field Name in Container, errors will occur during app execution.
Example: One element - various names
-
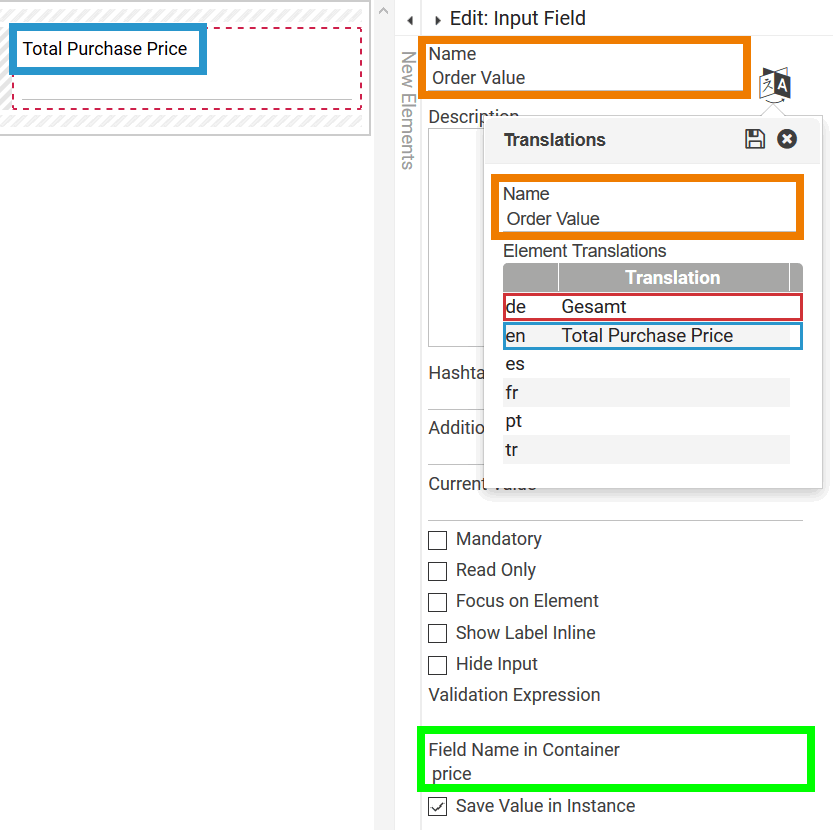
The form element Input Field was assigned the Name Order Value.
-
Translations have also been saved:
-
Gesamt for German language.
-
Total Purchase Price for English language.
-
-
In the form itself the English translation Total Purchase Price is displayed, as the current designer uses the BPaaS Editor in English.
-
The saved Field Name in Container is price. Now the value of this Input Field is saved in the container under the name price.
Displaying Container Data
During testing it may be helpful to have a look at the container content. You have simple access to the container content in test mode. In the reference process' last form insert a Button and activate the option Go to Next Step.
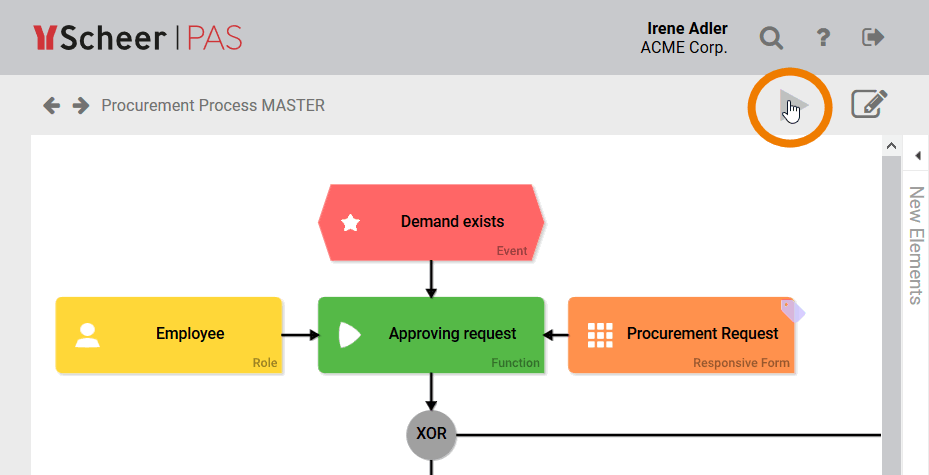
Start the reference model's execution via the Play button:
Capture the form data during test mode:

Clicking of the corresponding button ends the app and an Execution Summary is displayed.
Execution time does not equal computing time, but references the time frame between start and end of the execution.
Use the button Show Container to review the container's content. This allows temporary access to all form and other data elements at runtime.
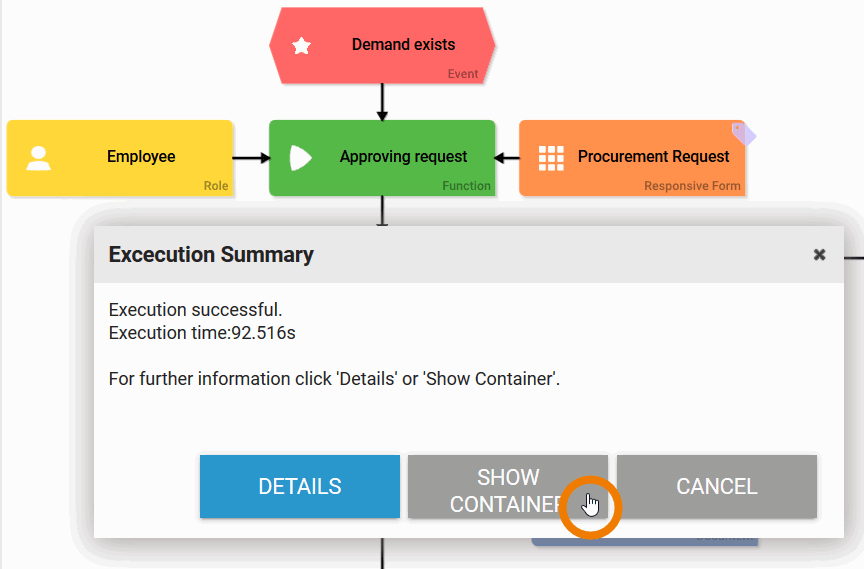
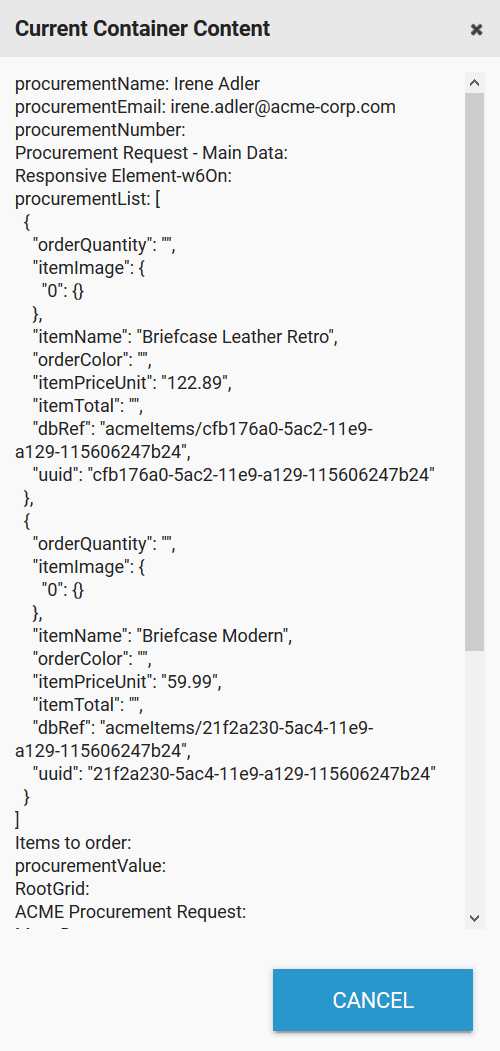
A click on Show Container opens the pop-up Current Container Content showing all information saved in the container.
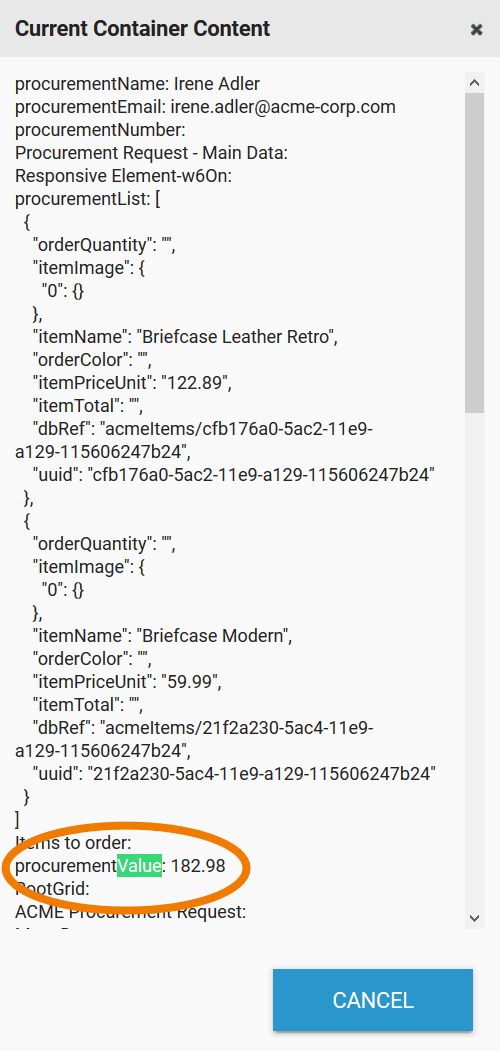
In this pop-up, you can use your browser's search function (in most browsers available via Ctrl+F). In the example a match was found for the search term value:
Expert Advice
Alternatively developers can enter the Field Name in Container into the browser console: console.info(container.getWorkspace().getData());
