You can develop custom Pro-Code forms in a PAS Form Library to use these forms as Low-Code forms or sub-forms in the Designer. Either you can start from scratch, or you can export the form definitions of a Designer service (see Modeling Forms) as a Pro-Code PAS Form Library. The library already contains the necessary structure and meta-information to directly start coding. The xUML Library Development Kit (xlib) helps you with this task. It can be used to build these libraries, and run them for testing purposes.
Prerequisites
Developing custom form libraries for the Scheer PAS platform assumes a basic knowledge of HTML, CSS, JavaScript/TypeScript and the Angular framework.
If you want to install the PAS xUML Library Development Kit, please contact our Support team.
You need to have the following installed:
-
the Angular CLI (version 13.1.1)
-
the PAS xUML Library Development Kit
You can install the xUML Library Development Kit using the following command:
npm install @pas/xuml-library-devkit
Expert Advice
For detailed information about multi-project workspaces, visit the Angular documentation.
Working with the xUML Library Development Kit (xlib)
After you have installed the @pas/xuml-library-devkit, you can switch to your project folder and execute the following commands to build a new multiple-projects workspace with a new library project in it.
Creating Workspace and Library
The following table displays an overview on the main features of xlib to use with developing your own form libraries.
|
Command |
Description |
Example |
|---|---|---|
|
|
This command builds a new multiple-projects workspace with a new library project in it. The development kit automatically generates a test form and application. |
|
|
You will get the multiple-projects workspace <library-name> containing the following files: Generated workspace files: Bash
|
|
|
|
The library project is generated at path <library-name/projects/library-name>. Projects Folder: Bash
|
|
Creating a Form
Your workspace project is created with an automatically generated PAS form from the @pas/xuml-library-devkit under the name my-form. To create your own form, switch to <library-name>/projects/<library-name>/src/lib> in your workspace project. You can now use the @pas/xuml-library-devkit to create a new PAS form using the following command:
|
Command |
Description |
Example |
|---|---|---|
|
|
The Development Kit creates a new folder that contains all the files needed for a new PAS form. Projects Folder: Bash
|
|
Use the @PasForm decorator in the my-form.component.ts file to set the name of the form in your Designer project and to define the events that can be used to trigger an execution in the BPMN process.
@PASForm Decorator:
@PasForm({
    name: 'MyForm',
    events: [
        'submit'
    ]
})
The Development Kit uses the my-form.interface.ts file to build the PAS Designer types for you, so use this file to define the types for this form.
Do not forget to export the form component class in the library interface file (public-api.ts) to make this new component accessible:
/*
 * Public API Surface of my-lib
 */

export * from './lib/my-lib.service';
export * from './lib/my-lib.component';
export * from './lib/my-lib.module';
export * from './lib/my-form/my-form.component';
Building the Library
Make sure you generate the build folder before you build the library for the first time.
|
Command |
Description |
|---|---|
|
|
Generates the build folder. You need to run this command once, before you can build the library for the first time. |
|
|
Creates an xlib folder and builds the <library-name>-library.xlib package in the root folder. Refer to Administrating Libraries for detailed information on how to upload libraries. The usage of libraries is explained in detail on Adding Libraries and in chapter Developing and Using Libraries. |
Testing and Developing Your Form Component
For testing purposes, your multiple-projects workspace comes with an automatically generated test application along with one Angular component.
Expert Advice
For detailed information about multi-project workspaces, visit the Angular documentation.
Test Application Features
All mentioned files reside in folder <name of the library>/projects/<name of the application>/src/app.
|
File |
Description |
|---|---|
|
form-test-wrapper.component.html |
Contains the <pas-child-form> element. This element is part of the @pas/app-core module and is also used by the Designer to show subform elements. With this element, you can test your Designer integration as close as possible. The <pas-child-form> element is preadjusted to use events in order to read the form's data. To test that, add text to the input field, open your browser console and click the submit button (see Starting the Test Application below). form-test-wrapper.component.html: HTML
|
|
form-test-wrapper.component.ts
|
Contains an import of your form component from your library's public-api.ts file and a form variable which allows you to use your component MyFormComponent in the <pas-child-form> element. form-test-wrapper.component.ts: TypeScript
|
|
app.module.ts |
Contains an import of @pas/app-core module which makes the <pas-child-form> element accessible. app.module.ts: TypeScript
|
|
app.component.html |
Contains the selector of your form-test.wrapper.component to make your component appear. app.component.html HTML
You can find how your HTML element is called in the .ts file of your generated form-test-wrapper component. It is the selector entry in the @Component decorator.
|
Starting the Test Application
To start your test application, use:
ng serve my-form-test --configuration development
This outputs with
** Angular Live Development Server is listening on localhost:4200, open your browser on http://localhost:4200/ **
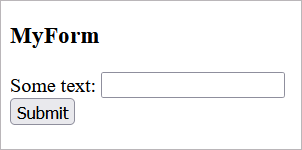
Open the mentioned URL http://localhost:4200/ in your browser and you will see the following screen:

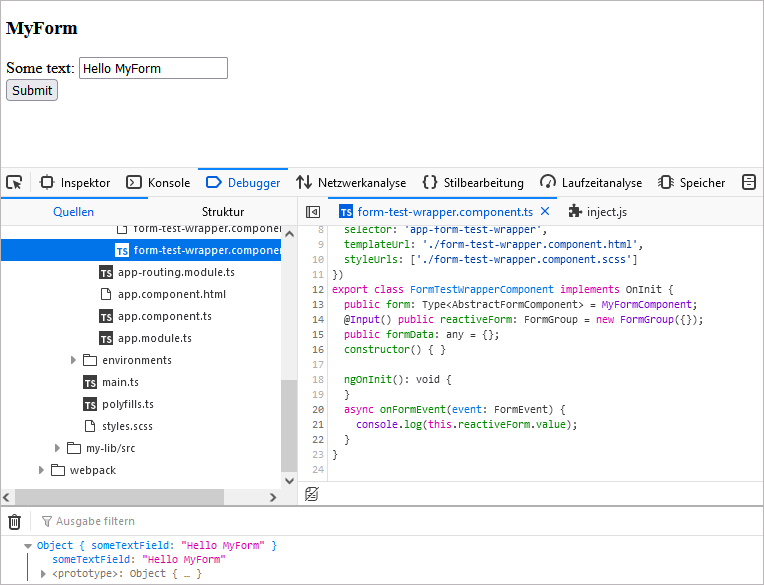
Enter some text in the input field in your form. Open the developer console of your browser and click Submit. The entered text will be displayed in the console:

Now you can continue extending your form with individual elements and test them in the Designer.
Using External Libraries
If you want to use external libraries in your Pro-Code forms, you need to add the external library to your own library project.
|
Path |
Step |
Description |
Example Code |
|---|---|---|---|
|
my-lib/projects/my-lib |
(1) |
Go to my-lib/projects/my-lib and execute the install command for the external library. |
Bash
|
|
(2) |
Adjust the ng-package.json in the library folder to make the external library available for your applications. |
TypeScript
|
Related Content
Related Pages:
Related Documents:
Download the archived (empty) test project if you want to use it as a starting point for a new Pro-Code project.
-
The project has been created by an xlib new command.
-
Just perform an npm install to install the dependencies.
