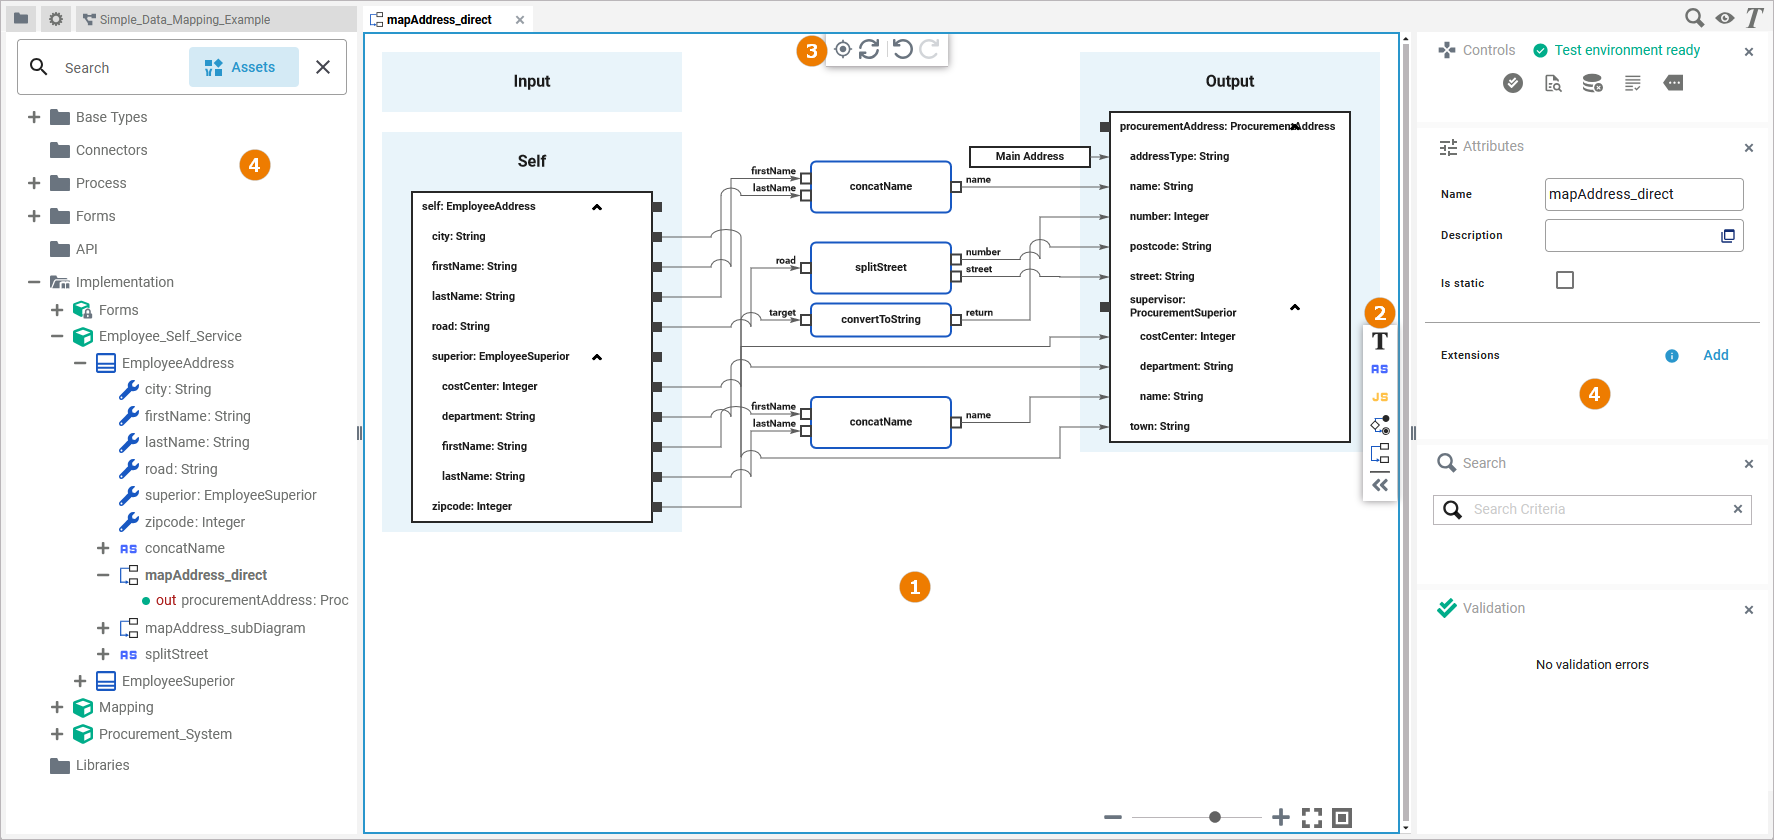
When you open the implementation diagram of a mapping operation, a new tab opens, and the mapping diagram is displayed in the mapping editor. This is where you model your data mapping.
The mapping editor consists of different areas:
(1) Mapping Editor
(2) Mapping Toolbar
(3) Elements Toolbar
(4) Designer Panels
Customizing the Mapping Editor
You have several options to adjust the mapping editor. When you open the editor for the first time, the default view is displayed:
-
The Diagram Pane is displayed in the top-right.
(See Modeling Data Mapping for more information.) -
Four Designer Panels are shown in the sidebars on the left and right:
-
The Service Panel
-
The Controls Panel
-
The Attributes Panel
-
The Validation Panel
-
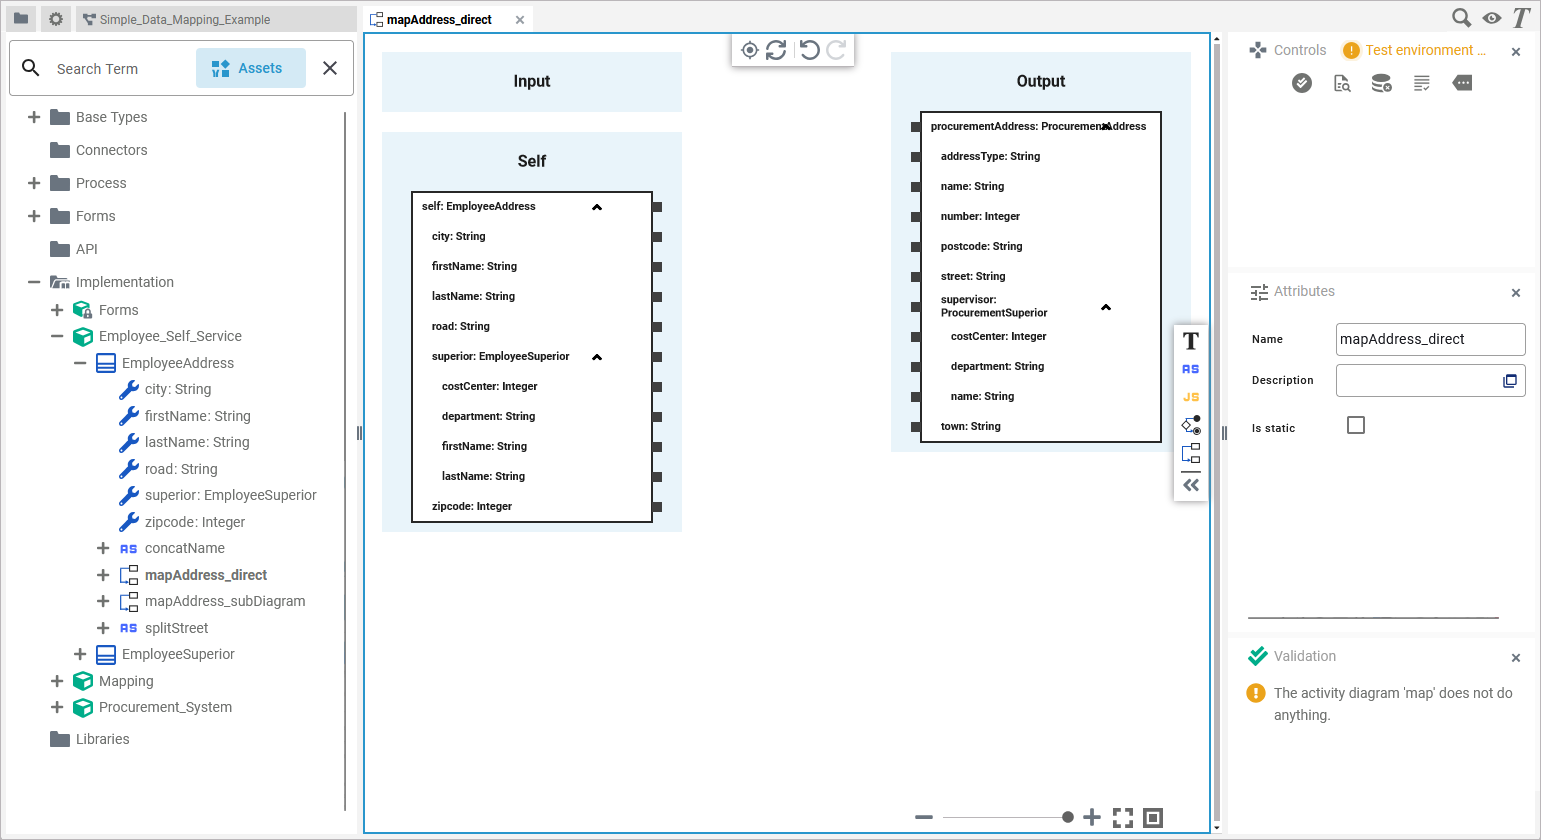
Refer to Customizing Editors and Panels for detailed information about panel management in general.
When starting with a new mapping diagram, the mapping editor displays a canvas that contains the incoming and outgoing parameters of the mapping operation. The image above shows the blank mapping diagram of a non-static mapping operation.
On the left side, you can see the mapping source. In this case, the source is the Self context of the related class. If the mapping operation has input parameters, the mapping diagram will also show elements in the Input section of the mapping diagram.
On the right side, you can see the mapping target (section Output). The target is defined by the output parameters of the mapping operation.
Refer to the other pages in this chapter for more information on how to model a valid Mapping diagram:
Modeling in the Mapping Editor
While modeling, some general functionalities help you to browse through your model, and to adjust your working location within the model. Refer to Customizing Editors and Panels for more details.
Toolbars
The mapping editor features a mapping toolbar in the center top of the diagram pane, and an elements toolbar on the right.
The Mapping Toolbar
Use the mapping toolbar to change the appearance of the mapping relations and to jump to the related mapping operation in the service panel:

The following table explains the available tools:
|
Tool Icon |
Tool Name |
Description |
|---|---|---|
|
|
Select in Service Panel |
Jump to the related mapping operation in the service panel. |
|
|
Reload diagram |
Use this option to reload the mapping diagram. |
|
|
Undo |
Undo the previous action you performed in...
If you click Undo in one of the Designer editors, this may also have an effect on the Implementation folder in the Service panel if you performed your previous action there. |
|
|
Redo |
Redo your previous action (after undo). |
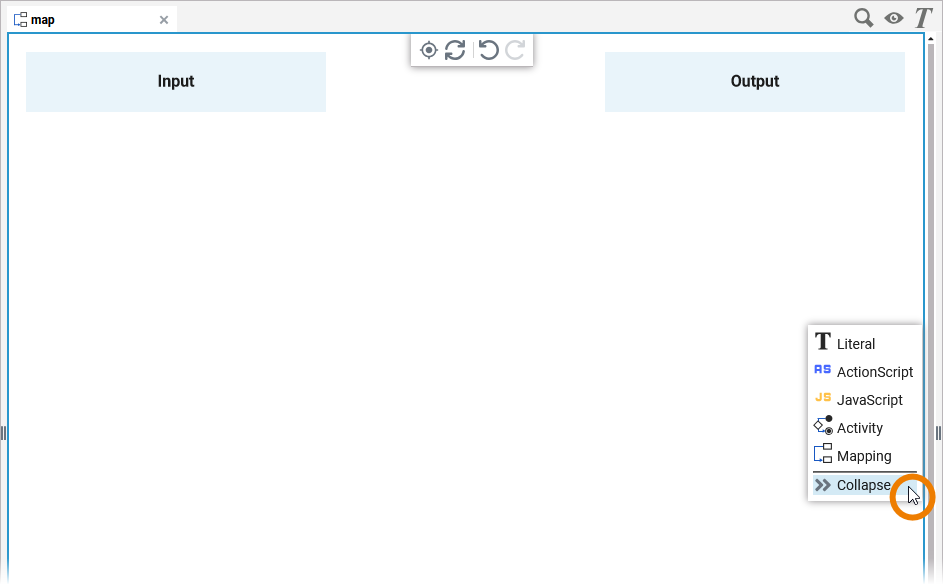
The Elements Toolbar
The elements toolbar contains all elements that you can create on your mapping diagram. By default, the elements toolbar only displays the icons of the available mapping elements. But you can also expand the toolbar using option Collapse at the bottom. In its expanded version, the names of all elements are also displayed:
The following table explains the available elements:
|
Icon |
Description |
|---|---|
|
|
Assign a string literal to a target property. |
|
|
Add an action script operation to the mapping diagram. |
|
|
Add a JavaScript operation to the mapping diagram. |
|
|
Add an activity operation to the mapping diagram. |
|
|
Add a mapping operation to the mapping diagram. |
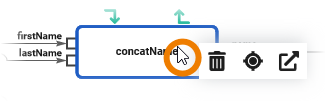
Context Menu of Elements in a Mapping Diagram
Each element of the mapping editor has a context menu that you can select actions from:
|
Mapping Elements Context Menu |
Icon |
Description |
Available for |
|
|---|---|---|---|---|
|
Right click on a mapping element, to open the context menu. |
|
Delete the selected element. You can also use the Del or backspace key to delete an element. |
All elements |
|
|
Highlight the current element in the service panel. |
|
||
|
|
Open the implementation of the mapping operation in a new tab. |
mapping operation |
||
Keyboard Shortcuts
Find below a list of all keyboard shortcuts that are available in the mapping editor:
|
Shortcut |
Description |
|---|---|
|
Arrow down |
Moves the whole editor content downwards. |
|
Arrow up |
Moves the whole editor content upwards. |
|
Backspace |
Removes the selected element(s) from the diagram pane. |
|
Ctrl + 1, 2, 3 ... 9 |
Switches to the Designer tab corresponding to the chosen number. This feature is available for the first nine open tabs. |
|
Ctrl + D |
Closes the active Designer tab. |
|
Ctrl + Mouse Wheel |
Zooms in (scrolling up) or out (scrolling down) of the current model. |
|
Ctrl + Shift + D |
Closes all tabs and switches to the service tab. |
|
Del |
Removes the selected element(s) from the diagram pane. |
|
Esc |
Aborts the following procedures:
|
|
Mouse Wheel |
Moves the diagram pane up or down. |
|
Shift + Page down |
Switches to the next Designer tab from left to right. |
|
Shift + Page up |
Switches to the next Designer tab from right to left. |