In the Designer, you can connect to backend systems using adapters. To make this much easier, you can create a connector that provides the needed configurations for the adapter:

The Connector provides the data model, the Adapter performs the actual call to the outside system.
The example above shows the connection to a REST service. This example is used to explain the usage of connectors in general.
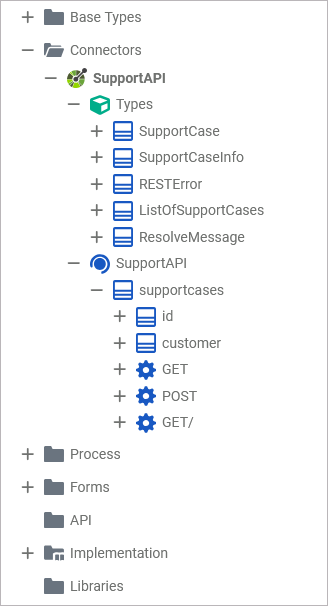
All connectors of the service that have been imported and configured reside below the Connectors folder in the Service Panel:
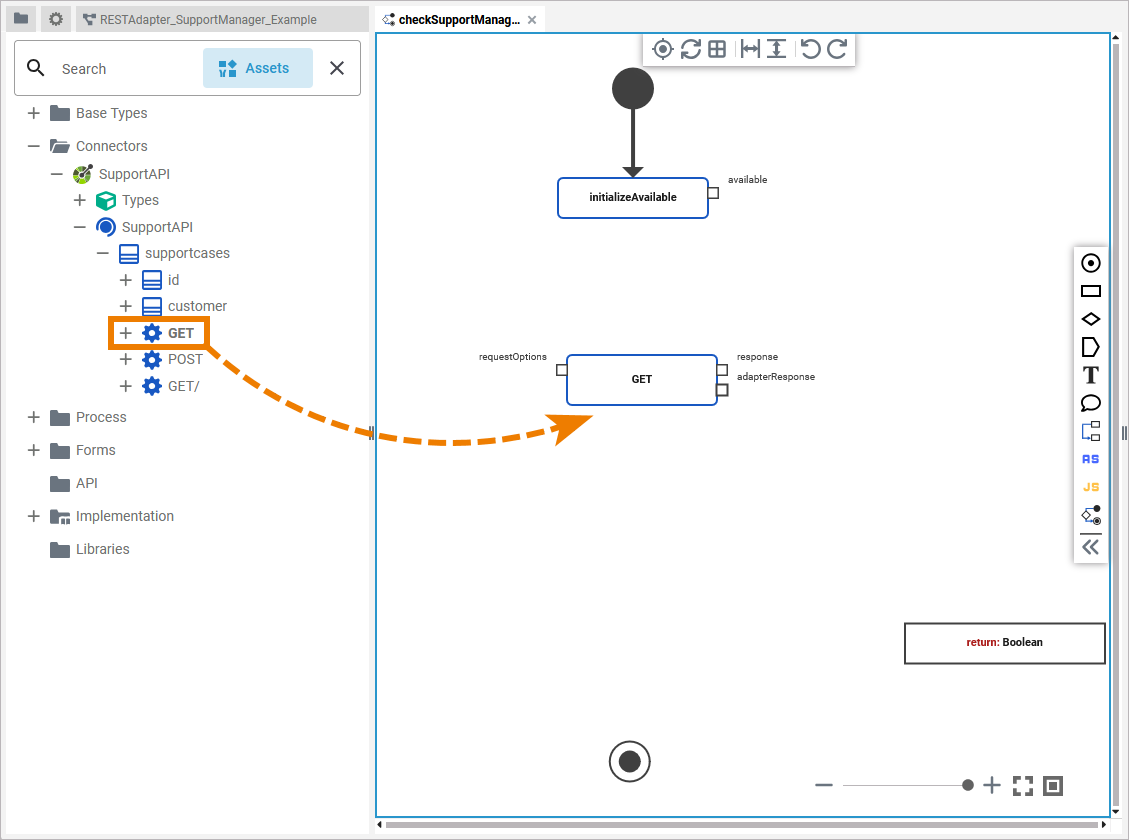
In the Designer, you can add connector operations to diagrams by simply dragging them from the service panel and dropping them on the canvas:
Configuring the Adapter Operation
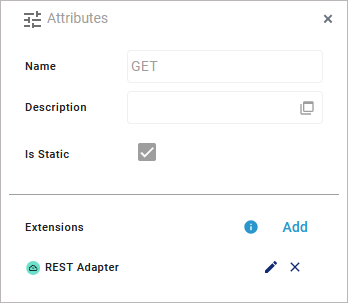
Once a connector operation has been added to a diagram, it needs to be configured as a corresponding adapter. Select the newly added connector operation and switch to the Attributes panel. You can see the following information:
|
Attribute |
Description |
Example |
|---|---|---|
|
Name |
The generated name of the operation within the diagram. This attribute is read-only. |
GET |
|
Description |
A description of the operation - if available. This attribute is read-only. |
Get some general info on existing support cases (number, affected customers). |
|
Extensions |
The adapter extension that corresponds to the selected connector. You can edit or delete the extension. |
REST Adapter |
Use option Edit to configure the extension:
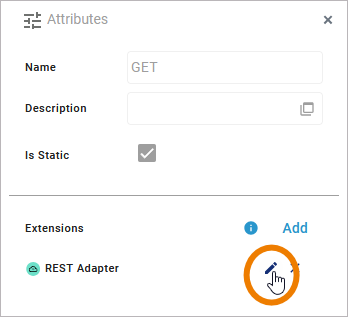
An adapter is configured via the attributes of the selected extension. For the REST Adapter these are e.g. Alias and Digest Algorithm.
For many adapters, you need to configure an alias. Aliases specify the path to the related backend.
In the Extensions editor, you can
-
select an existing alias from a list
-
add a new alias with Plus
-
remove the alias (if one has been assigned) with Minus
