You can style all form elements using CSS. A basic knowledge off CSS is helpful for that.
Styling a form with CSS includes the following steps:
-
Create your own CSS and upload it to your PAS installation. Refer to Styling Forms With CSS for more information on how to create your own CSS file based on a useful template.
Provide a CSS File
Create a CSS file that contains the styling definitions you want to apply, and upload it to the PAS system as a resource. Uploading CSS file resources is possible via the File Manager or via the additional menu in the Controls panel (see below).
Apply the CSS File
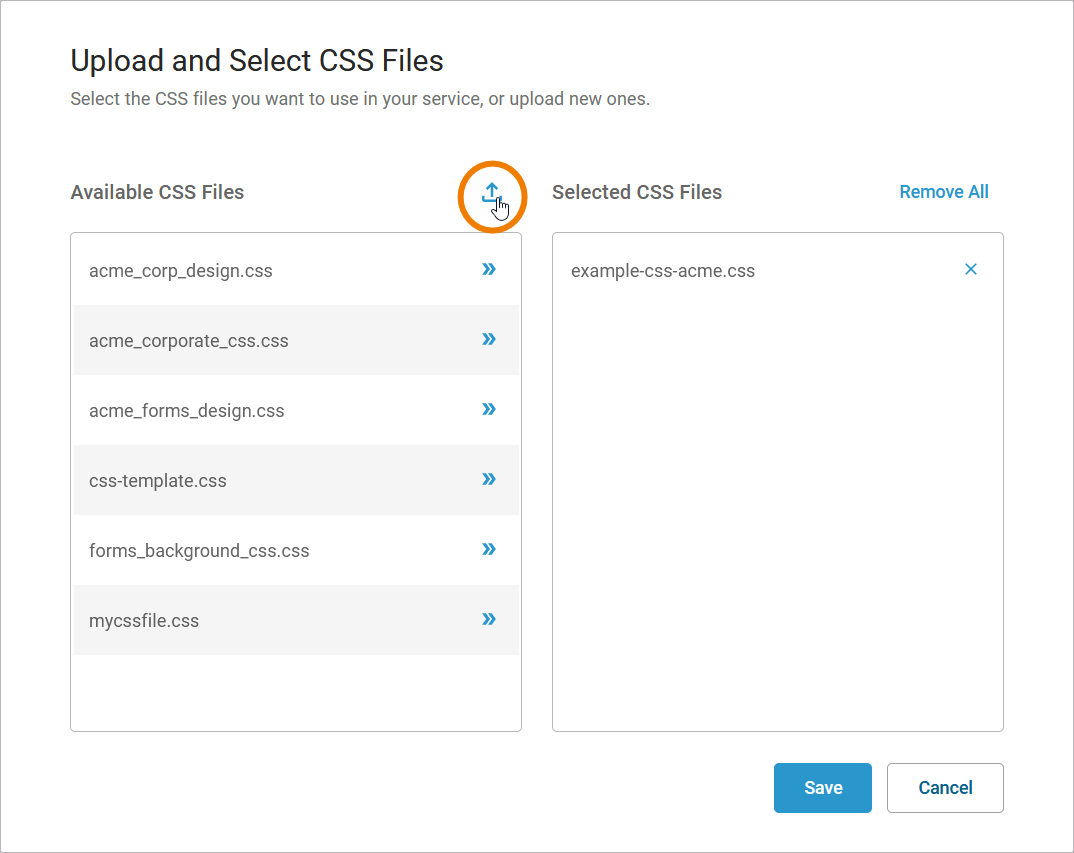
Next, you need to apply the uploaded CSS file to your service. Go to the Explorer and select the relevant service. In the Controls Panel open the additional menu and choose option Apply CSS:

A pop-up opens. Column Available CSS Files lists all available files. From this list you can select the CSS files you want to use in your service:

-
Click the arrow of a CSS file to add it to the list of Selected CSS Files.
-
Click X on a selected file to remove it from that list and send it back to Available CSS Files.
If the file you need is not yet available, use option Upload file to provide it:
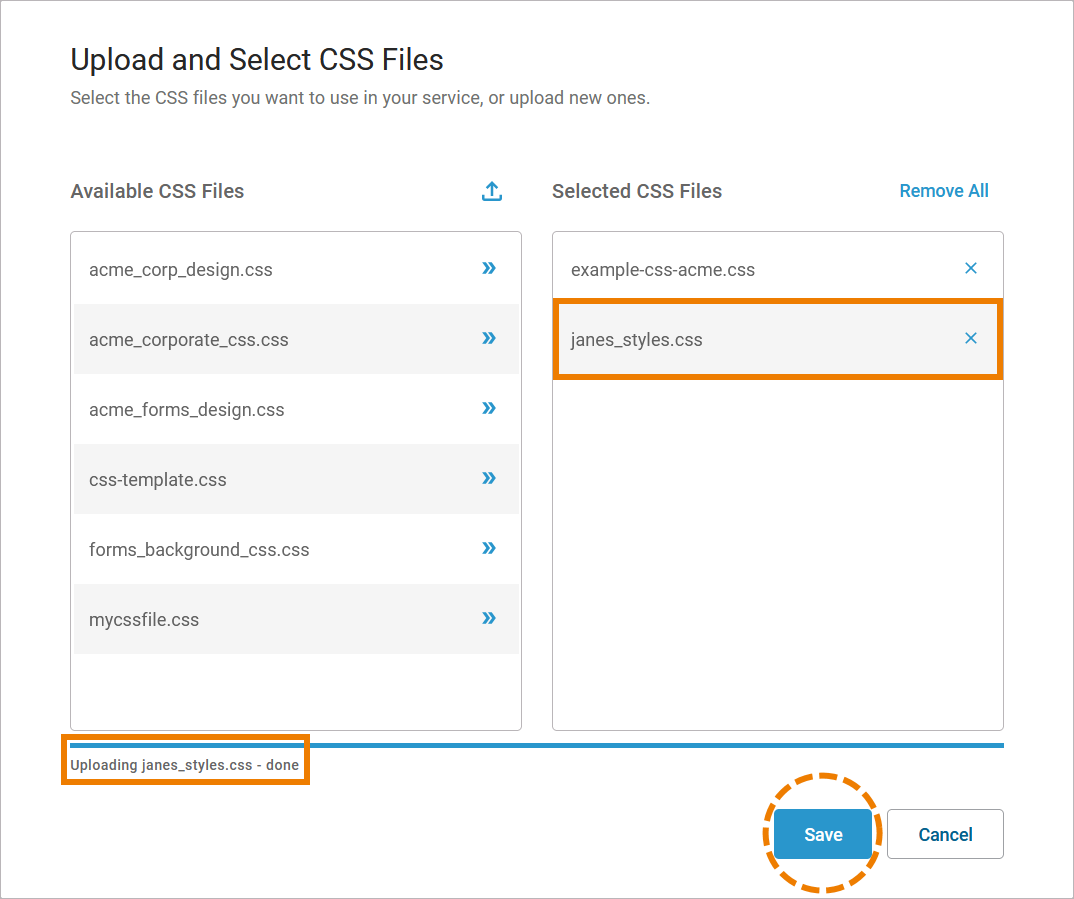
A successful upload is displayed below column Available CSS Files. A newly uploaded file is directly added to the Selected CSS Files - but you need to press Save to apply all changes:
You can also upload CSS files that you want to use via the File Manager.
Apply a Styling to a Form
You can assign a CSS Class to a whole form to apply a standard styling:
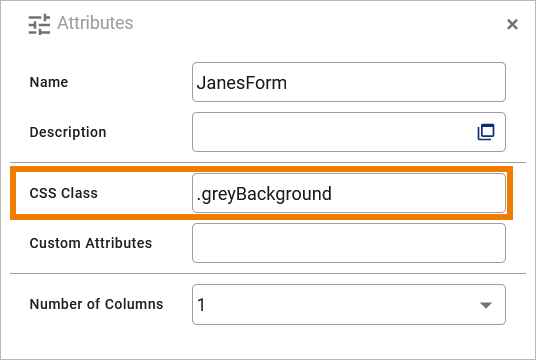
This CSS class must be defined in one of the active CSS file resources (see step Apply the CSS File).
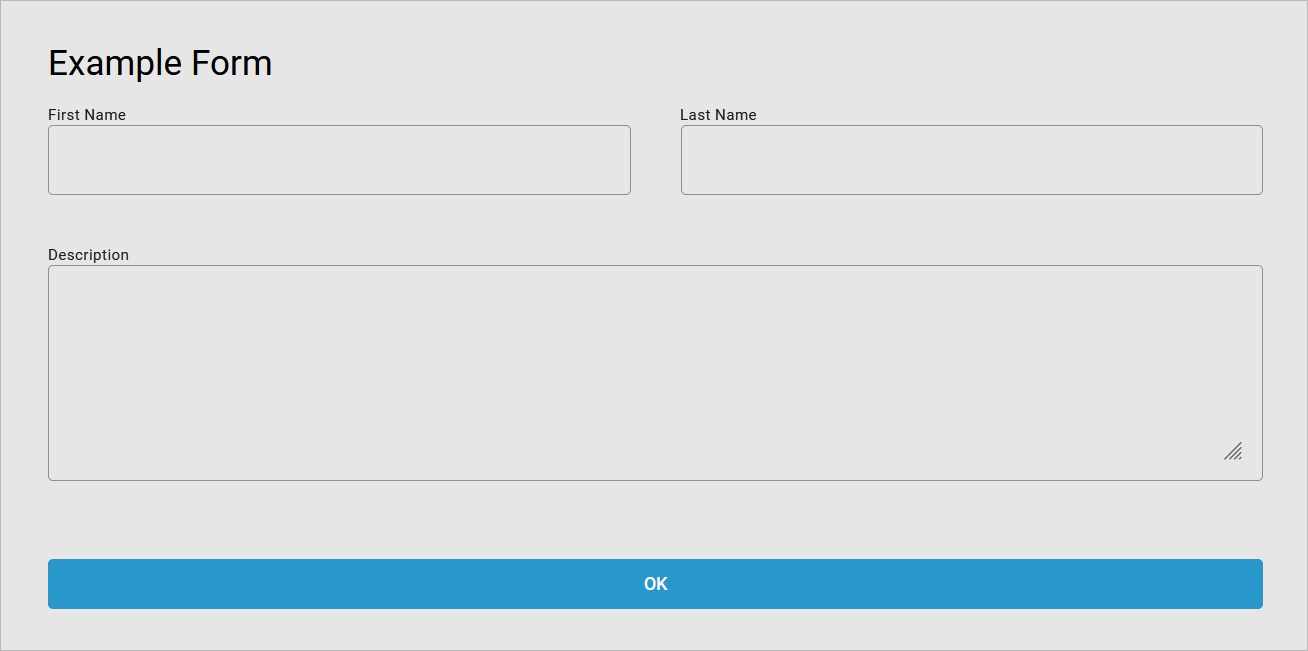
In the applied CSS file, the general background color is defined to be grey for body and header:
body {
	background-color: #E6E6E6;
}

header {
	background-color: #E6E6E6;
}
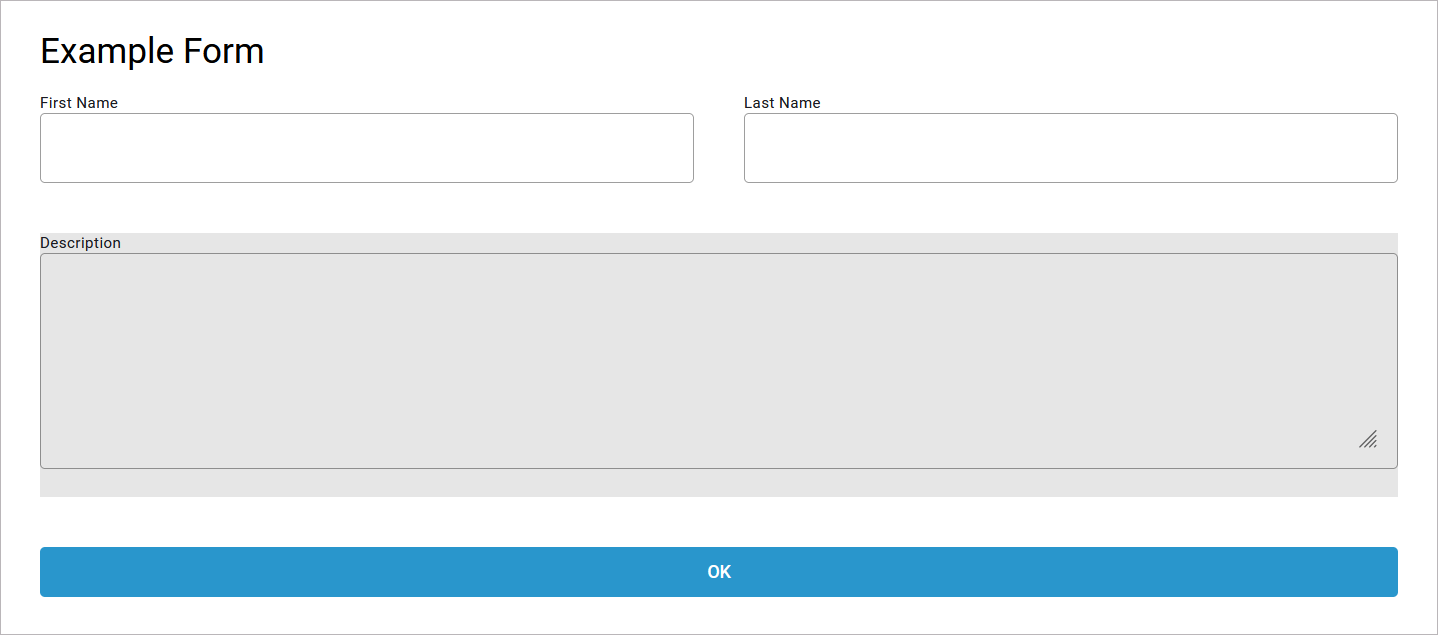
In the executed form, the defined styling is applied: The background is displayed in grey:
Add a Class to a Form Element
You can also assign a CSS Class to each single form element. This CSS class must be defined in one of the active CSS file resources (see step Apply the CSS File).
In our example, we use a class .description to style the description field.
Enter the name of the class in the attribute CSS Class without the dot.
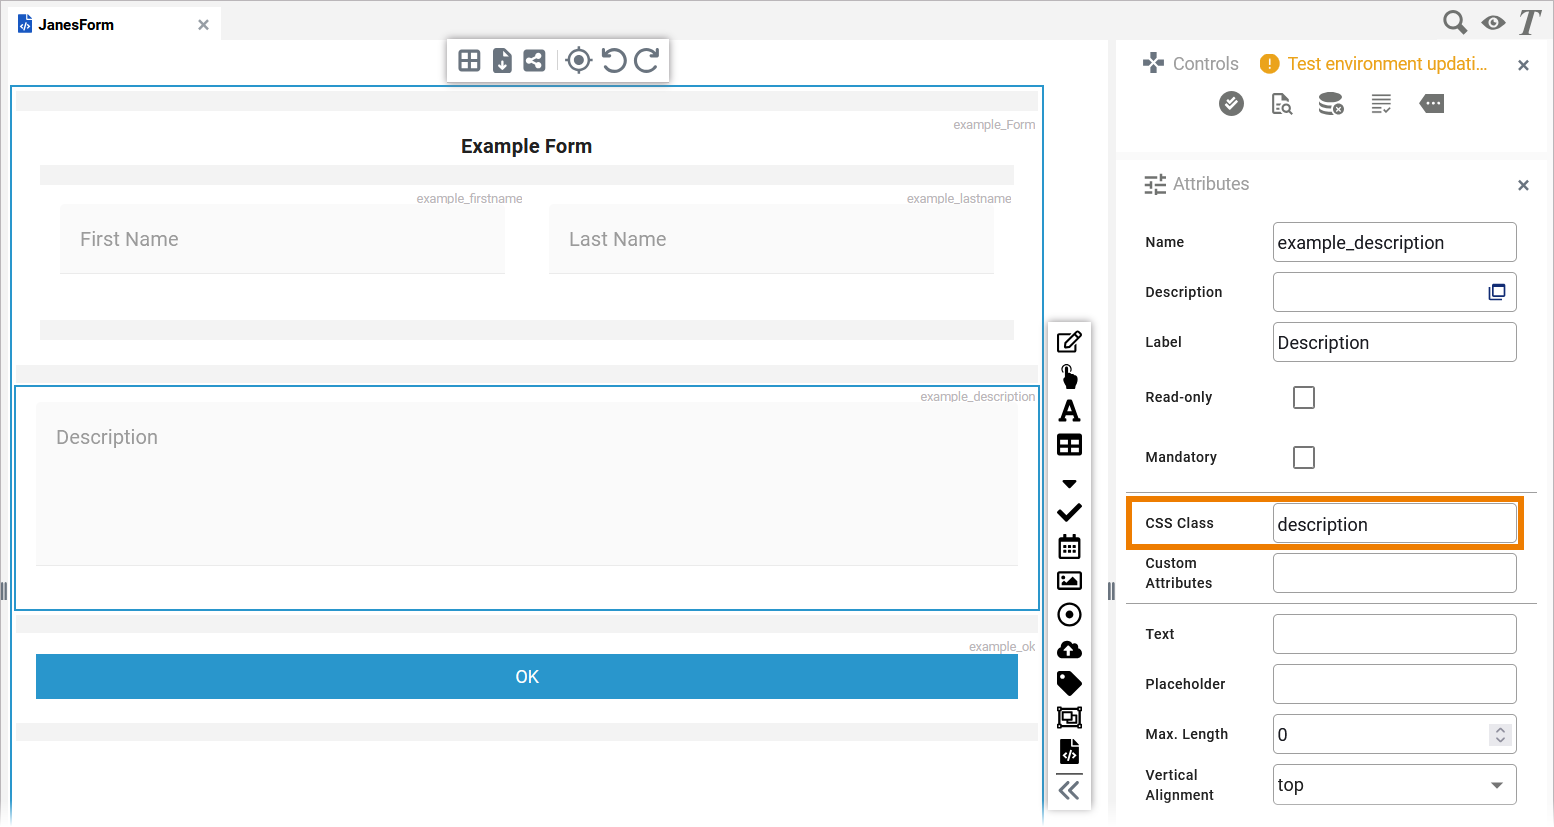
In the applied CSS file, the class .description is defined:
.description {
    background-color: #E6E6E6;
}
In the executed form, the defined styling is applied. The description field with attribute CSS Class .description is adorned with a grey background:
Form_CSS_Example
Click here to download a simple example model that shows how you can style forms with your own custom CSS in Scheer PAS Designer.
To be able to execute this example, you need to upload the sample CSS file example-ccs-acme.css as a resource to the File Manager.
You can download the CSS file here. Refer to Managing File Resources for more information on how to upload the file.
Related Content
Related Pages:
Related Documentation: