Compared to asynchronous REST communication, the synchronous communication expects a response and, if necessary, waits for it. For asynchronous communication, this could be implemented with a simple REST call to another service. To implement synchronous communication via REST, the called service must also be able to send a response back to the initial process instance. For this, it needs the instance ID and also an interface to the process itself.
From Asynchronous to Synchronous REST Communication
To demonstrate synchronous communication, a few changes are necessary in the asynchronous communication example. To better distinguish between the examples, we will rename our two services:
-
Caller_Service_async becomes Caller_Service_sync and is adapted as follows:
-
Class Message is extended to store and transmit the process ID.
-
A new connector is created using the OpenAPI descriptor of the Caller_Service_sync.
-
A REST call to the Caller_Service_sync is implemented to send the response.
-
-
Called_Service_async becomes Called_Service_sync and is adapted as follows:
-
Old connector is deleted, and a new one with the updated OpenAPI descriptor is created so that it now uses the extended Message class.
-
The current process ID is stored in the message to be transferred so that the Called_Service_sync can send a response to this instance.
-
A Receive Task element is added to the BPMN. This element can receive messages and trigger the process to continue.
-
A User Task and a new form are added to show the received data.
-
Service_Communication_Sync
This example shows synchronous communication between two services via REST:
Let's take a look at the changes step by step:
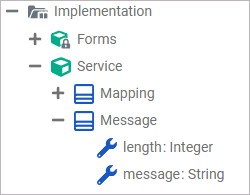
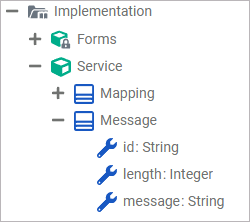
Step 1: Extending the Class “Message”
The first step is to change the Message class of Called_Service_sync. Since the service is supposed to return a response, it needs to know which service the response should be sent to - and to which process instance. To achieve this, add the property id of type String to the Message class:
|
Asynchronous Service Call |
Synchronous Service Call |
|---|---|
|
|
Caller_Service_sync also uses class Message. Therefore, you must recompile and deploy Caller_Service_sync. Afterwards, download the OpenAPI descriptor. Delete the old version of the connector and re-import the new one in Caller_Service_sync (refer to Asynchronous Communication via REST > Step 2: Download the OpenAPI Descriptor for details).
Step 2: Extending the Caller_Service_sync
To prepare the Caller_Service_async to receive data via a REST call, it is best to extend it with a Receive Task (Receive Data) (refer to Receive Task in the Designer Guide for more information about the element). A receive task waits for the arrival of a trigger from an external system. In our example case, the trigger is the response from Called_Service_sync via REST. When the process execution reaches a receive task, the process remains in a waiting state until a specific message is received from the engine, which causes the process to continue.
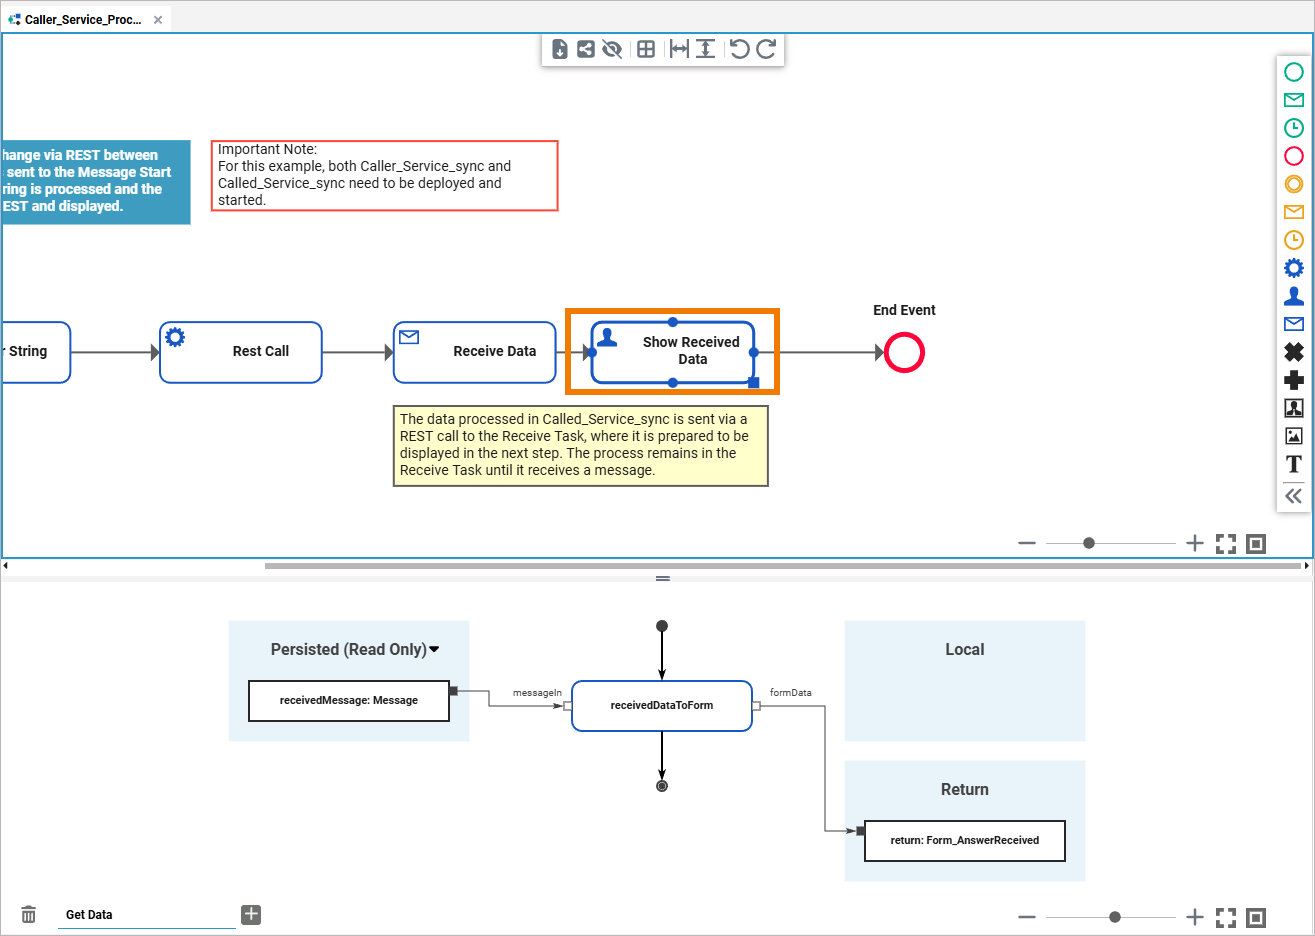
In our example, we use an additional user interface to display the received data, but this is optional. We use an additional UI so that the user can see the result immediately without having to jump to the log. For this reason, we have created another form for displaying the data and added a User Task (Show Received Data). The form for displaying the data has been assigned to this task.
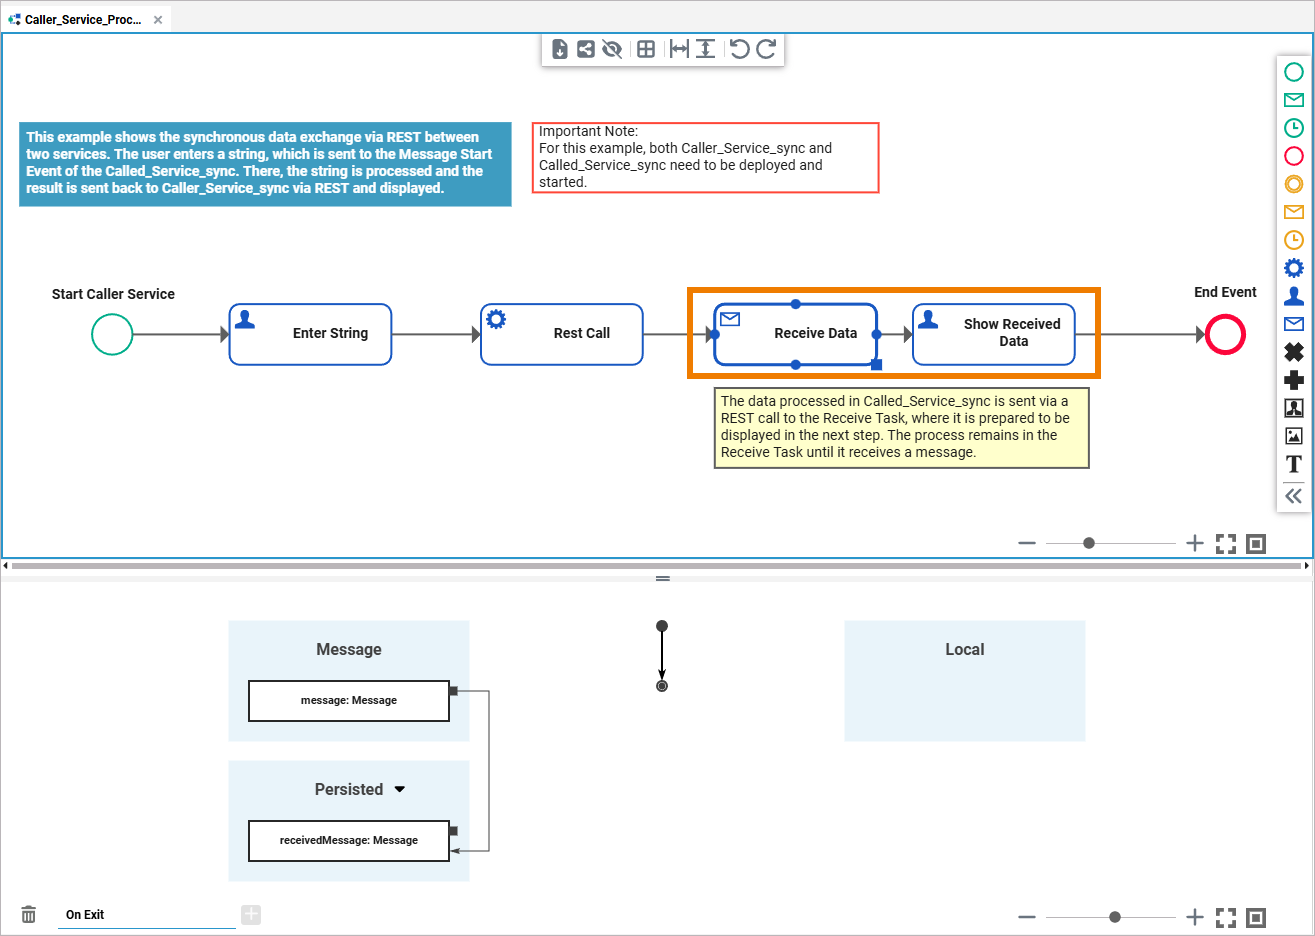
After creating the two new tasks, the received message is persisted in Receive Data. A newly created mapping diagram in the execution of the Show Received Data user task ensures that the received data is output via the corresponding form.
Deploy the service.
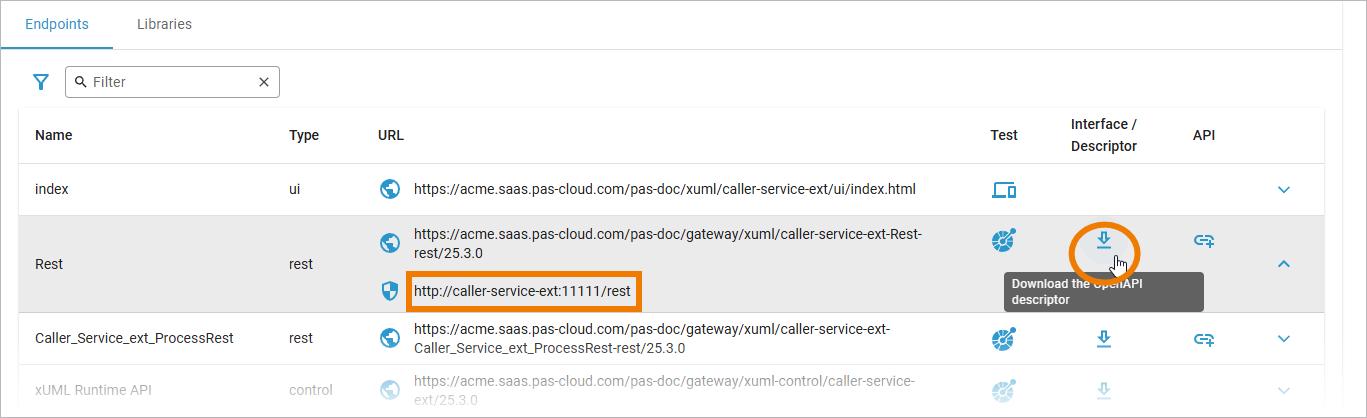
Step 3: Downloading the OpenAPI Descriptor of Caller_Service_sync
Now open Caller_Service_sync in the PAS Administration and download its OpenAPI descriptor (YAML file).
Since this is an extension of our asynchronous example, the new services have the suffix _sync. This affects the alias configuration, and the names of the services must be adjusted accordingly.
Step 4: Implementing the Response Call
Now you need to extend the Called_Service_sync so that it not only processes the received string and writes it to the log, but also sends the data back to the calling service. Import the YAML file to create a new connector. You can now use the POST function of Receive Data, the receive task that you added in Caller_Service_sync.
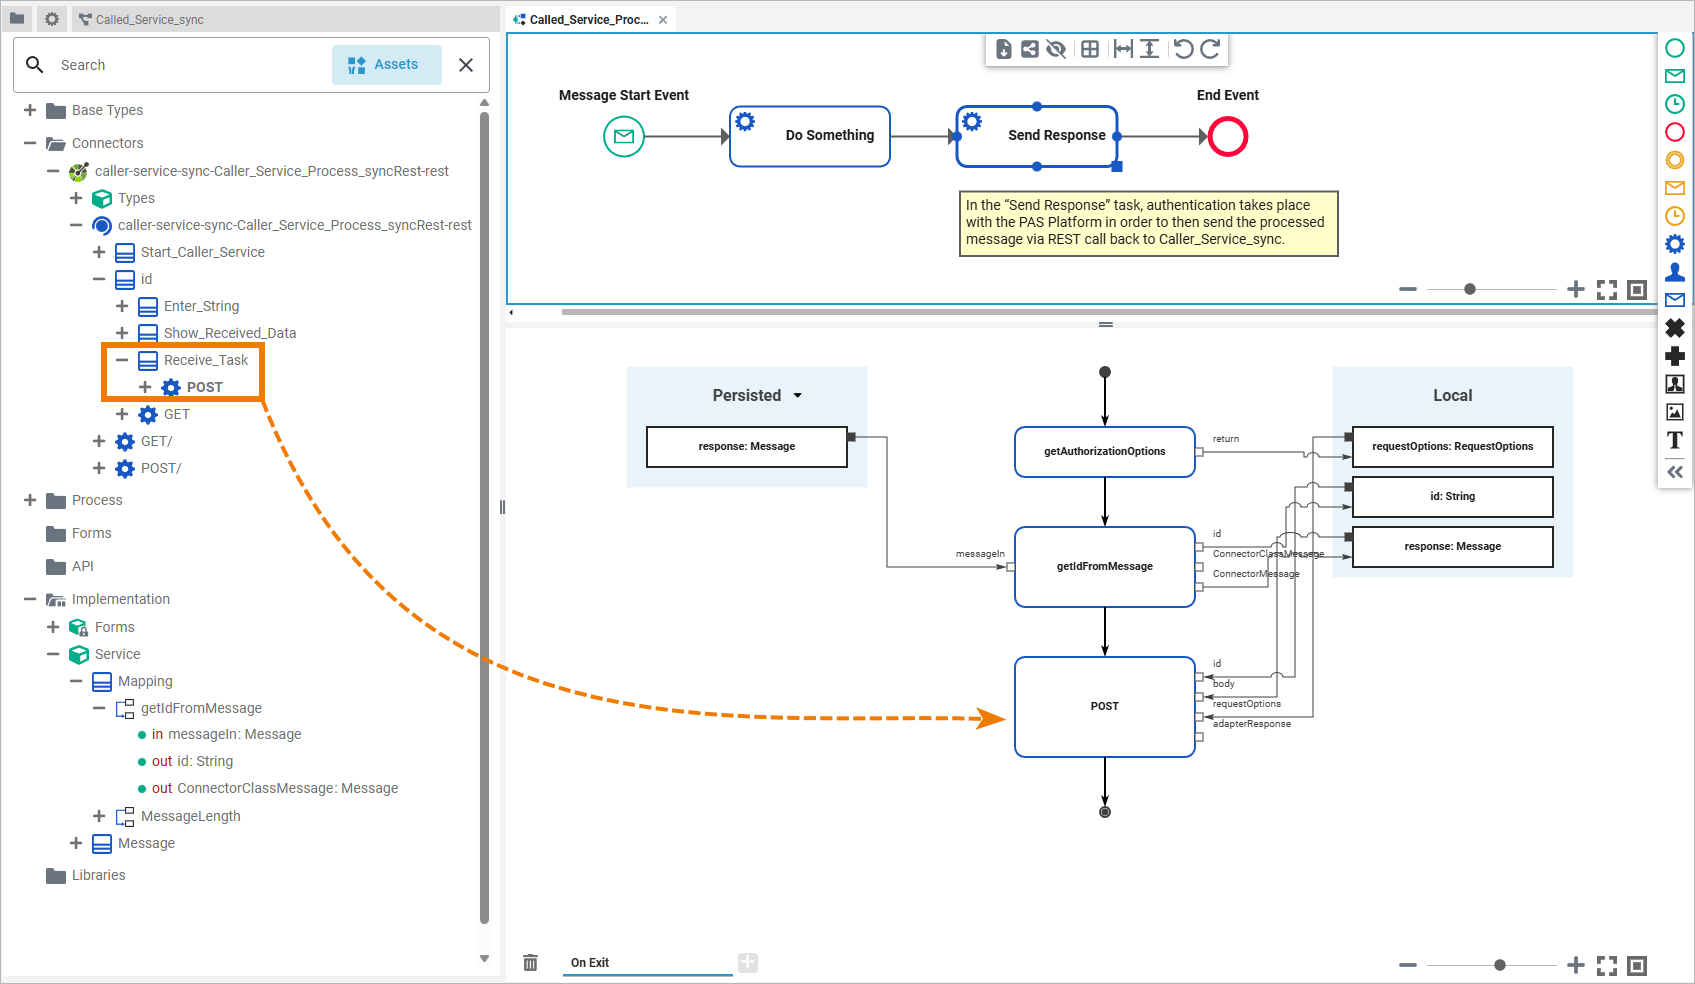
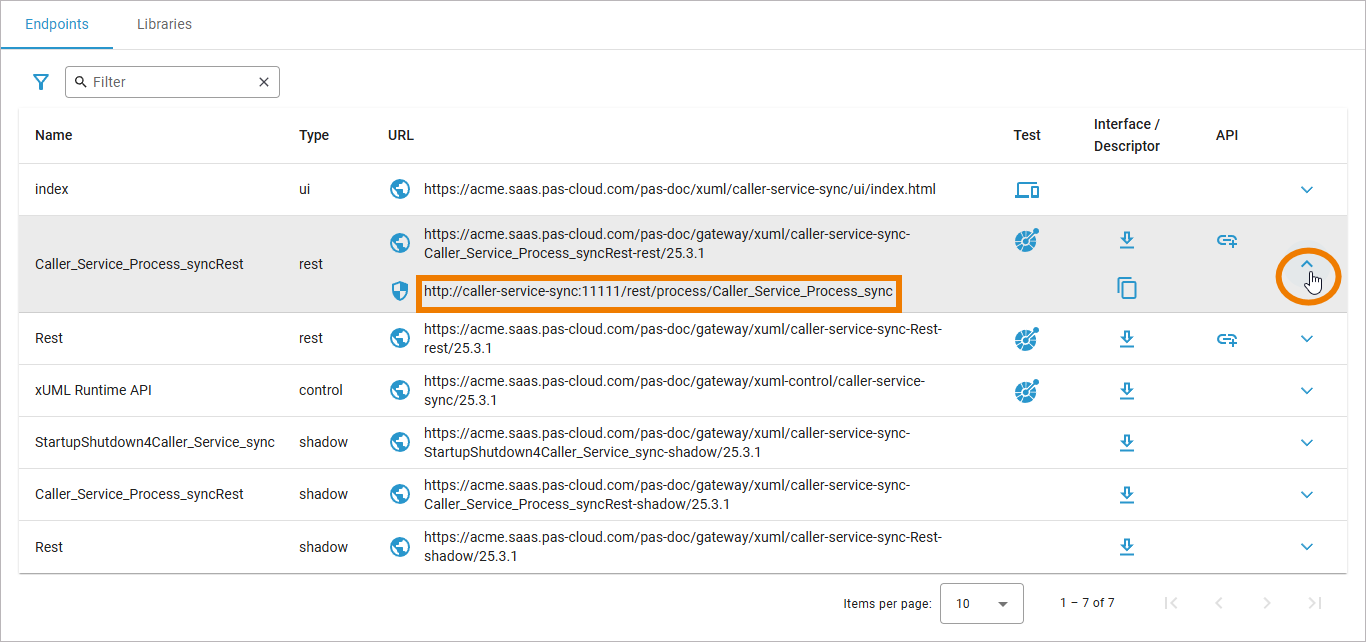
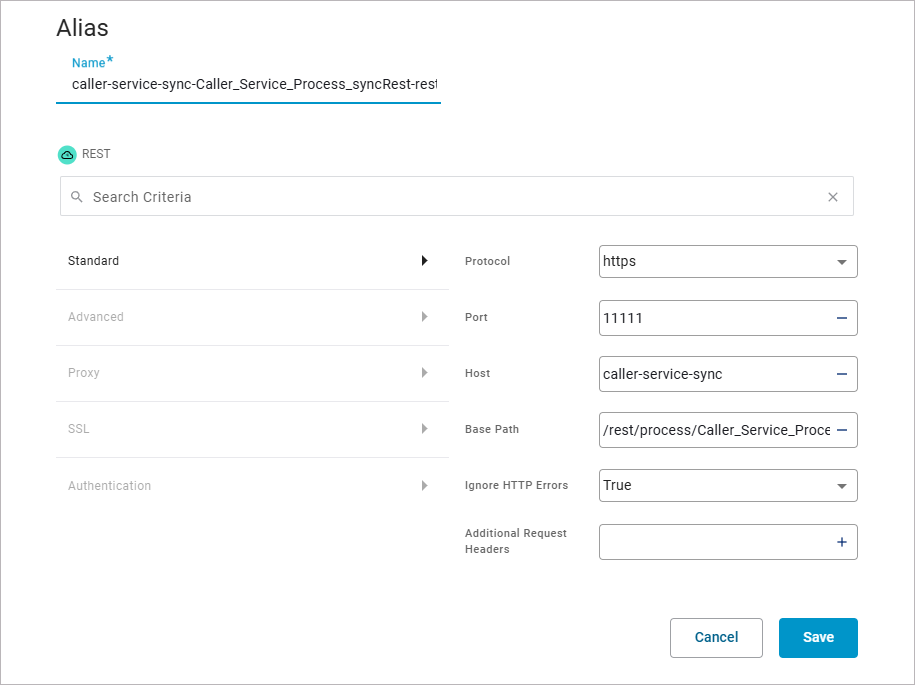
Use the getAuthorizationOptions() operation to authenticate with the PAS platform and save the requestOptions locally (refer to Asynchronous Communication via REST > Step 3: Implement the Service Call for details). Add the REST Extension (refer to REST Adapter in the Designer Guide for more information) for the POST function and select the appropriate alias. You can find the necessary data in the service details of the Caller_Service_sync in the PAS Administration:
|
Data in Administration |
Alias in Designer |
|---|---|
|
|
Finally, use a mapping operation to save the id from the received message locally and assign it to the POST function. This ensures that the response is returned to the correct process instance.
Step 5: Executing the Service
Once you have modified the service, you can deploy and execute it.
In the first basic asynchronous variant, the following happened:
-
A string was entered via the Caller_Service_async user interface.
-
The string was sent to the message start event of the Called_Service_async via the POST function.
-
The Called_Service_async processed the character string and output the result of the processing via the service log.
The extended Called_Service_sync can now do more than just write processed data to the log. By extending the processes with the current instance ID, a receive task, and an additional UI, the services can now exchange and display data about a specific process instance:
-
Caller_Service_sync sends the message entered in the form together with the current instance ID to Called_Service_sync.
-
Called_Service_sync receives the message, processes it, writes it to the log, and then sends it back to the sender.
-
Caller_Service_sync receives the processed message and displays it in the additional form.
To illustrate the differences, the steps from both examples are shown side by side in the table:
|
Service |
BPMN Element |
Asynchronous Example |
Synchronous Example |
|---|---|---|---|
|
Caller_Service |
Enter String |
Entering a string via the UI. |
|
|
Caller_Service |
Enter String |
The string is added to the message and persisted. |
The string and the instance ID are added to the message and persisted. |
|
Caller_Service |
REST Call |
The message is sent to the recipient via a REST call. |
|
|
Called_Service |
Message Start Event |
When the message is received, the process starts. |
|
|
Called_Service |
Do Something |
The message is processed, persisted, and written to the log. |
|
|
Called_Service |
Send Response |
|
The message is sent with the instance ID to the receive task of the calling service. |
|
Caller_Service |
Receive Data |
|
Receiving the message continues the process instance. The received message is persisted. |
|
Caller_Service |
Show Received Data |
|
The previously received message is displayed. |
Error Handling
In distributed systems, service calls can fail for many reasons, such as temporary network issues, timeouts, or unavailable endpoints. If these errors are not handled properly, process instances may end in an error state.
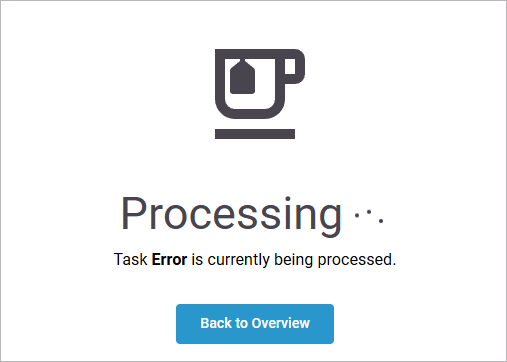
If the Called_Service_sync is unavailable, you see an error message after submitting the form:
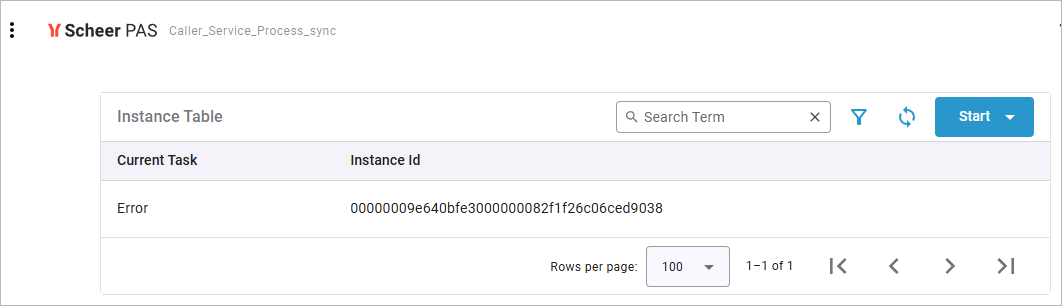
The erroneous execution is also listed in the instance list:
You can use the retry function of the root state machine to prevent this error. Refer to Using the Retry Function for Service Calls for details.
For more information about the error handling of the root state machine, refer to Error Handling of Root State Machine.
Related Content
Related Documentation: