
Follow Our Example User Story
David Stringer wants to add roles to his order process. To do this, he needs to insert lanes into the BPMN model and assign the appropriate roles.
Add Lanes for the User Roles
In tutorial 1, you have created BPMN model Order_approval_1. Open the BPMN model. It forms the basis for the following steps.
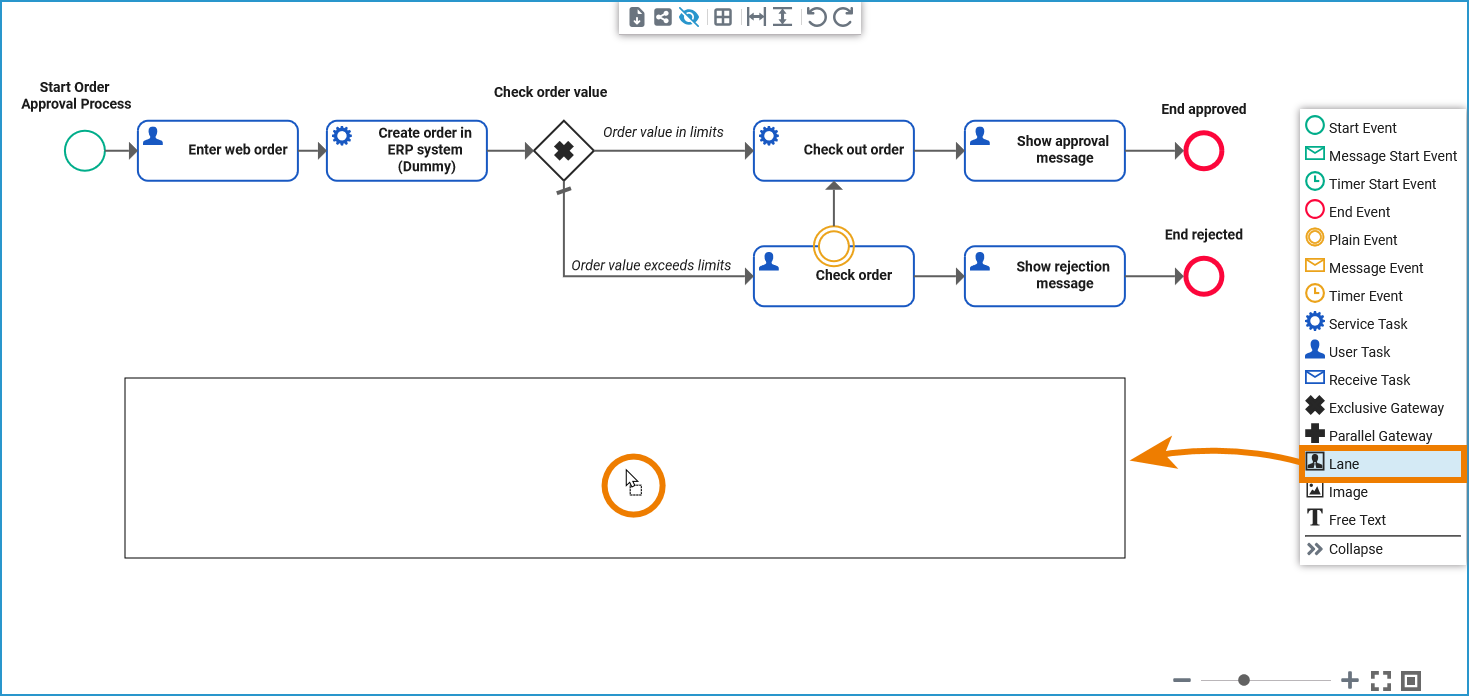
Select a lane element from the elements toolbar on the right side of the BPMN editor and drag it below your BPMN diagram:
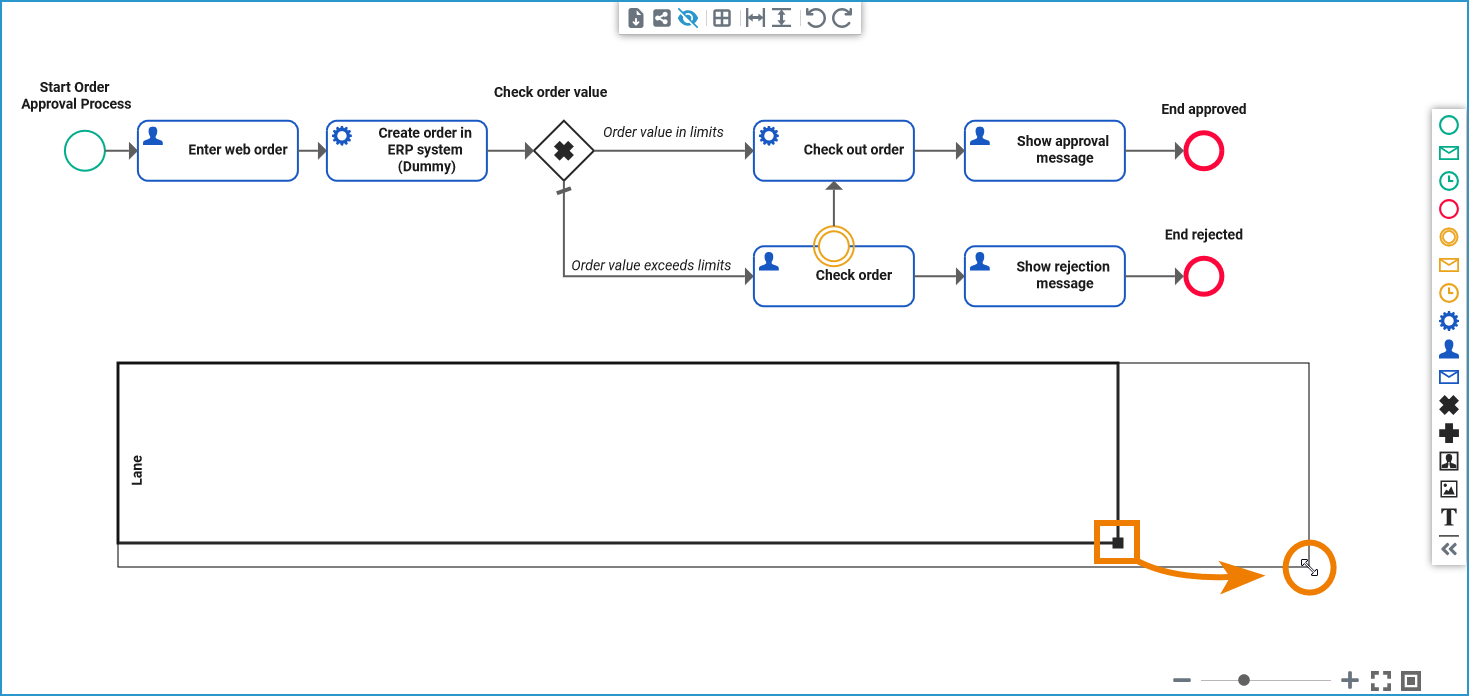
If you want to adapt a lane element, select it by clicking on its name or border. The selected lane is outlined in bold and a black square will appear at the lower right edge. Use the square to adjust the size of the element. Enlarge it to the whole length of your BPMN process:
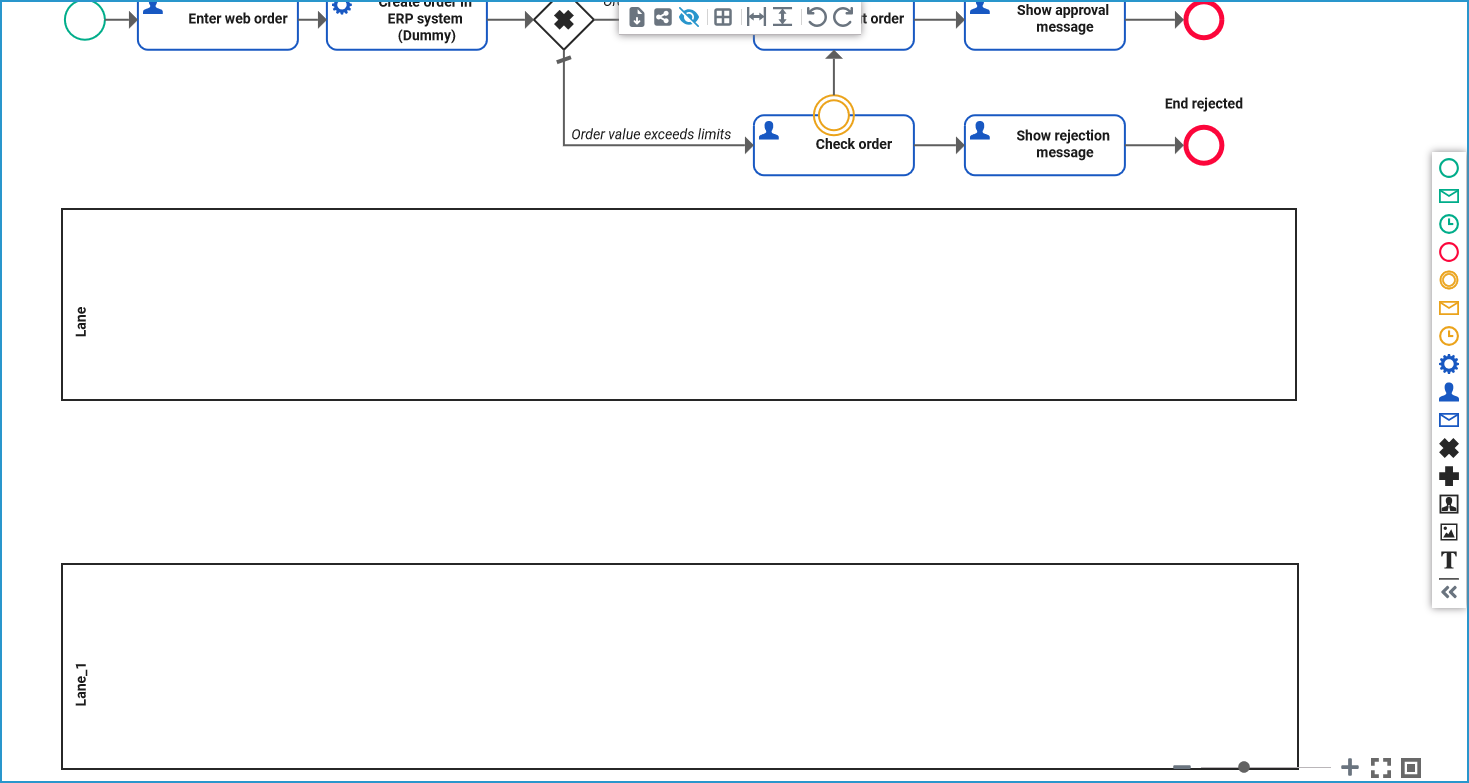
You need a separate lane for each role you want to use in the process.
Create a second lane below the first one. Since some process steps can be performed without human intervention, and therefore do not require a role, leave some space between lane 1 and lane 2:
Configure the Lanes
Follow Our Example User Story
David has added the lanes. Now, he can configure the lanes and name them according to the roles he wants to use them for.
David wants to use one role for employees who are allowed to create orders and another role for supervisors who are allowed to check orders that exceed the order limit.
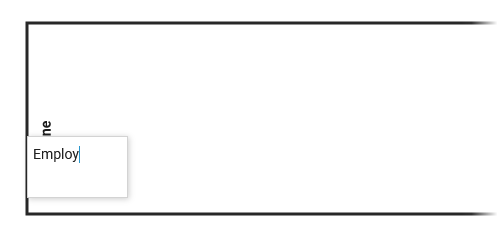
Double-click the lane name to open a text editor and change the name of lane 1 to Employee:
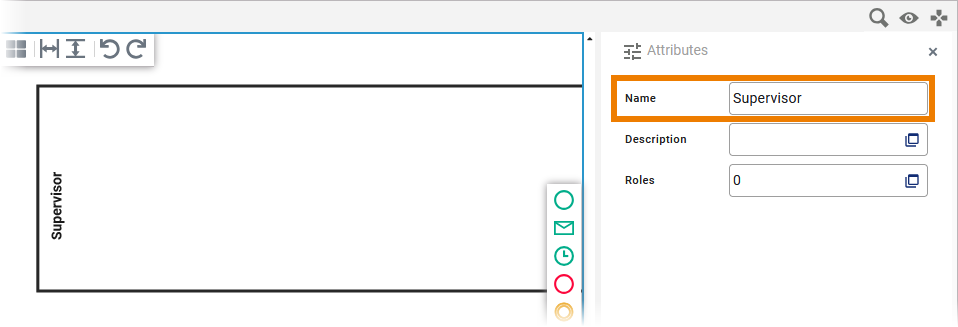
To change the name of a lane, you can also use the Name field in the attributes panel. Change the name of lane 2 to Supervisor:
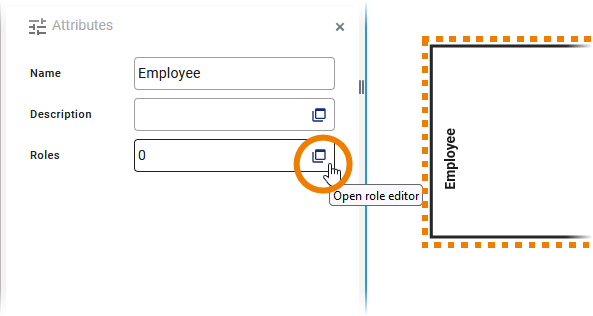
In the next step, you are going to assign roles to the lane elements. Select the Employee lane (click on the border of the element). Go to its attributes panel and open the Role Editor:
In the role editor, you can search for already created roles to reuse them or create your own roles:
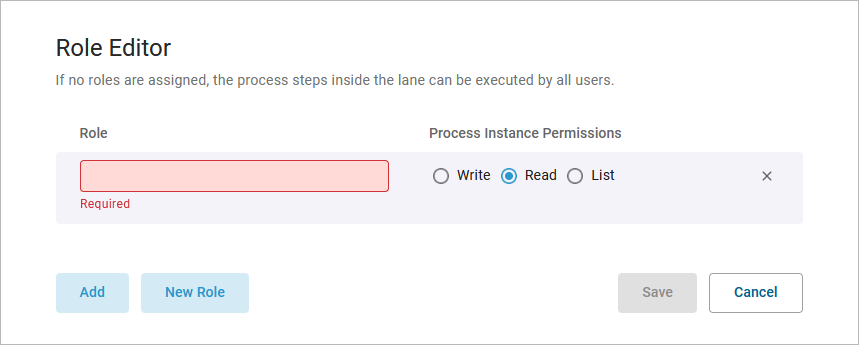
You can also define different rights to each role:
|
Right |
Description |
|---|---|
|
Write |
A user assigned to this role will be able to see and change the instance data for all process steps in the current lane. |
|
Read |
A user assigned to this role will be able to display the instance data for all process steps in the current lane. This right is assigned by default. |
|
List |
A user assigned to this role will only be able to see the instances in the instance table for all process steps in the current lane. |
You are going to create two new roles. You have already opened the role editor for the Employee lane. Now enter tutorial_employee as role name. The search field is still red, because this role does not exist on your system yet. To create it, click the link + Create tutorial-employee below:
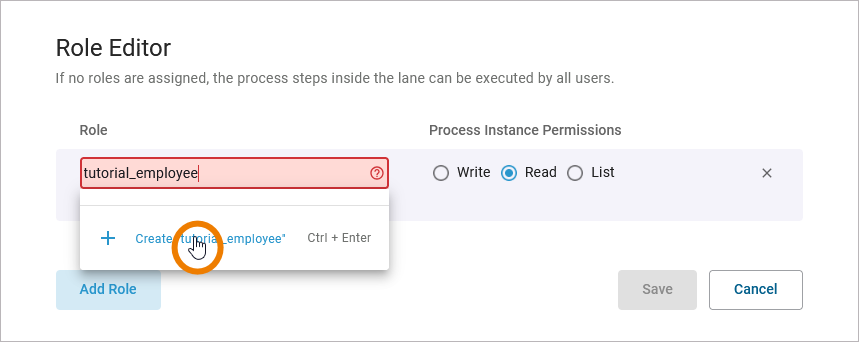
Give the new role write permission and save the new role:
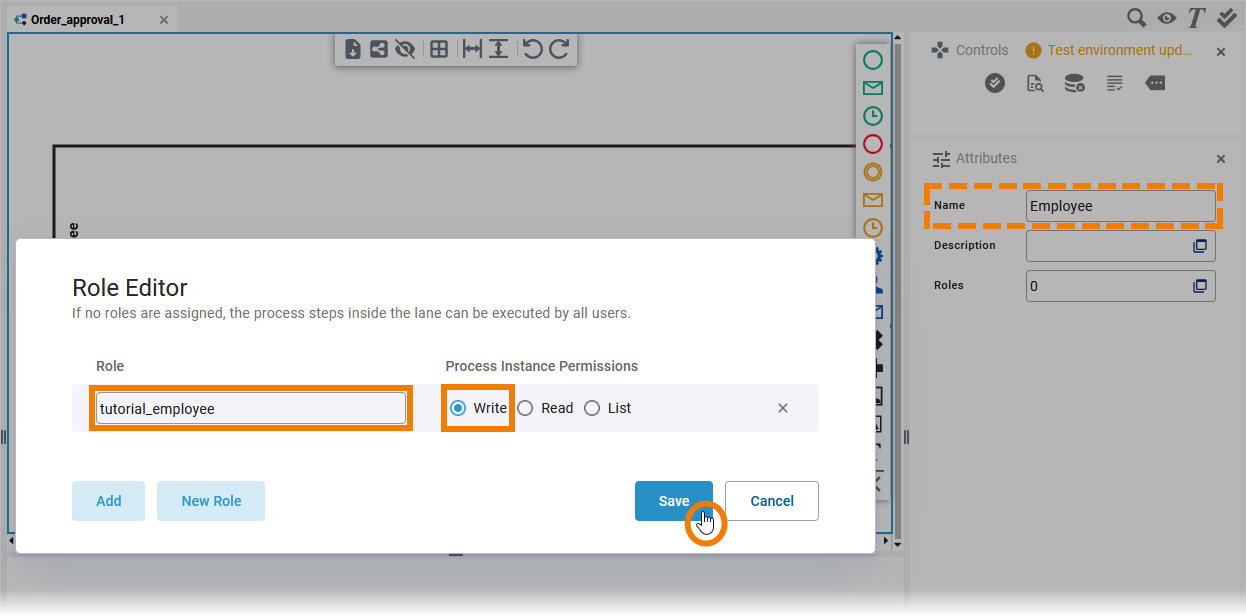
Now click the Supervisor lane and add a second role tutorial_supervisor with write permission:
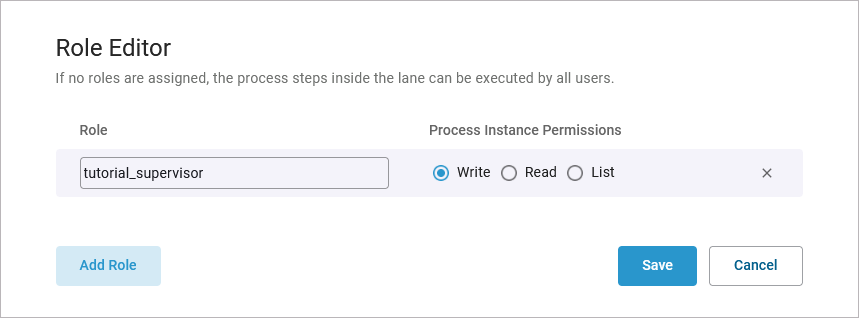
Assigning Roles to Users
Every user who is supposed to use a role-based app must be assigned the appropriate roles. This is done by an administrator in the PAS User Management. If you don’t have access to the user management, ask an administrator to assign your user both roles that you have created in this step:
-
tutorial_employee
-
tutorial_supervisor
In the next step, you will remodel your process.
Curious about more details?
In this step you learned how to add roles to a service. Have a look into our Designer Guide if you are interested in more detailed information:
-
Refer to page Lane for all configuration details of the lane element.
-
Get to know the basics of working with role-based applications on page Role-based Authorization Concept.
-
Refer to Assigning Roles for more details about how to assign a role to users
-
For more information about role management in the Scheer PAS User Management, refer to Managing Roles in the Administration Guide.