Follow Our Example User Story
David has modeled the business process. Now he wants to create and configure the AI agent that he will use in process step 2 to handle the unstructured email data.
ACME Corp. uses OpenAI as their AI service provider, so David will use an API key from OpenAI during the configuration.
Create The CaseAgent
In the Designer, AI agents are part of the service implementation. Therefore, agents are created within the Implementation folder in the service panel. We recommend to create a separate package for your AI agents.
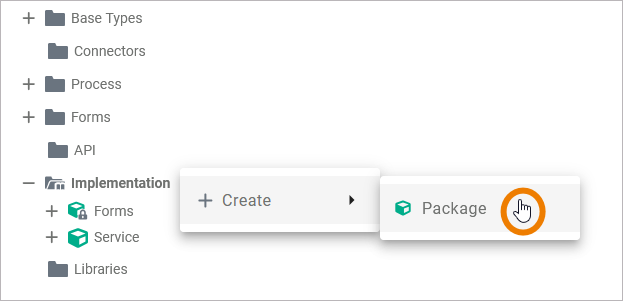
Right click on the Implementation folder to open its context menu and create a new package, e.g. Agents:
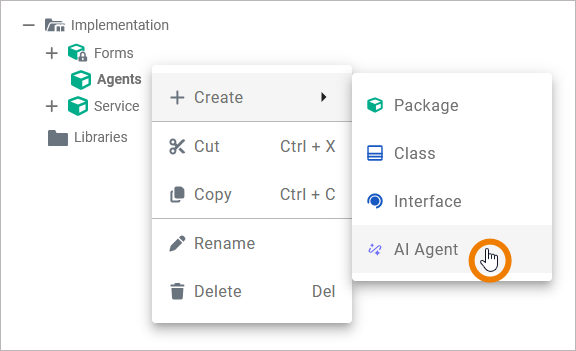
Open the context menu on the new package and create a new AI agent. Call it TutorialCaseAgentYourName:
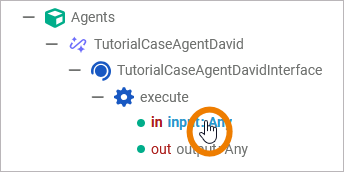
Expand the agent’s contents in the service panel. An AI agent always contains the following elements:
-
an interface
-
an execute operation
-
an input parameter of type any
-
an output parameter of type any

Do not rename or delete the standard operation execute or its input and output parameters.
Configure the CaseAgent
Before you can use your new AI agent, you must first perform some basic configuration. The default execution operation is a REST call to the AI agent. Therefore, a corresponding REST alias is automatically created for each AI agent.
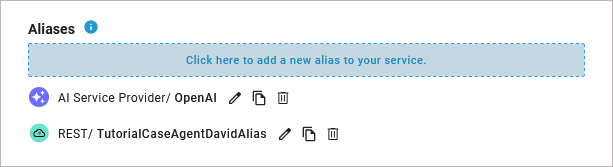
Open the service details to see the REST alias, in our tutorial case TutorialCaseAgentDavidAlias:
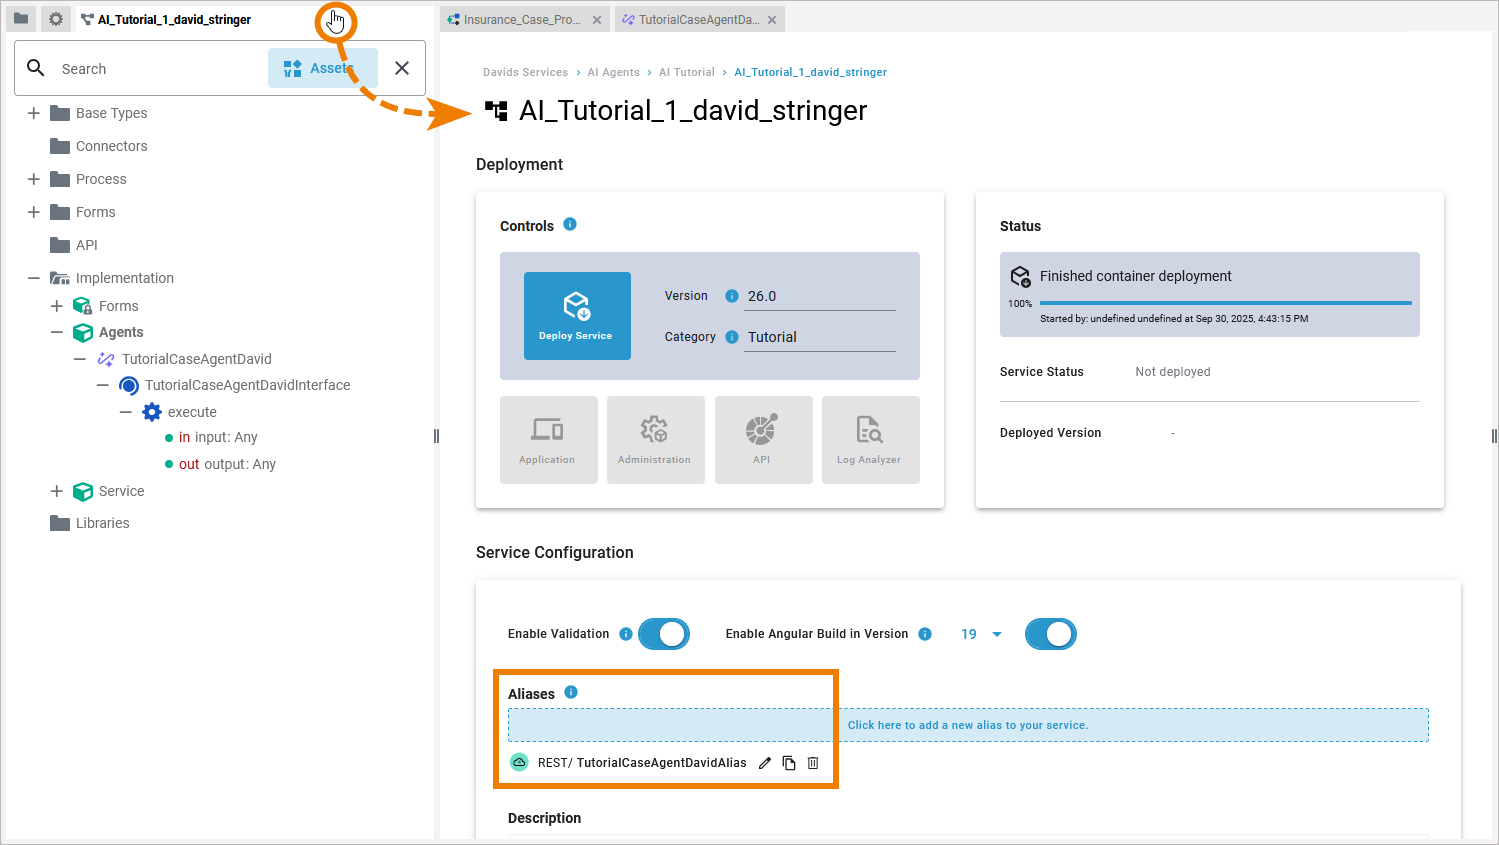
The REST alias is automatically populated with the necessary input, you have nothing to do here. If you want to inspect the alias' details, use option Edit.
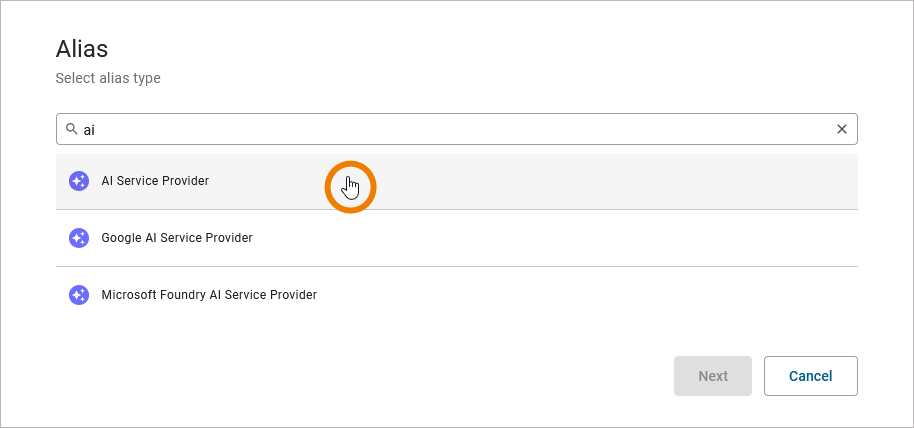
What we need now is a new alias for the AI service provider.
Scheer PAS currently supports the following service providers:
-
LLMs hosted by Microsoft Foundry
Please have your own API key from the AI service provider of your choice ready at this point.
In our tutorial, we are using OpenAI and the AI Service Provider alias.
Click into the blue Aliases section to create a new alias. In the pop-up, select the alias for the AI service provider of your choice and click Next:
In the next pop-up, enter the necessary settings:
-
Enter a Name for the alias.
-
Select the Provider you want to use.
-
Select the provider Model you want to use.
-
Enter your API Key.
If you are not using OpenAI or Mistral, refer to the following pages for an overview on all alias settings:
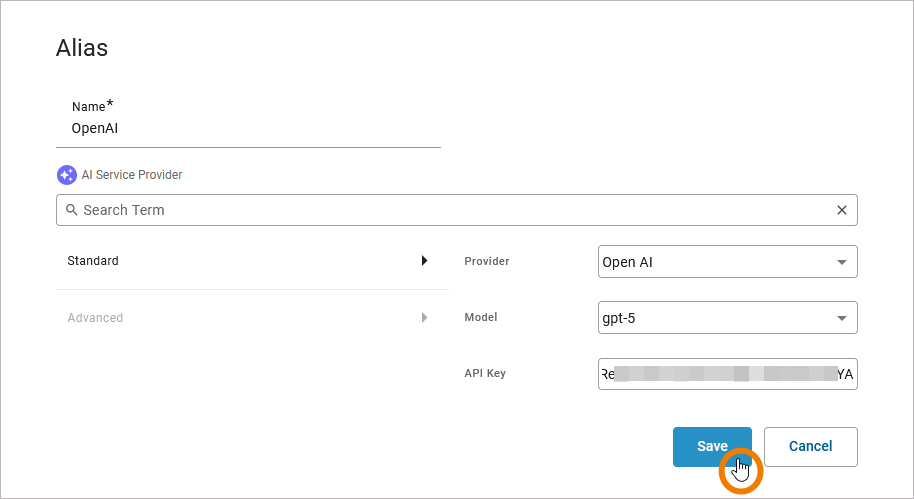
Click Save to create the service provider alias. All necessary aliases have now been created:
Define Input and Output of the CaseAgent
Follow Our Example User Story
David knows that an AI agent needs exactly one input and returns exactly one output. In the package Service he created two classes.
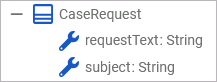
Class CaseRequest represents the unstructured data that insurance colleagues receive from customers:
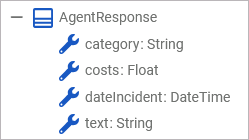
Class AgentResponse represents the structured data that David expects from the AI agent:
Now he has to adjust the input and output parameters of the AI agent to match this.
In the service panel, click the input parameter, open the attributes panel, and click option Change type:

Change the type of the agent’s input parameter to CaseRequest:

Next, change the type of the agent’s output parameter to AgentResponse:
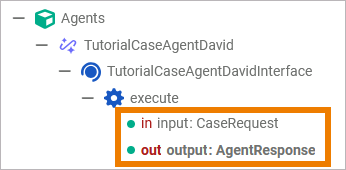
The basic configuration of the AI agent is finished.
Curious about more details?
In this step you have created the AI agent and configured the necessary basics.
-
For more information about AI agents in Scheer PAS, refer to Using AI Agents and Creating an AI Agent in the Designer Guide.
-
If you want to know more about aliases, how to create and manage them, refer to Aliases in the Designer Guide.
-
Chapter AI Service Provider contains detailed information about the supported AI service providers and their necessary settings.