
You deploy a project from the Projects view. When you deploy, the Control Hub creates a new deployment of the selected project version in the selected platform and starts it.
Project deployment involves the following steps:
-
Open the deploy dialog.
-
Select a platform and a deployment name.
-
Follow the deployment progress.
-
Open the new deployment.
Every deploy action creates a new deployment. The Control Hub does not update a running deployment in place, so deploying a project again does not overwrite an existing deployment. Instead, you get an additional, separately named deployment that you monitor and manage on its own.
Using the Deploy Dialog
Select a project from the list. Use the version selector in the project header to select the version you want to deploy. Refer to Inspecting the Project Details for further information.
Click Deploy in the project header to open the deploy dialog:
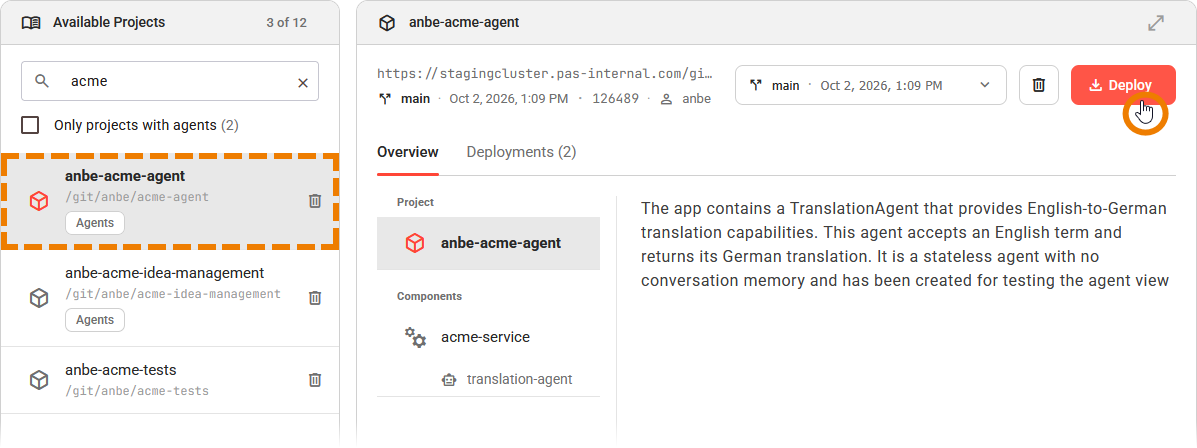
The deploy dialog opens for the selected project and version:
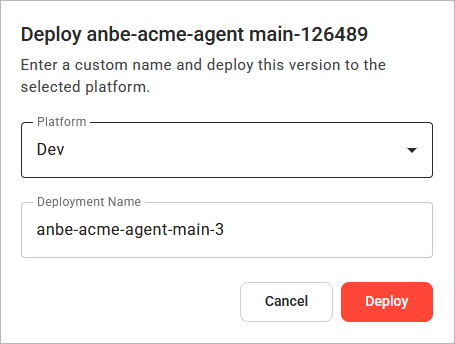
Selecting a Platform and a Deployment Name
The deploy dialog contains two mandatory fields:
|
Field |
Description |
|---|---|
|
Platform |
Select the platform the project is deployed to. The selection list starts on the first available platform. |
|
Deployment Name |
Enter a name for the new deployment. By default, the project name is used. If a deployment with that project name already exists, a sequential number is appended to the name. |
The deployment name is required. If you clear the field and start the deployment, the dialog shows the message Deployment name is required. and does not deploy.
A deployment name must be unique on a platform. If a deployment with the proposed name already exists in the selected platform, the Control Hub appends a number, for example myproject-2. Keep the suggested name or enter a name of your choice.
Click Deploy in the dialog to start the deployment. The Control Hub confirms the start with the message Deployment of <project> <version> started on <platform>.
Following Deployment Progress
While the deployment runs, the dialog stays open, the fields are locked, and the Deploy button shows a progress indicator:
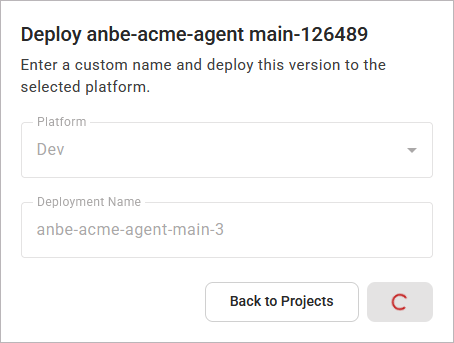
Wait for the deployment to finish. Do not close the dialog while the deployment is in progress.
Opening a New Deployment
When the deployment finishes, the dialog offers two actions:
|
UI Element |
Description |
|---|---|

|
Closes the dialog and opens the detail page of the new deployment in the Deployments view. Use this option to open and monitor the new deployment, refer to Working With the Deployment Details Page for more information. |
|
Closes the dialog and returns you to the Projects view. |
Refer to Working With the Deployments View for details about the status of a deployment, and to Operating a Deployment for more information on how to operate it.