
Use the Users menu in the Control Hub to manage the people who work with your PAS Code platform. It displays all users of your installation, allows you to create new users and manage their details, groups, and state.
This chapter explains how to work with users in the Control Hub:
Overview on the Users View
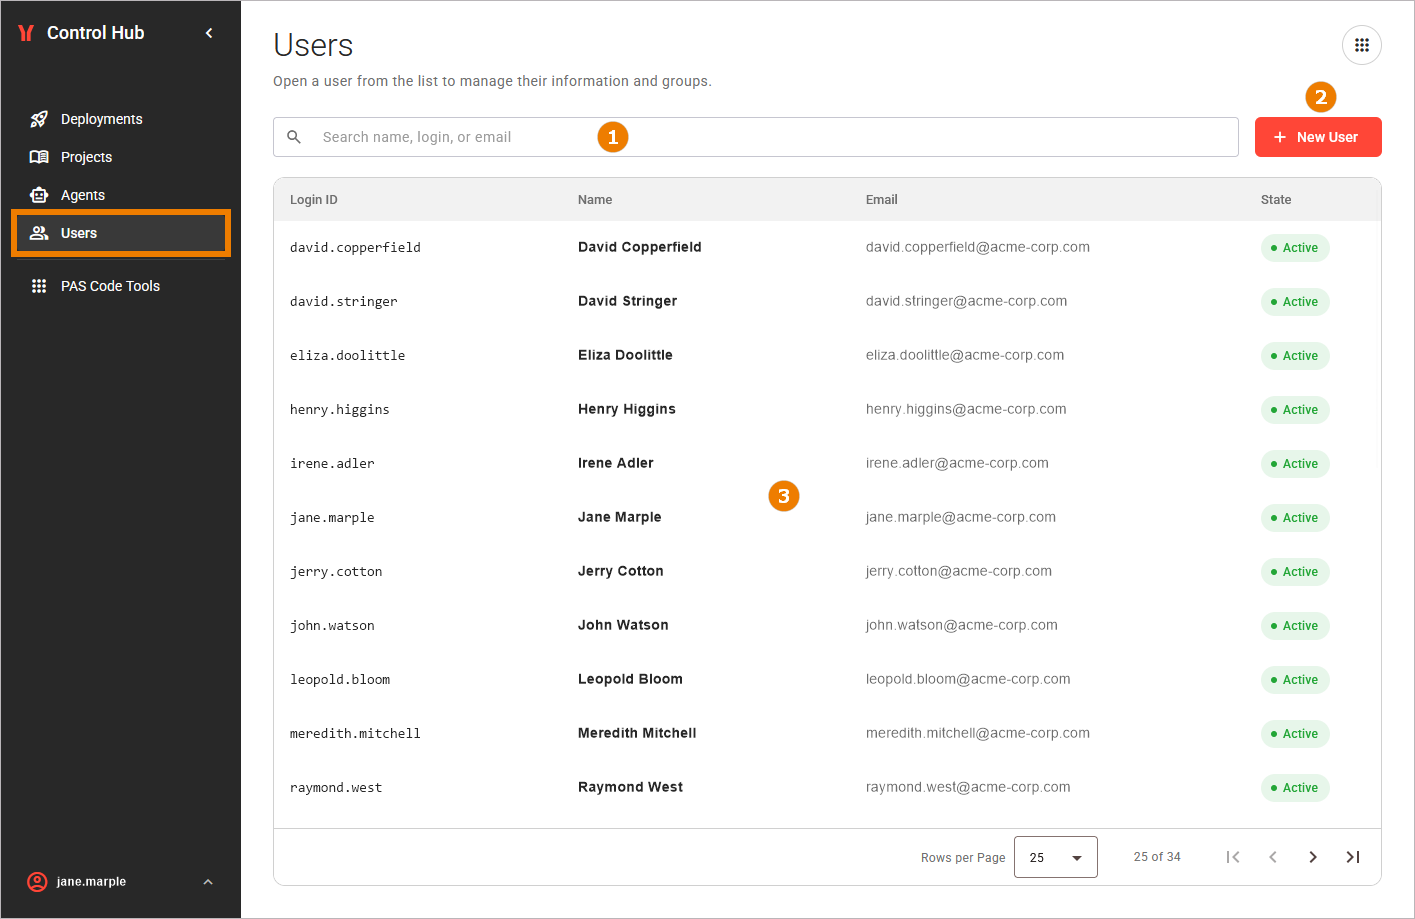
To open the list of users, click Users in the sidebar. The Users view consists of the following parts:
|
|
Search |
The search field narrows the list to the users whose Login ID, name, or email address contains your search term. Click a column header to sort the table by this column. Refer to Working With the Control Hub for details on searching, sorting, and using the pagination. |
|---|---|---|
|
|
+ New User |
Click this button to create a new user. Refer to Creating a User for details. |
|
|
Users Table |
The table lists all users your own user is allowed to see. It consists of the following columns:
A user with Super Administrator privileges is indicated by a corresponding label below the login ID. This label is visible to all readers of the list. Inactive users cannot log in to the platform. Click anywhere on a user's row to open the user’s detail page. |
Refer to Managing a User for more information on how to adapt user data.
The Users view shows different message while it reads the users, when no user exists, when your search matches no user, and when the users cannot be read. Refer to Error Handling Users for details.
Related Content
Related Pages: