Every deployment has its own configuration, the set of runtime settings that control how the deployment and its component deployments behave. You can view and change the configuration in the Control Hub, without redeploying.
Deployment Configuration Basics
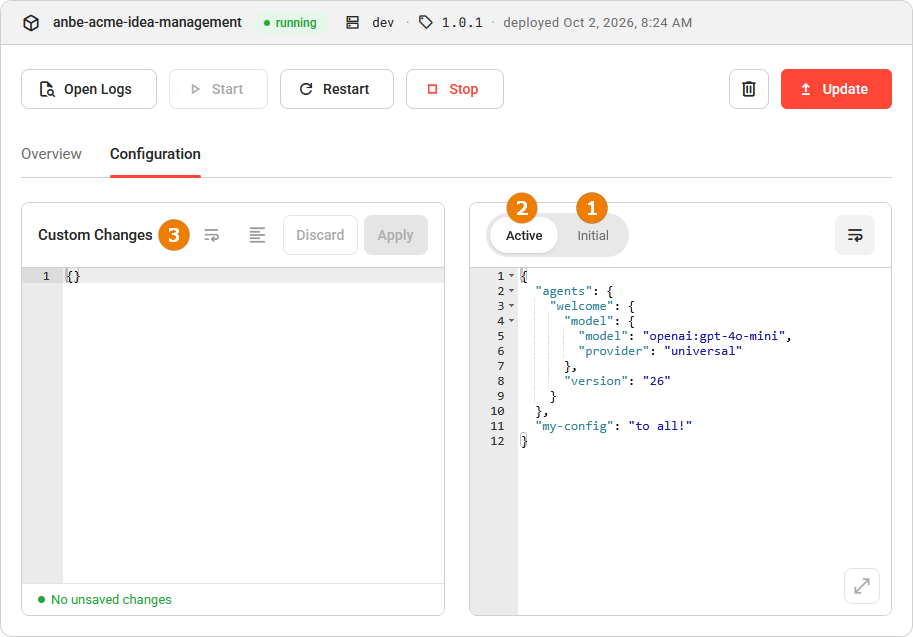
A deployment configuration is stored as JSON and consists of three parts. The configuration editor shows all three, so it is worth knowing them before you edit anything:
Initial holds the values that the project version of the deployment ships. Each project version ships its own initial deployment configuration. When you update the deployment to another version, Initial shows the values of the new version. The initial deployment configuration is read-only, you cannot edit it.
Active holds the configuration the deployment runs with. It is the result of combining your custom changes with the initial values. You cannot edit it directly, it changes when you apply your custom changes or when you update the deployment to another version.
Custom Changes displays the values that you set on top of the initial deployment configuration. This is the only part you can edit.
Each deployment has its own configuration. A change to the configuration of a deployment does not affect other deployments, not even another deployment of the same project.
Refer to Using References for more information on using references within a project and across projects.
Your custom changes belong to the deployment, not to the project version. When you deploy a project again, the new deployment starts from the baseline of the version you deploy and contains no custom changes. Changes you made to an earlier deployment are not carried over (refer to Redeploying or Changing the Version). When you update an existing deployment to another version, your custom changes are kept (refer to Updating a Deployment).
Editing Configuration
Configuration exists at two levels:
-
Project-level configuration applies to the project deployment.
-
Component-level configuration applies to a single component deployment.
Expert Advice on Configuration
-
You should define references and important values/variables in the code rather than in the Control Hub configuration editor.
-
Use the Control Hub configuration editor if you want to override existing values or set specific new values for a deployment, for example for debugging purposes.
You can edit the configuration of a deployment in the configuration editor. The editor opens in the Configuration tab of the details section of the deployment details page. It works the same way for project-level and component-level configuration.
Adding Custom Changes does not change the active deployment until you apply your changes.
Opening the Configuration Editor
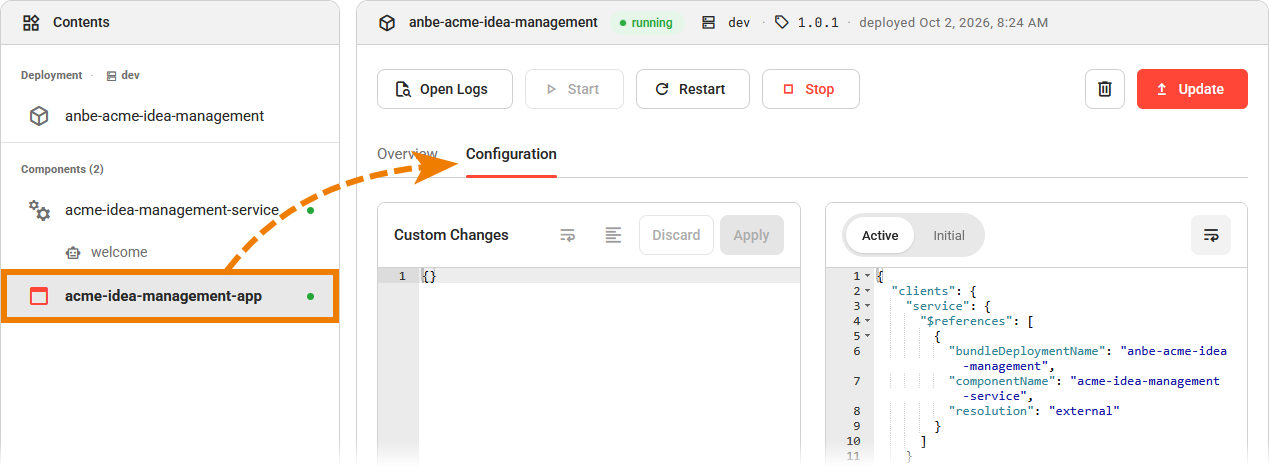
The entry that you select in the contents section of the deployment details page decides the level that you edit. Then open the Configuration tab in the details section:
Expert Advice
Use the project configuration editor to maintain values that are applicable to the entire project. You will then be able to easily reference these values when configuring the individual components with $references. Refer to Using References for details.
For more information on the deployment details, refer to Working With the Deployment Details Page.
Working With the Configuration Editor
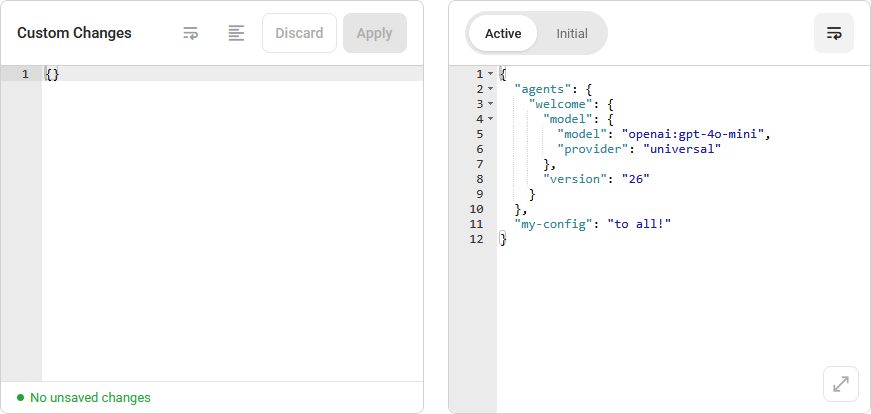
The configuration editor shows two panels side by side. The Custom Changes panel on the left holds the values that you can edit. The right panel is read-only and shows the Active configuration. Use the toggle in the header of the right panel to switch to the Initial configuration (see above).
A toolbar at the top holds the actions, the editor below shows the configuration:
Custom Changes
Custom Changes displays the values that you set on top of the initial deployment configuration. This is the only part you can edit.
-
Arrays are completely overwritten.
Content in Custom Changes will be merged with the content in Initial. Arrays are an exception: they are completely overwritten. -
Custom changes survive a project update.
When you update a deployment to another project version, the Control Hub keeps your custom changes.-
A value that you did not set takes the value of the new version.
-
A value that you set keeps your value.
-
|
UI Element |
Description |
|---|---|
|
Wrap long values |
Use this option to enable wrapping of long values. Click again to disable soft wrapping. |
|
Format JSON: 2-space indent |
Use this option to apply 2-space indent formatting to the editor’s content. The option is disabled if your content already uses this format or if your content is not valid JSON. |
|
Discard |
Use this option to discard your edits in the Custom Changes editor. The option is available while there are unsaved changes. |
|
Apply |
Use this option to apply your changes. Your changes will be merged with the values in the Initial editor. The result is then displayed in tab Active.
You can leave the deployment details page while the platform applies the change. The Control Hub notifies you when the process is finished. Unsaved changes are not kept when you open the Overview tab or select another entry in the Contents section. Apply or discard your changes before you leave the editor. |
Active and Initial
Active holds the configuration the deployment runs with. It is the result of combining your custom changes with the initial values. You cannot edit it directly, it changes when you apply your custom changes or when you update the deployment to another version.
Initial holds the values that the project version of the deployment ships. The initial deployment configuration is read-only, you cannot edit it.
Since the content of both tabs is not editable, you have only two options:
|
UI Element |
Description |
|---|---|
|
Tab toggle |
Use the toggle button to switch between the Active and the Initial view. |
|
Wrap long values |
Use this option to enable wrapping of long values. Click again to disable soft wrapping. |
If the configuration cannot be loaded, both editors are empty and read-only, and the reason is shown below the text, in place of the unsaved-changes status. All three parts are loaded together, so one failure concerns all of them and there is nothing to edit until the configuration loads. Refer to Error Handling Deployments for the error messages and how to resolve them.
Maximizing the Editor
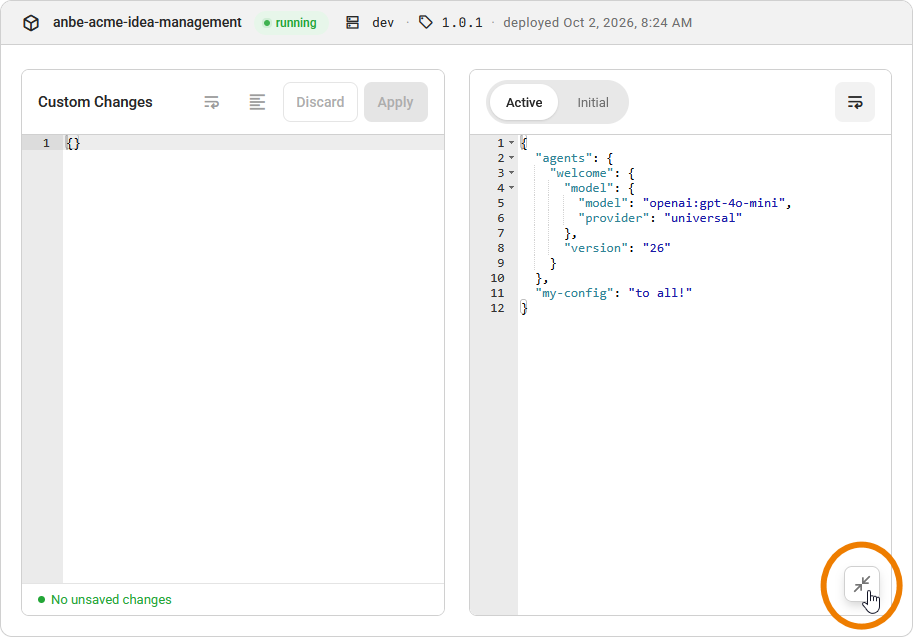
To give yourself more room, select the maximize button in the corner of the editor to expand it to fill the details section. Select the button again to restore the editor to its normal size: