A process app offers two basic functionalities: The creation of instances and the overview of all already created instances, which can be searched via filters. When creating an app project, the corresponding start links Process App - Create and Process App - Overview are automatically created.
The role check does not apply to overviews. Basically all users are allowed to open overviews. Create specific overviews for each role using search queries or restrict user rights using the role rights option.
Using the Overview
In each app, data is created and stored. These data sets, the so-called instances, can be searched after saving. It is also possible to use the instances in other apps. PAS design users can freely define which data should be displayed in the overview model.
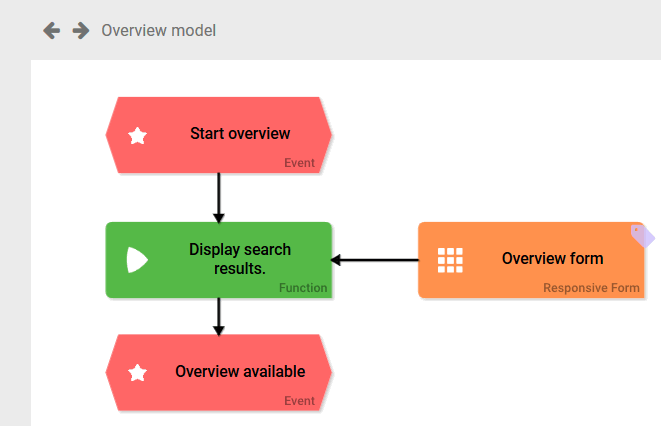
A newly created app project automatically contains the EPC models Reference model, Overview model and Initialization model.
| Open the Overview model to edit the overview. |
| Then click on the Overview form to open the form editor. |

The Overview Form
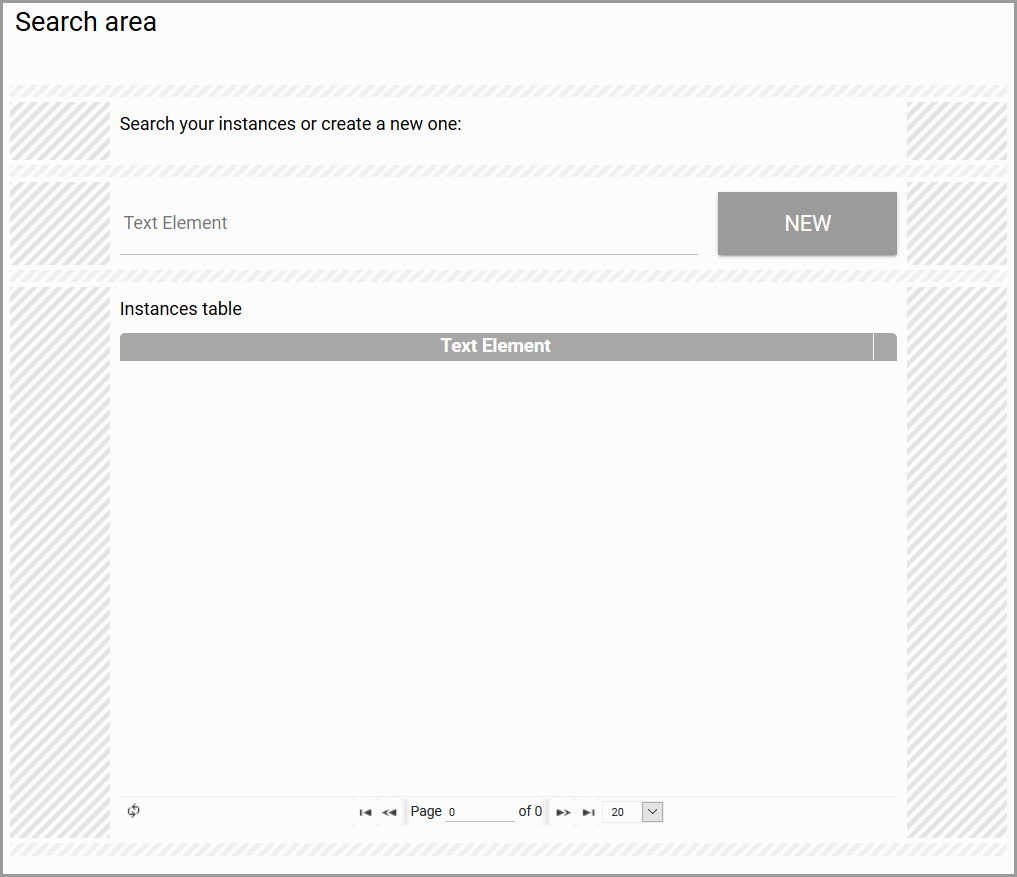
The overview form consists of two sections:
- The upper area contains filter fields. Users can use these to search the instances.
- The lower area contains the Instance Table in which the saved data from the app is displayed.
| The standard overview contains the grouping element Search area, in which the following form elements are combined:
You can configure these elements to match your app:
|
You don't want to use the division element Search your instances... in your form? You can delete the element - or replace the text with your own heading.
Inserting a Filter
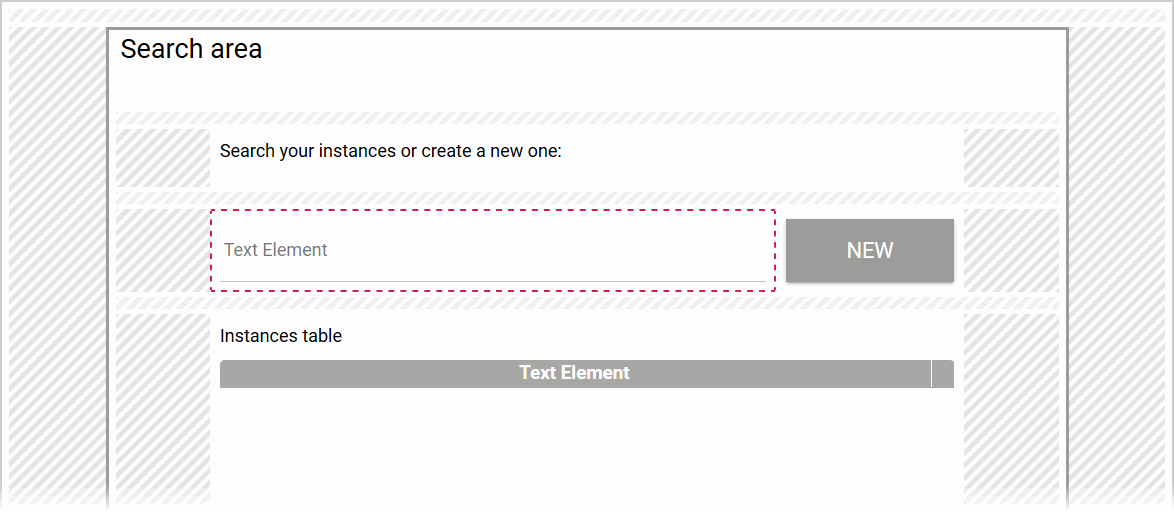
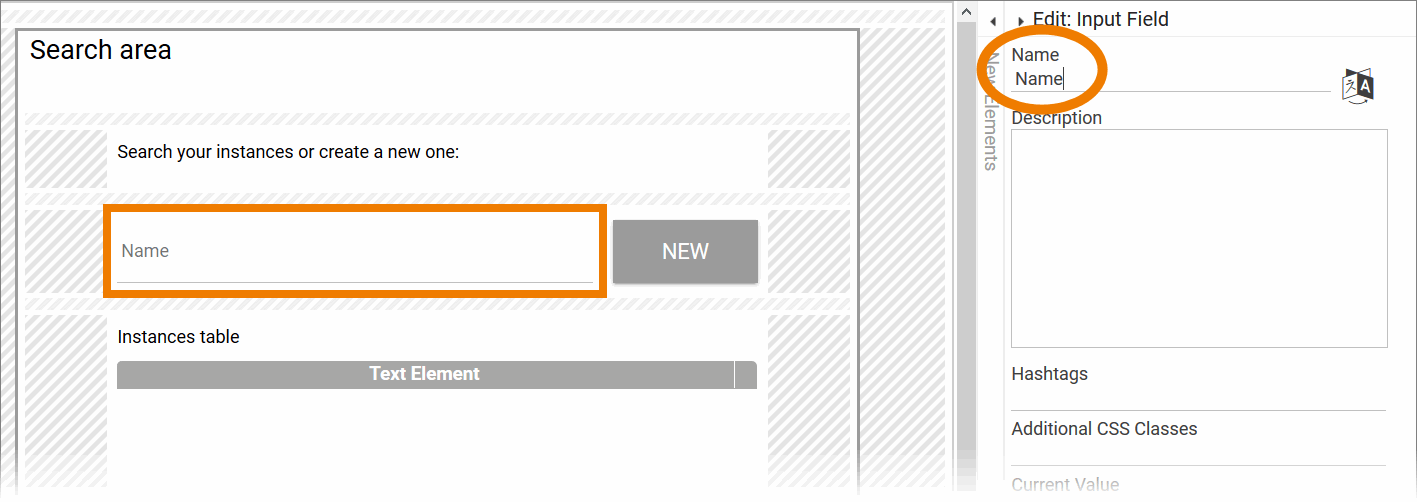
| The input field Text Element in the overview... |
| ... is a link to the field in Form Step 1 of the Reference model. |
| Renaming the field in the overview form... |
| ... immediately effects the field in the input form - and vice versa. |
| In most cases you can link a field from the input form to the overview form:
|
Special Filter Fields
Some form fields need special configuration if you want to use them as filter fields.
| Form Field | Configuration |
|---|---|
| Date Picker | You can use the meta information meta.createdAt as Field Name in Container of a date picker. When creating a new instance, the date is saved accurate to the millisecond. If you link such a date picker in the overview to use it as filter, the instance table will always be empty. This is because meta.createdAt contains the date accurate to the millisecond - but if you select a date from a date picker, the chosen date always contains the selected date at midnight. |
| Drop-down Field | You can configure a drop-down field in a way that only specified values are available in the input form, excluding empty input. But if you want to use the drop-down field as a filter in the overview, you will need a drop-down field containing an empty input so that all instances can be displayed. Otherwise, the pre-selected value from the drow-down field will always filter the instance table content. If you want to use a drop-down field without empty input as a filter, you cannot simply link the element from the input form. You will have to create a new drop-down field including an empty Possible Value . To ensure that the correct data appears in the instance table, you need to reference the correct content. When creating the filter field make sure that...
|
| Radio Button | You are able to configure a radio button in a way that one of the options is pre-selected. If you link such a radio button in the overview to use it as filter, the instance table will never display all available instances. Instead, the instances are always filtered according to the default setting selected in the radio button. Use the element Drop-down Field instead of the Radio Button to select a value from a list of options. You can display all instances at any time using a Drop-down Field with an empty Possible Value. |
Find out more about the configuration of overview tables and special features of form elements on page Configuring Overview Tables.
Opening an Overview
There are various ways to open an overview:
- Using a tile in the cockpit
- Using the element Process App - Overview
- Using the button Go to Overview in the input form
Opening the Overview Using a Tile
| Using a start tile in the cockpit is the fastest way to open the overview. A list of the available start links is displayed in the sidebar of the cockpit. To create a start tile in the cockpit, drag the required start link Process-App - Overview to the cockpit. A click on the tile starts the process app directly, the overview form is called showing the list of already created instances. |
Opening the Overview Using the Start Link "Overview"
| PAS design users can also call up an app via the Process App - Overview element:
|
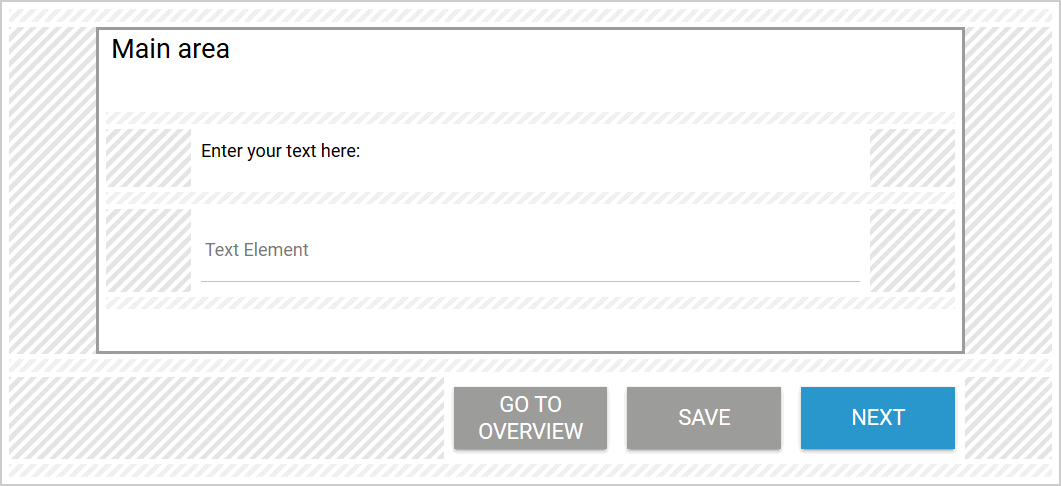
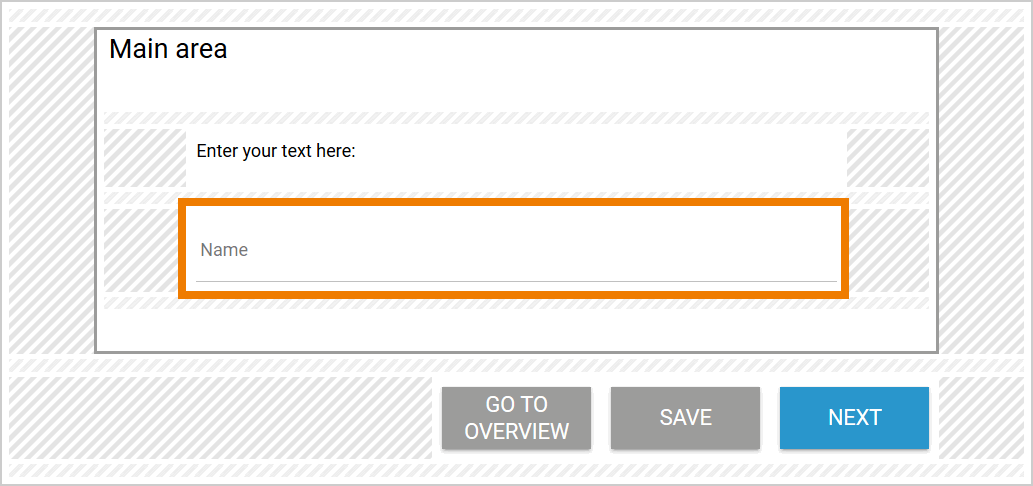
Using the Button Go to Overview
| The third way to open the overview is via the corresponding input form. The start link Process App - Create is normally used to open the input form so that the user can create a new instance. However, you may want to check whether the data record already exists. In that case, you can switch directly from the input form to the overview form by using the button Go to Overview. Each input form automatically contains a button Go to Overview, which can be deleted or renamed by a PAS design user. The button opens the corresponding overview form and gives you direct access to the list of already created data. |

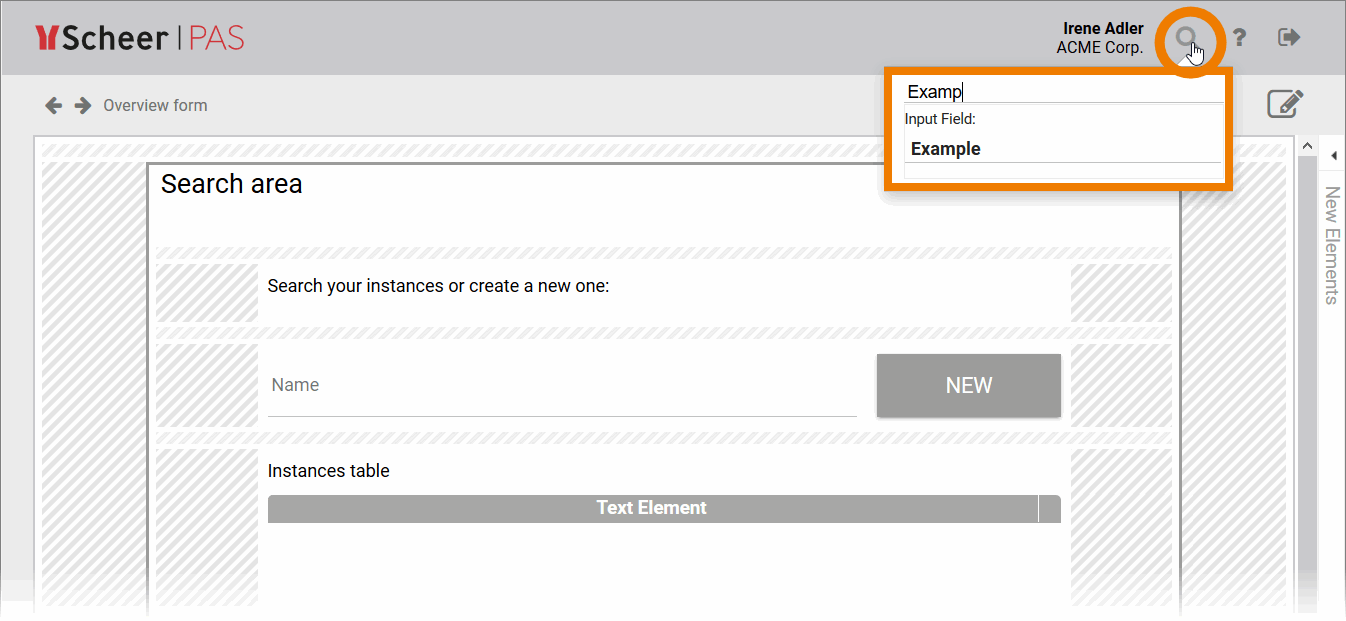
Searching the Overview
| To search the overview data, enter a search term in a filter field and confirm with ENTER. Alternatively, click on the work area outside the filter field. The data in the table adapts to the search selection made. You can combine different filter fields to refine the search. If the filters remain empty, no filtering is applied and the table displays all created data. Users also have a sorting option in the instance table: By clicking on the column name, the contents are sorted in ascending or descending order. |
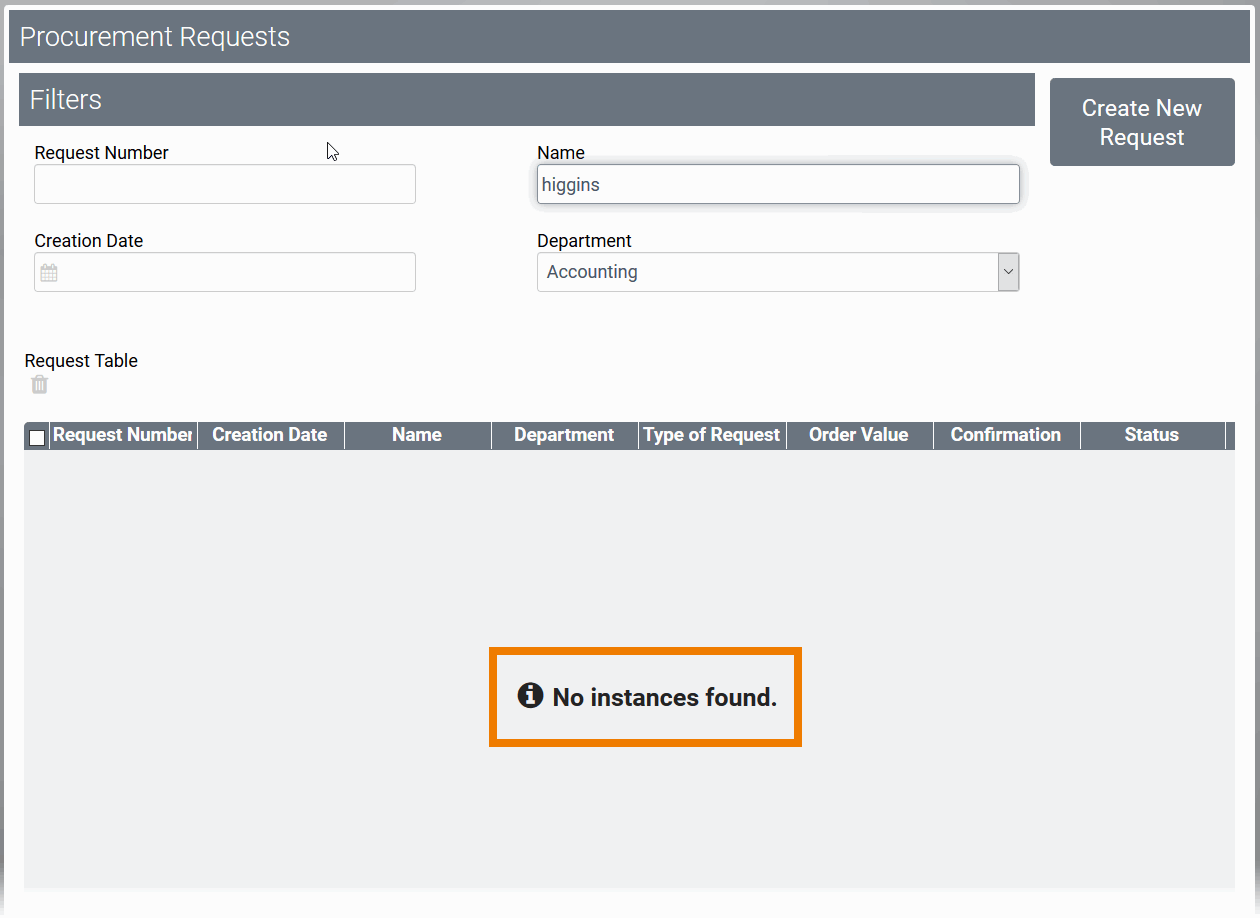
| If no instances match the search criteria, the message No instances found is displayed. |
Example: The ACME Procurement Process
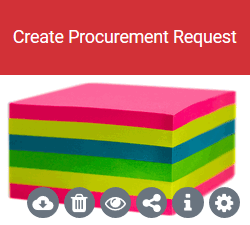
ACME Corp. uses the app Procurement to manage its internal demand for office supplies. Employees can use the tile Create Procurement Request to submit an order. After saving the data, the request is forwarded to the purchasing department. If the order exceeds a specified budget, the request is first sent to the head of accounting, who must approve it.
The app contains two start tiles:
|
|
|
|
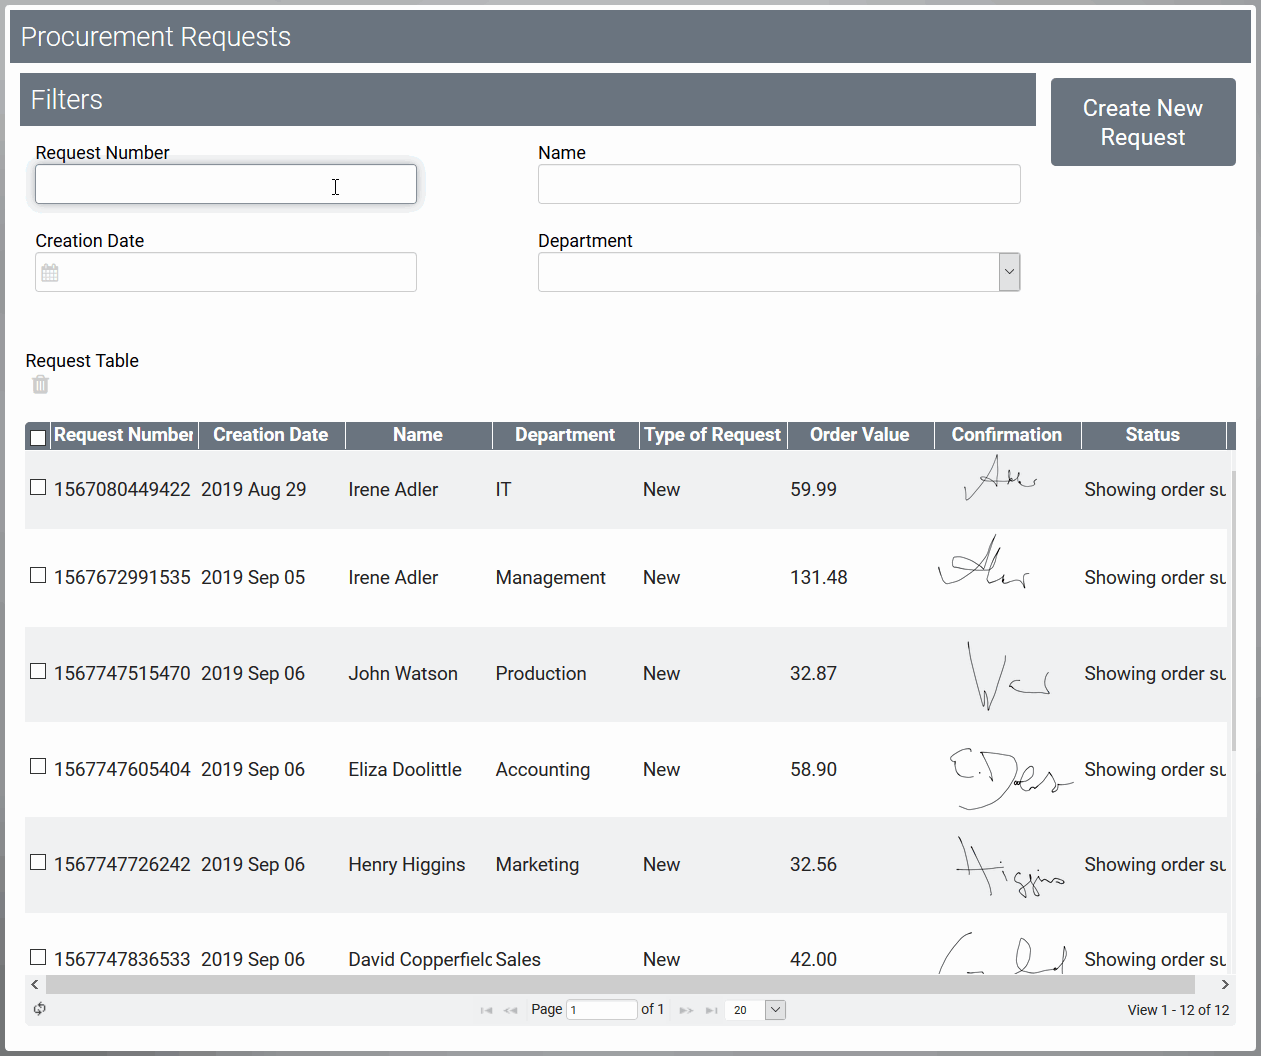
| The unfiltered overview displays all procurement requests. |
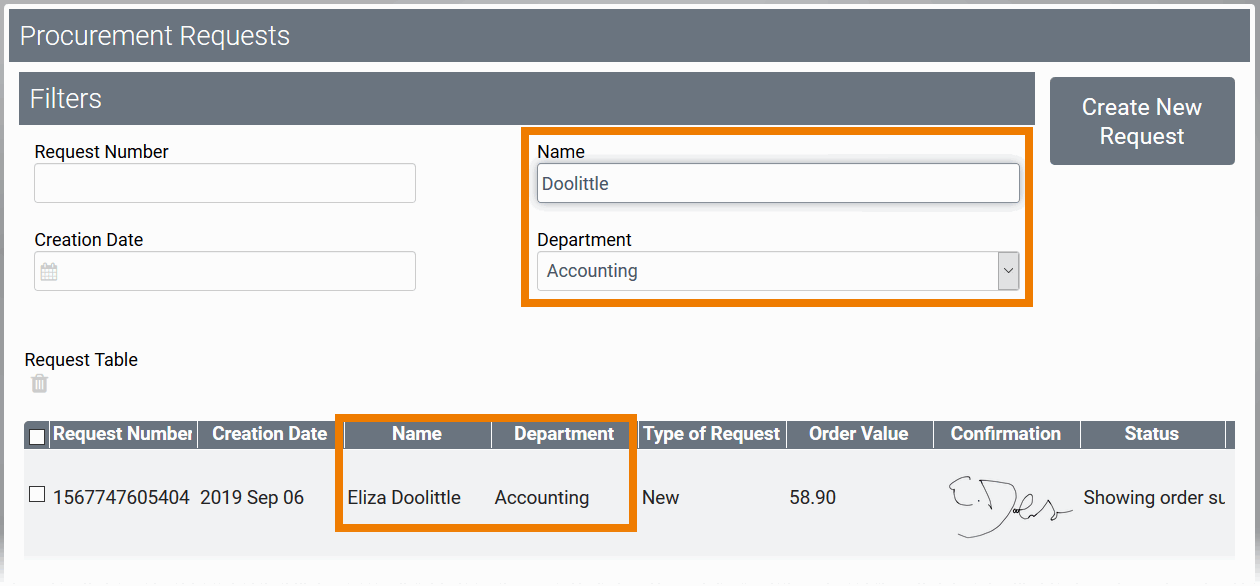
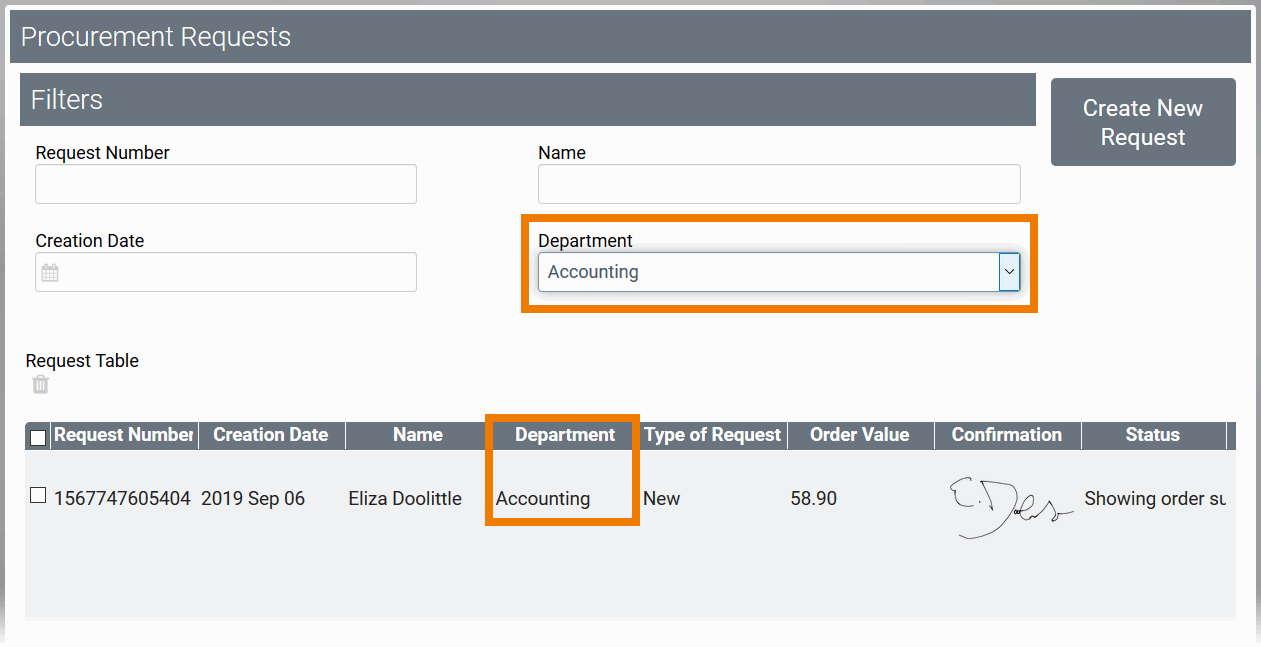
| With the help of the filter fields, employees can search the list of already created procurement requests. |
Opening Instances
Users can also open instances out of the instance table. If you click on an instance in the overview table, the instance will be opened in the input form in which the instance was last saved.
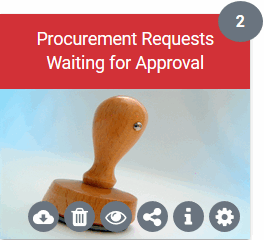
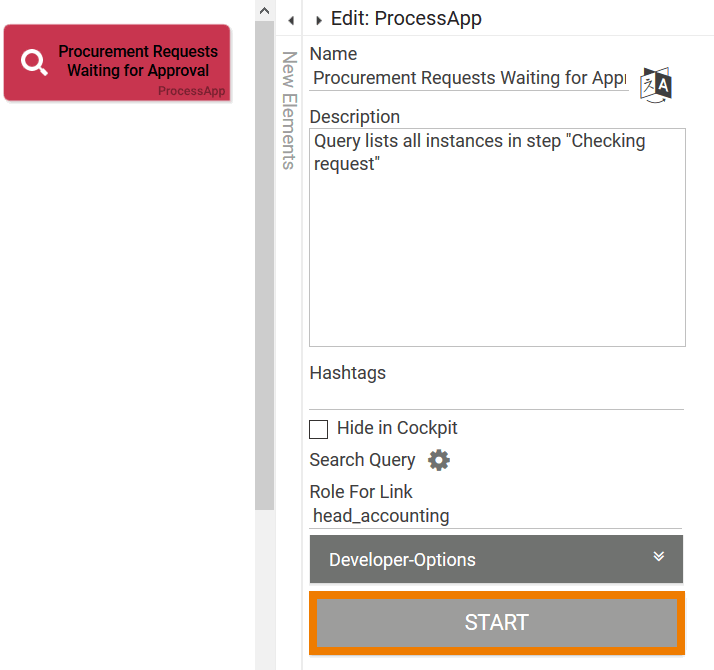
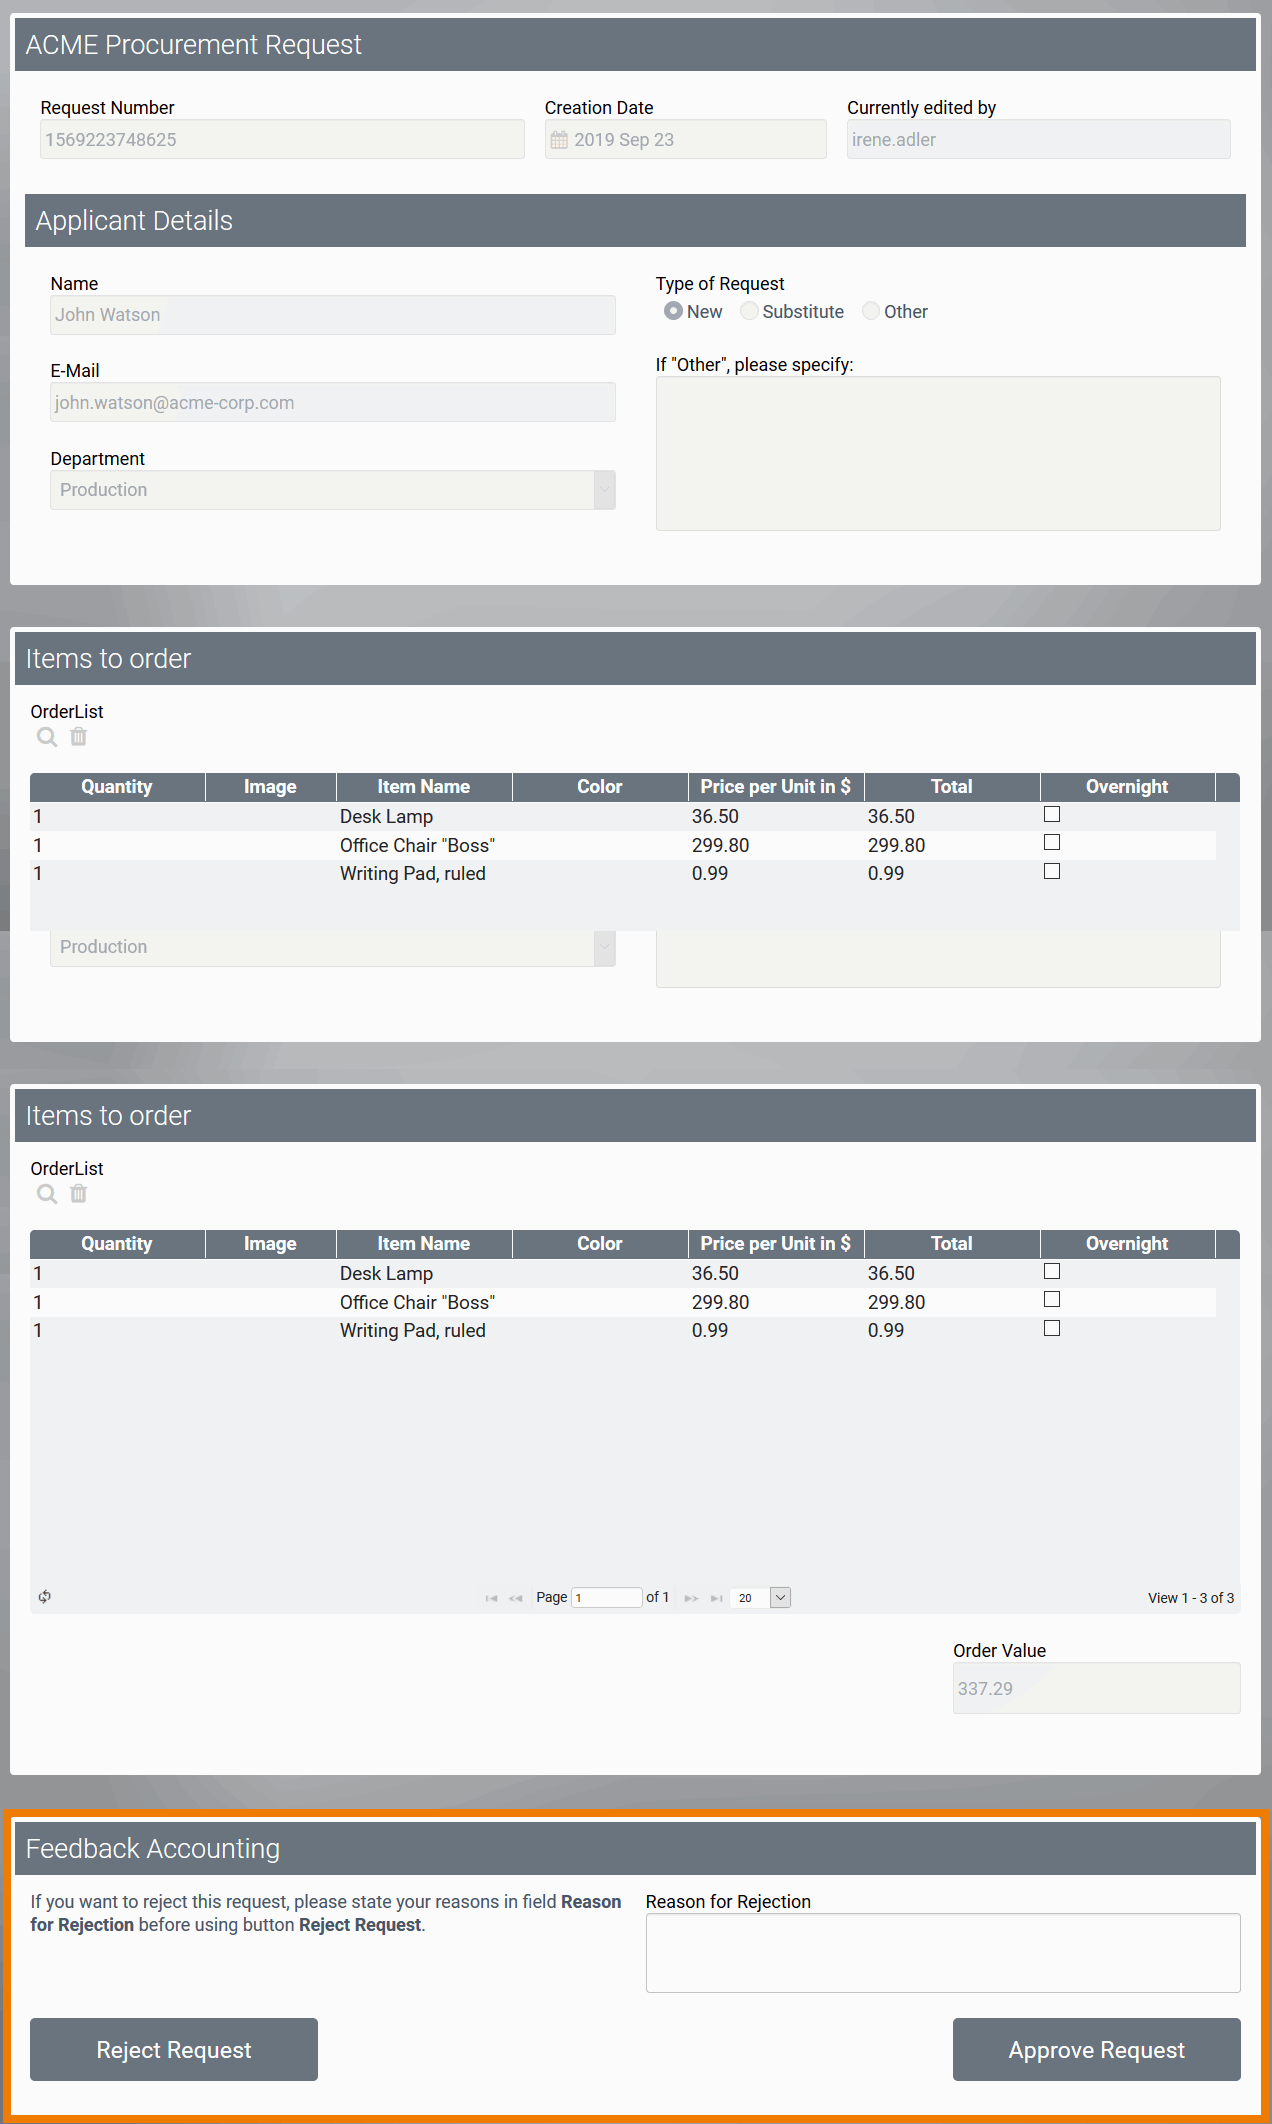
| Eliza Doolittle, ACME's head of accounting, wants to process the procurement requests that are waiting for approval. She clicks on tile Procurements Requests Waiting for Approval to display the list of all pending requests. Two orders are waiting to be processes. Eliza clicks on the first line of the instance table to open the corresponding dataset. |
| John Watson's order is displayed in the Approval form and Eliza can process the order directly. |

Caution when deleting process steps out of a (productive) EPC
- Instances, which are situated in this process step can not be opened again after deletion. When trying to open an affected instance an error message will be displayed in the overview. The message contains name and ID of the deleted process step.
- Every function has its own ID in the database. A new function with the same name cannot therefore replace a deleted function.
On this Page:
Related Pages:
Related Documentation:
Overview
Content Tools