Configuring Instance Tables Using the Column Wizard
BPaaS 16.08
The column wizard supports you in configuring Instance Tables. The wizard is particularly useful when configuring the overview of an app, because it already contains a list of all form elements you have created in the corresponding EPC. You can also use the column wizard to configure the instance table of a Process App Link (multiple). In this case, the wizard displays all form elements that were created in the linked app.
The column wizard lists only form fields with activated Save Value in Instance option.
| Open the column wizard over the Start Wizard button in the column configuration. The column wizard is only available for instance tables. |
| You can only use the column wizard if the model was assigned to a process app. Otherwise the button remains inactive: |


The column wizard will open in a separate window:
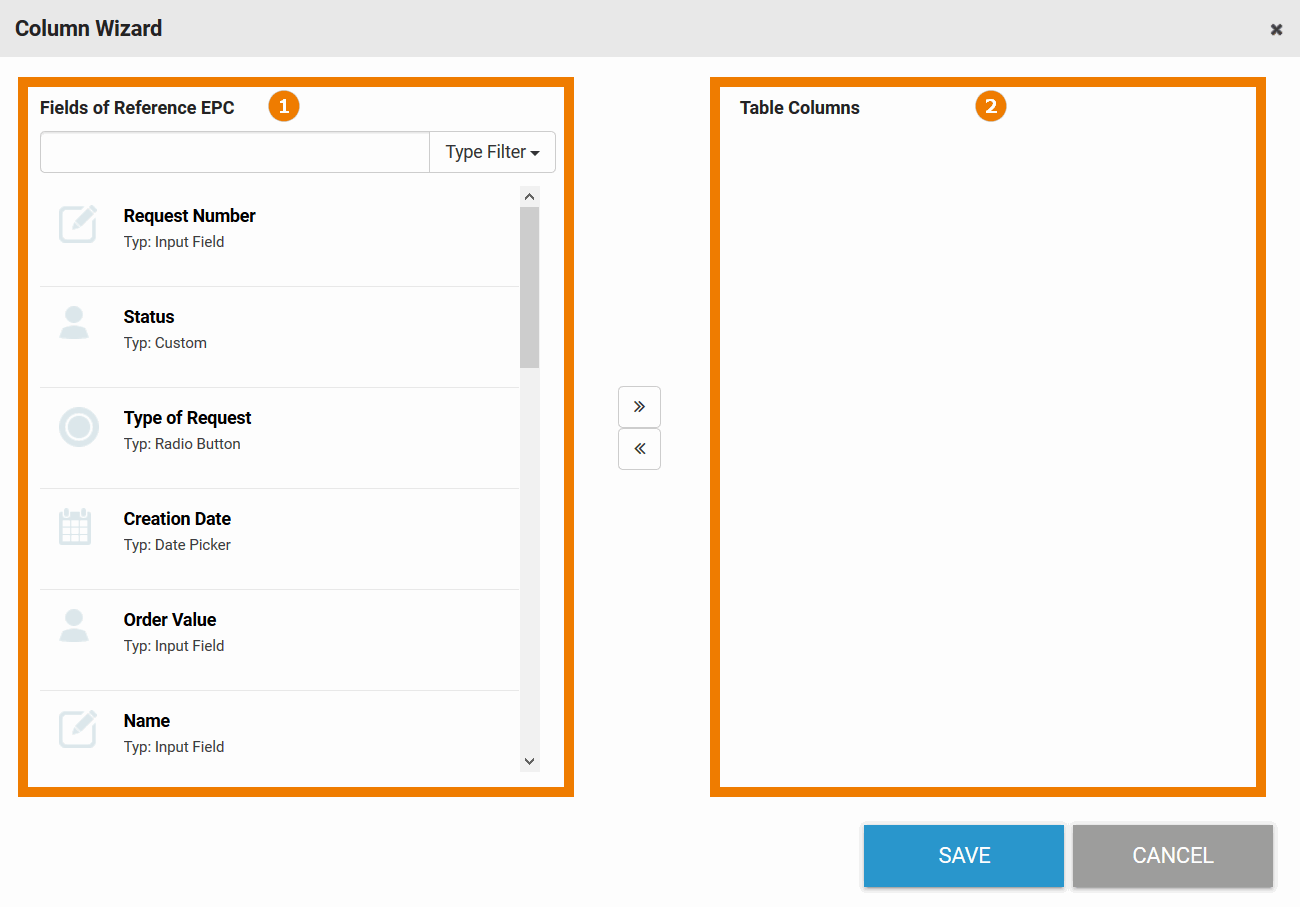
The display of the column wizard is divided into two parts:
- Fields of Reference EPC: The left side lists the form elements that were used in the corresponding EPC. The list includes both form elements from Responsive Forms and form elements from Mobile Forms.
- Table Columns: Form elements dragged to the right are created as columns in the Instance Table.
Elements of the Column Wizard
 | The column wizard contains two filters:
|
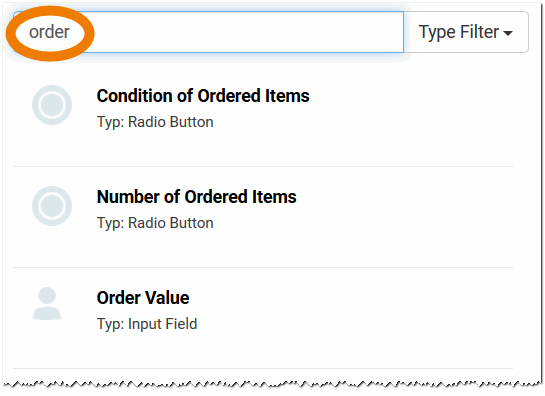
| Enter your search term in the text filter to search the list of elements. |
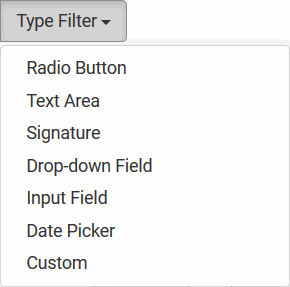
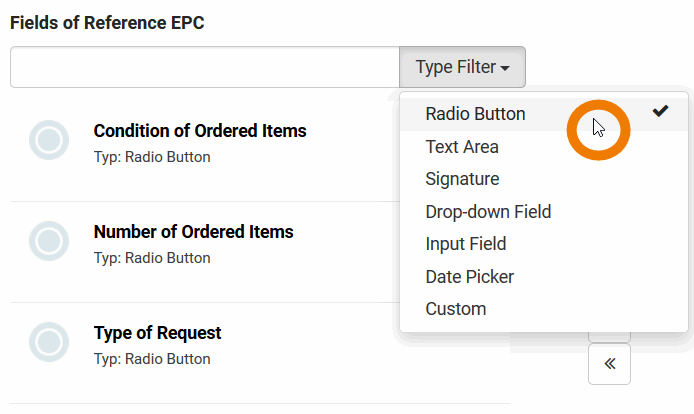
| Use the type filter to search the form elements by type. You can also select several types. The hit list displays all elements that correspond to one of the selected types. The type filter can be combined with the text filter. |
| The form elements are displayed with
|
| Click the >> button to transfer all listed fields of the reference EPC to the overview. |
 | The button << removes all fields from the right side of the wizard. |
| Save your changes via the Save button. |
 | The Cancel button closes the column wizard. Attention: Unsaved data will be lost when clicking Close. |


Using the Column Wizard
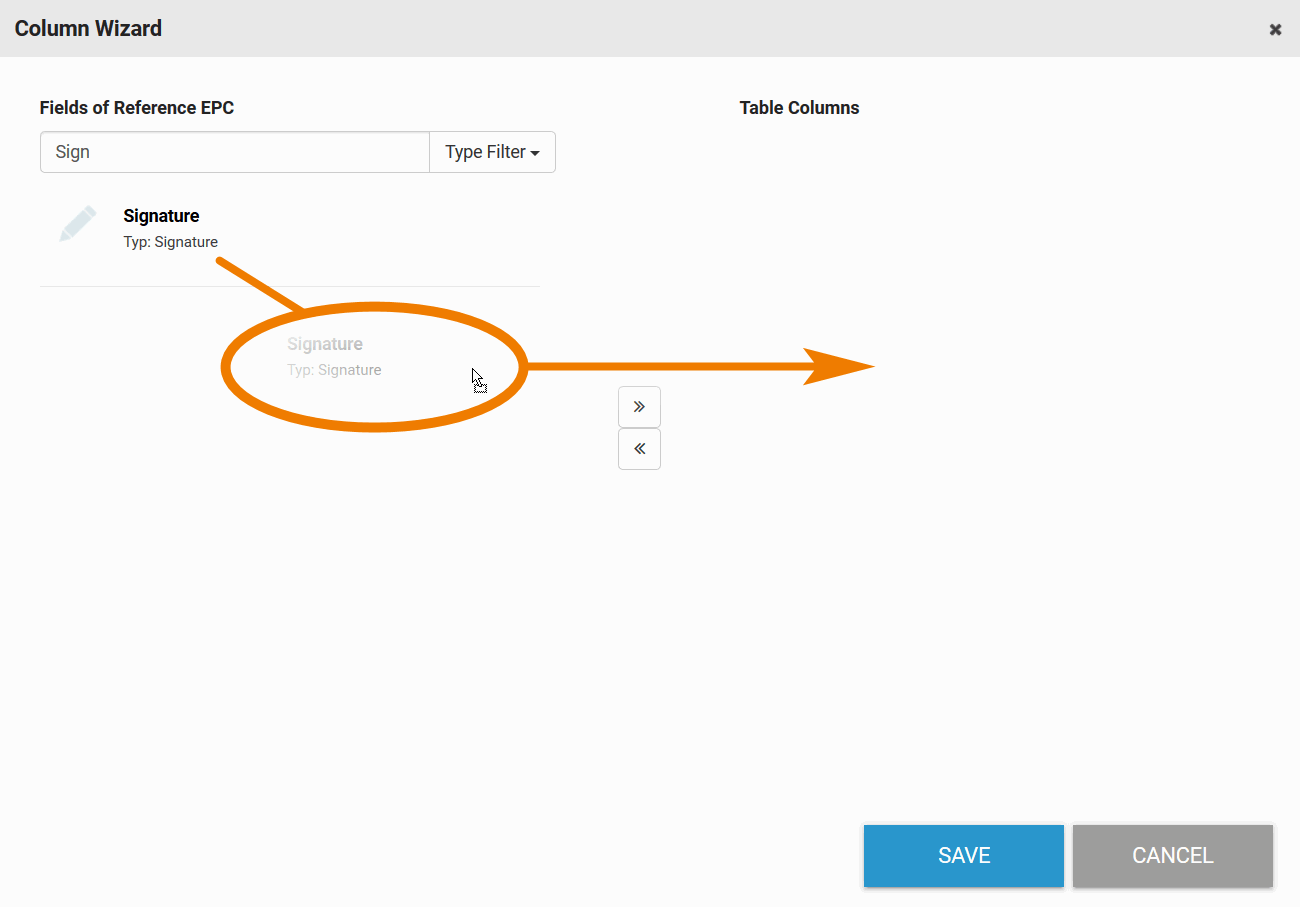
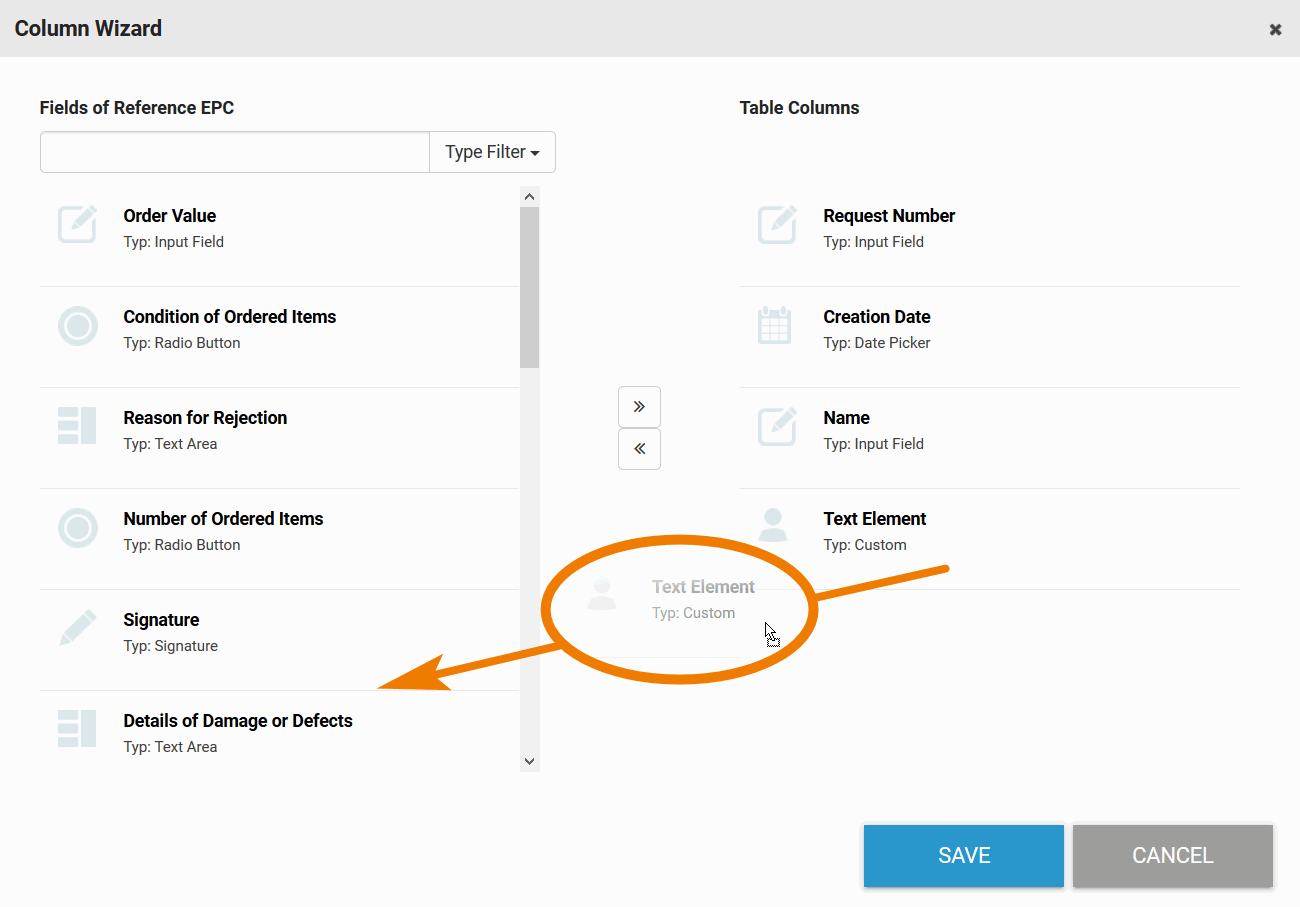
In the wizard's window, simply drag & drop form elements from the list Fields of Reference EPC to the list Table Columns to add them to your instance table.
When you open the column configuration of an instance table for the first time, it is empty - except for two contents:
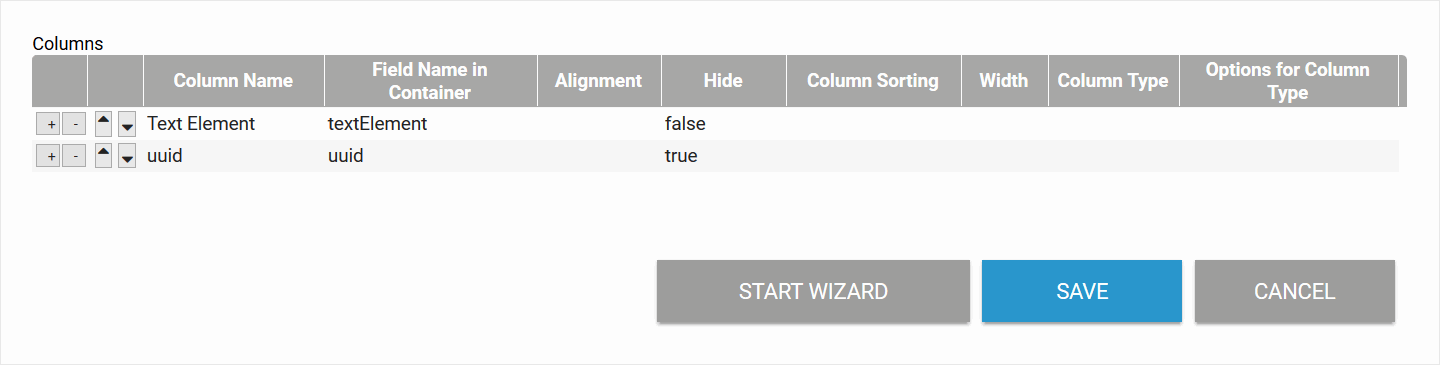
- The default field Text Element, which is created in every new app project, is displayed.
- The element uuid is displayed, but hidden by default.
Purpose of Column "UUID" Each instance is assigned a UUID in the database to enable explicit identification. Instance tables contain a by default hidden column uuid. Unhide the column in order to show instance identification numbers. This information is helpful for example when contacting BPaaS Support with a support request regarding faulty instances.
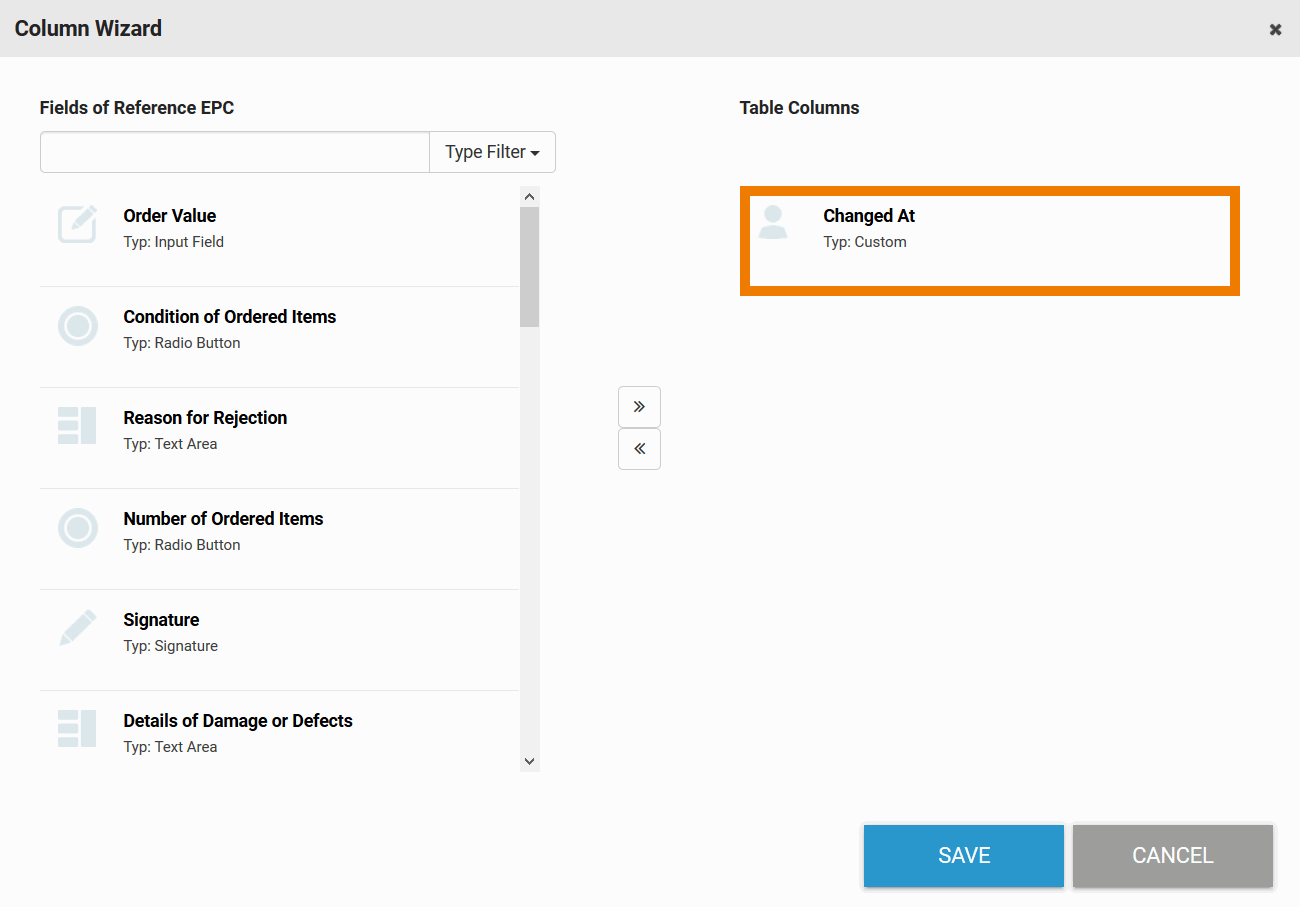
When opening the column wizard, all available form elements are displayed in the list Fields of Reference EPC. The example column Text Element from the overview table is already displayed in the list Table Columns:

During column configuration, you can also create columns referring not to content of form fields but to meta information. In the wizard, such content is specified as Type: Custom.
Example: The Changed At column refers to the meta information meta.changedAt, which is the automatically saved creation date of the instance. The column has been created manually by the user and does not refer to any form field.
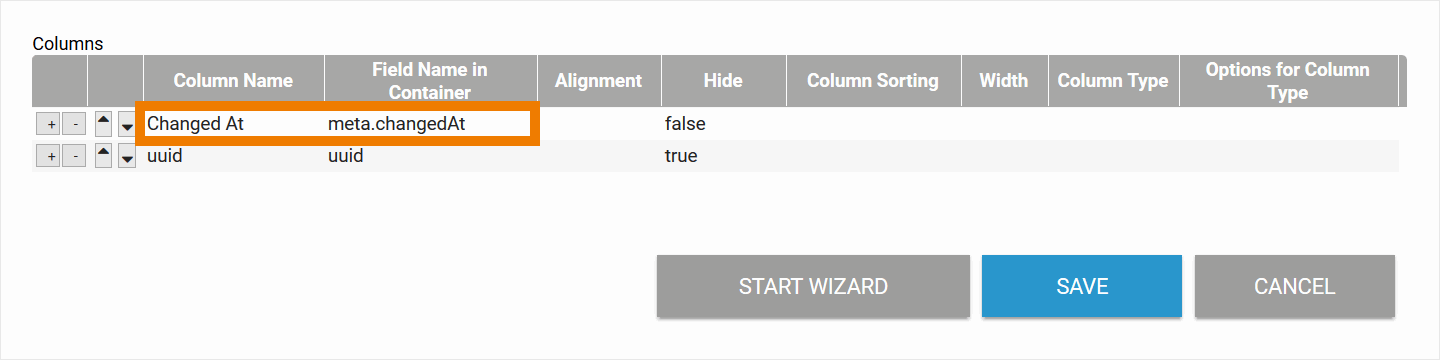
In the column wizard, the element Changed At is therefore already displayed on the right side of the wizard's window and displayed as of type Custom.
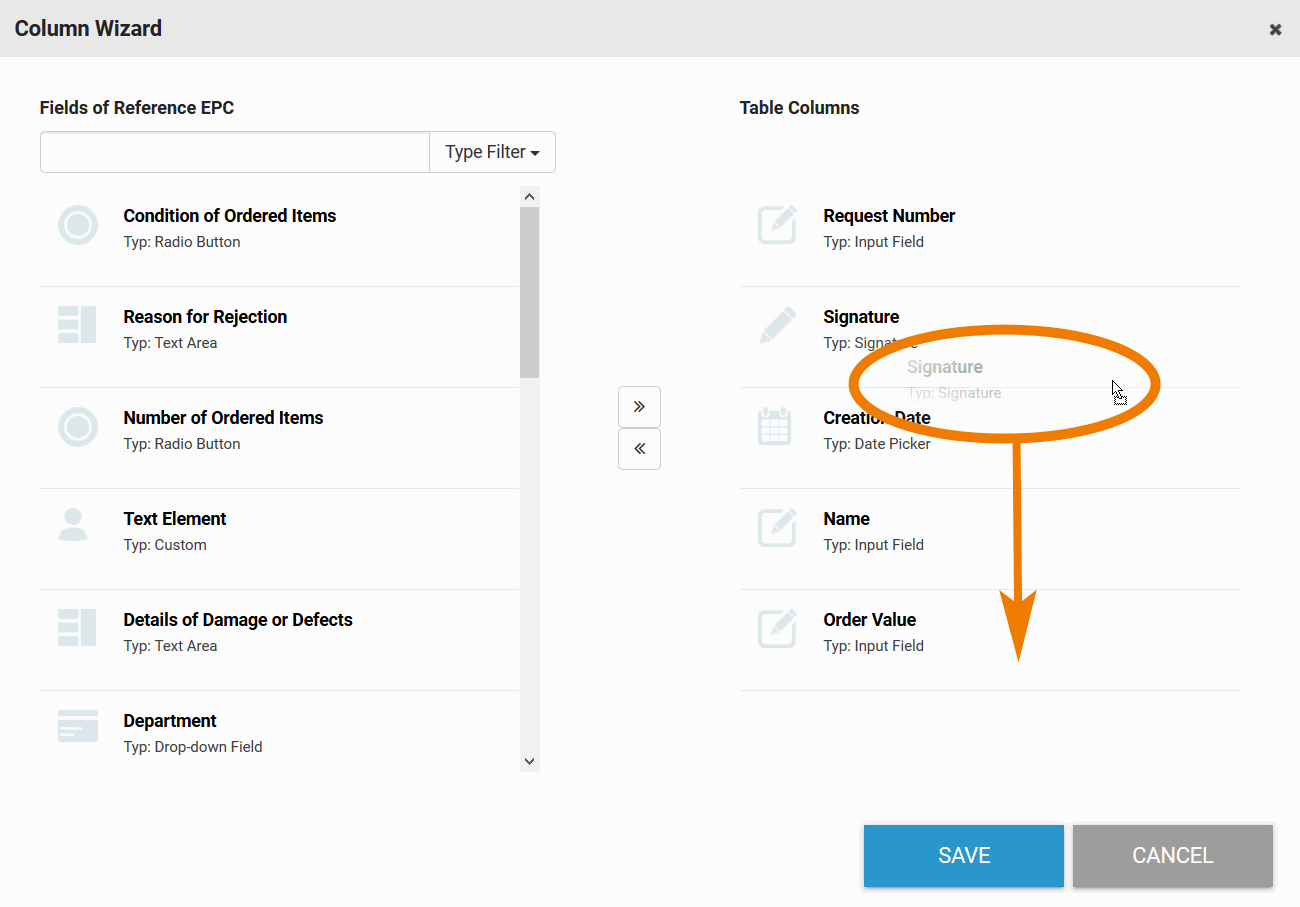
| Now configure your overview table: Drag all the form fields you want to display in the overview table from the wizard's left to its right column. |
| You can drag superfluous fields back from the right to the left list. |
| You can change the order of the elements in the Table Columns list by simply moving them up or down. |
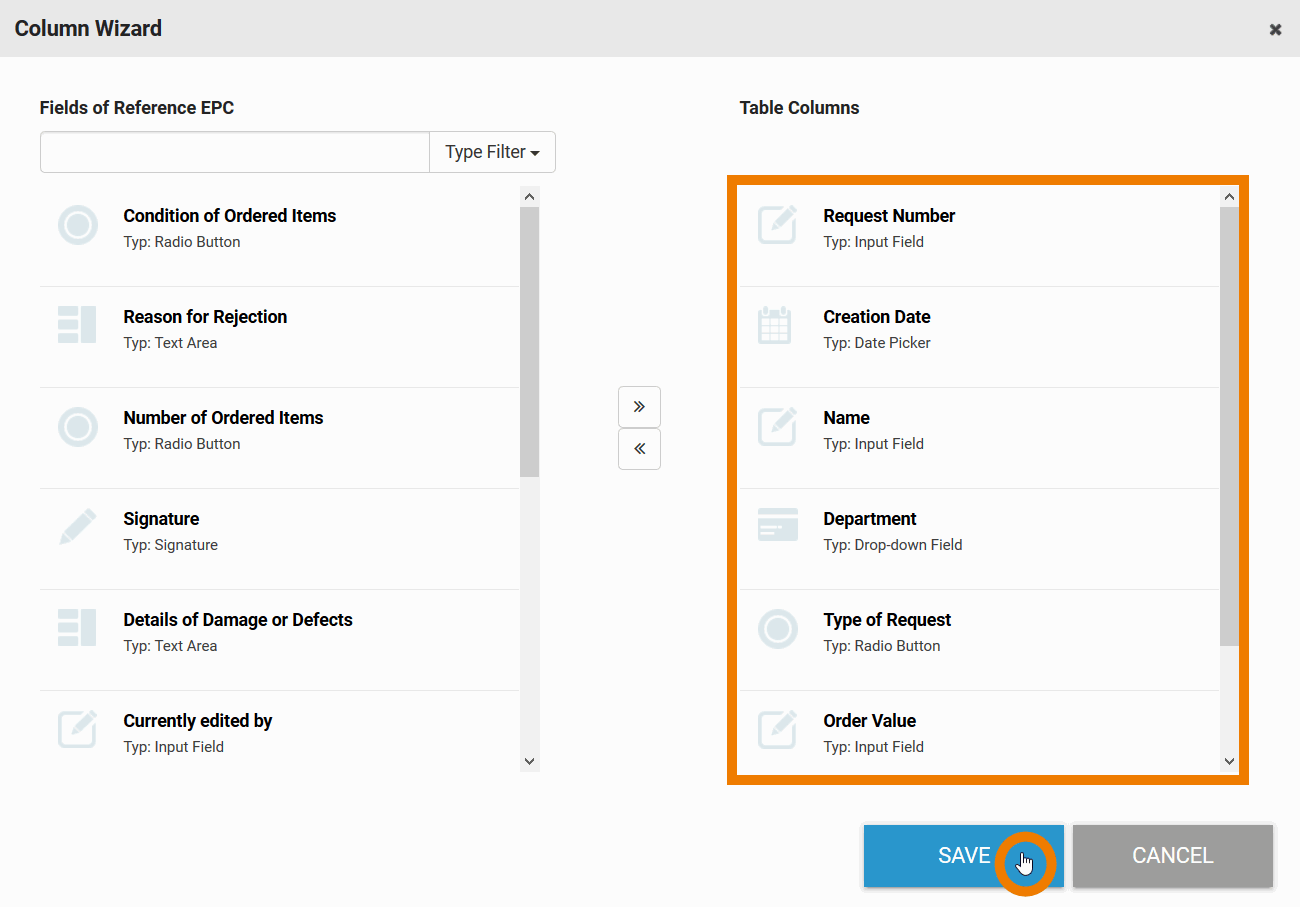
| Save your input when the configuration is complete. |
| Your configuration is transferred to the column configuration editor of the instance table. |
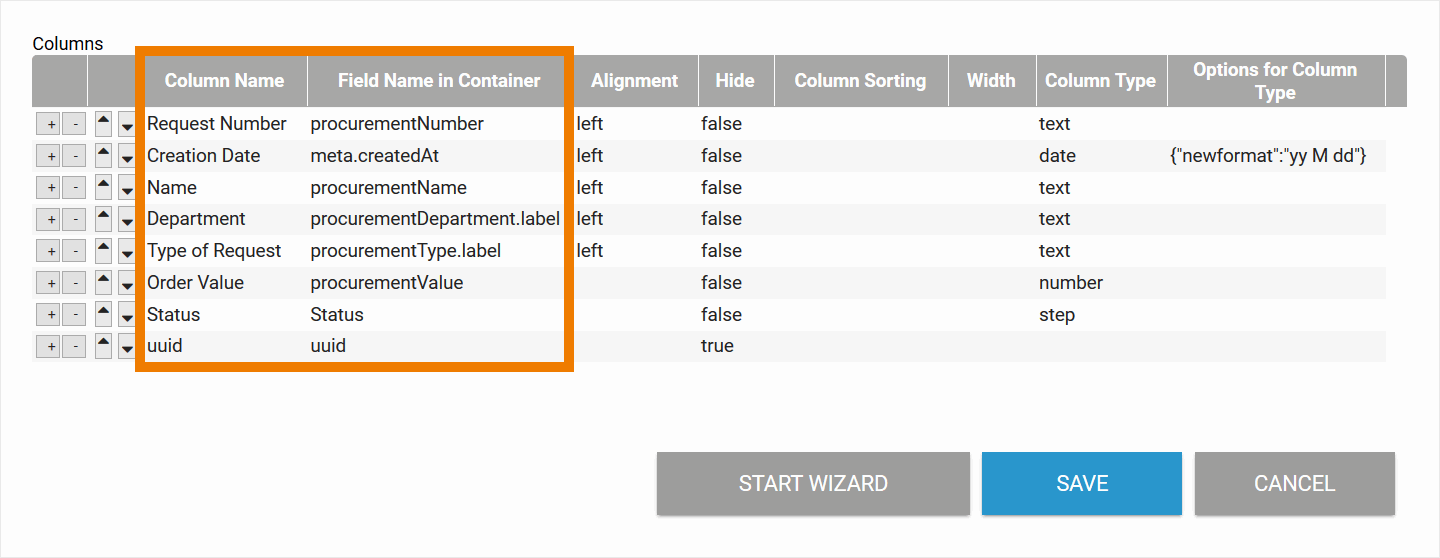
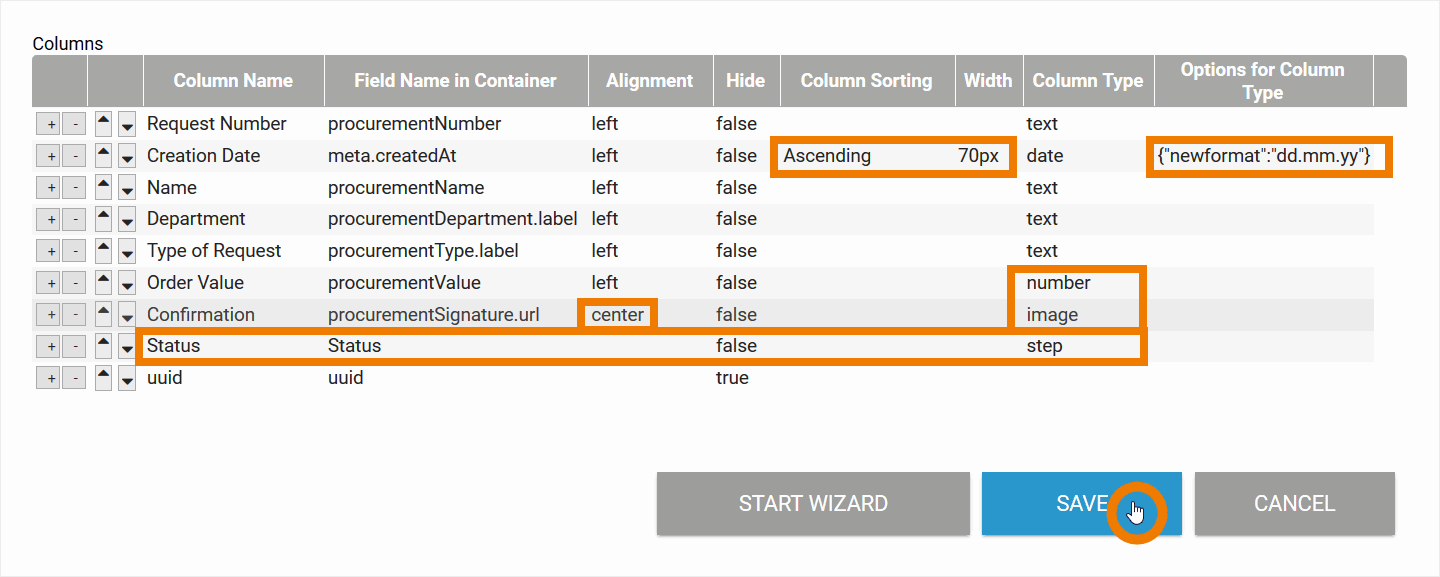
| Designers can always edit the table in the column configuration editor manually, for example to change column names, widths or column types or to add columns of type custom. |
| After saving, the table is displayed as configured. |

Special Cases
Some form fields require special configuration. The column wizard recognizes these special cases and completes the input in the Field Name in Container column as follows:
- App Link (single): The name of the app link (single) is extended by the name of the first content of the app link's option Display Fields. The app link (single) can contain more than one value. For every value that should be displayed in the instance table a new column has to be created. Visit page Configuring Overview Tables for more information on this topic.
Selection List: The extension .label is added to the element name (for further information on this topic, please refer to page Possible Values: Value and Label).
File Upload: The name of the element is extended by the extension .fullUrl. The link to the uploaded file is displayed in the overview.
Radio Button: The extension .label is added to the name of the element (for further information on this topic, please refer to page Possible Values: Value and Label).
Search Field: The extension .label is added to the name of the element (for further information on this topic, please refer to page Possible Values: Value and Label).
Signature: The name of the element is extended by the extension .fullUrl. The link to the corresponding image is displayed in the overview.
URL Field: The extension .label is added to the name of the element (for further information on this topic, please refer to page Possible Values: Value and Label).
The wizards recognizes if you use a Field Name in Container that differs from the element name. The wizard then automatically uses the Field Name in Container instead of the element name.
For more information and an overview of all form fields that require special configuration, see page Configuring Overview Tables.
On this Page:
Related Pages:
Overview
Content Tools