Adding Objects to the Execution Canvas
You need to perform two steps to implement executional parts to your model:
- Provide all necessary data types and operations for the implementation of your process. These types and operations reside in the Service panel of the BPMN editor.
- You can use the Base Types that are provided with the Designer.
- You can create other necessary types yourself in the Implementation section.
Refer to Modeling Data Mapping for further information. - You can import a library that provides additional types and operations.
Refer to Designer Administration > Libraries for further information.
- In the second step, select data types and operations from the Service panel, and add them to your process at the right places.
- How this is done will be explained in this chapter.
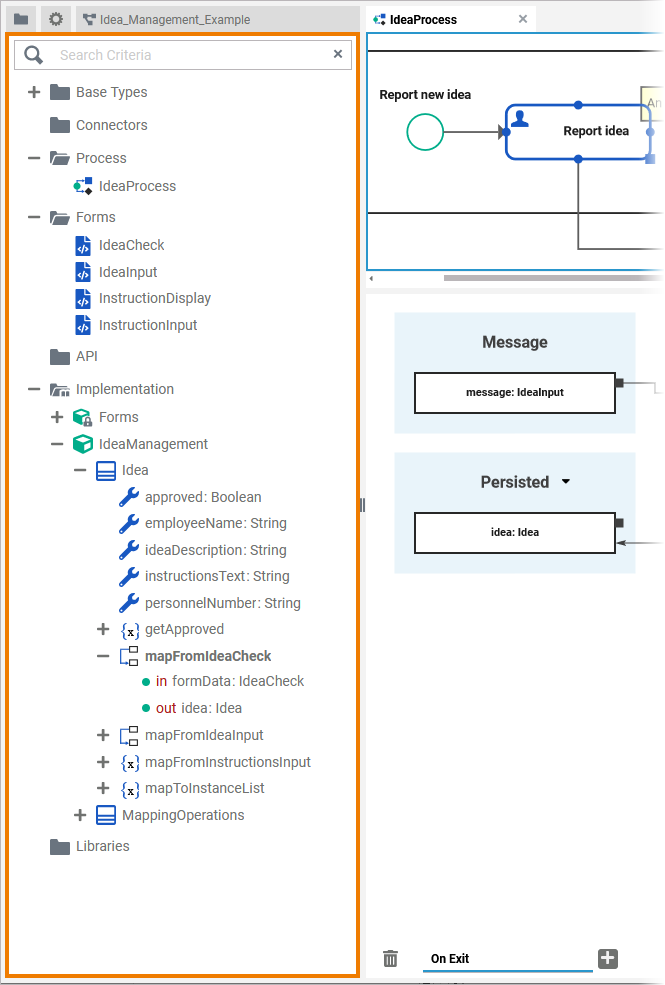
Select BPMN Element
| To add an execution object, you must first select the element on the BPMN canvas to which you want to add the object. | |
| The related execution part will be displayed in the execution canvas. As no execution has been implemented yet, the panel shows an empty UML diagram. |
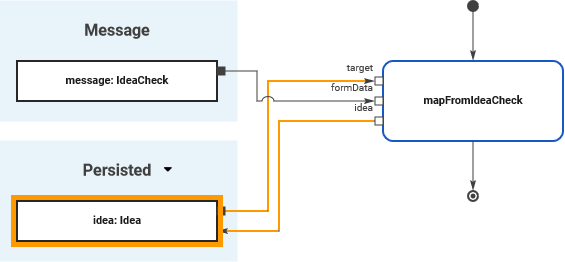
If the selected BPMN element is a Message Start Event, the execution canvas also shows section Message with an incoming message object of type Any. MultiExcerpt named info_message_section was not found -- Please check the page name and MultiExcerpt name used in the MultiExcerpt-Include macro | |
| If you have selected the outgoing relation of an Exclusive Gateway, section Return is displayed, containing the unchangeable object return of type Boolean. |
Select Type
| Now go to the Library panel and expand the library you want to use. Page Library Panel contains further details about the panel contents. On page Libraries Administration is explained how to upload a library to the Designer.
|
The Designer provides all necessary base types in a Bridge Base standard library. This library is available in all services and cannot be removed. It contains the following xUML base types: Most of these base types are only able to hold one single piece of information, like text in a string, true or false in a boolean, or binary data in a blob. Refer to Available Base Types for more information on the xUML base types. If you want to associate several bits of information, you have to define a complex type that combines a number of independent base types and possibly other complex types. Such complex types are modeled as classes. To use your own types, you can How to upload your own libraries is explained on Designer Administration > Libraries. |
Drag to Execution Canvas
Adding objects to the execution canvas is simple:
There are different targets to drop an object to:
| |
You can cancel the operation by pressing Esc or dropping the element outside the execution canvas. |
Adding a New Object
You can add a new object by dropping it in section Persisted or Local. You can drag the following library contents to the canvas:
| |
| This applies to objects from your own customized libraries as well as to the Bridge base types. | |
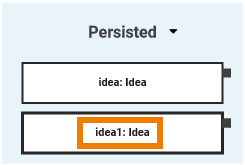
Variables created in section Persisted are usable in all executions of the BPMN model. See page Persisting Data for further informations. | |
Variables created in section Local are only available for use within the current execution. |
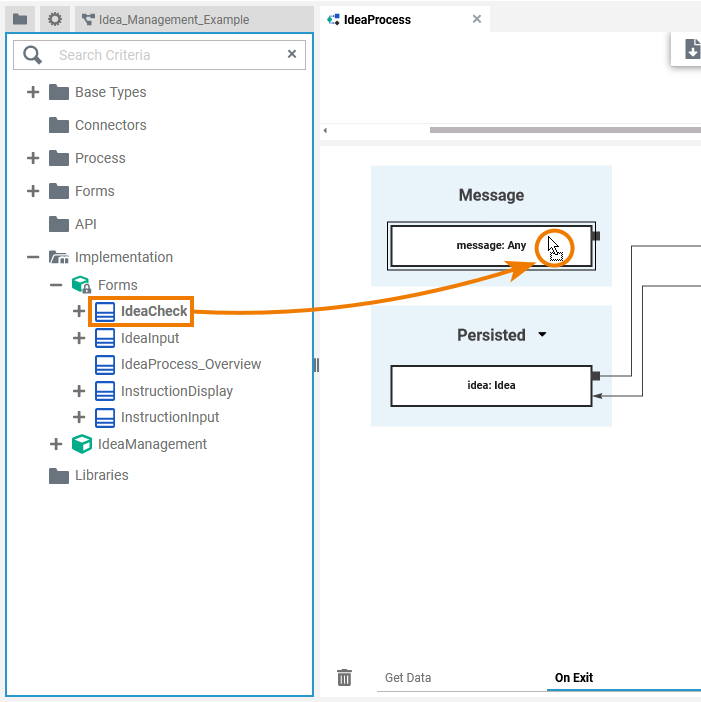
Changing the Object Type
| You can change the type of any object if you drag a type from your library and drop it on the object itself. Example: |
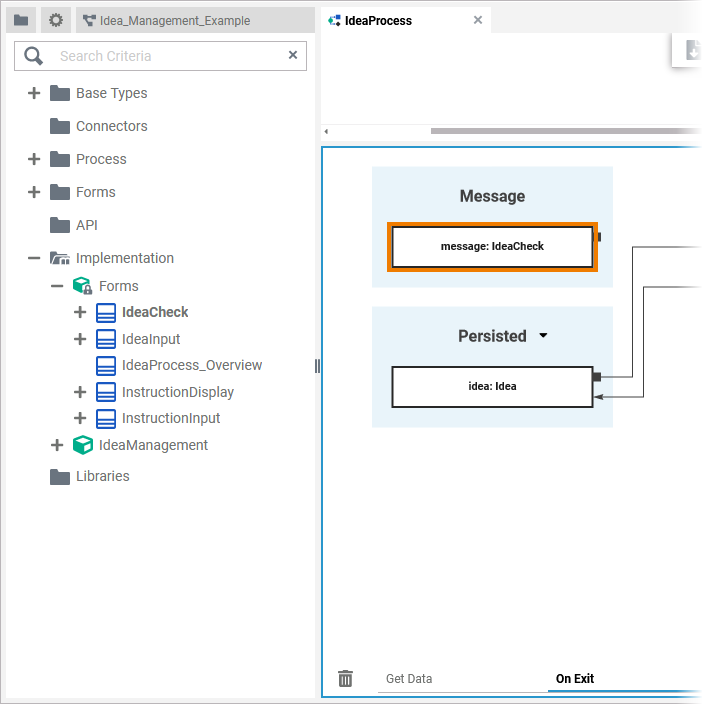
| After you have dropped the type on the object, it has changed its type. Example: |
Expert Tipp Use simple type Any from library Bridge Base to change the message type back to its default. | |
| Object message cannot be of simple type. If you try to drop a simple type other than default type Any on the message element, a red frame indicates that this is prohibited. |
Changing the Section
It is also possible to change the section for an object. You can drag&drop objects:
- From Local to Persisted
- From Persisted to Local
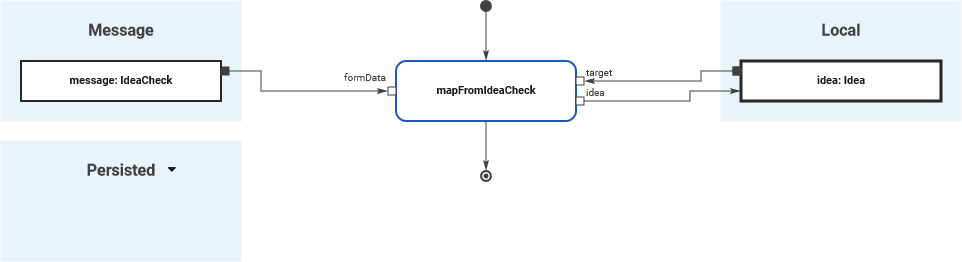
- From Message to Persisted or Local
|
|
|
|
|
|


Special Case: Adding Persisted Objects
For detailed information see page Persisting Data.
| If you add objects to section Persisted, they are usable in all executions of the BPMN model. |
| To use a persisted object, click the icon |
MultiExcerpt named persisted_object_added was not found -- Please check the page name and MultiExcerpt name used in the MultiExcerpt-Include macro | |
|

On this Page:
Related Documentation:
Overview
Content Tools