The BPaaS Editor is your work area where you manage project content, model processes and design forms. In this chapter we introduce you to the editor and its functionalities.
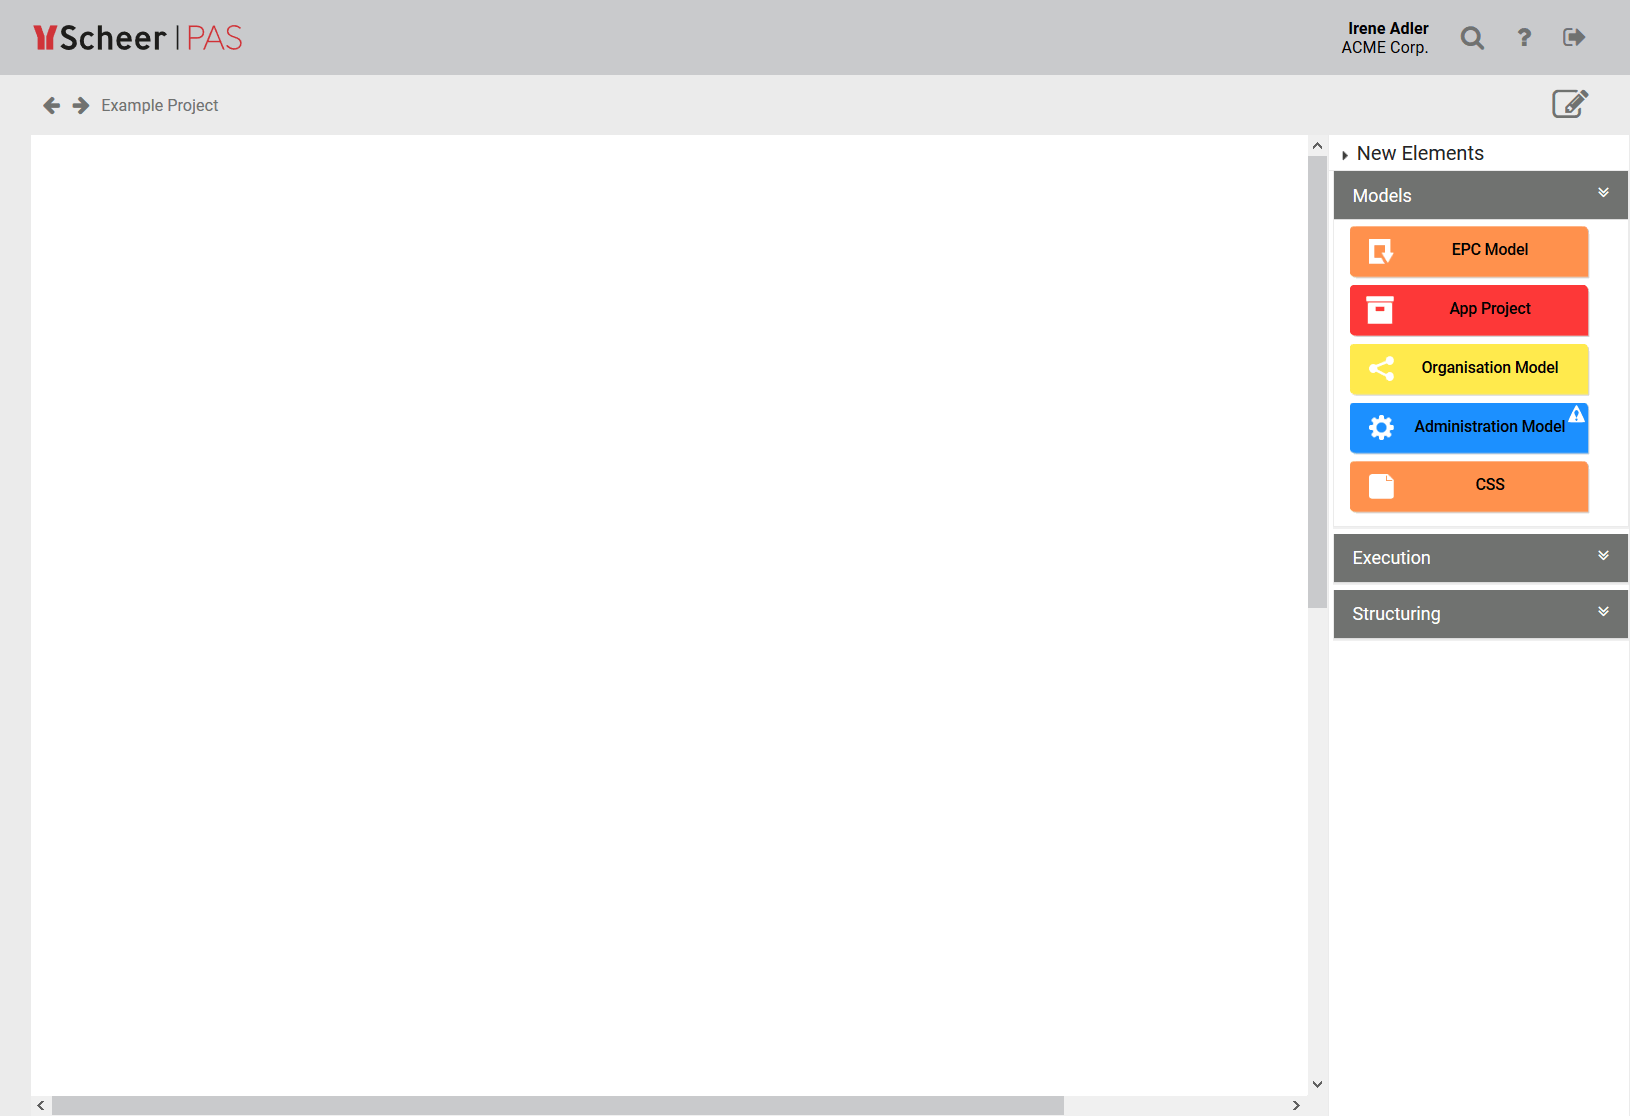
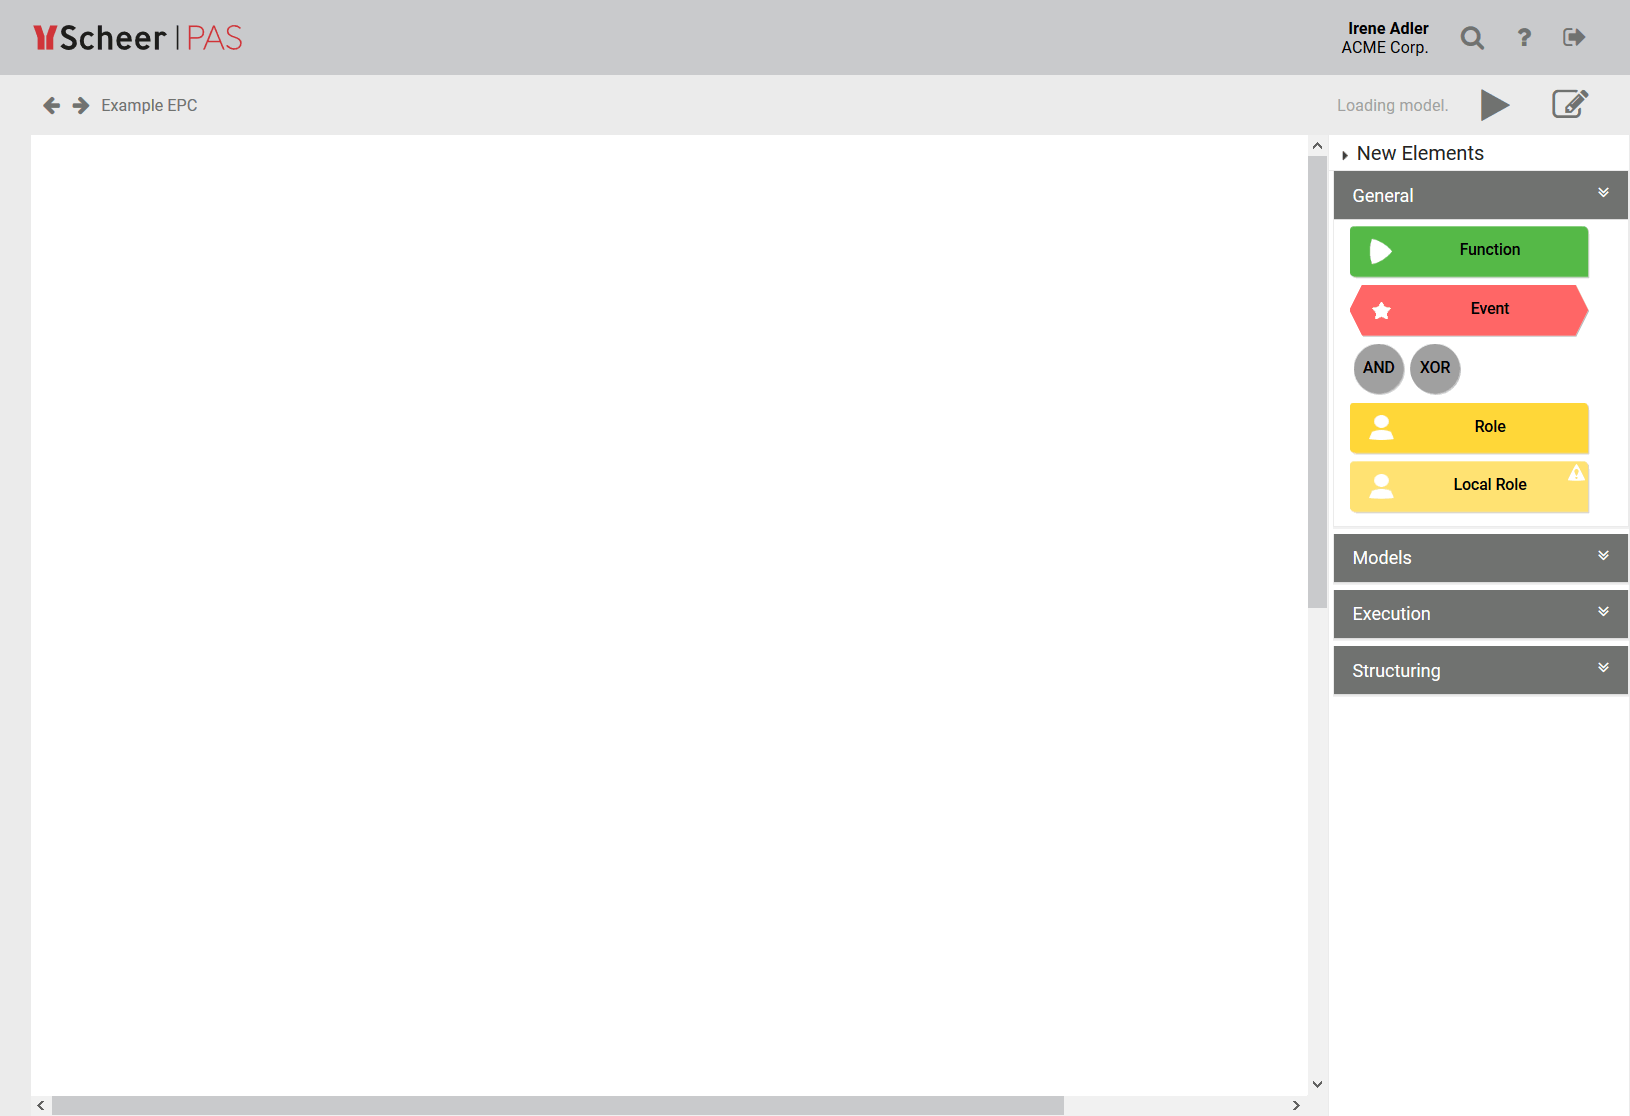
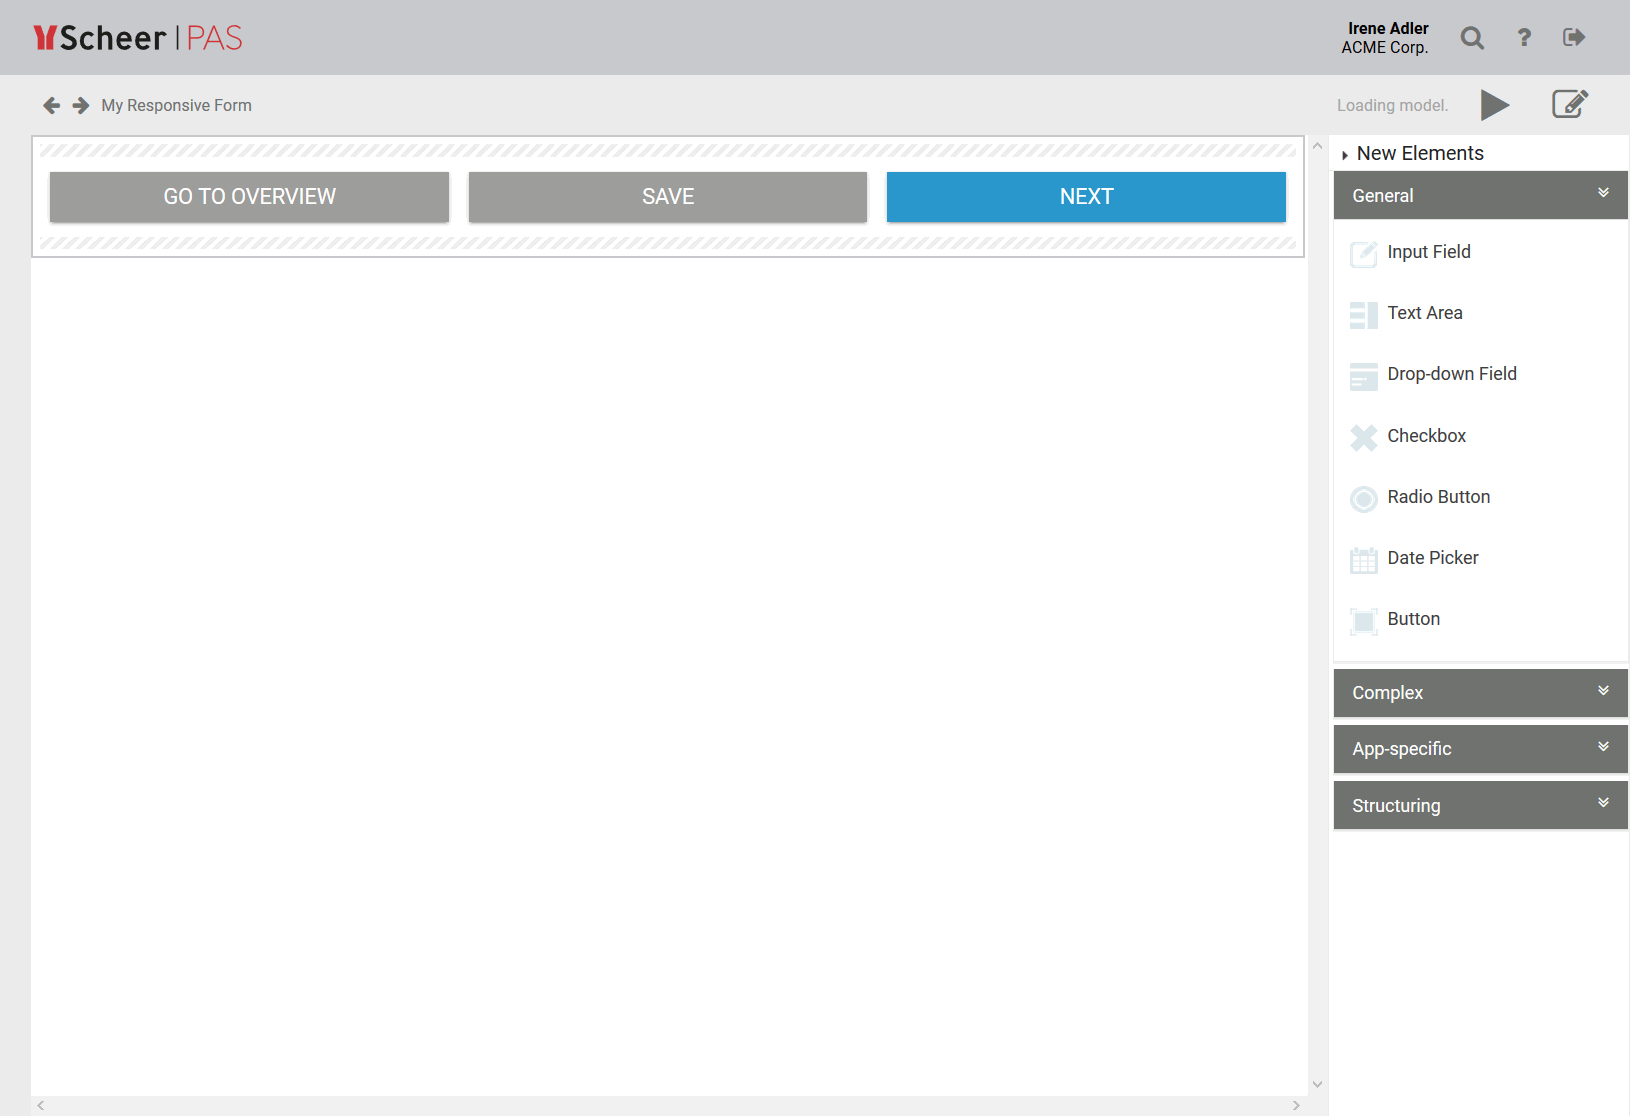
On the left side of the editor you will find a white desktop. This is your workspace where you create new elements. The BPaaS Editor is available on different levels. Depending on the level, you can manage projects, model EPKs or forms on the workspace. The Sidebar New Elements on the right offers the corresponding elements that can be used for each level.
| Example | Description |
|---|---|
| Project Editor: Within a project or an app project. On this level, you manage the contents of your project/app project. |
| Process Editor: Within an EPC model. On this level, you can model your business processes. |
| Forms Editor: Within a Responsive Form. In the Forms Editor, you can design your own responsive forms that are optimized for execution on the computer. |
| Mobile Forms Editor: Within a Mobile Form. In the Mobile Forms Editor, you can design your own mobile forms that are optimized for execution on mobile devices. |
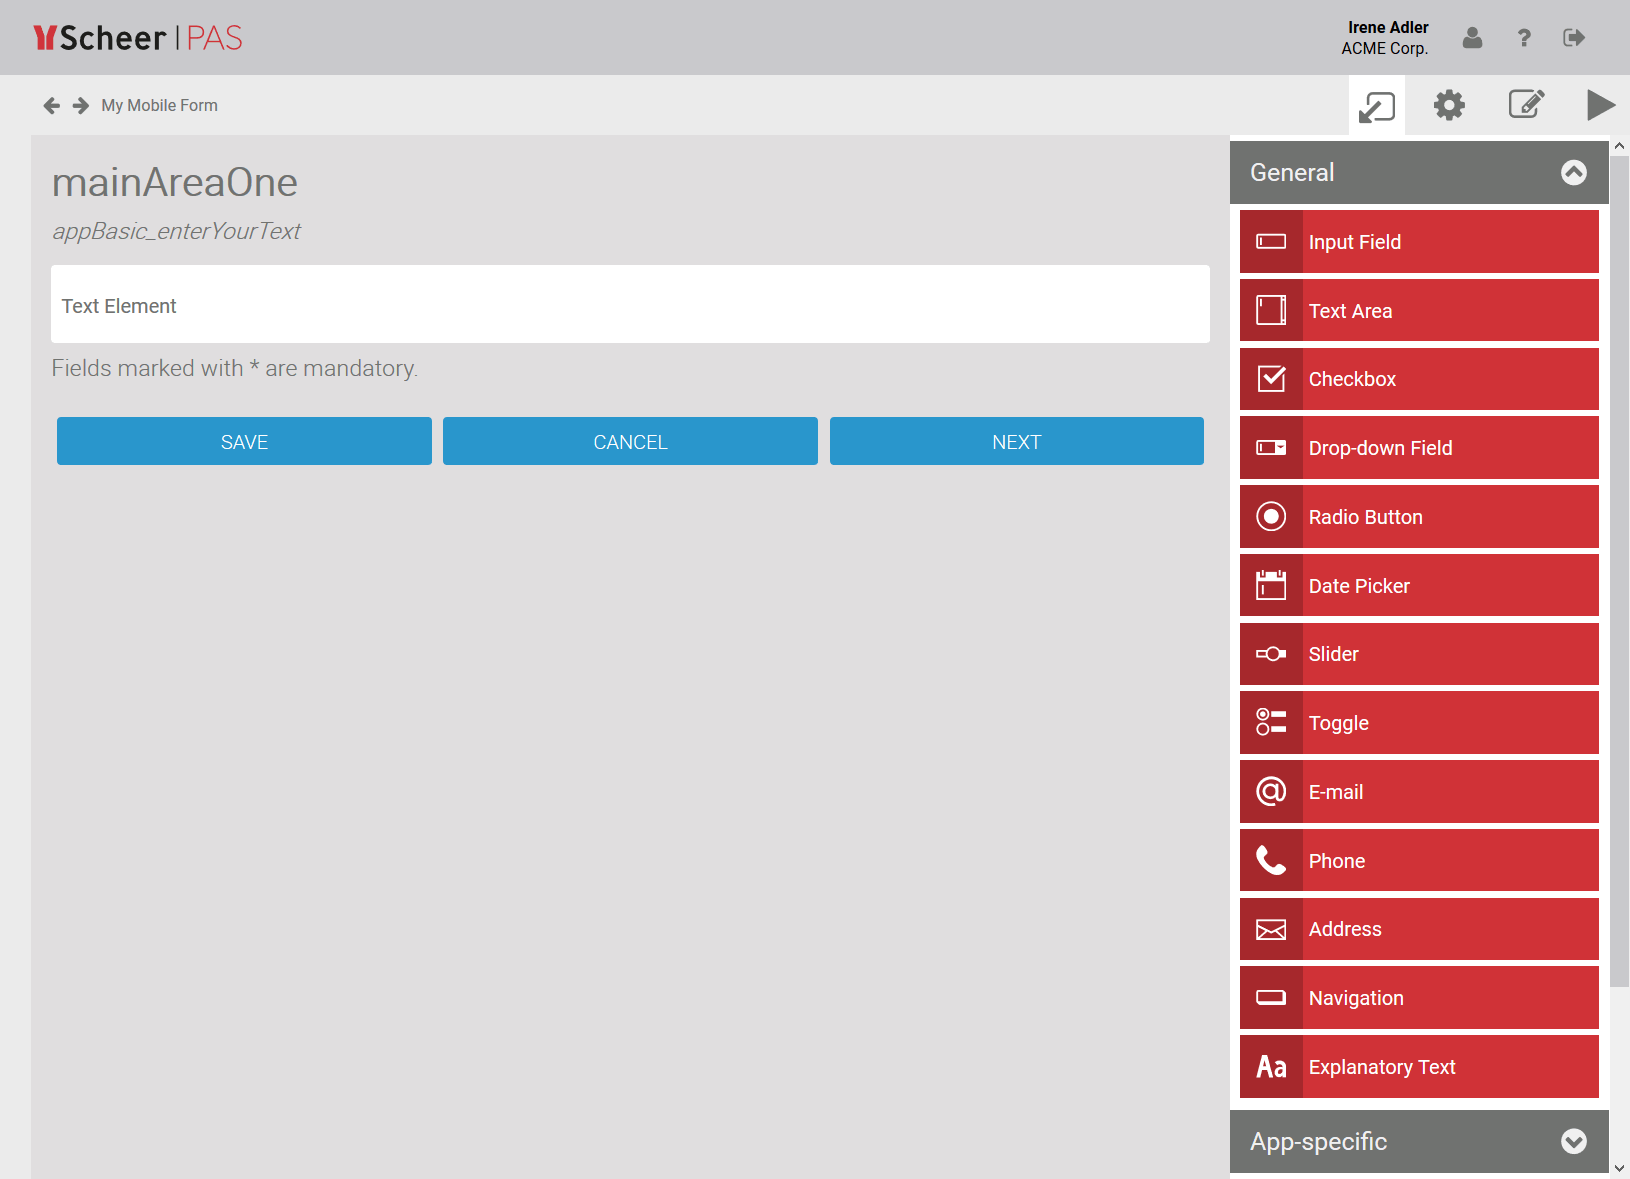
The Sidebar New Elements displays the elements that match the current level. Within an EPC model, EPC elements appear, in a form a multitude of form elements. The Mobile Forms Editor allows you to create forms, that are optimized for execution on mobile devices. The work in this editor therefore differs slightly from the work in the other BPaaS Editors. Visit the Scheer PAS Mobile documentation (German) to know more about creating and executing mobile apps. | |
The Editor's Navigation Bar
Above the workspace you will find the navigation bar, which contains various buttons for operating the editor:
| Button | Functionality |
|---|---|
| Click on the logo to open the Scheer PAS Cockpit (start page / project overview). |
| Use the navigation arrows to navigate back and forth in the editor levels. |
| The model name shows the name of the current project, EPC model or form. You can directly edit the model name by clicking on it. The change also affects the corresponding project tile in the cockpit. The change becomes visible in the cockpit as soon as it has been reloaded. Conversely, a name change in the project tile affects the model name in the editor as soon as the editor is called again. |
| The user name of the logged in user is displayed in the top right corner of the navigation bar. Below this the name of the company is displayed. |
| Use the magnifying glass to start the search for objects. Hits are displayed in a list: Use drag & drop to create an element on the workspace. If you click on a model or form in the hit list, you switch directly to the relevant model or form. The hit list displays a maximum of 15 results. If the object you are looking for is not below it, refine the search entry. The system searches according to several criteria: Name, translation for the current language, object type and hashtag. For comprehensive information on how to use the search, visit chapter Searching in BPaaS Editor. |
| A click on the question mark will take you to the Scheer PAS BPaaS Guide, where you can look up all functionalities of BPaaS. |
| Click on the logout button to end your current BPaaS session. |
| Use the button Edit Model to change model properties and store translations. |
| Use the Play button to display and scroll through the current model in preview mode. |
a) b) | Switches to show or hide the Sidebar New Elements and the Edit Sidebar.
|


Opening the Project Editor
You have several possibilities to open the BPaaS Project Editor. On the one hand you can access the editor directly by clicking on a project tile, on the other hand via the App Project element.
Both options open the Project Editor. In the editor within an app project, however, the Process App and Mobile App elements are available in the Sidebar New Elements instead of the element App Project.
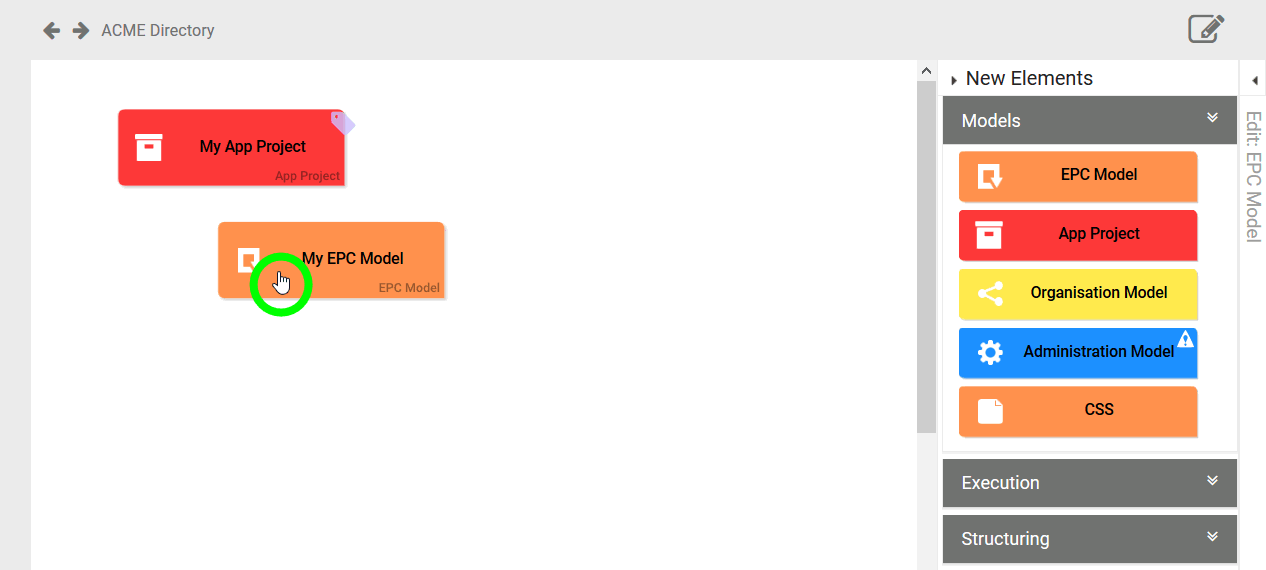
Opening via a Project Tile
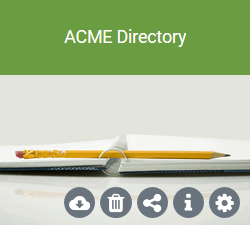 | Click on a green project tile to access the Project Editor. |
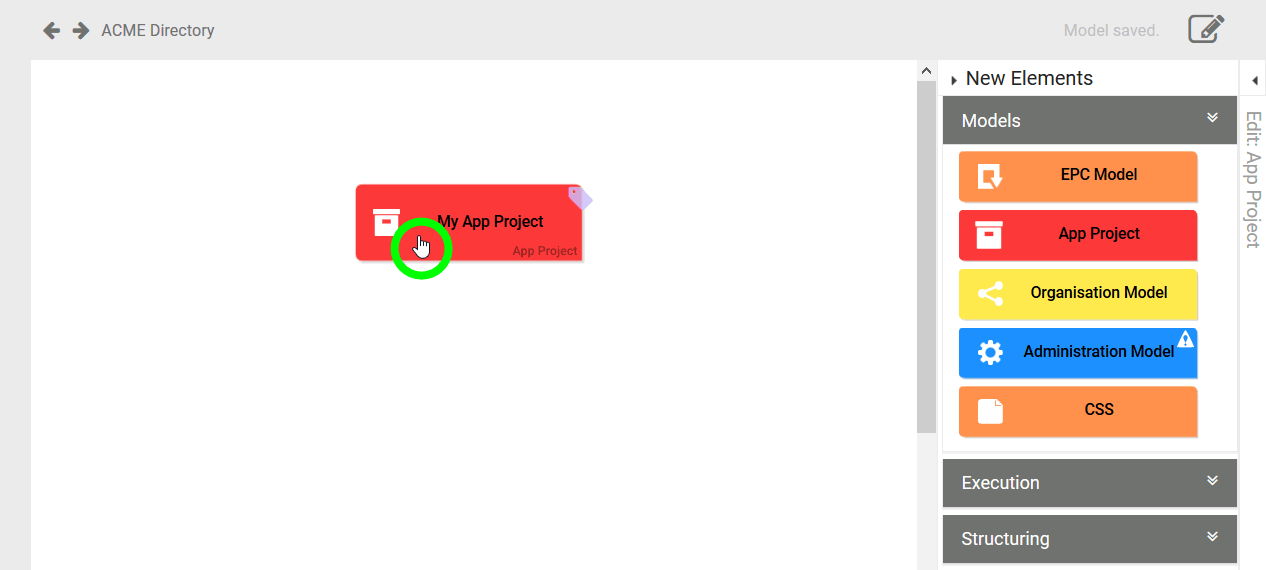
A newly created project is empty. You can fill it with one or more EPC models, app projects and organization models. The Sidebar New Elements on the right-hand side of the window displays the elements you can create on this level. The elements are grouped into the following categories: | |
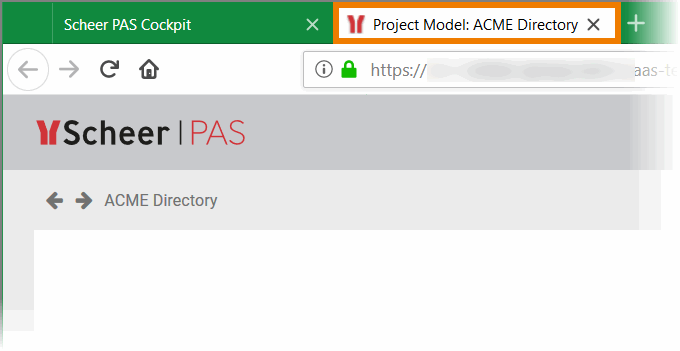
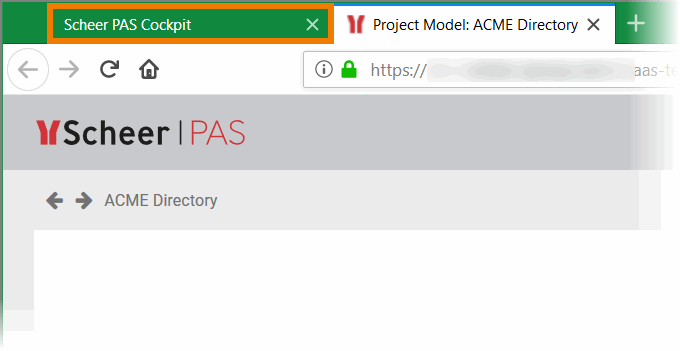
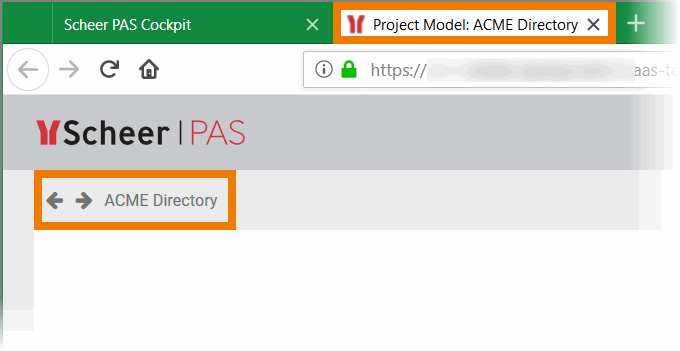
| The project editor will open in a separate browser tab. |
| The cockpit remains available in the previous tab. |
| The name of the project tile (ACME Directory) is displayed in the browser tab and in the navigation bar of the Project Editor. |
Opening via a Project App Element
Within a project you can create app projects.
| To do this, drag the App Project element from the Sidebar New Elements onto the workspace. This operation automatically opens the Process App Wizard, which supports you in creating an app project. Detailed information on this topic can be found on the page Creating an App Project. |
| The Project Editor will also open if you double click an App Project element. |
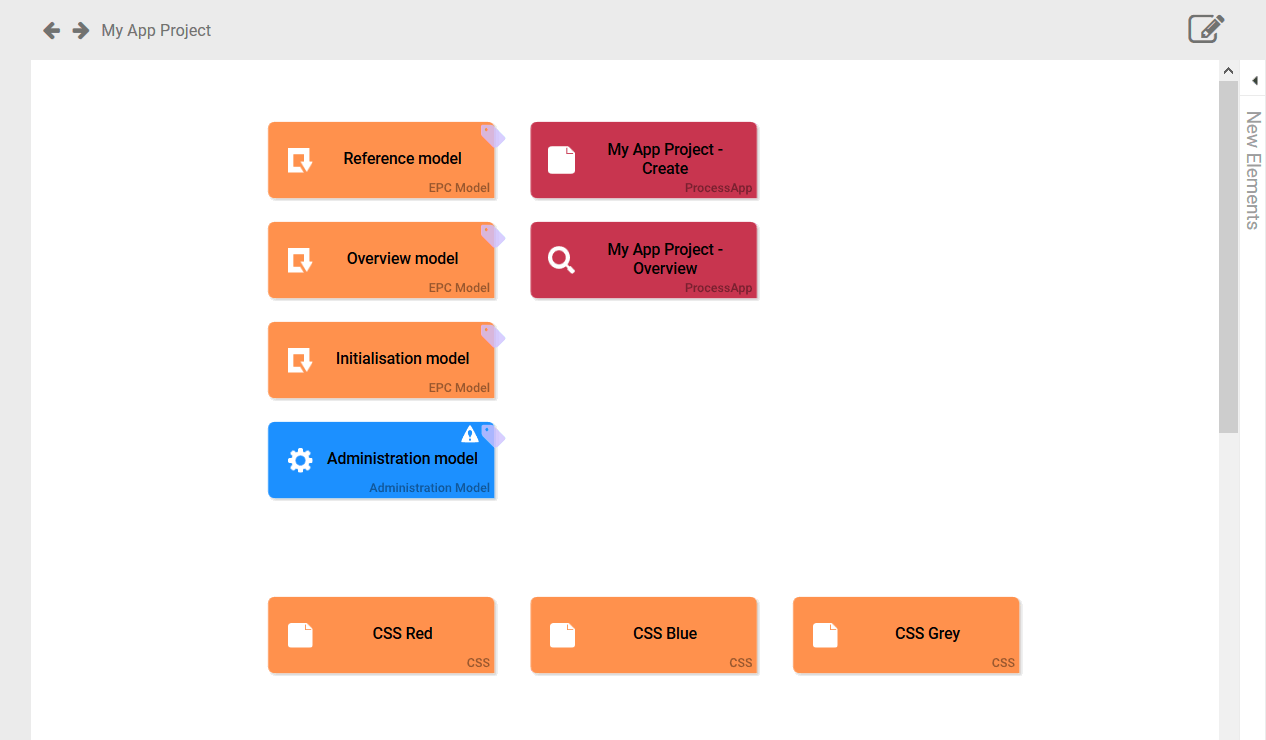
| In contrast to a project, a newly created app project contains predefined elements. The elements within an App project are explained in detail on the page Creating an App Project. |

Opening the Process Editor
Besides app projects you can also create EPC models in a project.
| To do this, drag the EPC Model element from the Sidebar New Elements onto the workspace. |
| Clicking on an EPC model opens the Process Editor. |
| In the Process Editor, the Sidebar New Elements to the right of the workspace displays the appropriate elements for modeling an EPC. Expand the categories to display the available elements: |


Opening the Forms Editor
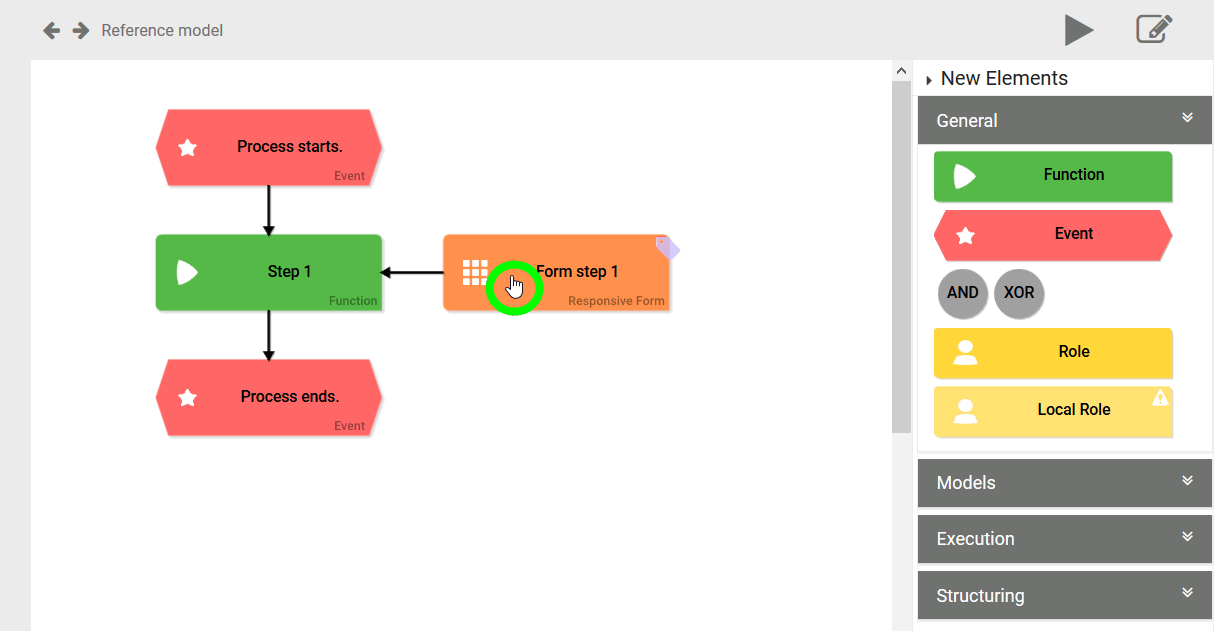
When modeling, you can add forms to your EPC model.
| From the Sidebar New Elements, drag the element Responsive Form onto the workspace. |
| Clicking on a responsive form opens the Forms Editor. |
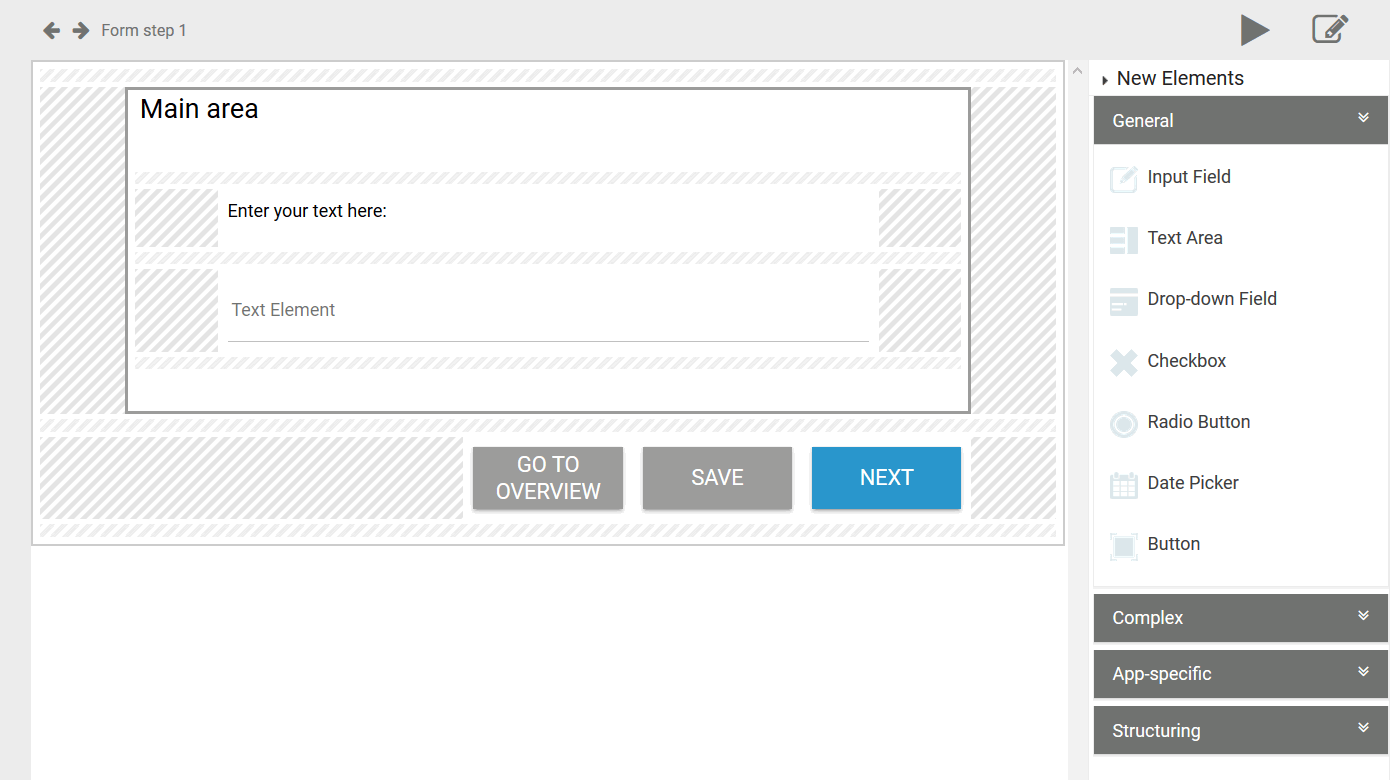
| In the Forms Editor, the Sidebar New Elements to the right of the workspace displays the appropriate elements for designing a form. Expand the categories to display the available elements: When you open a Mobile Form, you will be taken to the Mobile Forms Editor. This editor allows you to create forms, that are optimized for execution on mobile devices. The work in this editor therefore differs slightly from the work in the other BPaaS Editors. Visit the Scheer PAS Mobile documentation (German) to know more about creating and executing mobile apps. |
The Edit Sidebar
The Edit Sidebar is located at the right edge of the editor next to the Sidebar New Elements. You can open and close both sidebars with the buttons ![]() and
and ![]() . All properties of the respective element are displayed in the Edit Sidebar. You can also adjust the element's properties via this sidebar.
. All properties of the respective element are displayed in the Edit Sidebar. You can also adjust the element's properties via this sidebar.
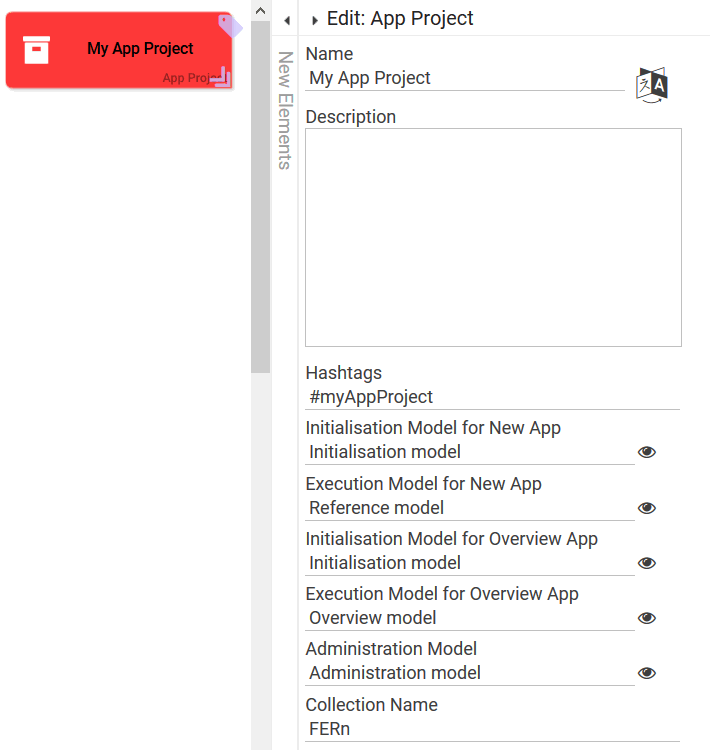
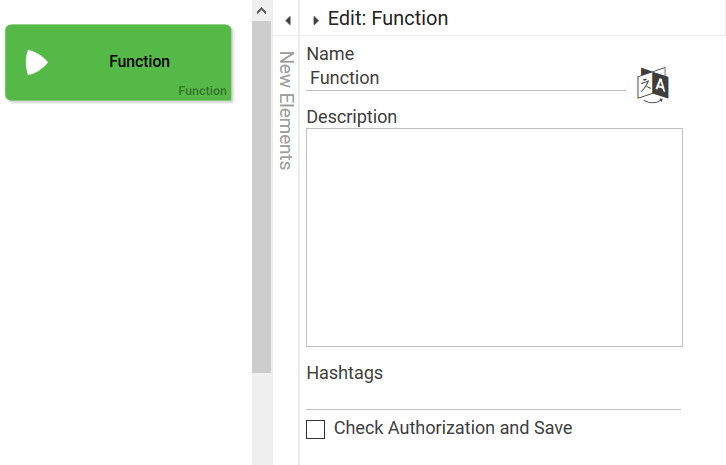
| Once a new element has been created on the editor's work area, it can be edited using the Edit Sidebar. As soon as the element is selected, the sidebar appears on the right side of the window. |
| This applies to project elements... |
| ... as well as to EPC elements... |
| ... and to form elements. |


Tip for working in BPaaS Editors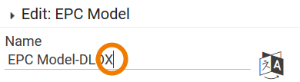
Use a single click to set focus to a field. 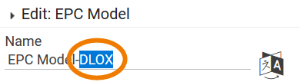
Use a double click to mark the clicked word. 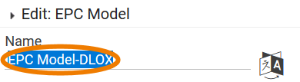
Use a triple click to mark the entire field's content.
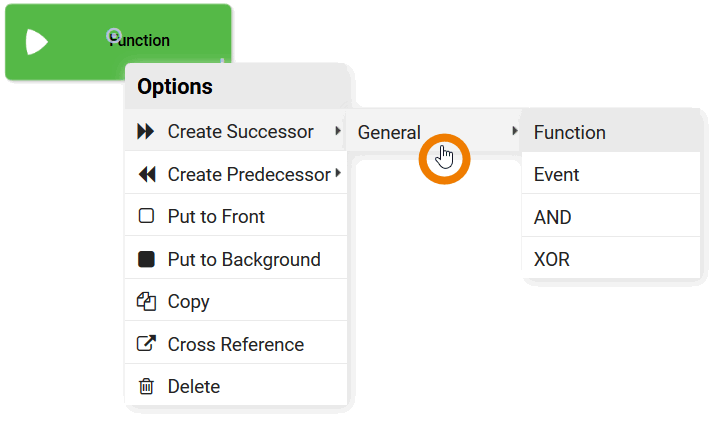
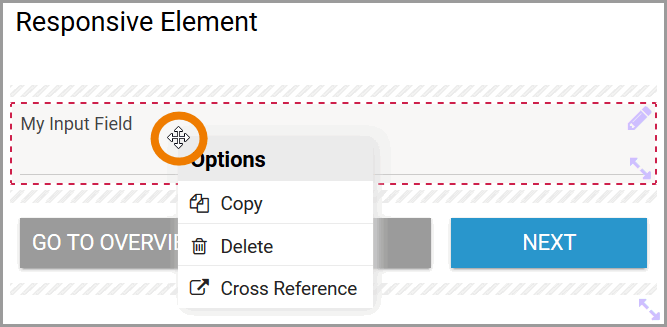
The Context Menu
Right-click to open the context menu in any editor. Depending on whether it is called on the empty workspace or on an element, the context menu offers you different options for creating and editing your elements and models:
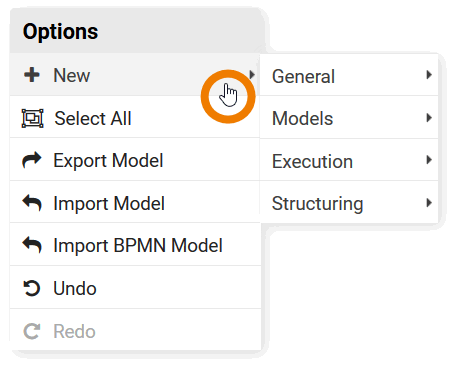 | Context menu opened on the work area. |
| Context menu opened on an EPC element. |
| Context menu opened on a form element. |
Use cases for the usage of context menu options can be found in chapter Modeling EPCs and Creating Forms. The option Generate Model Report is a Documentation Tool.
The Preview
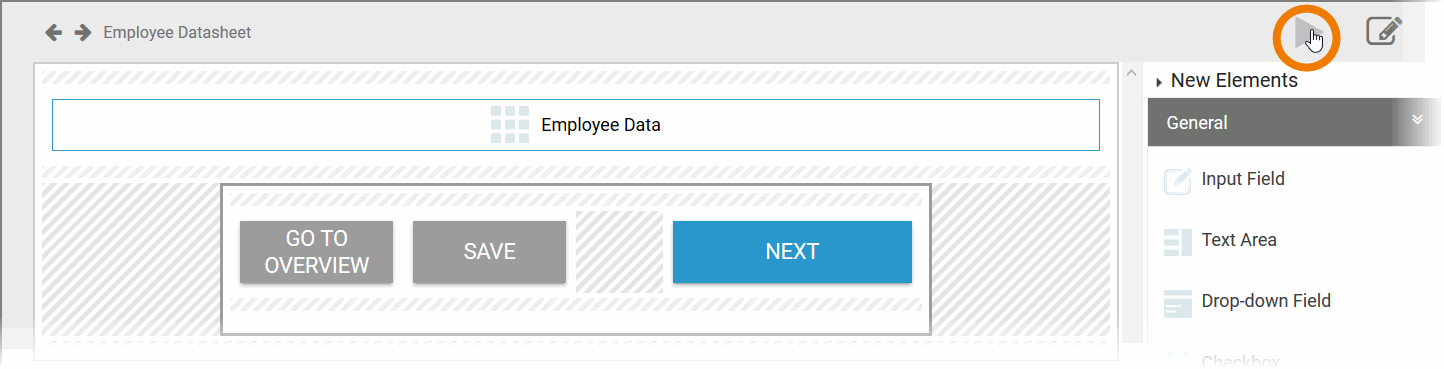
Testing the current model is possible if you use the Play button in the navigation bar. This applies equally to EPC models and forms. Testing with the preview function has the advantage that no instances are created.
The testing possibilities of a form are limited within play mode. To test the interaction between multiple apps, start the apps using the tiles in the Scheer PAS Cockpit or use the process app's start link in the Project Editor.
| You have modeled an EPC and want to test the model. Click the button |
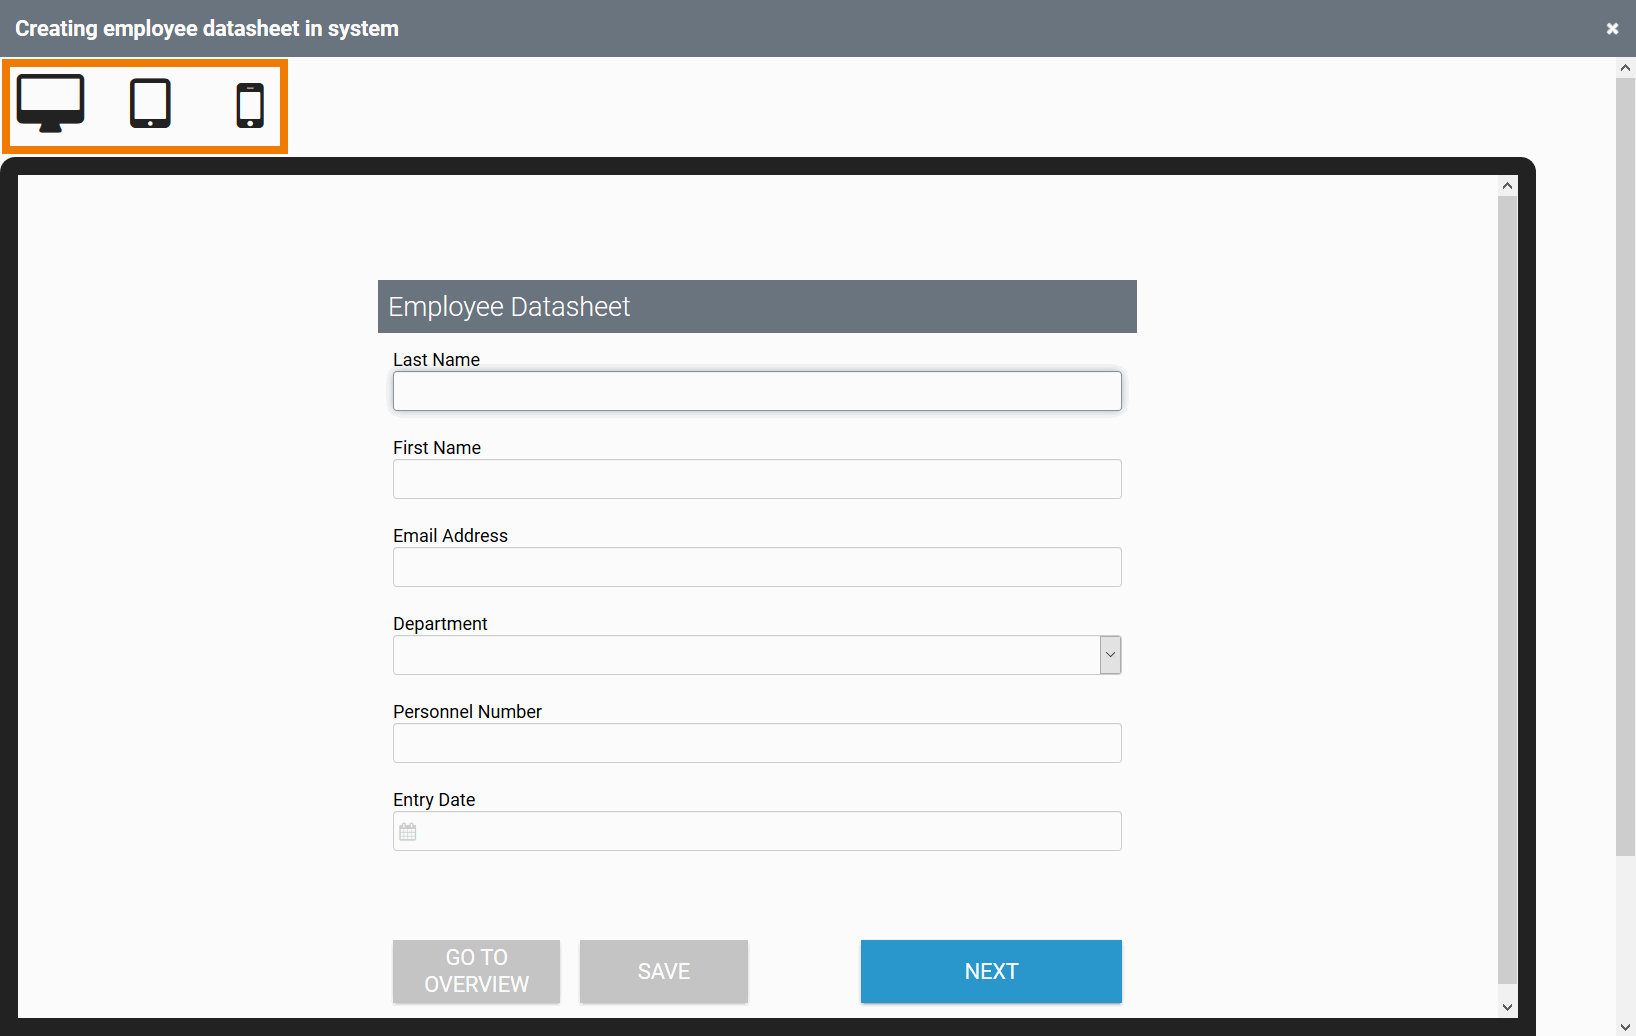
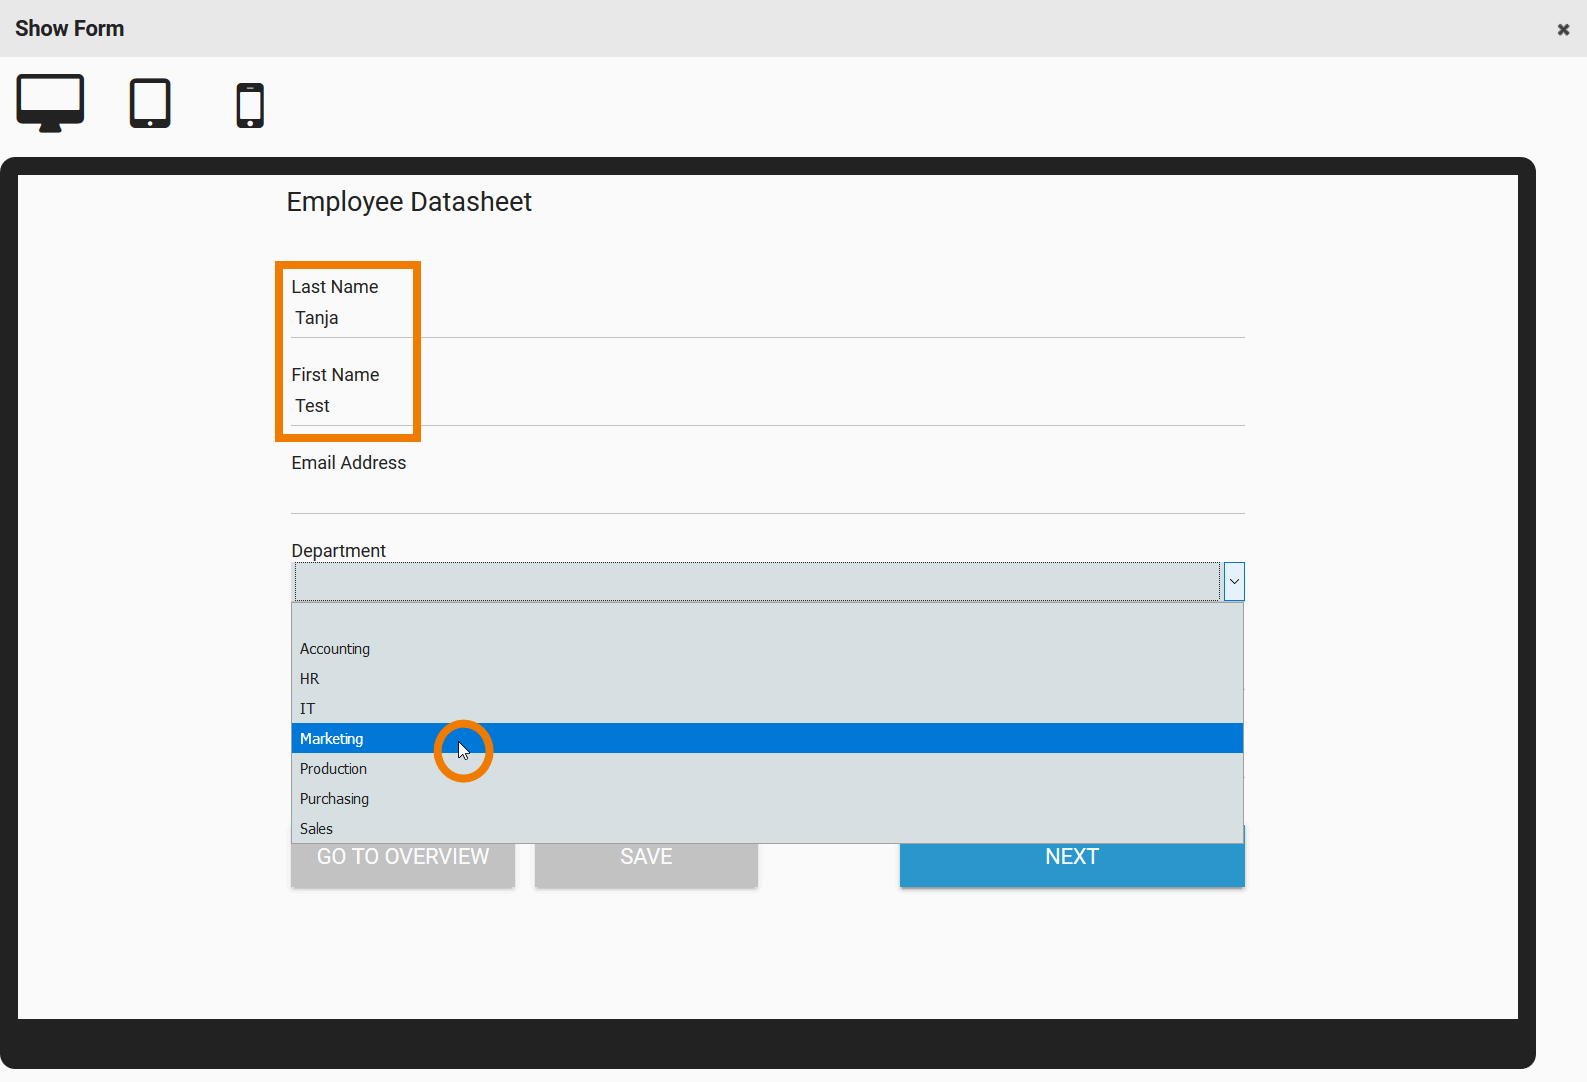
| The preview opens in a separate pop-up window. By default, the display appears on a computer monitor. Use the icons at the top left to change the display. |
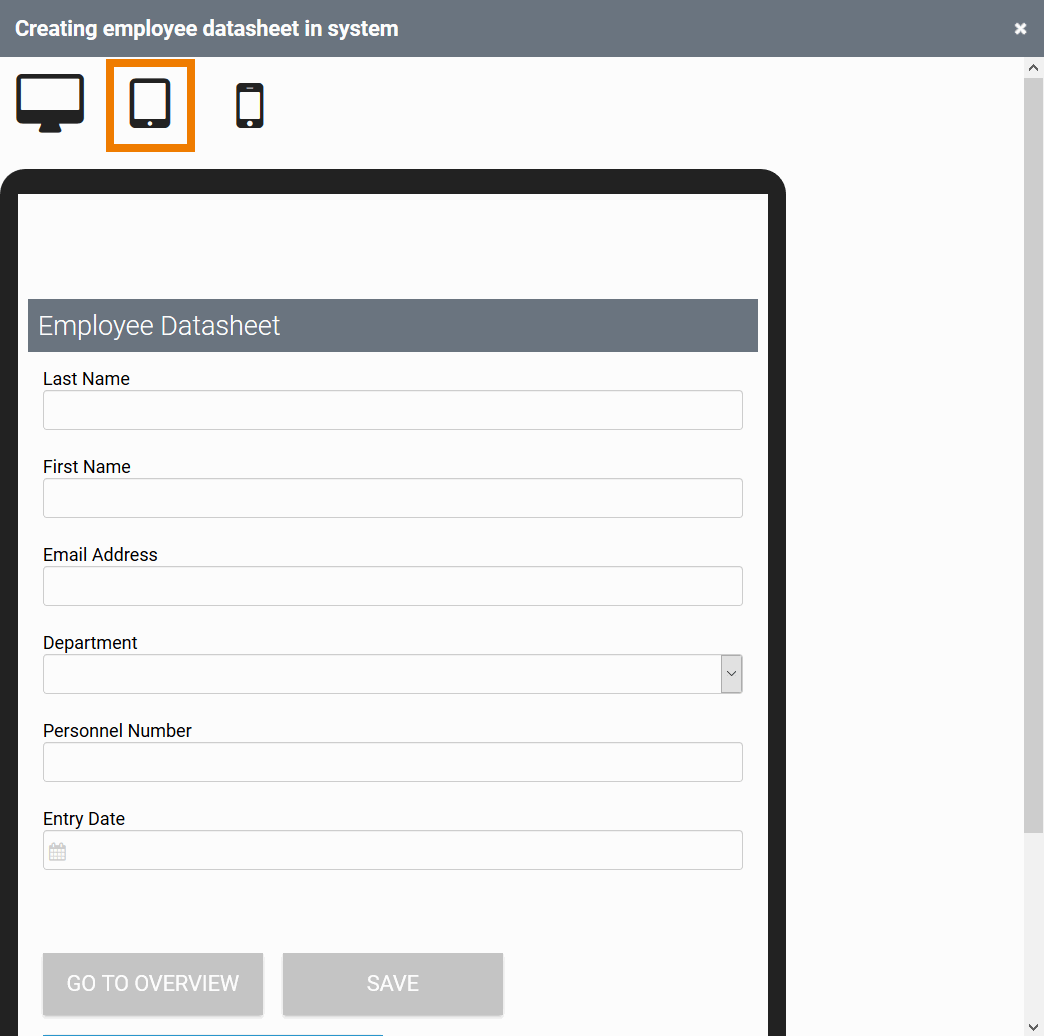
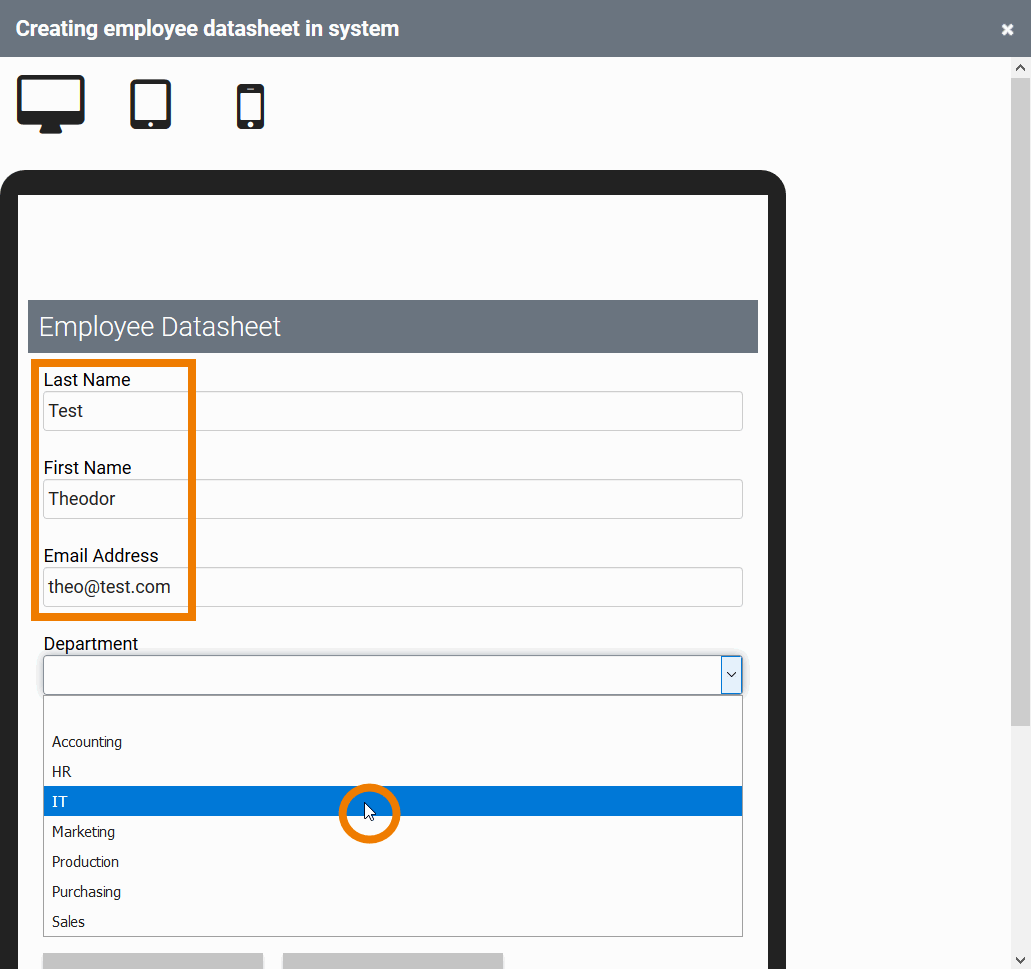
| The different views allow you to compare how your forms would look like on a tablet... |
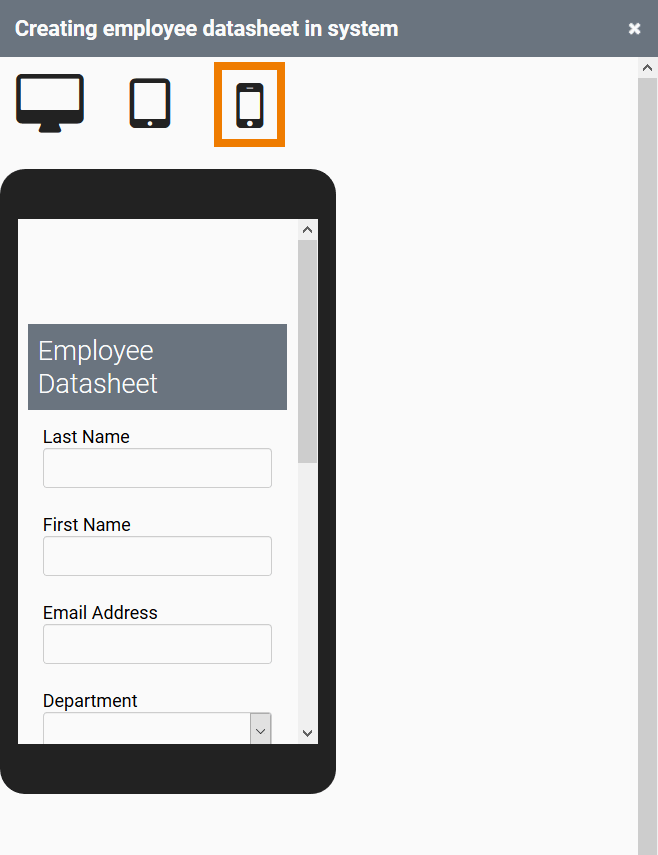
| ... or on a smartphone. If you want to create a form that is optimized for execution on a mobile device, use a Mobile Form and design a form exclusively for mobile execution in the Mobile Forms Editor. This editor has its own preview function. For more information, see the Mobile documentation (German). |
| You can run through your model completely in test mode, fill in form fields and click the buttons in the forms. |
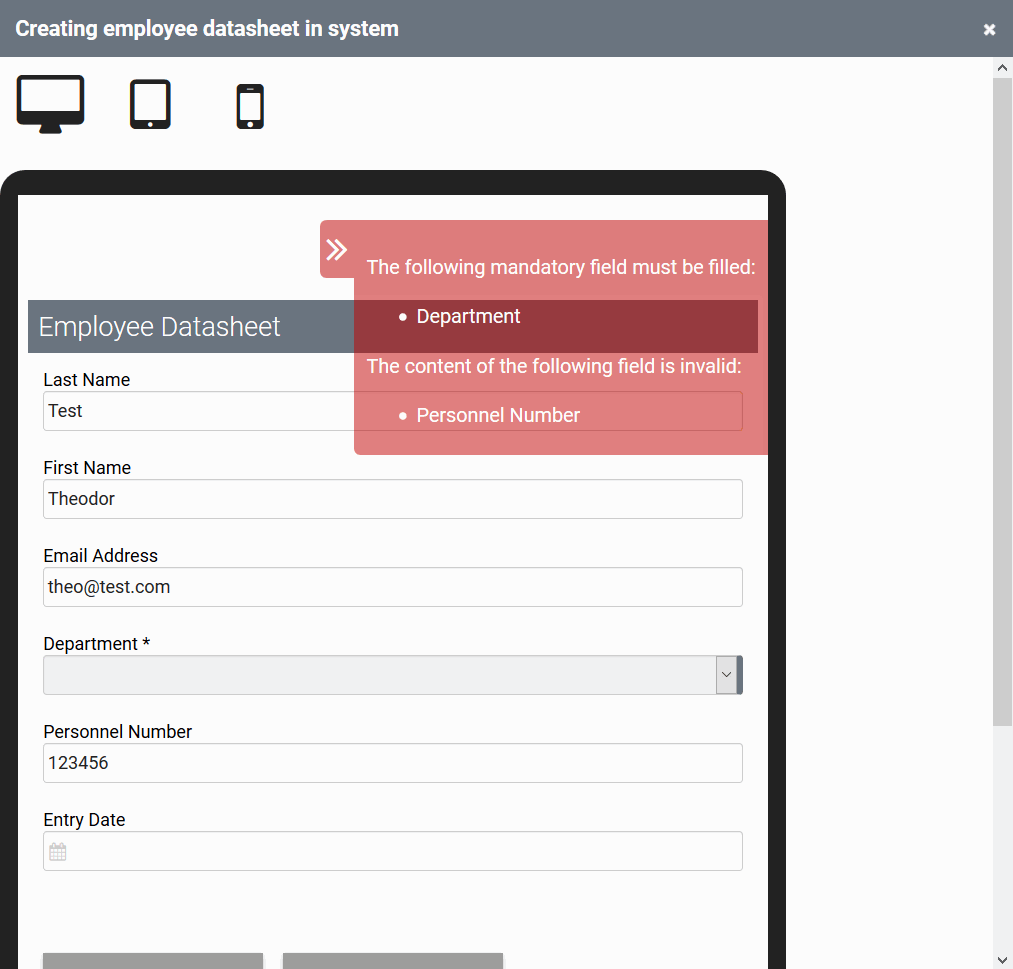
| When switching to the next process step, the input is validated. For example, if you have not filled all mandatory fields or if some of your input is not valid, a corresponding message will also be displayed in test mode. For further information about validation, visit page Validating Form Fields. |
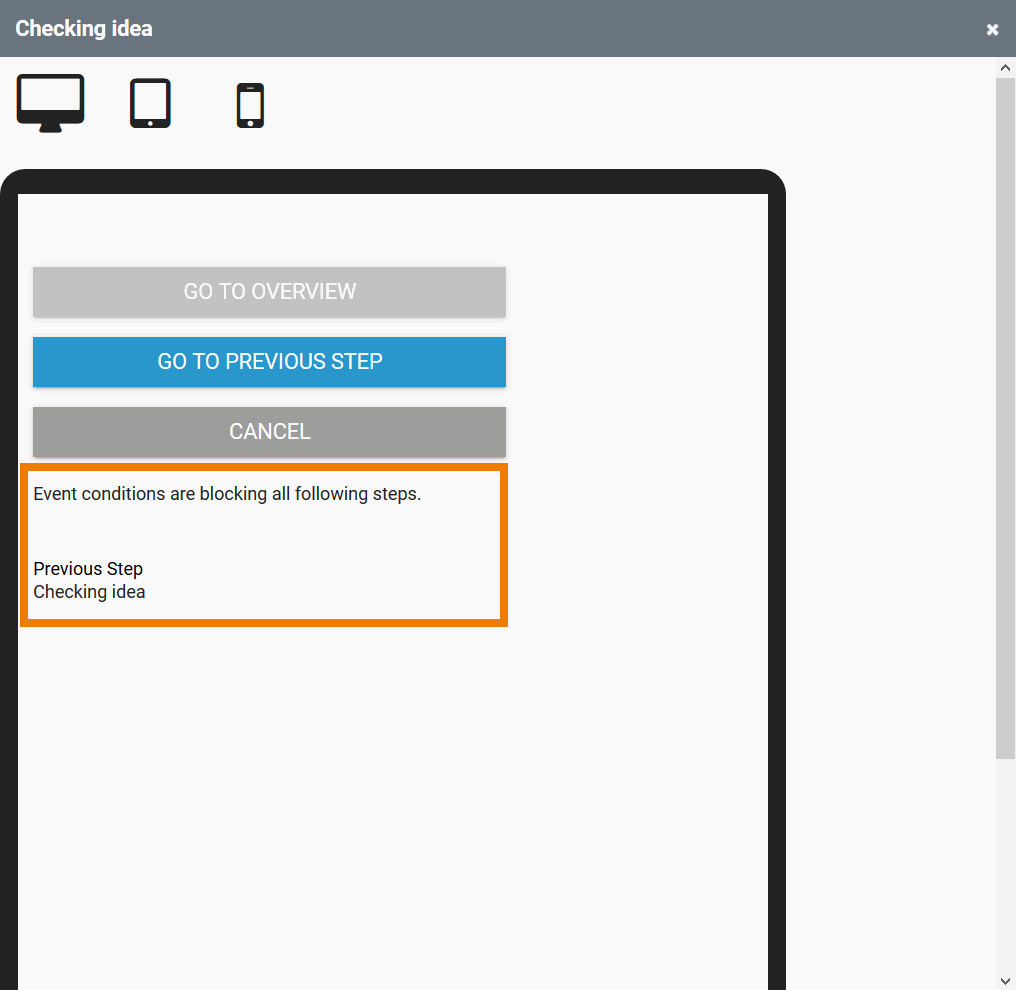
| You can also check constraint definitions in test mode: Incorrect condition checks generate corresponding notes. |
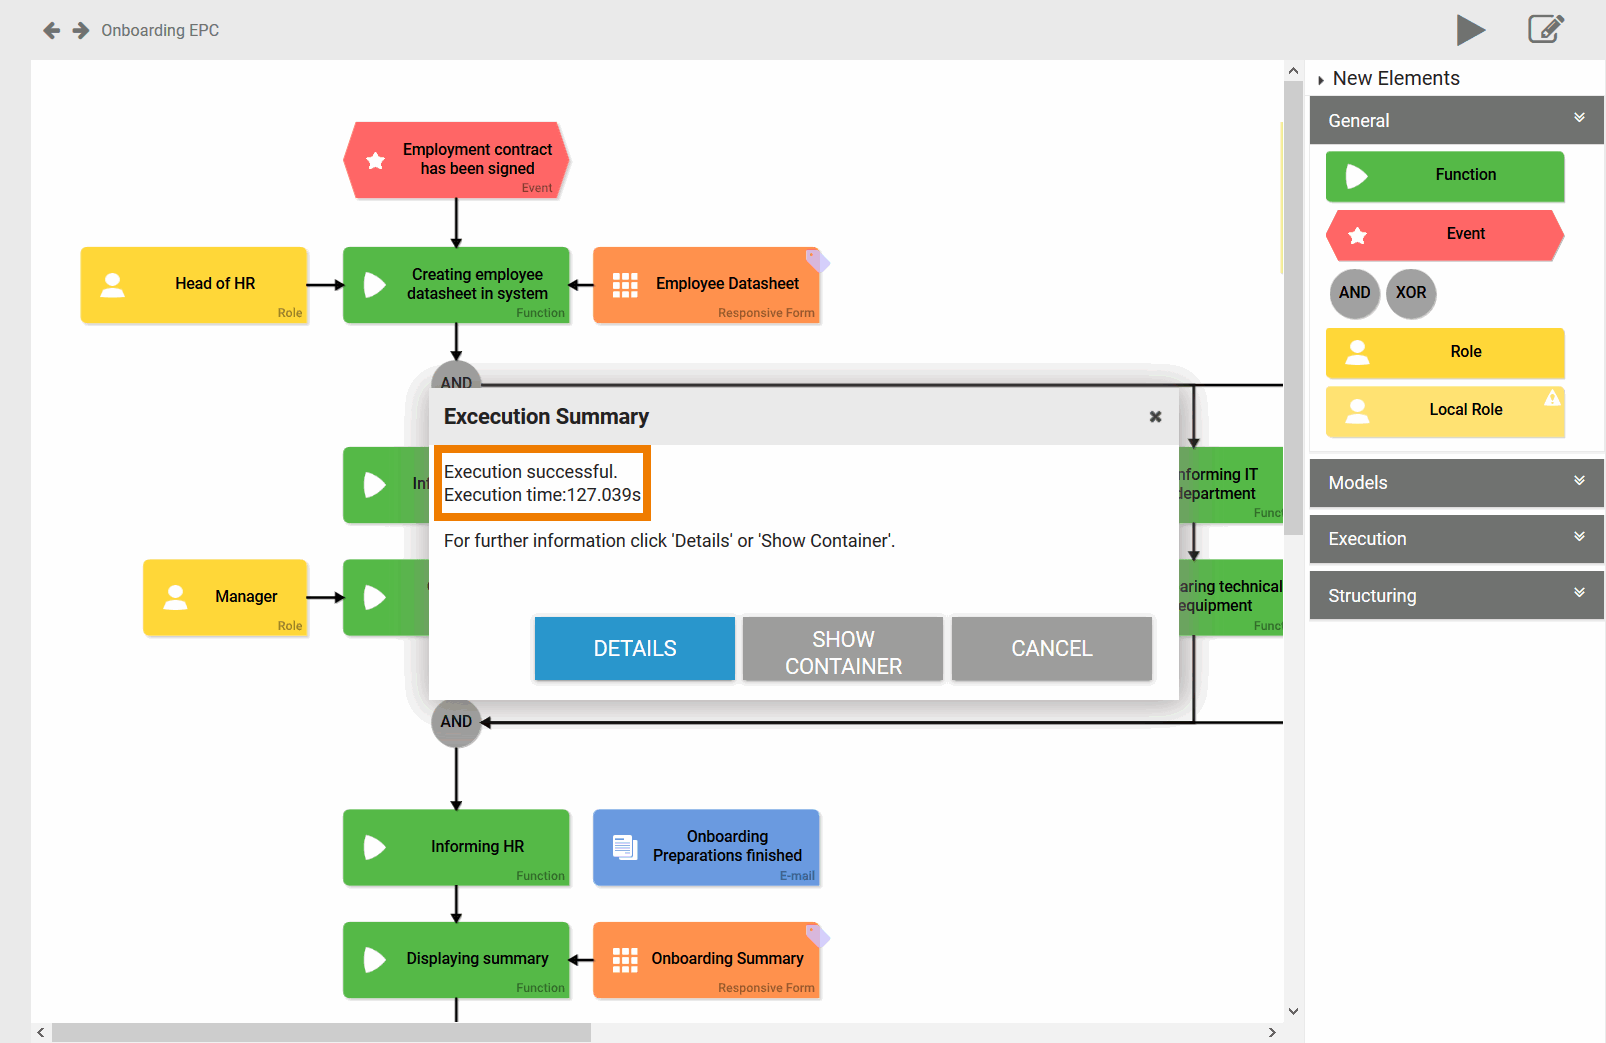
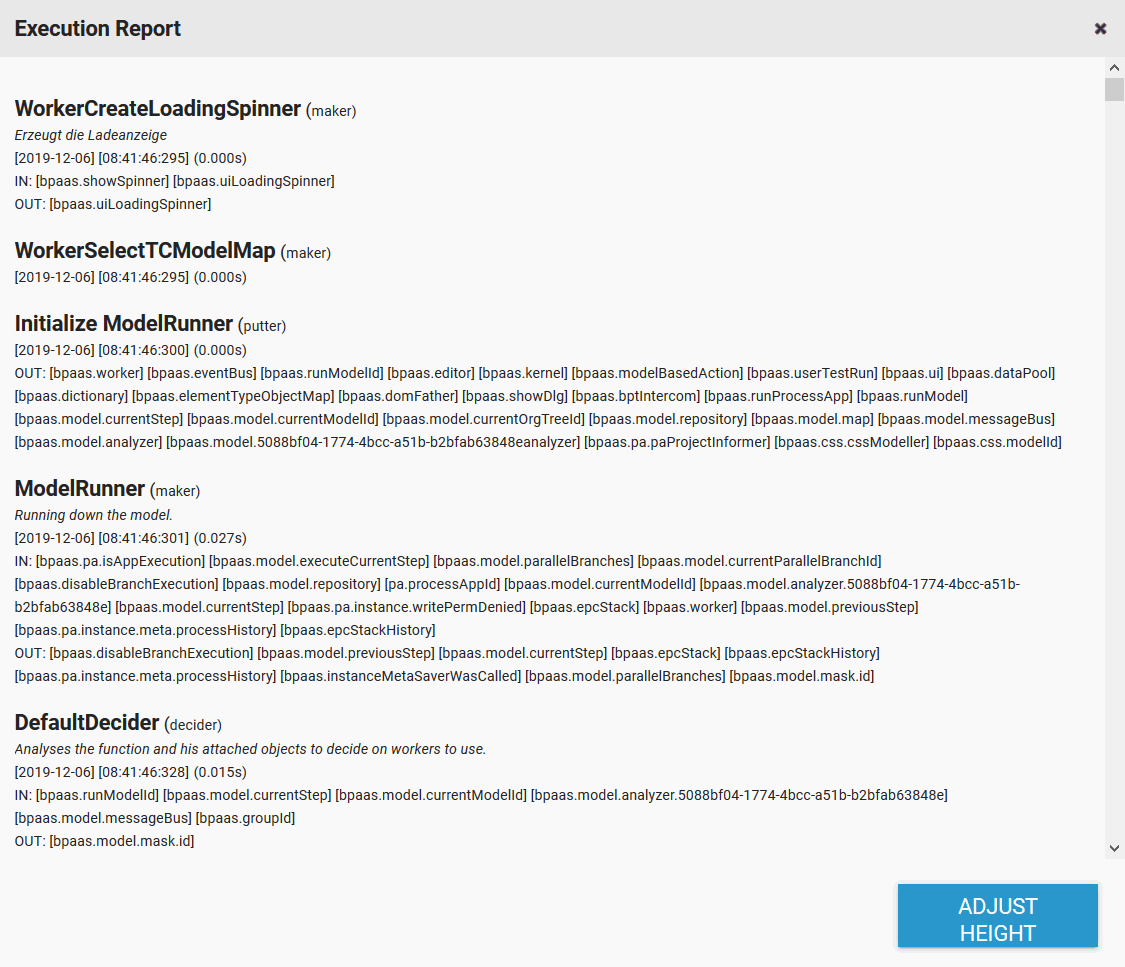
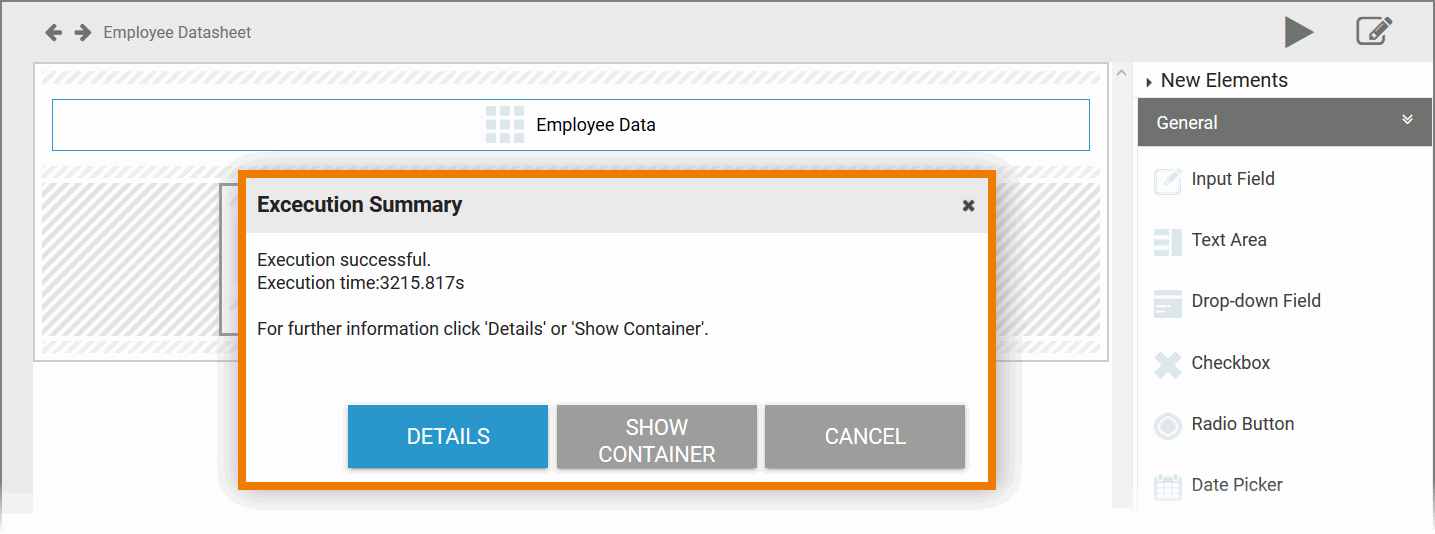
| If the model has been run through to the end, a summary is displayed. The Execution Summary shows the execution time and whether the run was successful. For further options use one of the three buttons:
|
| If you press the button Details, the Execution Report opens. |
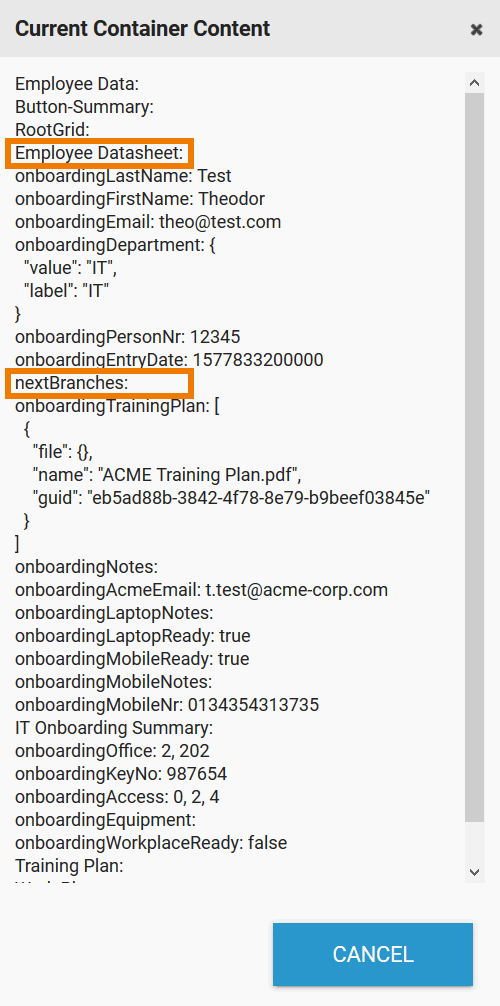 | You can also display the content of the container by pressing the button Show Container. The Current Container Content gives you an overview on the input made and the corresponding Field Names in Container. Click Cancel to exit test mode. |
| You can also start the test mode in a form. |
| You can also fill out the form here and validate the input. However, it is not possible to switch to the next process step. Clicking on Next ends the execution of the current form. |
| The Execution Summary as well as the Execution Report and the Current Container Content only contain the data of the current form. |

Overview
Content Tools