Your app does not only consist of the input forms. The app always contains an overview in which you can search through the stored data. You will now configure the overview of your app.
Refer to Configuring Tables and Configuring Overview Tables for further explanations on this topic.
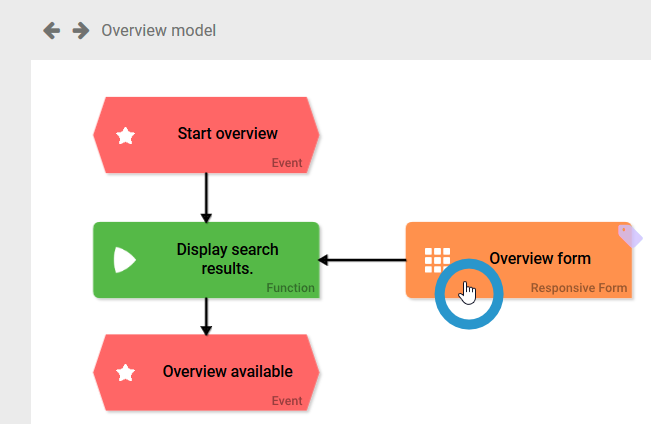
| You will now configure the overview of your app project according to your requirements. In the app project you can find the Overview model. Open it. |
| In the model, open the Overview form. |
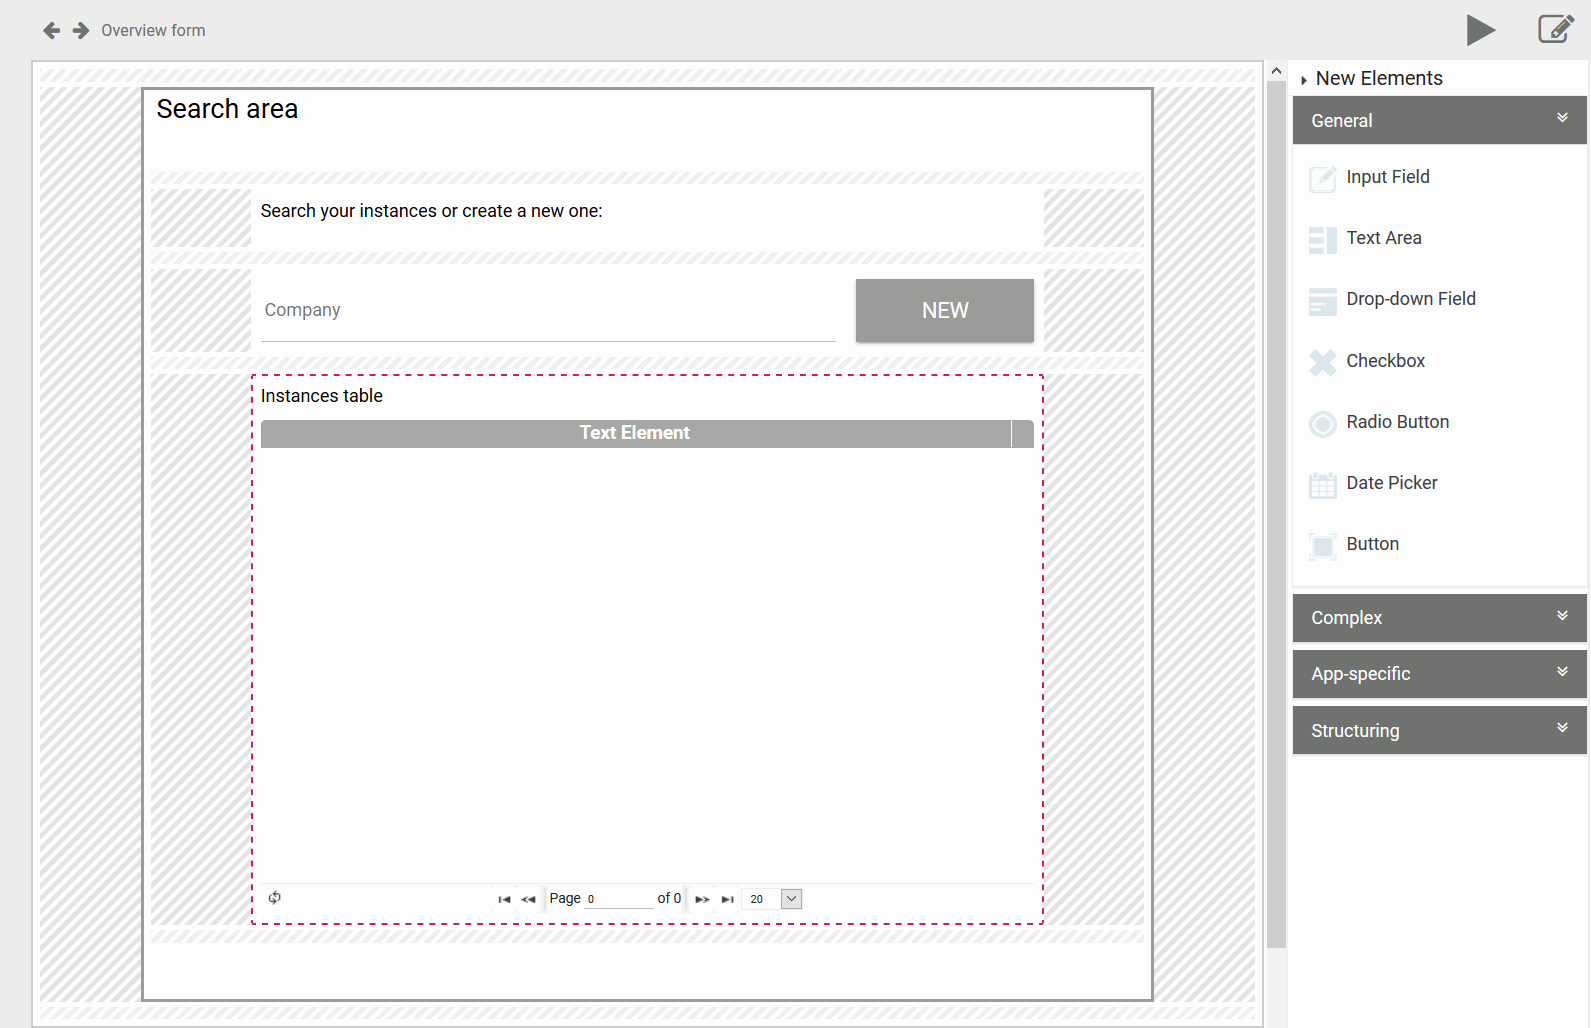
| Just like the input form, the overview form consists of a preconfigured area including:
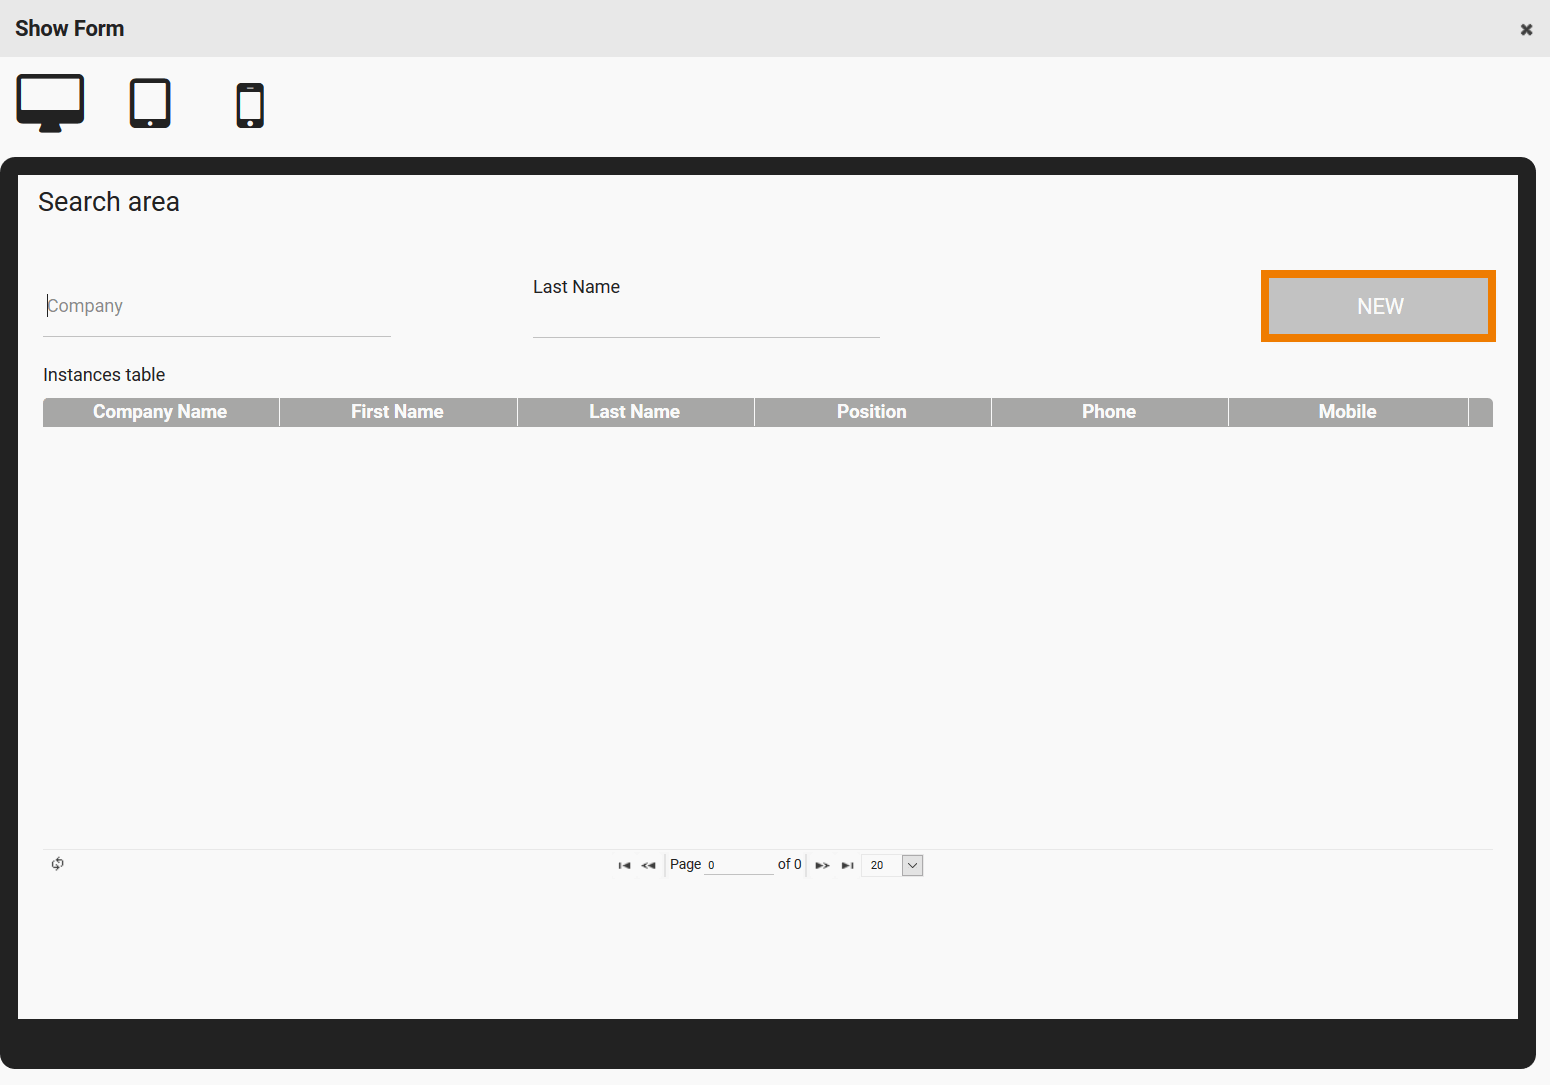
You will create instance data with your input form. If you want to be able to search for the data created, you now have to adapt the instance table. The instances created in the app will then be displayed in the table according to your definitions. |
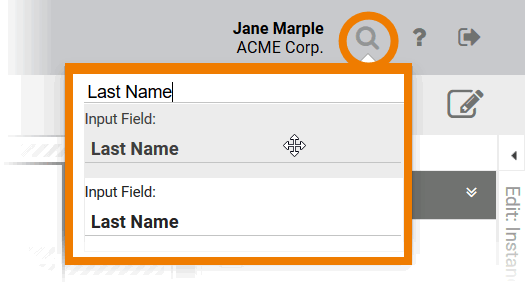
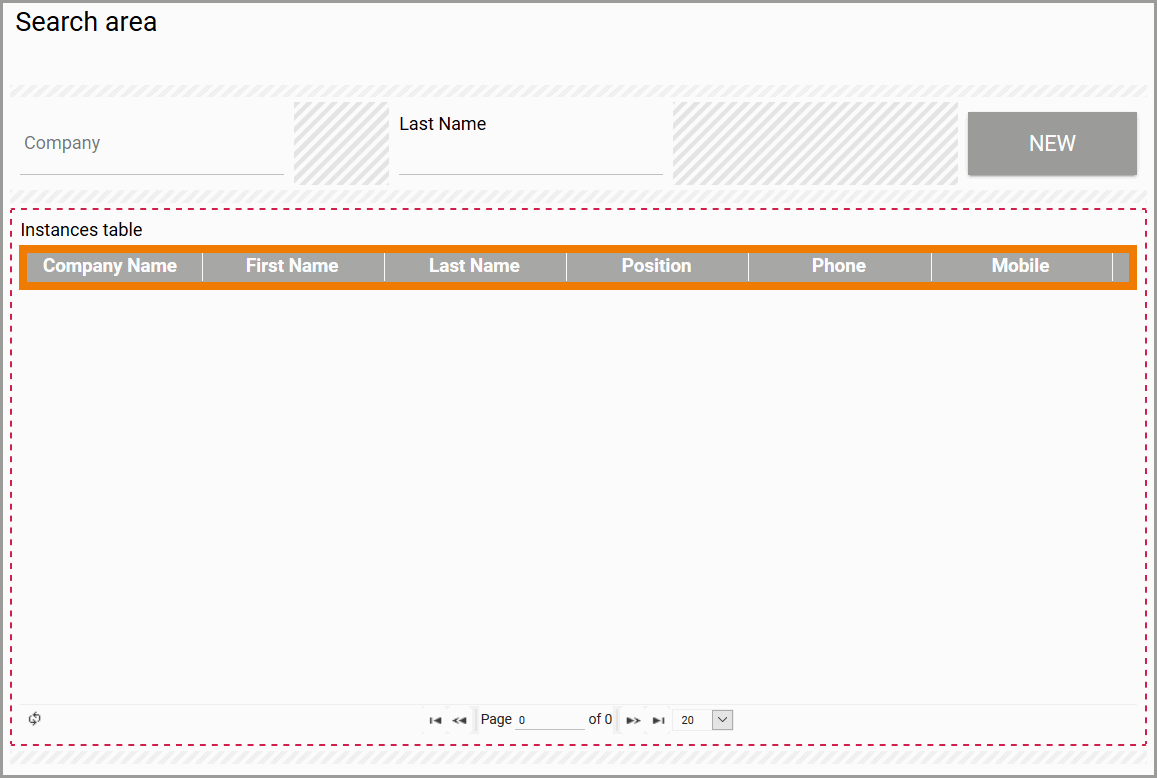
| Above the table you can insert form elements that serve as filters for the instance table's content:
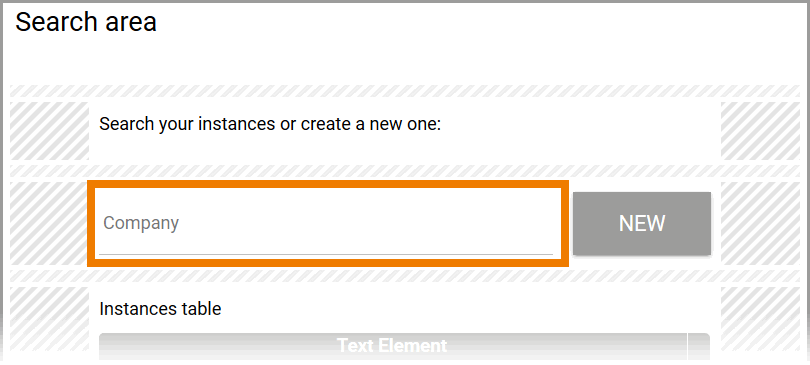
In the overview form, the field serves as filter. If you enter a search term in this field, the instance table will only display instances matching this term in the input field Company. |
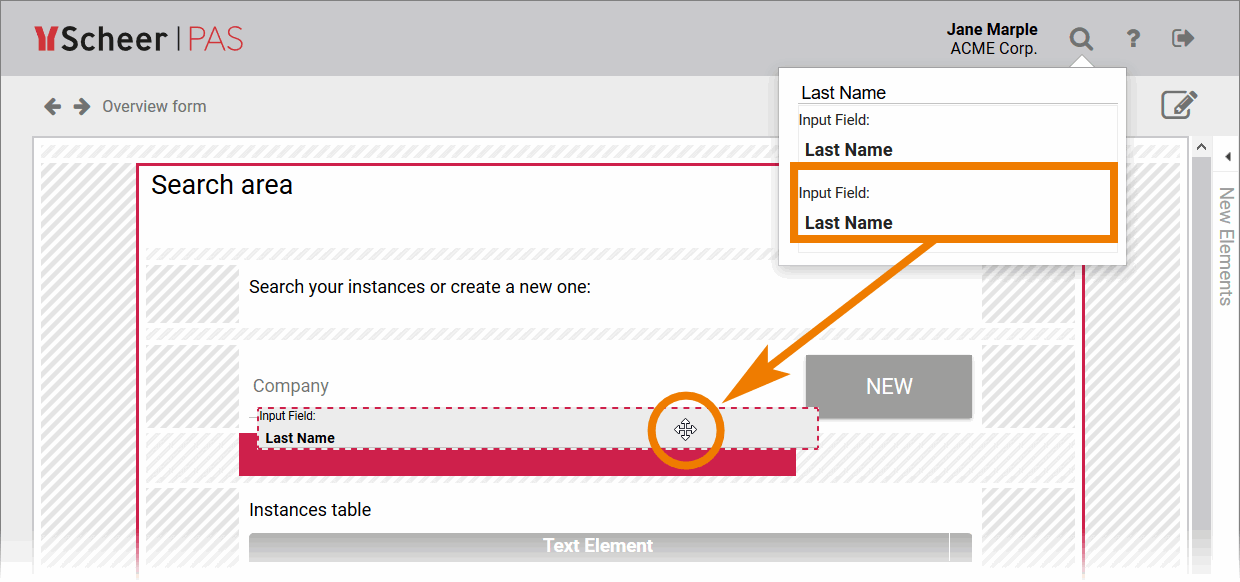
| Use the search function Enter the name of an already created form field to obtain suitable hits. |
| You can drag and drop the elements from the hit list onto the workspace. The fields of both forms are thus linked. All inserted form fields can be used as filters to reduce the content of the instance table. |
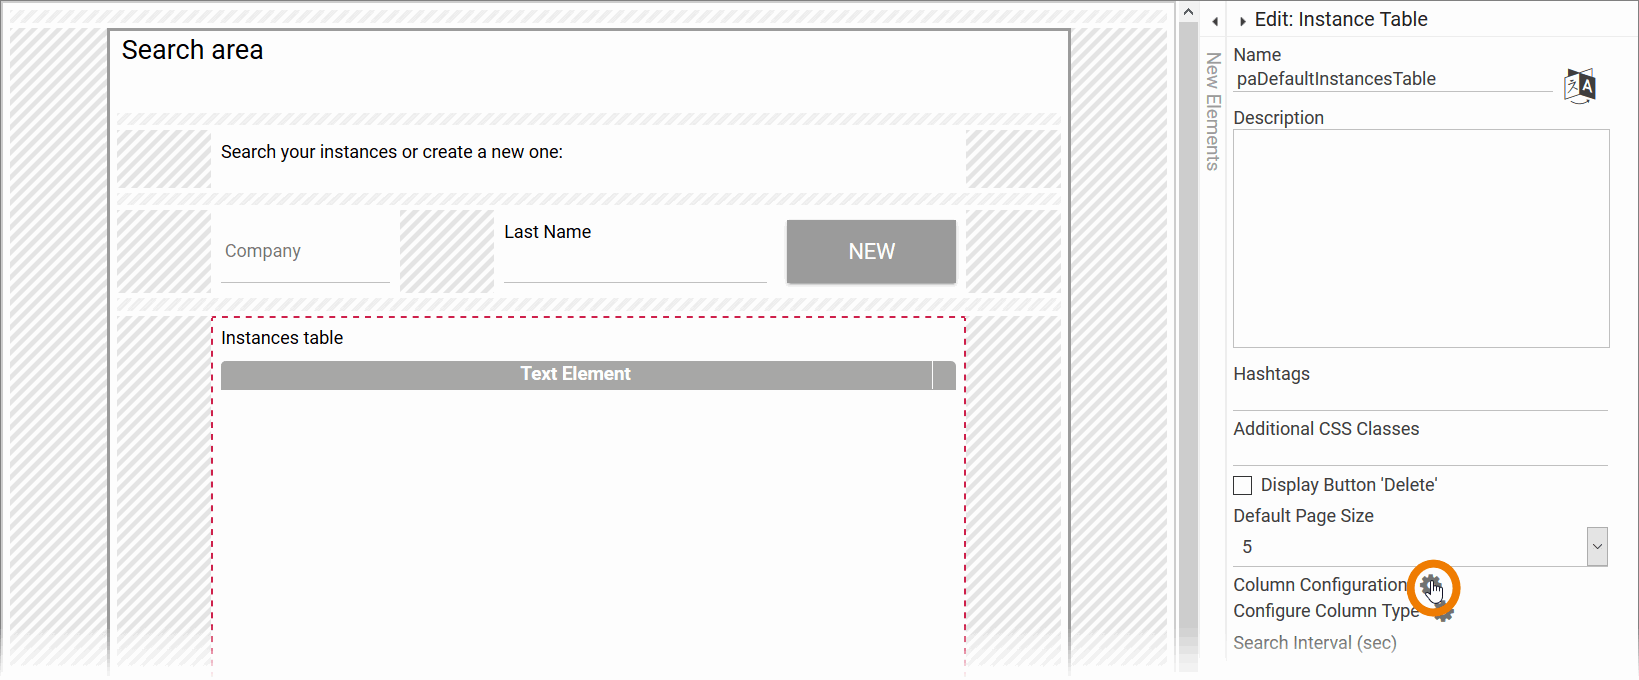
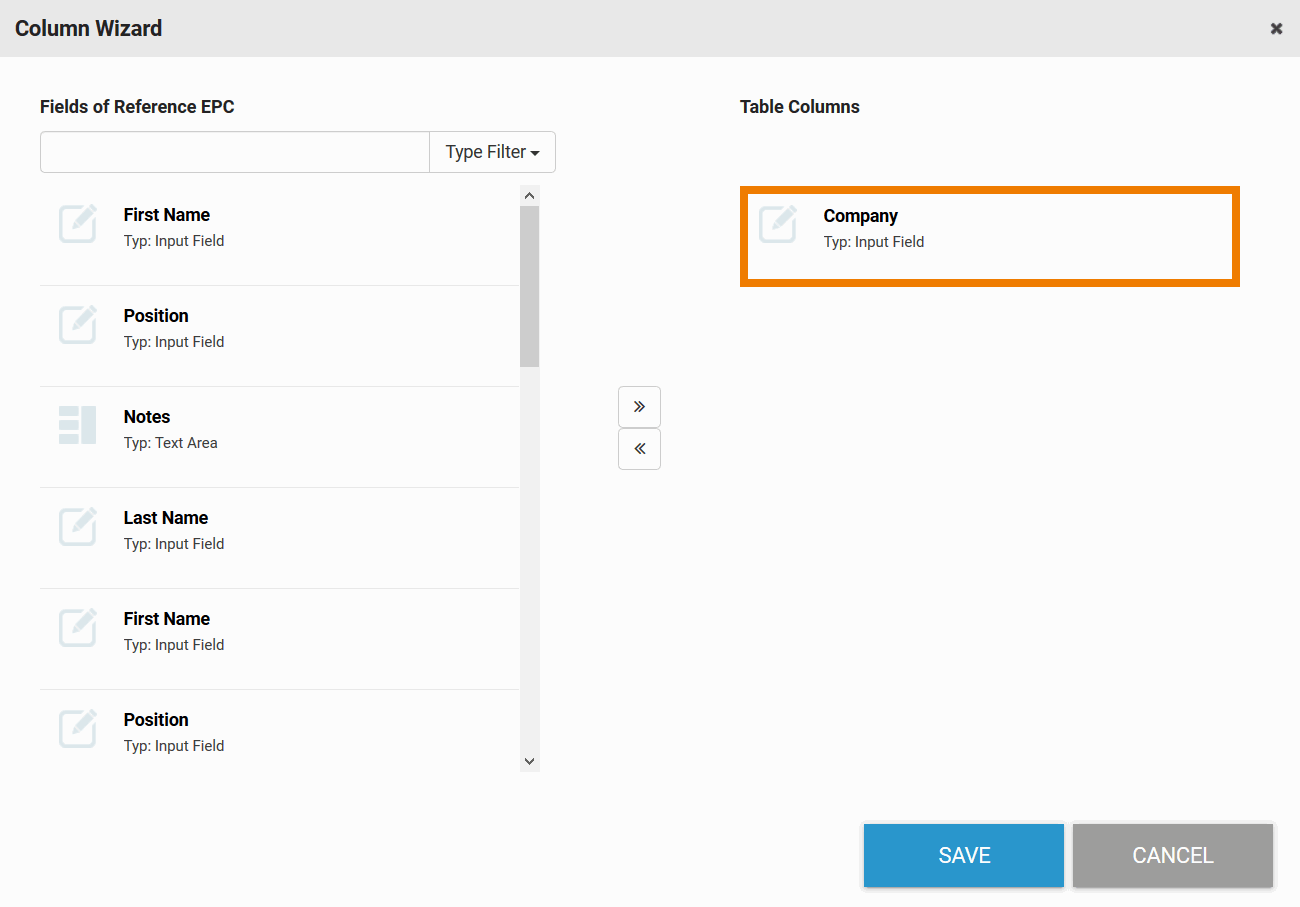
| You must now define which fields are displayed in the instance table. Select the table and expand the Edit Sidebar. Click on the gear wheel of the option Column Configuration. |
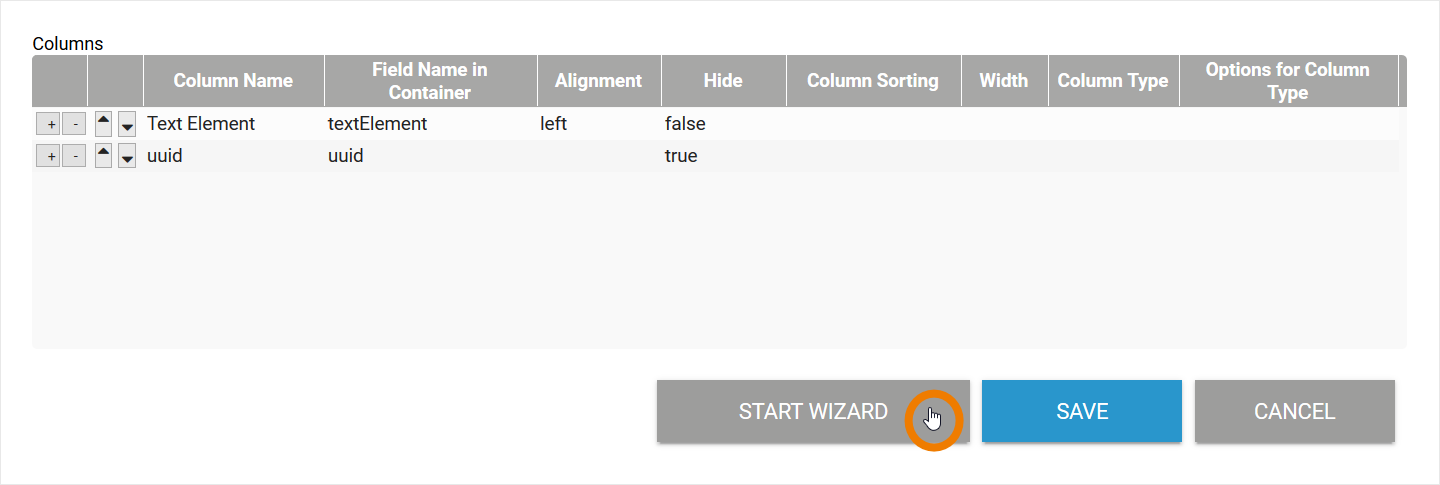
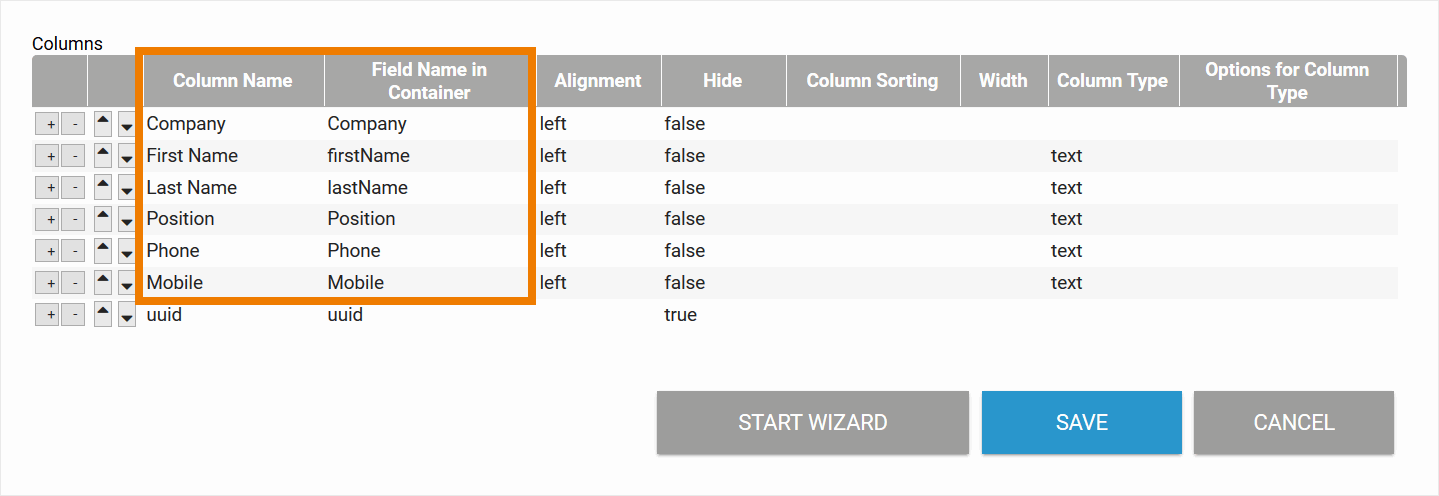
| The column configuration opens in a pop-up window. In this window, you can configure the instance table of the overview according to your requirements. Two default columns are already defined:
You can configure the table manually or use the column wizard, which assists you during configuration. Click on the button Start Wizard. |
| The wizard is divided into two parts:
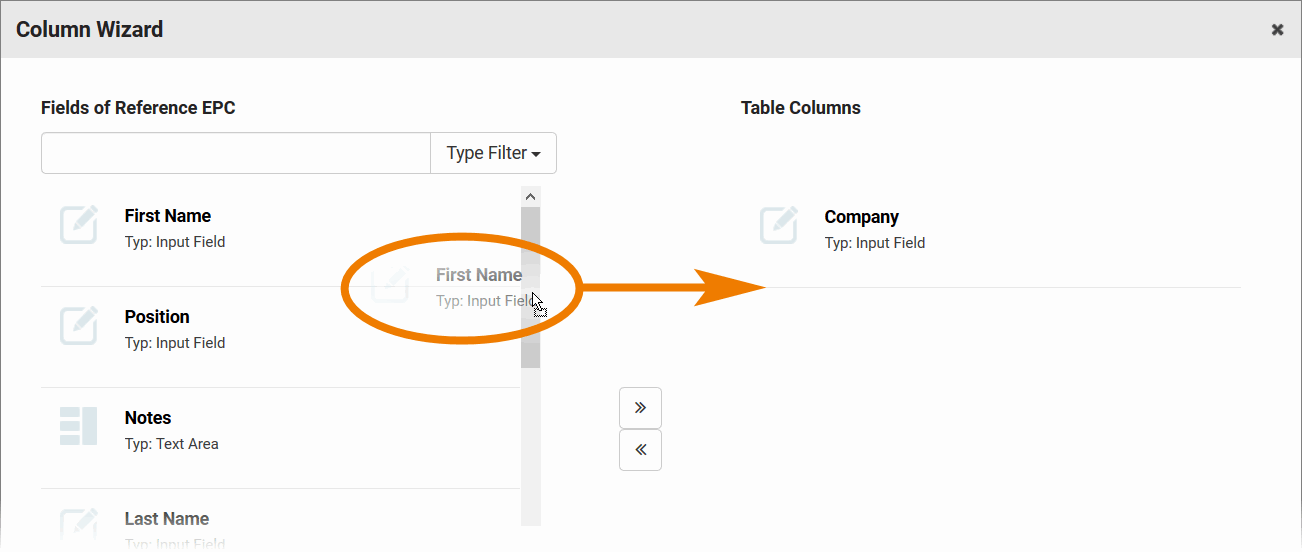
If you want to use all fields as table columns, click button >> to take the wohle content over. Accordingly, a click on the button << removes all fields from the overview. |
| Transfer the fields you want to display in the overview by either pressing the button >> or dragging and dropping the fields of your choice from the left to the right side of the wizard. |
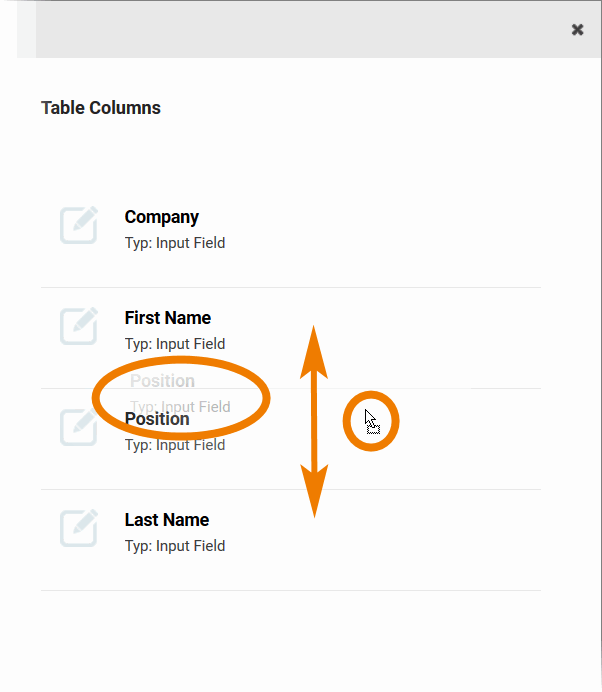
| The columns in the overview are created according to the sequence in the list. Change the order in the Table Columns list by simply moving the objects up or down. |
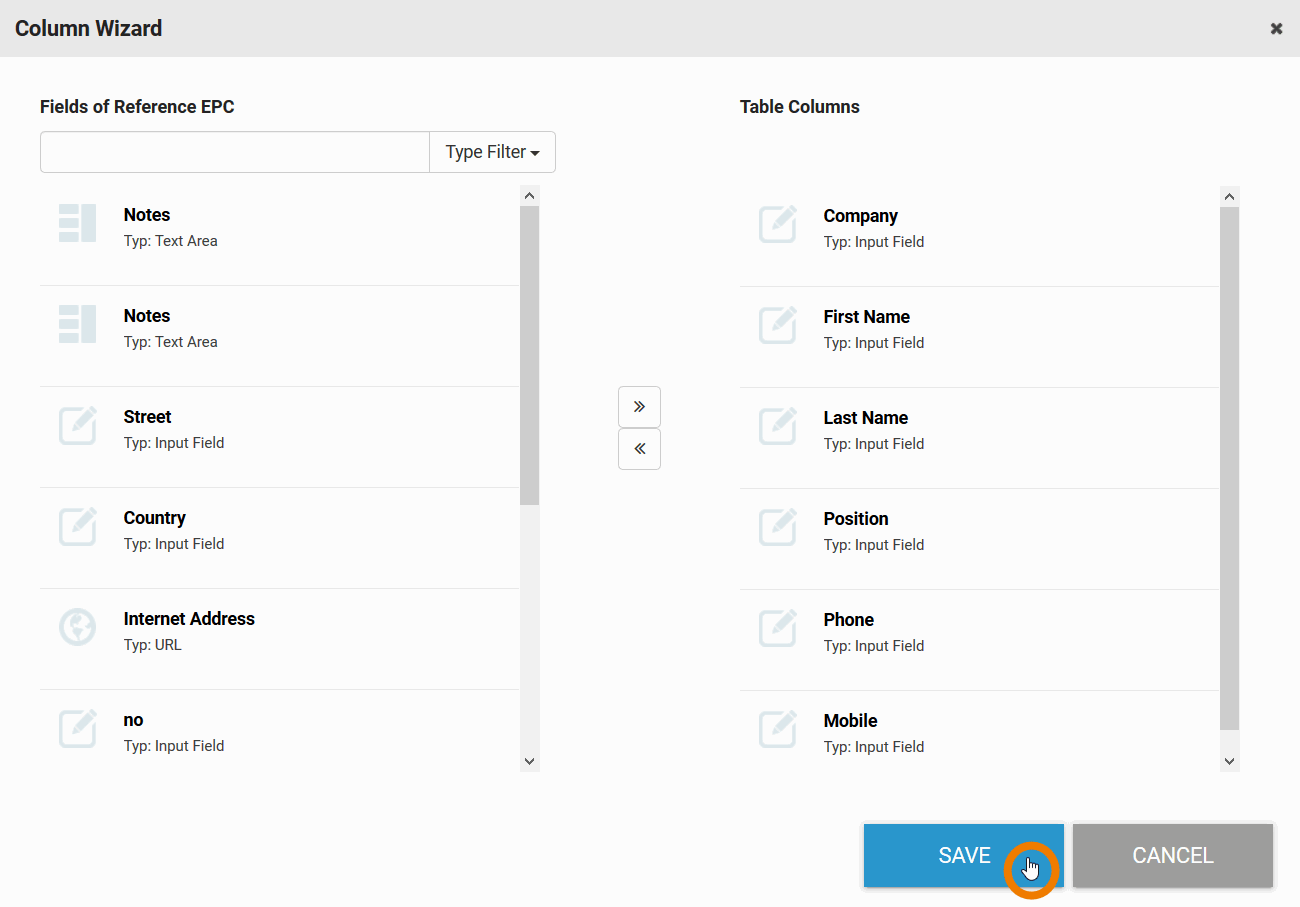
| Once you have arranged all the fields in the desired order, close the wizard by clicking Save. |
| The table of the overview is now configured according to the input in the wizard. The column wizard supports you in configuring the overview. It also inserts the correct Field Name in Container of each form element. However, you can also define all content in the instance table manually. |
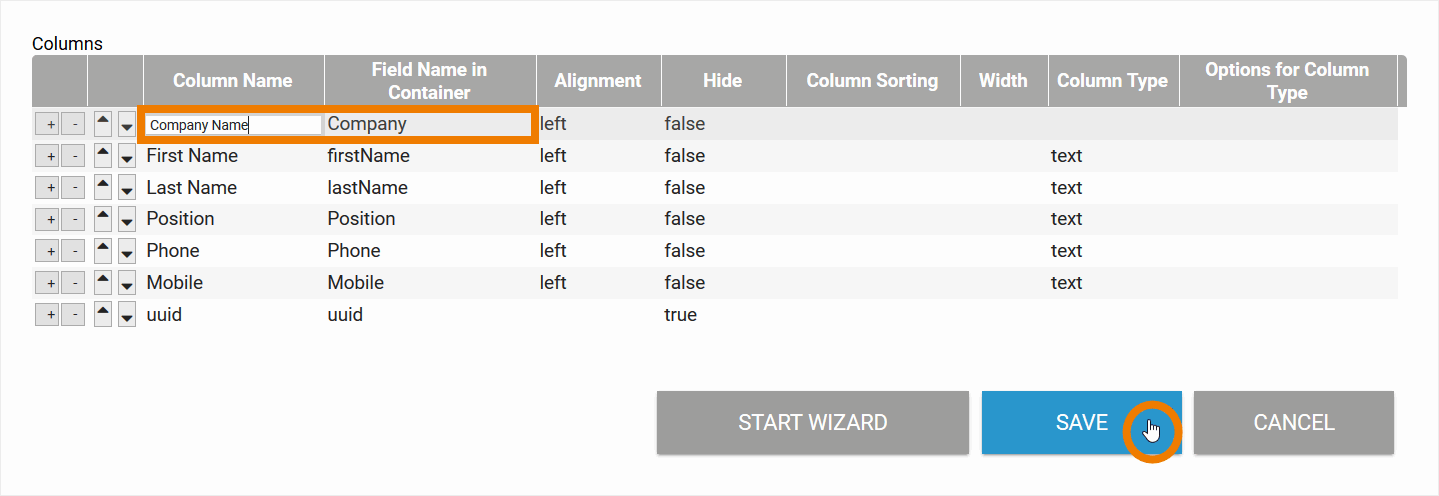
| The wizard copies the fields as they were defined in the input form. Sometimes you may want to display the fields under a different name in the overview. The reference for the columns content is the Field Name in Container. If you want the column to display a different name, change the content of Column Name. In our example, we want the content of field Company to be displayed as Company Name in the overview. Save your changes. |
| The instance table now displays the columns as defined:
|
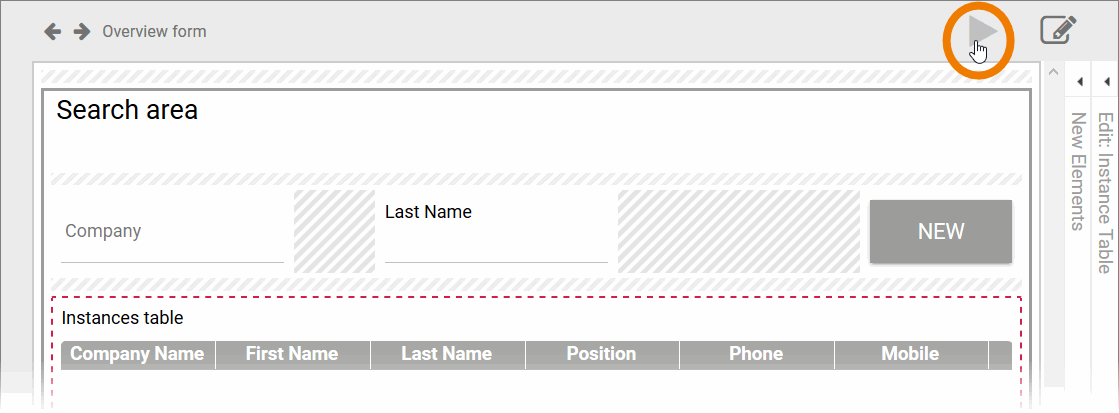
| You can use the button |
| The New button for creating instances branches to the reference model and cannot be tested from the overview model in play mode. If you are satisfied with the configuration of the overview, you are ready to execute your app. |
Related Documentation:
Overview
Content Tools