Basis for the feasability of a process are the forms designed within your EPC models. Each form is assigned to a function. Now you have to design the forms for ACME's address book.
Designing a Form
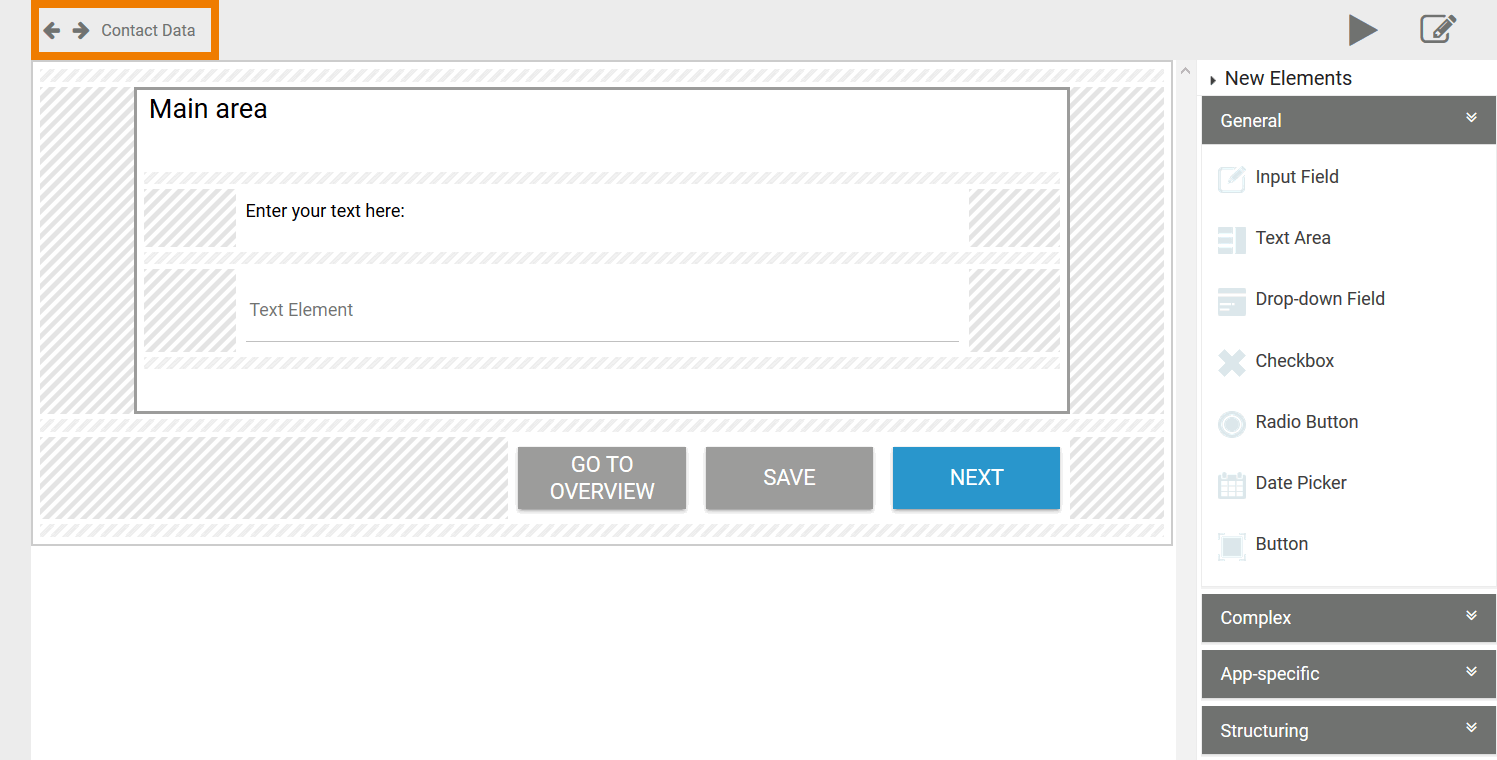
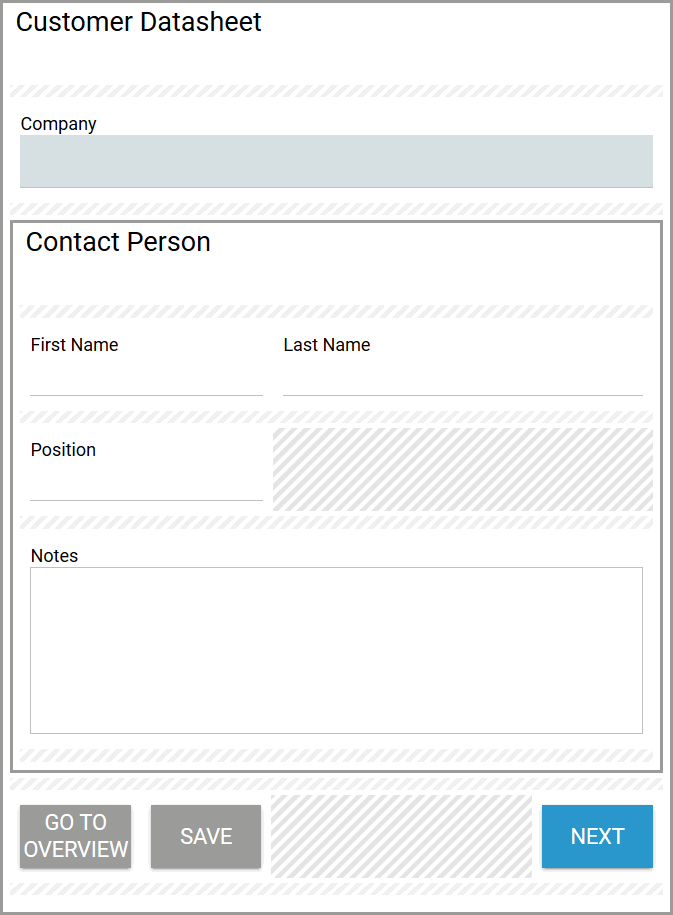
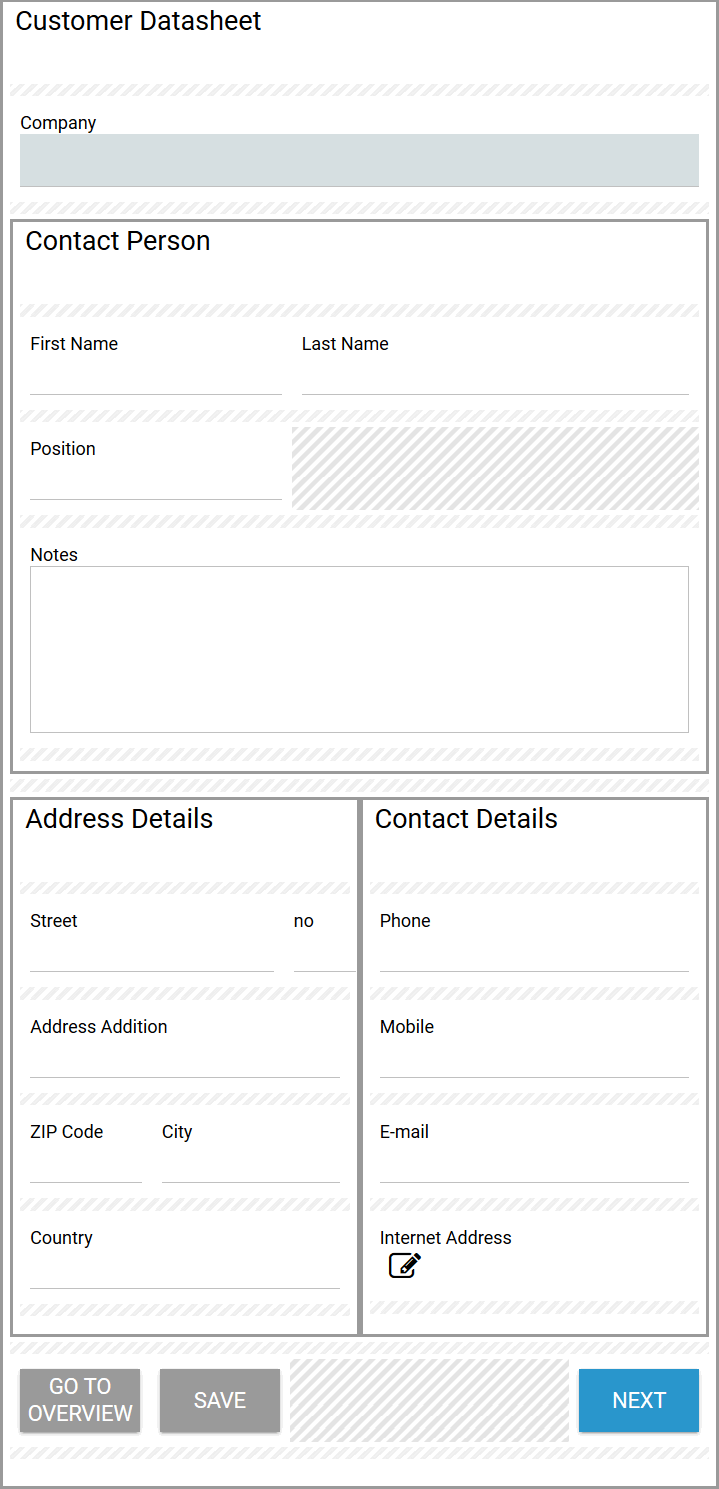
| You opened the form Contact Data. If you create a new app project, the first form in the Reference model contains a predefined area including the following elements:
|
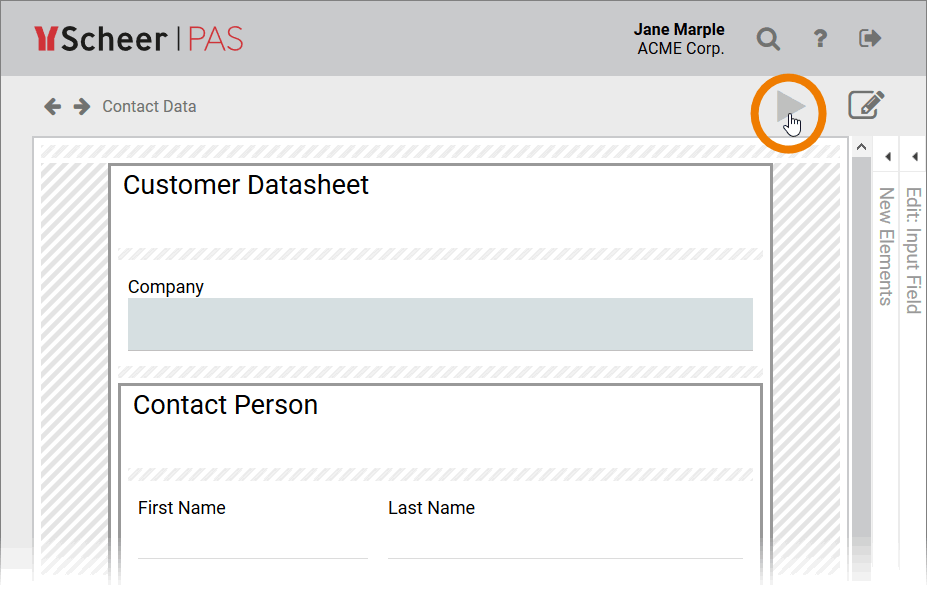
| At the right side of the workspace you will find the Sidebar New Elements. Use it to drag and drop additional form fields onto the workspace. The elements are classified in four categories:
Click on the category name to display the associated elements. Refer to BPaaS Guide > Creating Form Elements to learn more about the creation of form elements and how to use them. |
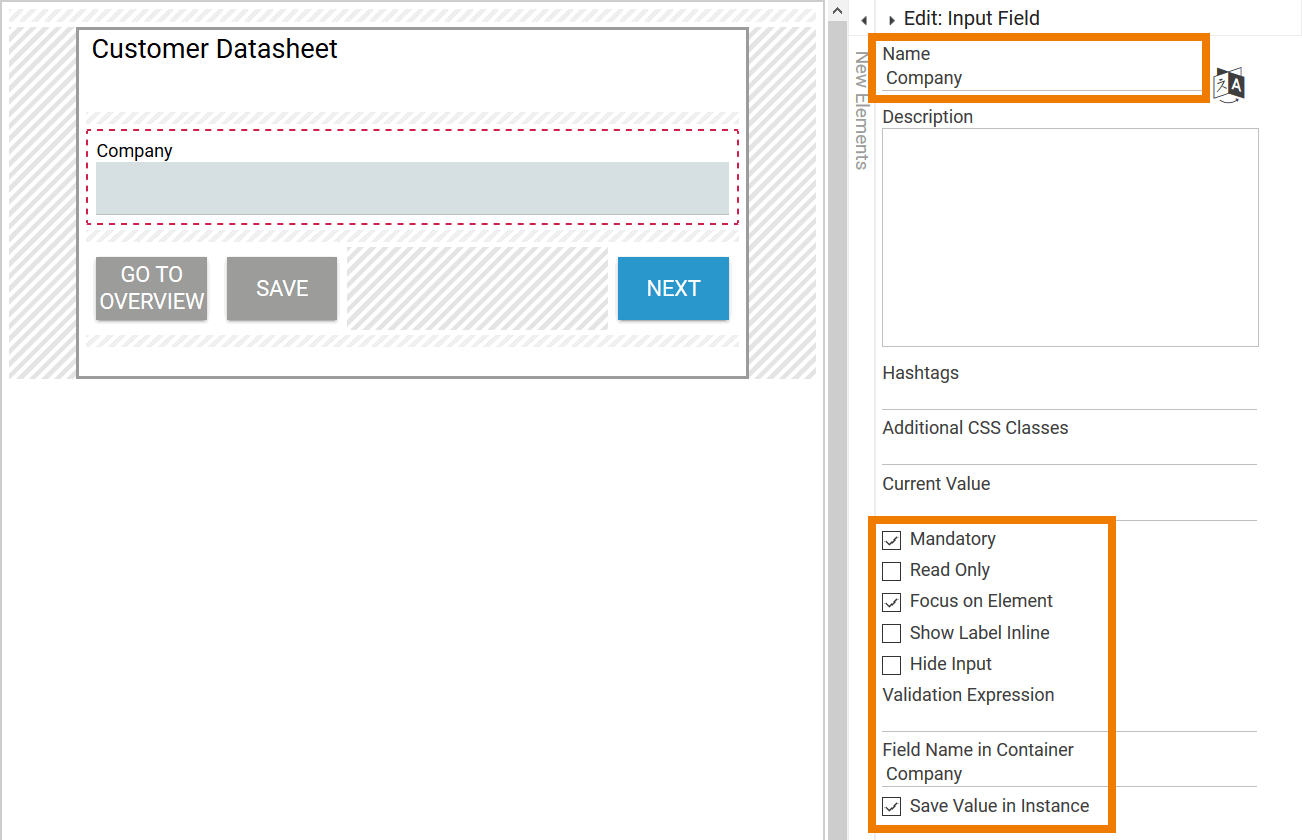
| You can define additional field properties for the active element (marked by a red border) using the Edit Sidebar. Here you can for example change the name of the element, define whether it should be a mandatory field and much more. Now use the already existing form fields:
|
|
For details about the concept of the Field Name in Container refer to BPaaS Guide > The Container Principle. |
| Create additional form elements, for example:
|
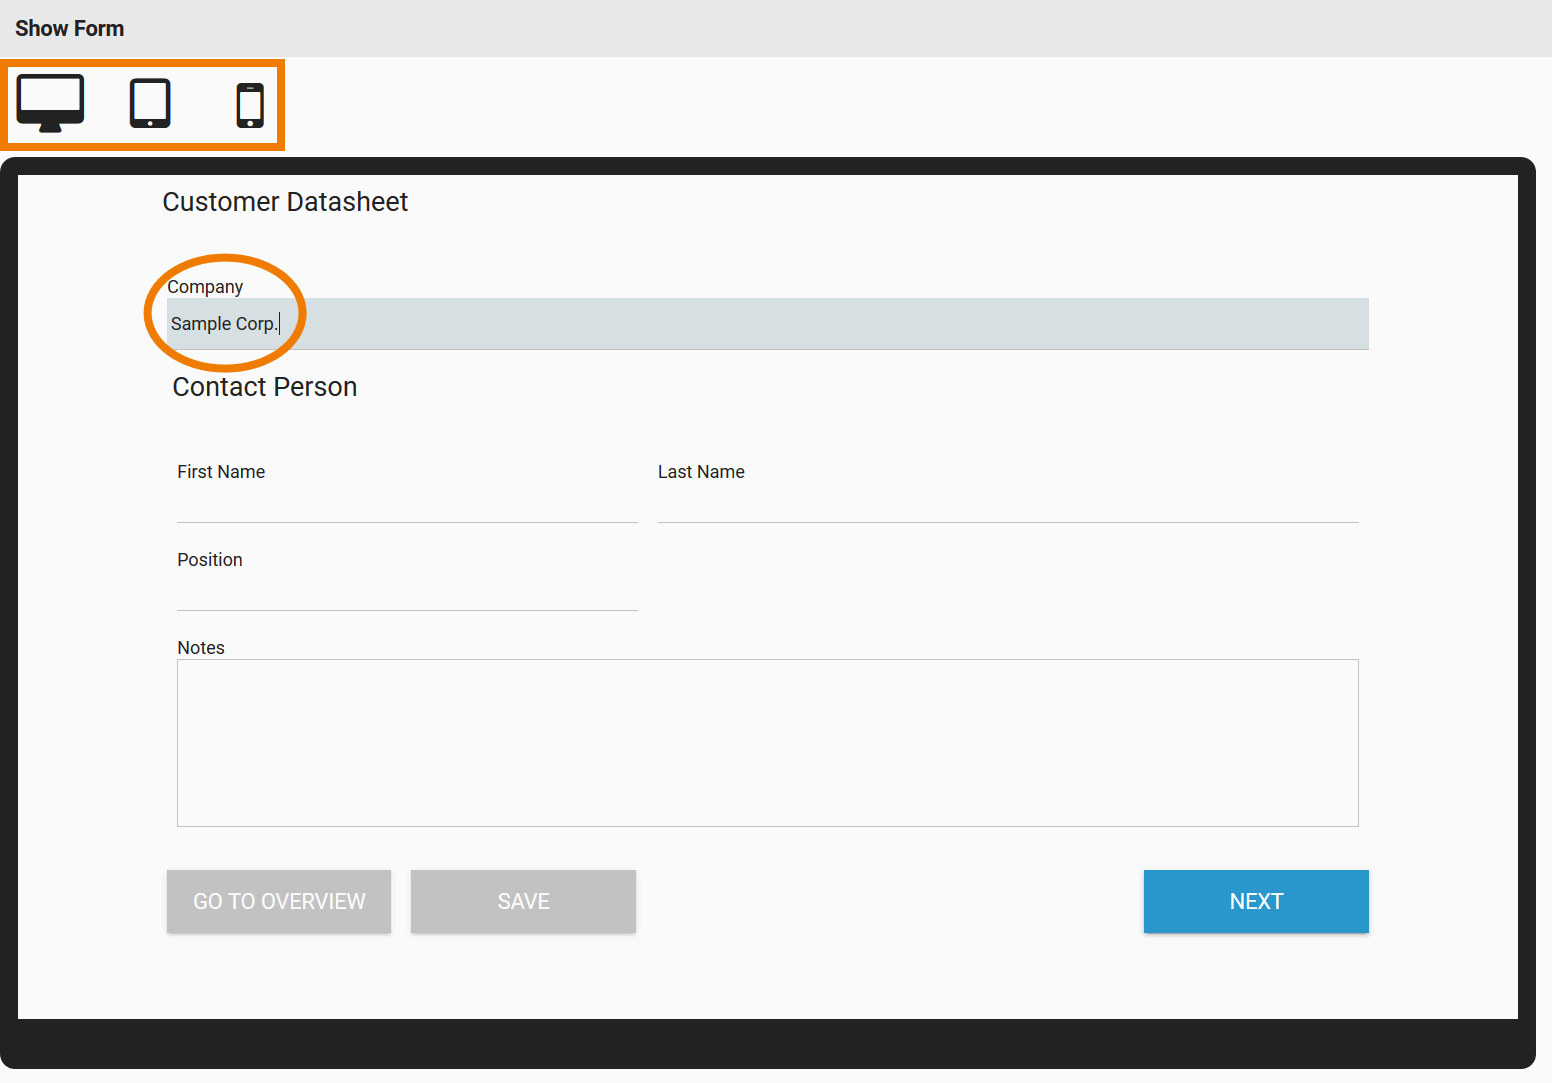
| Use the Play button to execute your model. If you use the preview function in the Forms Editor, only the current form is displayed. |
| The form view is displayed in a pop-up window. By clicking on the corresponding icons, you can switch between different views:
In test mode, you are also able to insert text in your form fields. After testing close the pop-up window. |
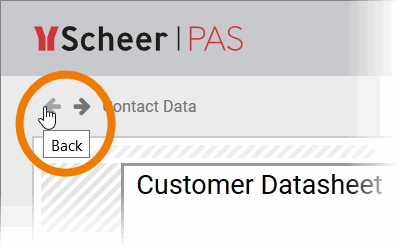
| If you want to add more fields or rework the layout, you can now make further adjustments in the Forms Editor. When your form is finished, navigate back to the EPC. |
Reusing Forms
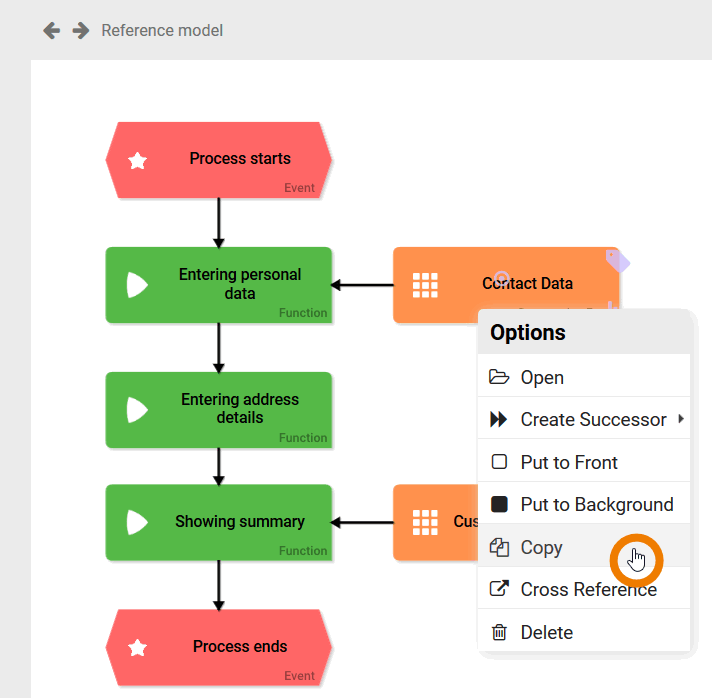
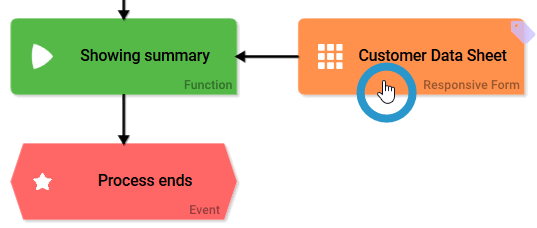
| In the next process step, the user shall insert the address details of the customer, but the contact person's details should also be displayed again. Therefore you can reuse the first form Contact Data. Right-click on the form element Contact Data to open the context menu. Select option Copy. |
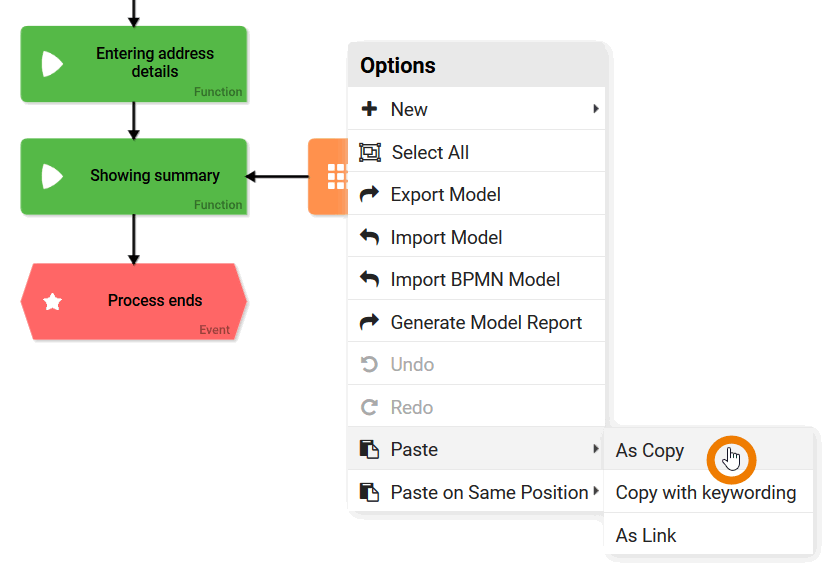
| Then right-click on the empty workspace and choose the context menu option Paste > As Copy. A copy of the first form is created on the workspace. |
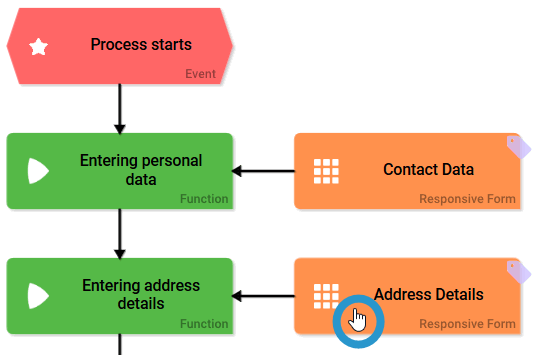
| Rename the form element, for example to Address Details. and connect it to the function Entering address details. Open the new form. |
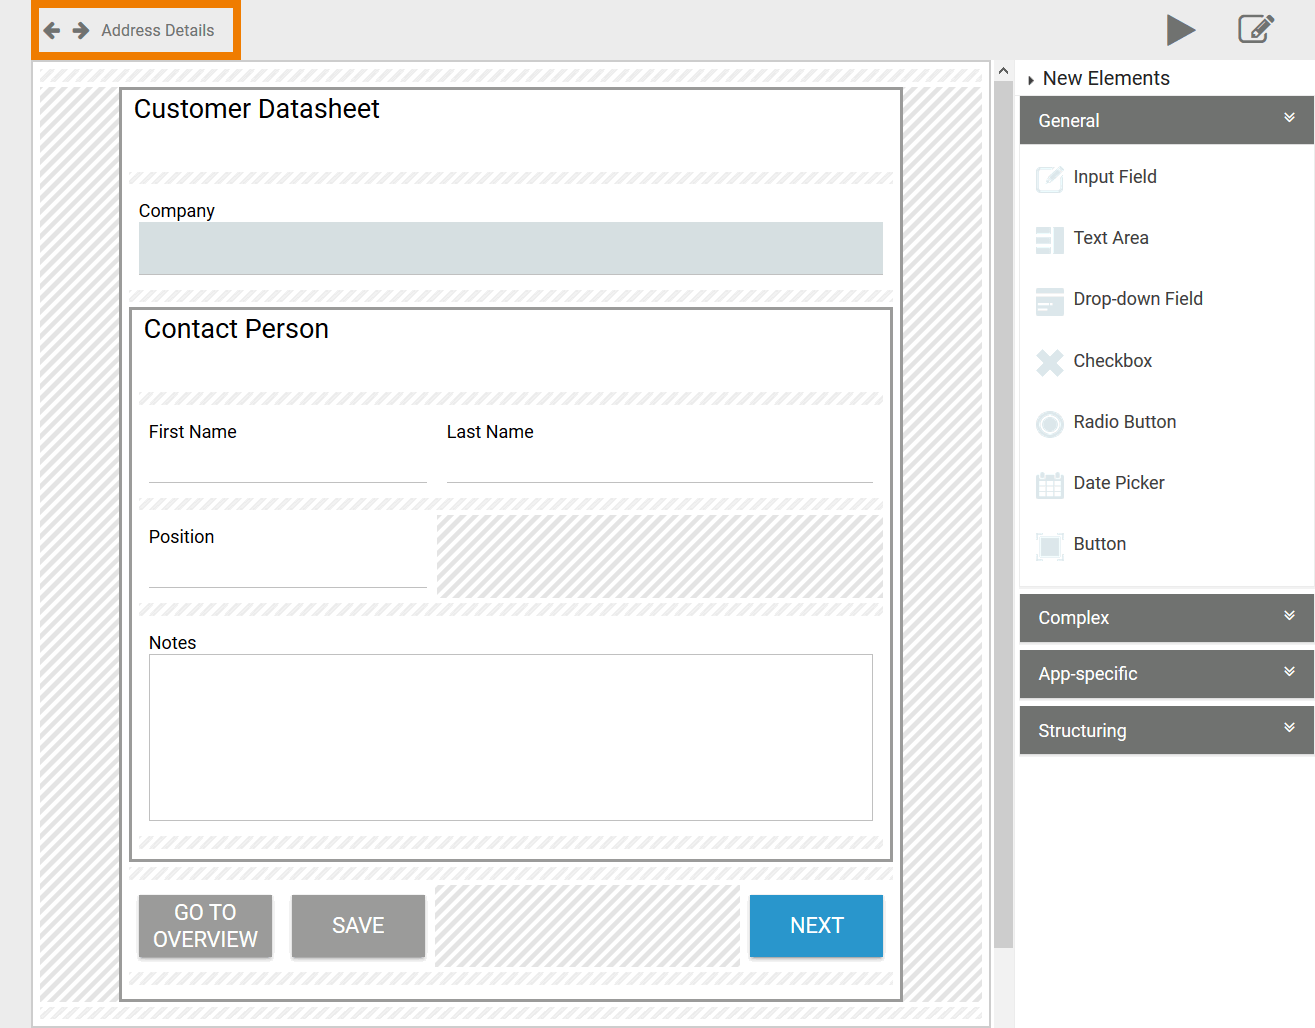
| The copy contains the content of the first form. Extend the content by creating further form fields for the address details. |
| In our example, we added the following fields:
|
| When your form is finished, navigate back to the EPC. |
Designing a Summary Form
In the last process step, all entered customer data should be displayed in a summary. The creation of a summary form is very easy, as a preconfigured form element exists for this purpose.
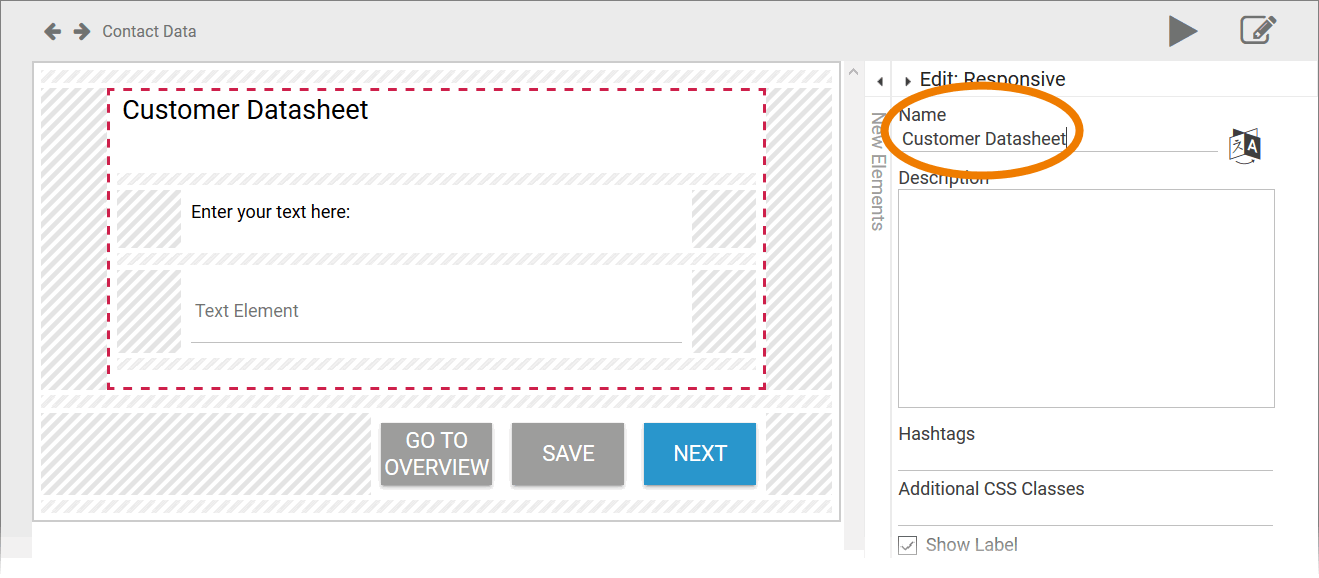
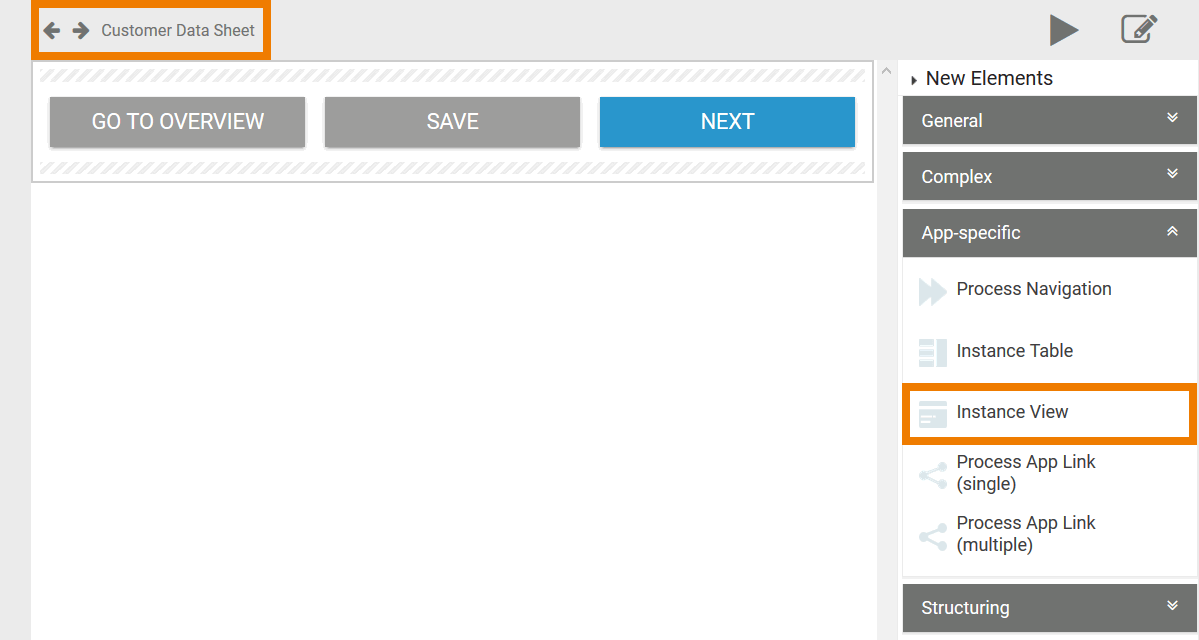
| Open the last form Customer Data Sheet. |
| A newly created Responsive Form element is empty. It contains only three preconfigured default buttons:
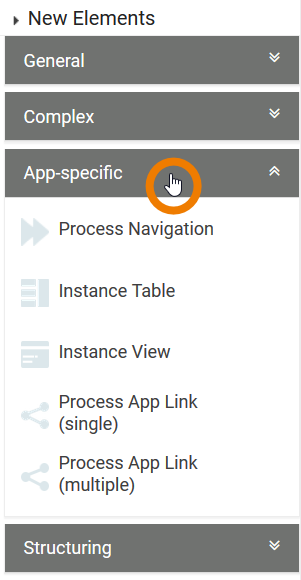
Open the category App-specific in the Sidebar New Elements. Here you will find the necessary form element to create a summary: Instance View. For further information about the usage of the Instance View refer to BPaaS Guide > Using the Instance View. |
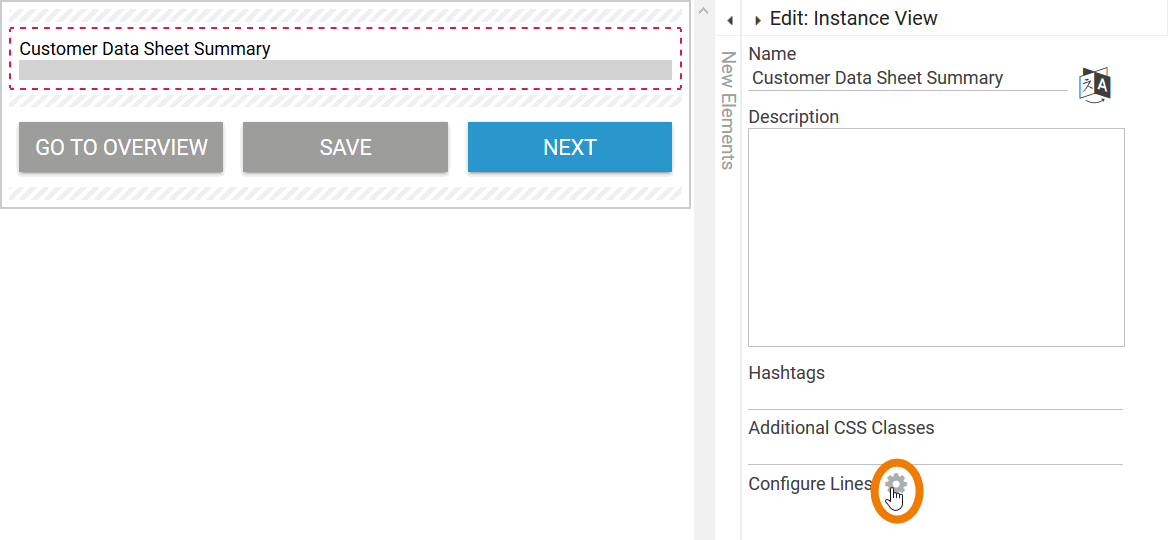
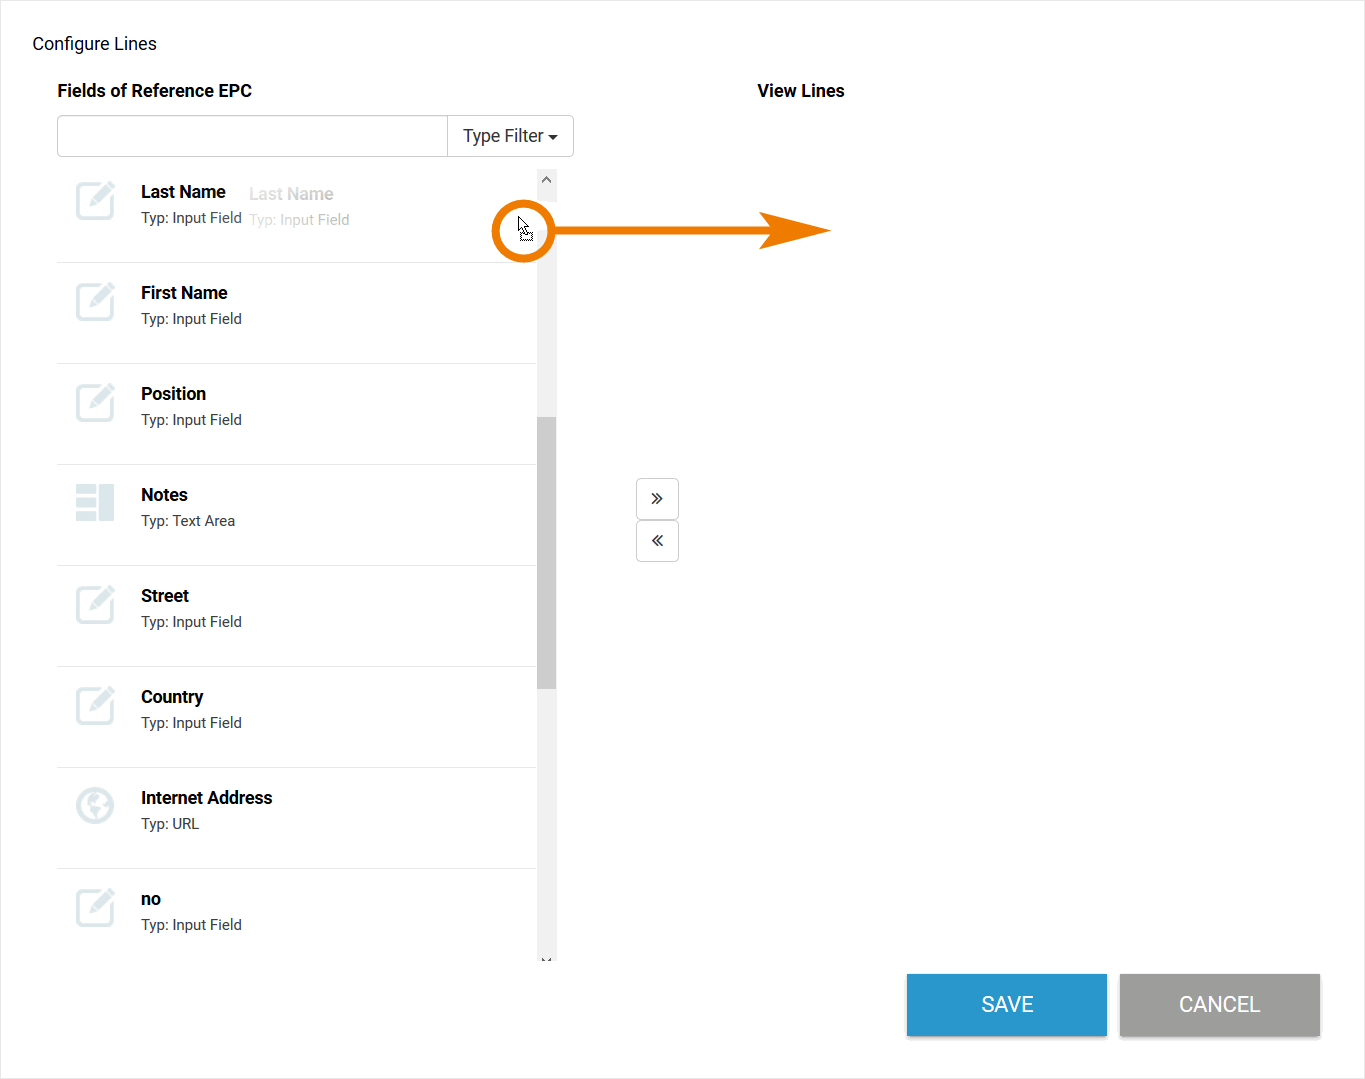
| Drag the element to the workspace and rename it (for example Customer Data Sheet Summary). In the element's settings in the Edit Sidebar you can find the option Configure Lines. Open the configuration editor by clicking on the gear wheel. |
| A wizard supports you during the configuration. The wizard is divided into two parts:
If you want to use all fields, click button >> to take the wohle content over. Accordingly, a click on the button << removes all fields from the instance view. Drag and drop the fields you want to display in the summary to the right side of the wizard. |
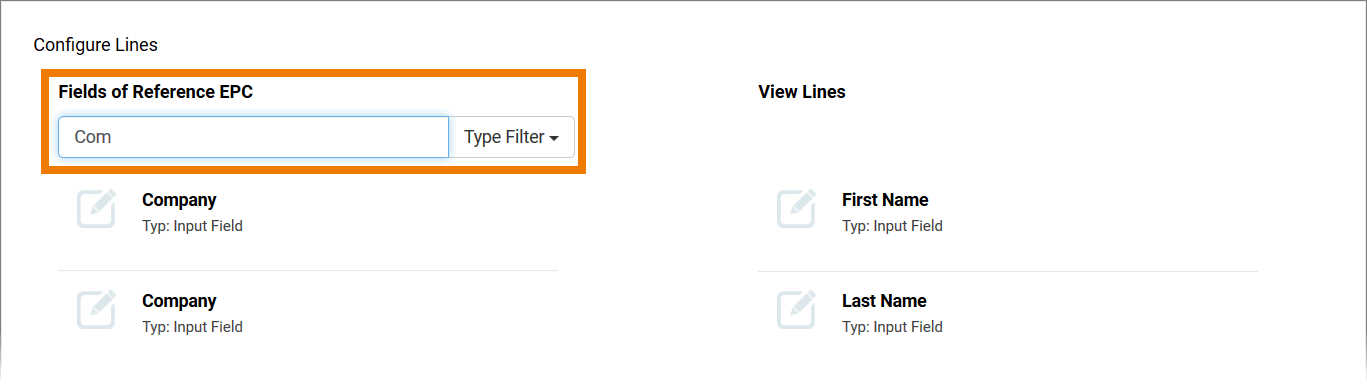
| You can also use the wizard's search function to find specific fields. |
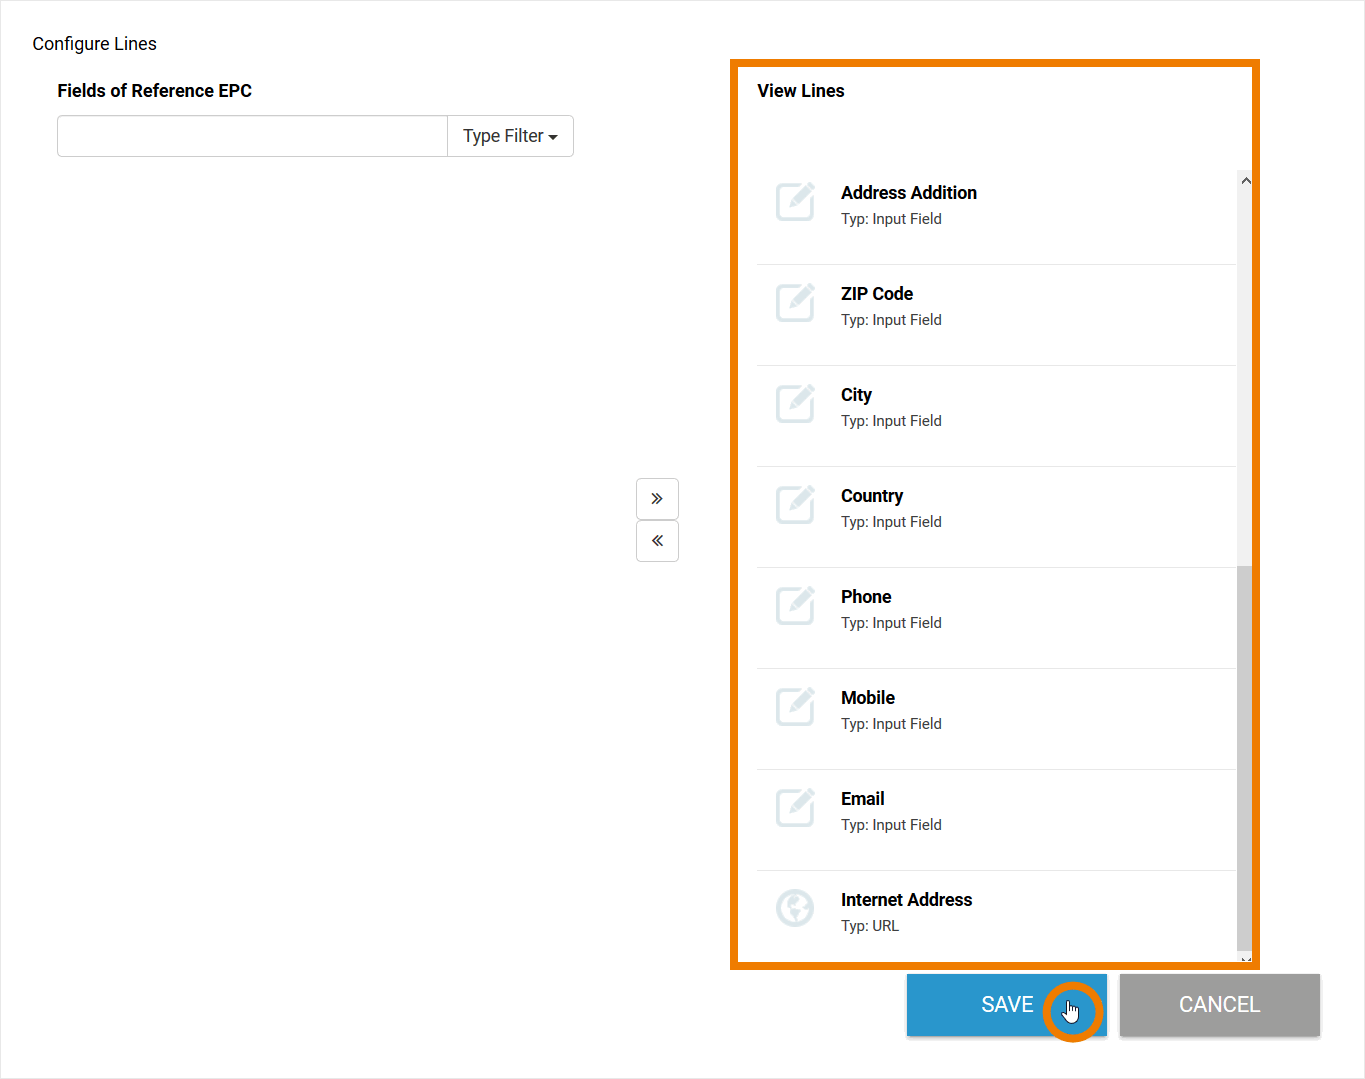
| When you have finished the configuration, leave the editor with Save. |
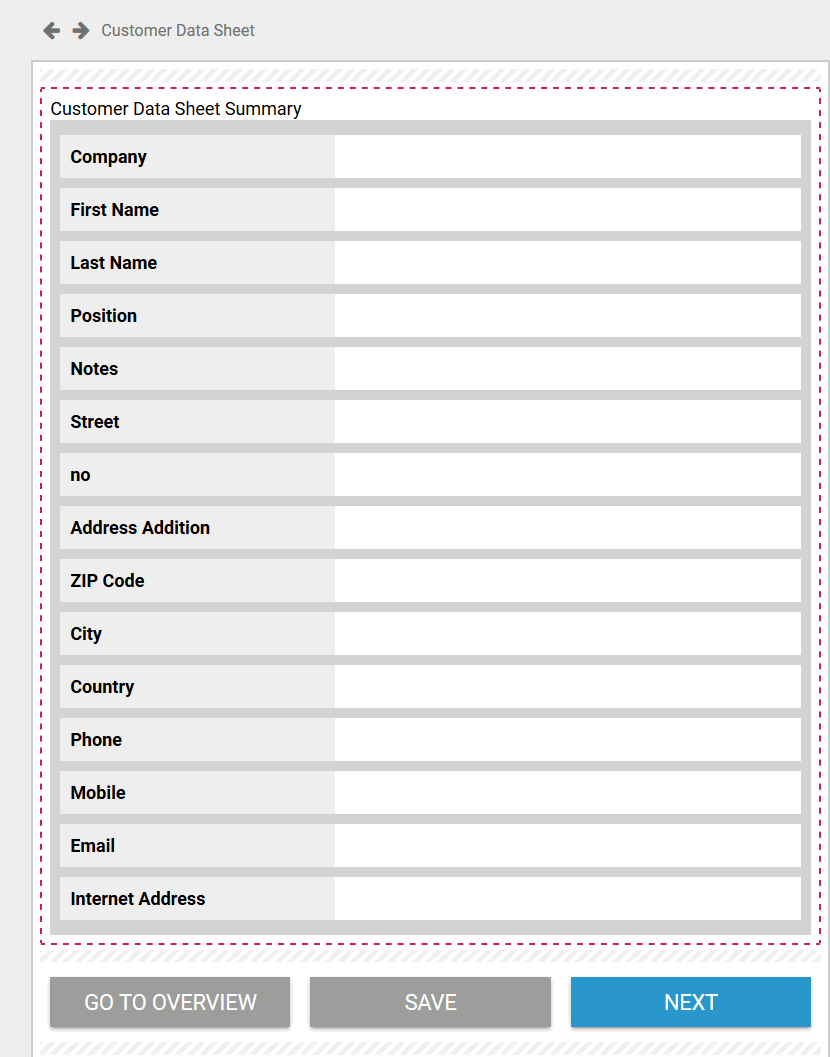
| The element in the Forms Editor now shows the selected content. You have finished designing your forms. Before you can execute your app, you have to configure the overview. To do so, switch back to the content of the app project. |
On this Page:
Related Documentation:
Overview
Content Tools