Creating a Summary
Once an instance has reached the last process step, it is finished but still available via the Process App Overview. The data of the last process step is always displayed in read-only mode in its last form. If you want to make sure that the user still has access to all necessary information after the instance has been finished, we recommend to insert a summary as the last process step. A simple way to achieve this is to use the form element Instance View.
Example: Summary in ACME's Procurement Process
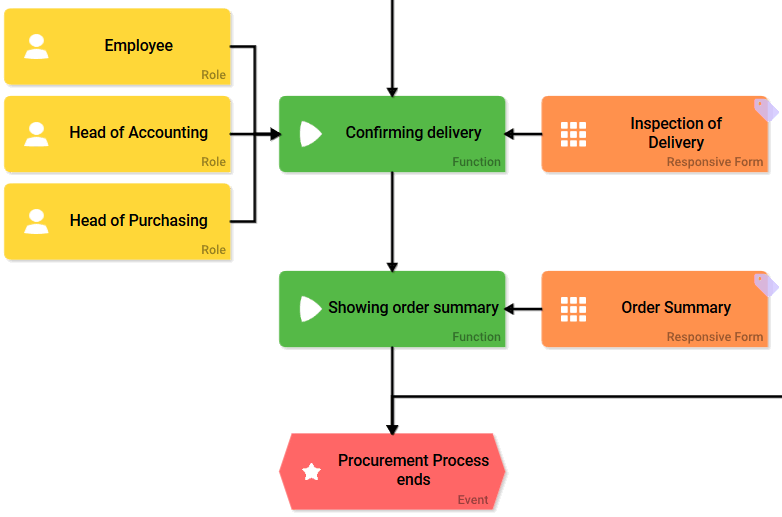
| Irene Adler wants to display a summary of the procurement process after the step Confirming Delivery has been completed. To do this, she inserts the function Showing Order Summary as the last process step in her EPC and links it to the Order Summary form. |
| In the form Order Summary, Irene inserts an instance view element and names it Procurement Request Summary. Now all she has to do is define the contents. To do this, she clicks on the gear wheel of the setting Configure Lines. |
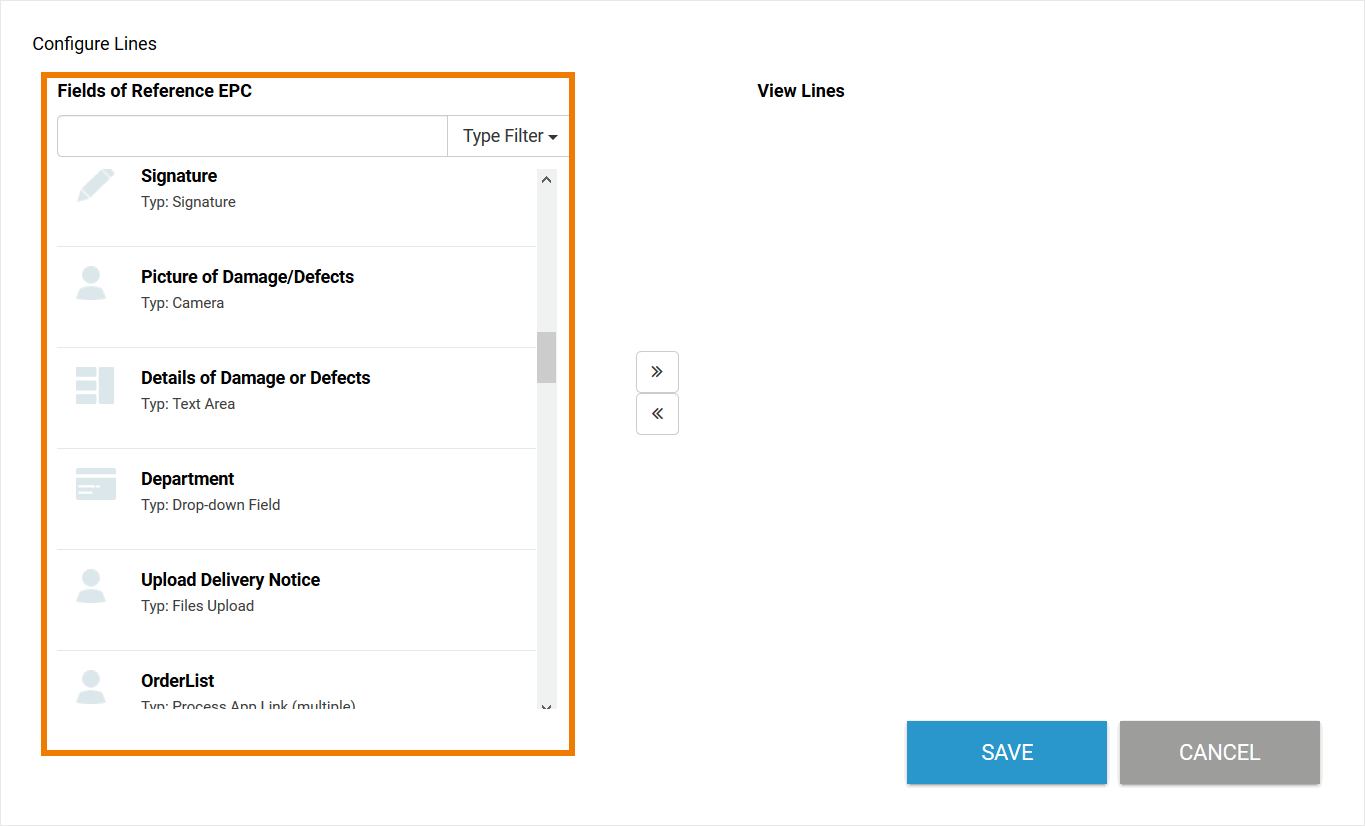
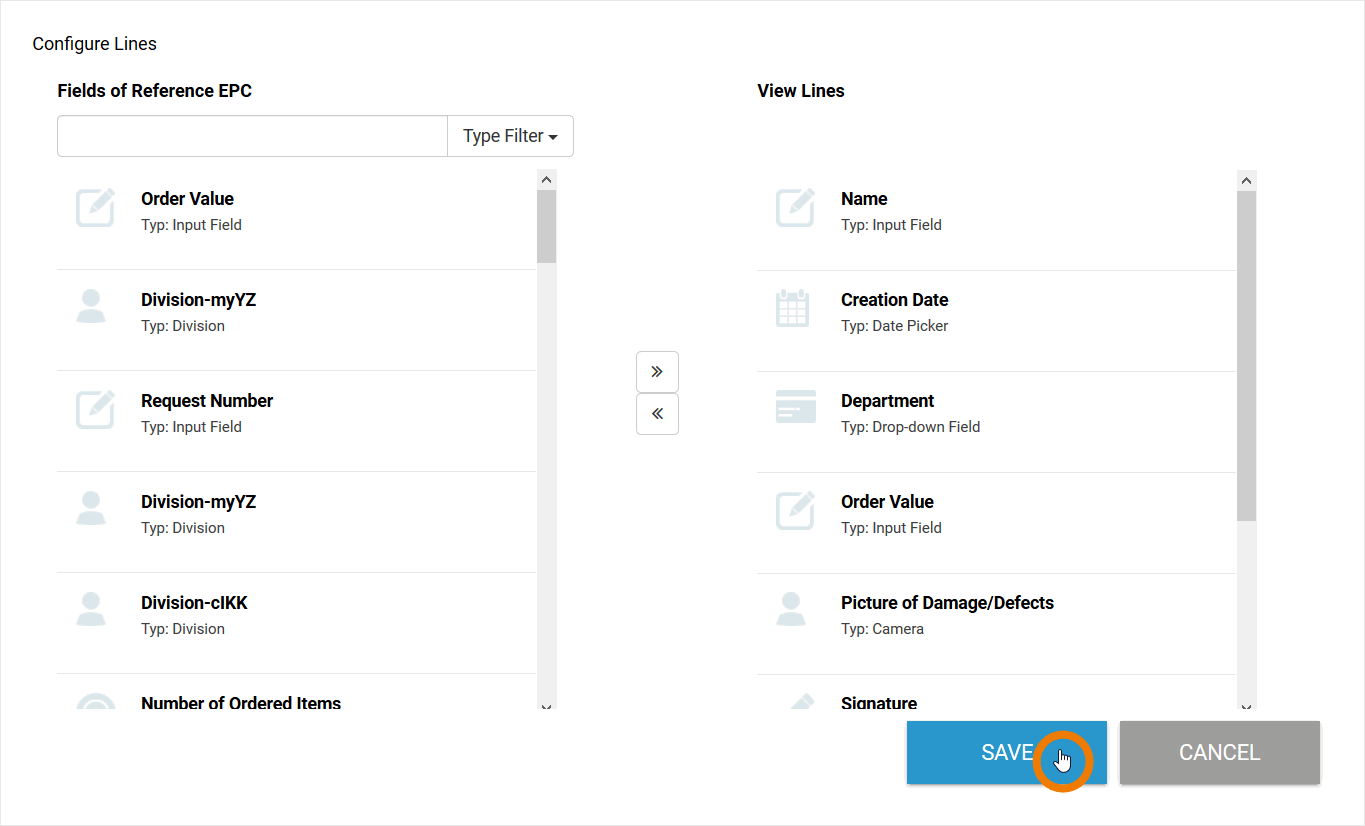
| The Configure Lines wizard opens. All form elements that are used in the forms of the reference EPC are displayed in the left column of the wizard. |
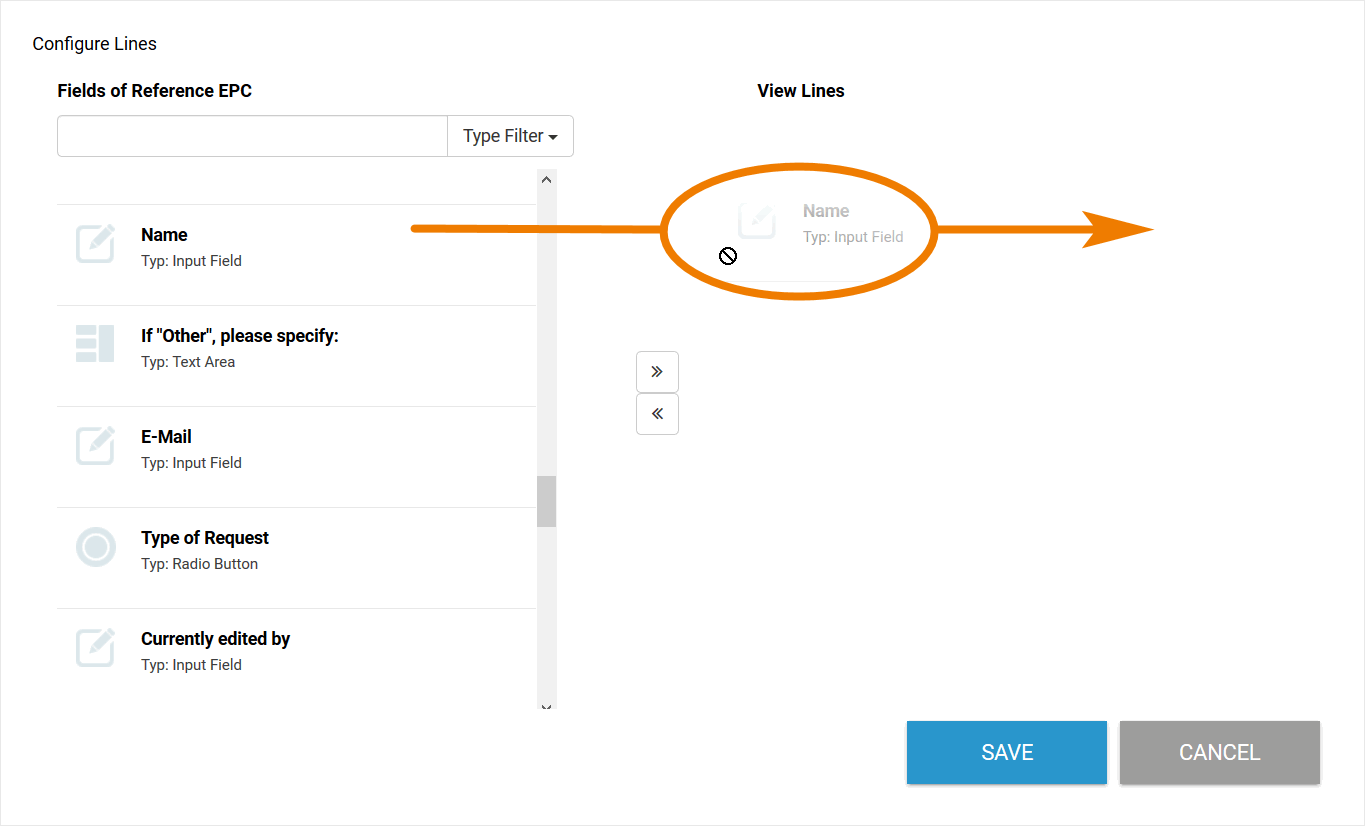
| Irene moves the fields she wants to display to the right column View Lines. With the button A click on the button |
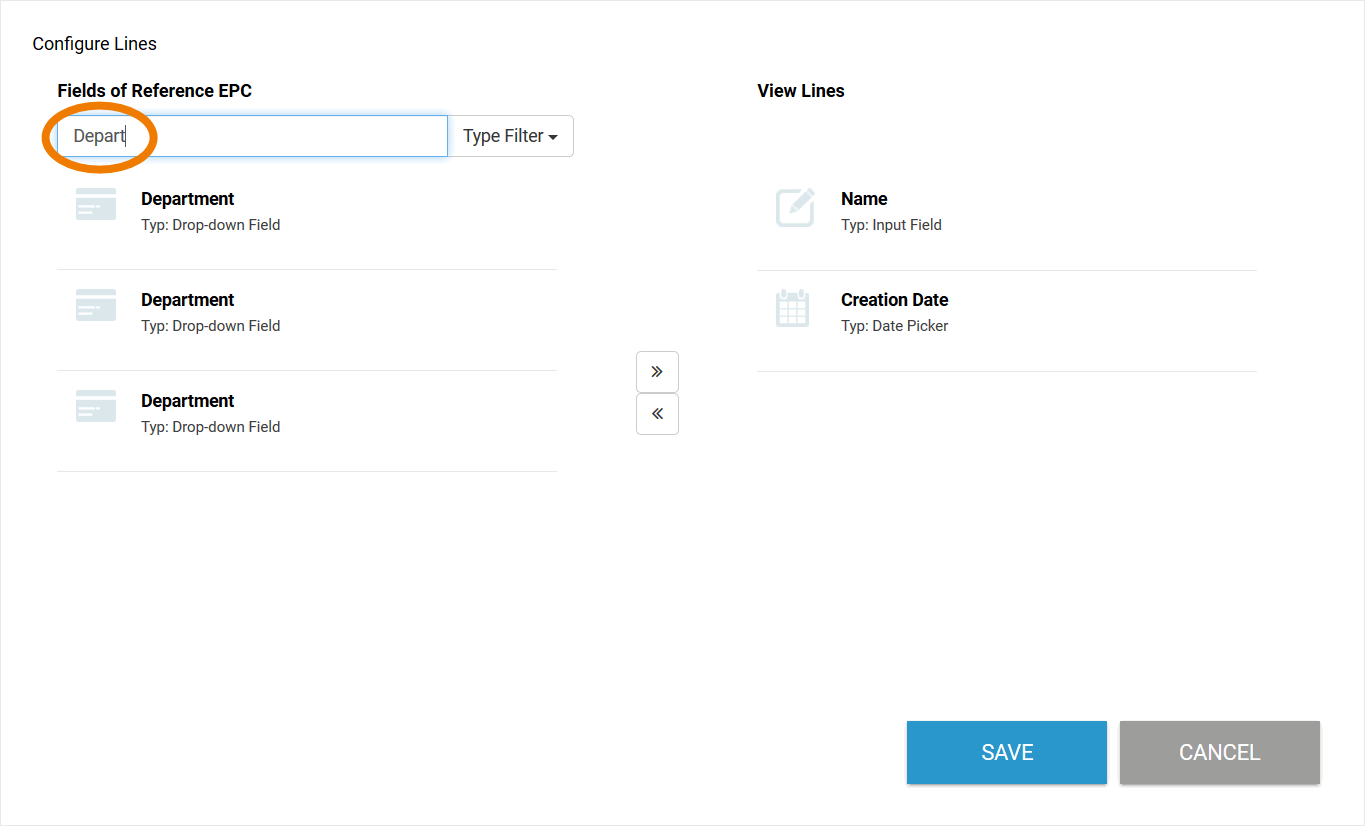
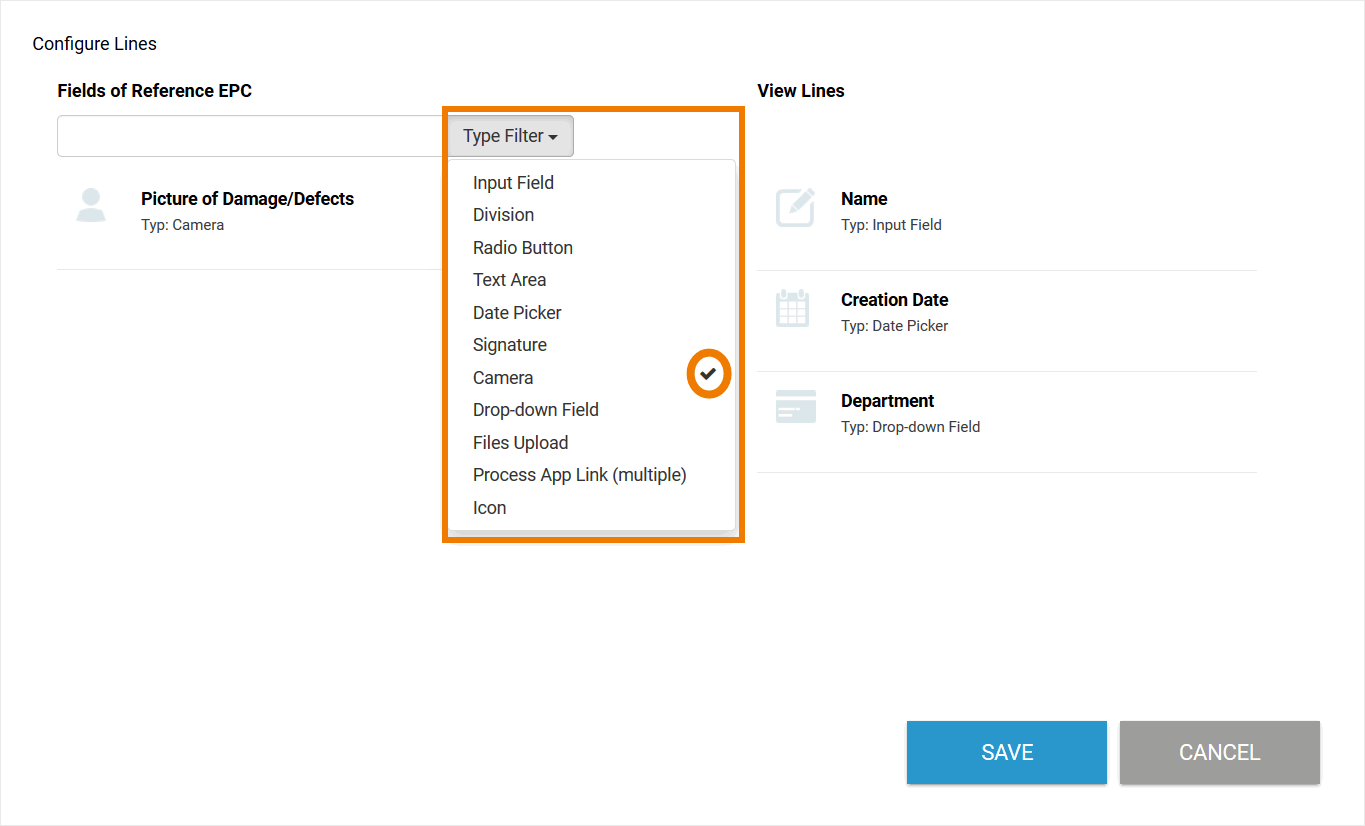
| To find a field by its name, Irene can use the text filter. |
| Using the type filter, Irene can find form elements of a specific type. A click on a type activates the filter, another click removes it again. Several types can be set at the same time. You can also combine the text and the type filter. |
| Irene has added all the fields she wants to use in the summary, so she saves her selection using button Save. You can leave the pop-up window via the Cancel button. Caution: In that case, changes will not be saved! |
| The instance view is now presented with all selected contents. |


When the app is executed, the instance view is filled with the values that the user entered in the app:
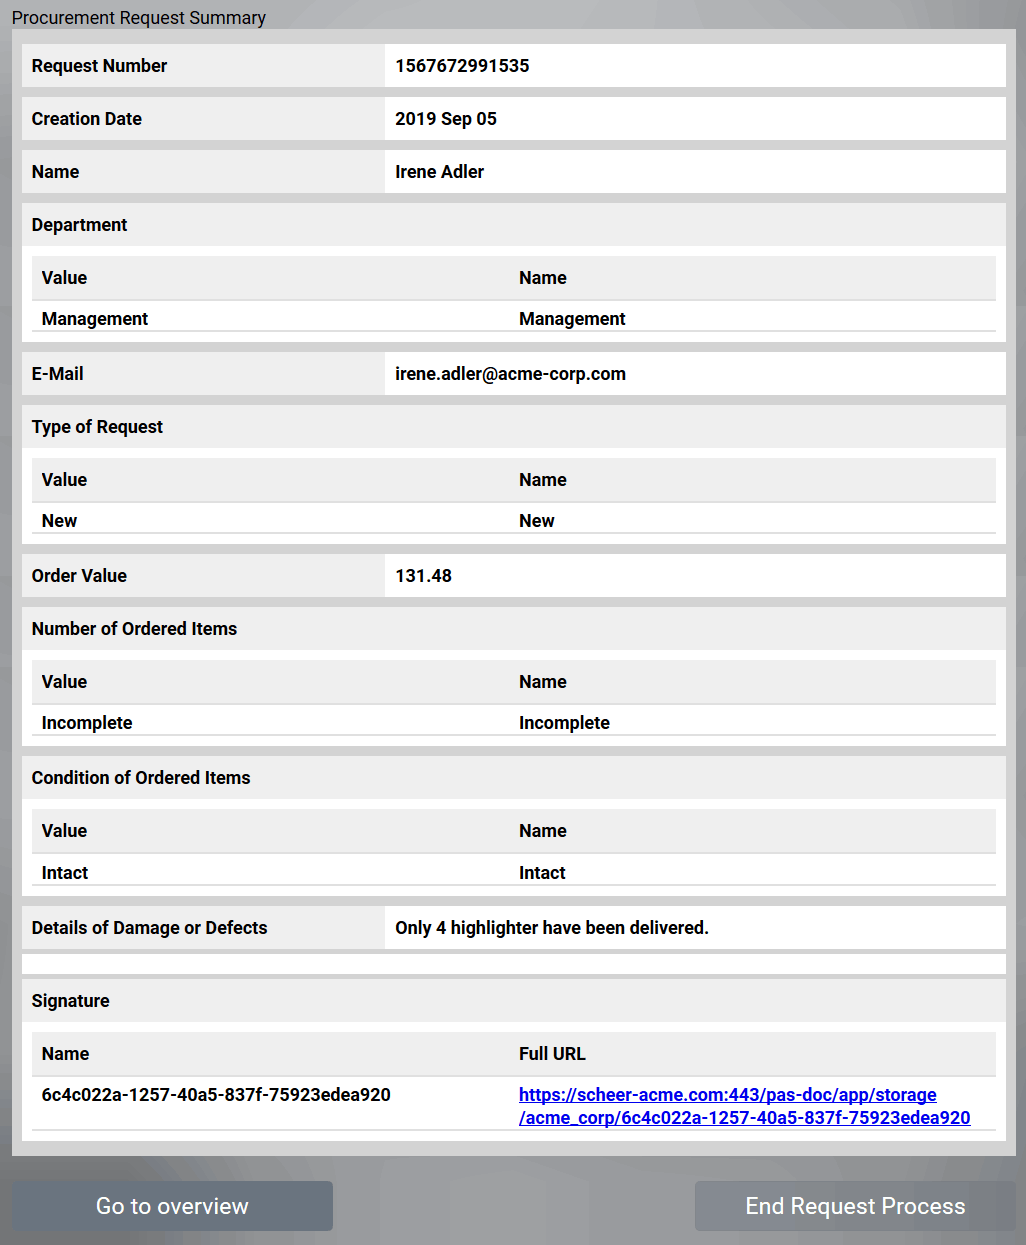
The values of some form elements are stored as value pairs (see chapter Possible Values: Value and Label). The instance view takes this into account and displays both contents: value and label, if available.
Printing a Summary
In some cases you may want to print the contents of a summary. If you use the instance view to display a summary, you can do this using the browser function Print.
Example: Printing an Instance from ACME's Procurement App
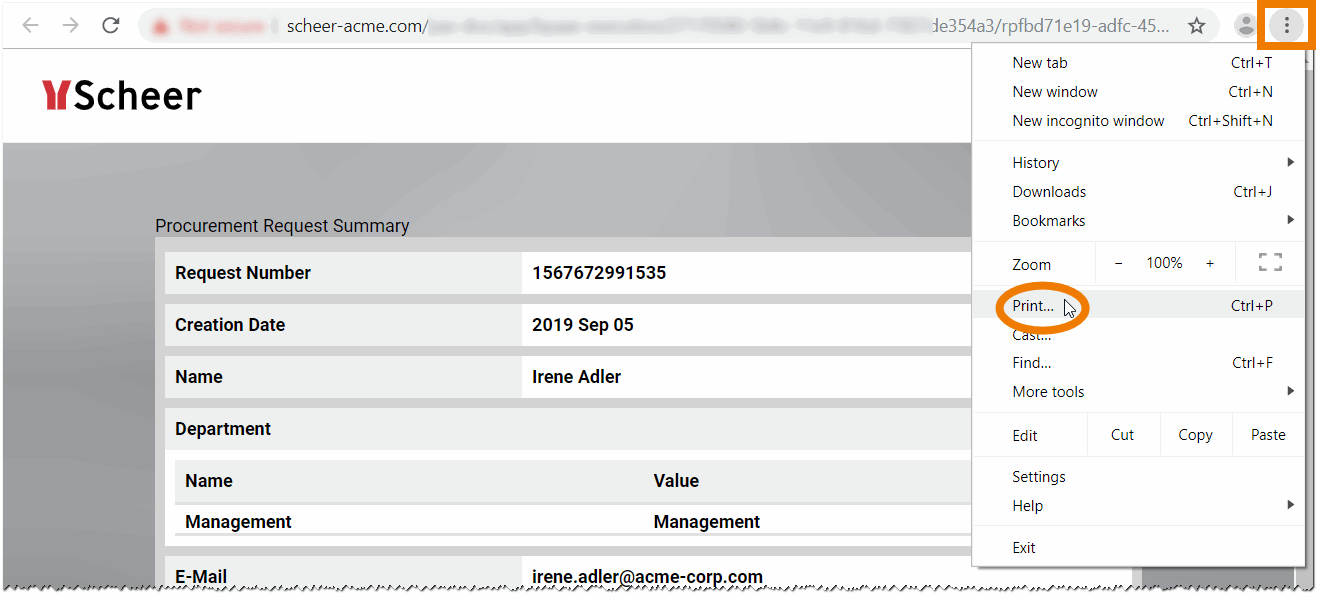
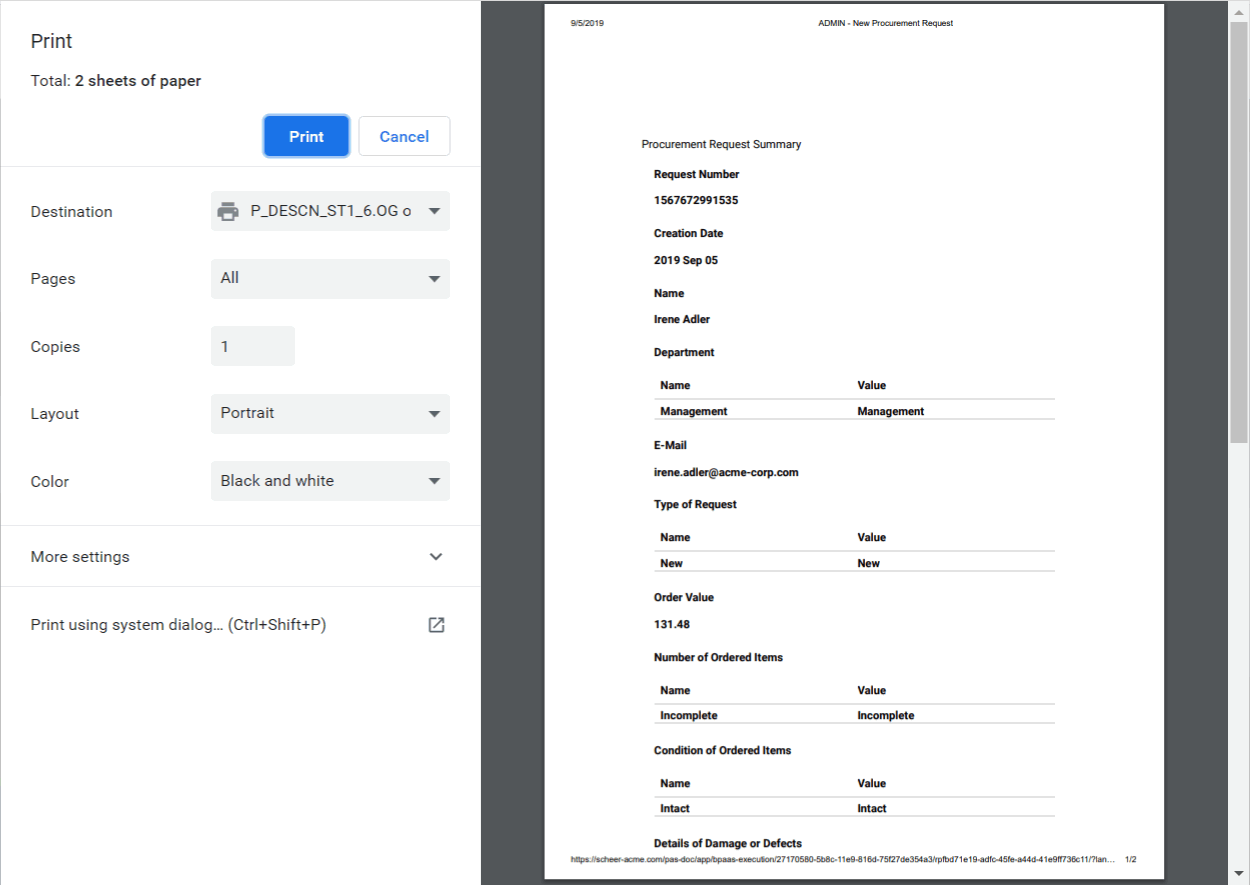
| Irene Adler has completed an instance in the Procurement app. In the last step, the summary is displayed. She now wants to print it out. |
| Irene uses the browser Chrome. She opens the settings menu and selects the option Print. |
| The contents of the summary will open in the Chrome print preview. Irene can now adjust the print settings according to her needs, for example...
|
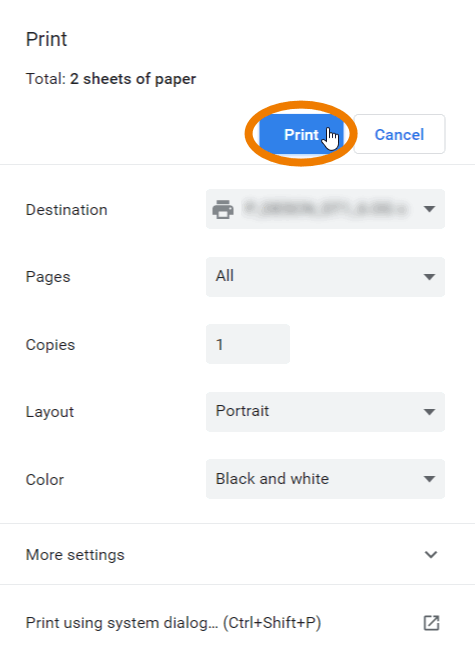
| Then Irene chooses the button Print to execute the print order. In the Firefox browser, the print function can also be found in the settings under Print and the settings in the print preview can also be adjusted the same way. |
Overview
Content Tools