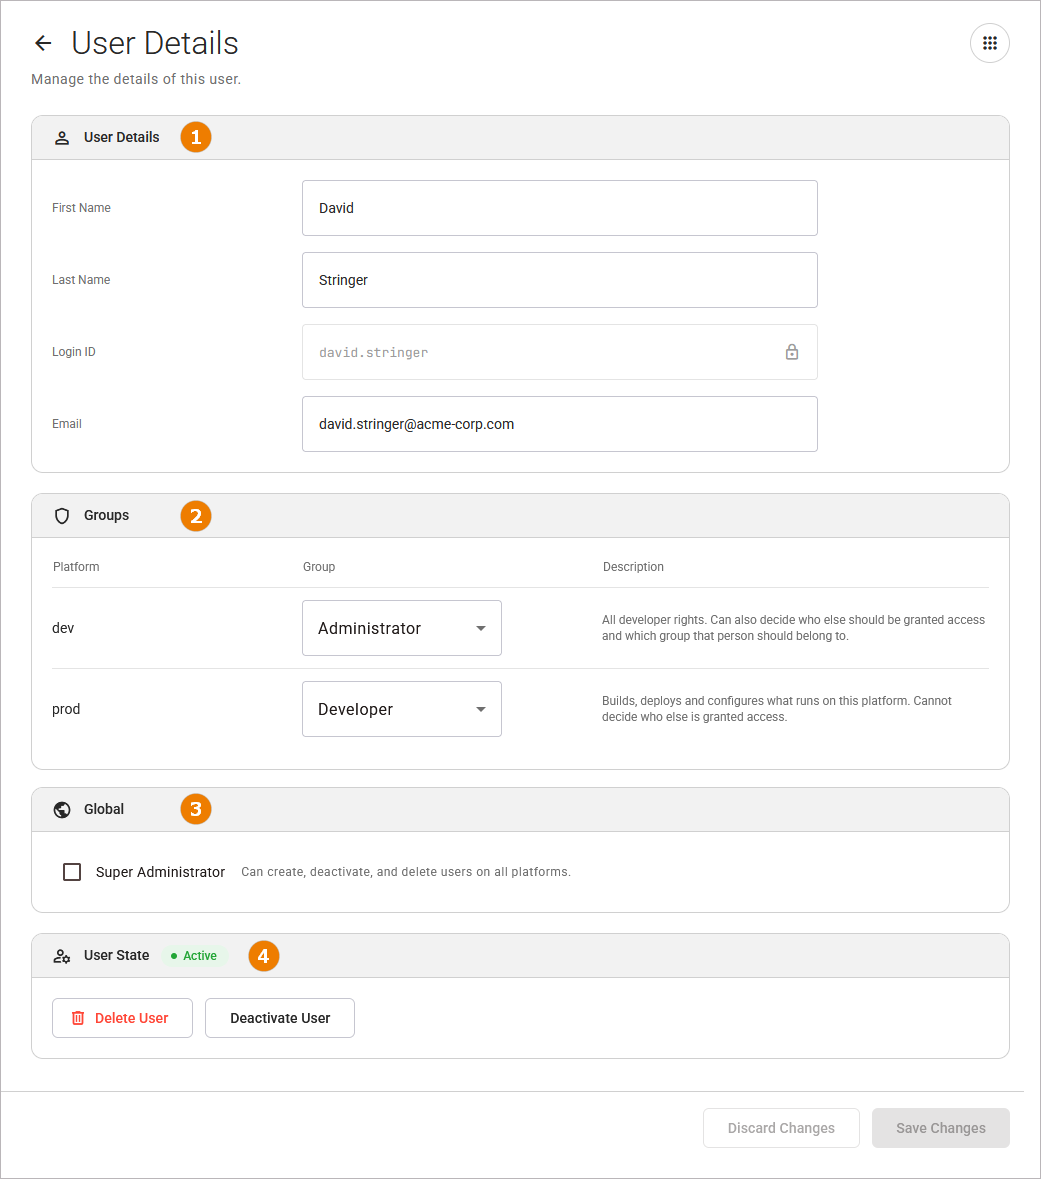
You maintain a user on the user’s detail page. You can adapt the user details, change the groups, deactivate or activate, and delete the user.
Which user details you are allowed to edit depends on the permissions you have for the respective platform.
-
A locked field or a greyed-out button tells you that you do not have the right permissions. Hover over it to see an explanation.
-
Section User State is only displayed if you have permission to update users, to delete users, or both.
Opening the User Details
In the table of available users, click anywhere on a user's row to open the user’s detail page. The Control Hub also opens this page after you create a new user. To return to the Users view, click the arrow beside the heading or Users in the sidebar.
The user details page consists of the following parts:
User Details
Groups
Global
User State
Changing the User Details
In section User Details you can change the following fields:
|
First Name |
The first name of the user. |
|---|---|
|
Last Name |
The last name of the user. |
|
|
The email address of the user. The email address must be unique on the platform.
|
A user's login ID can no longer be changed once the user has been created!
The same rules apply to changing the entries as to creating a user. Refer to Creating a User for details.
Changing Groups
In the Groups section, you can adapt the groups that have already been assigned to this user.
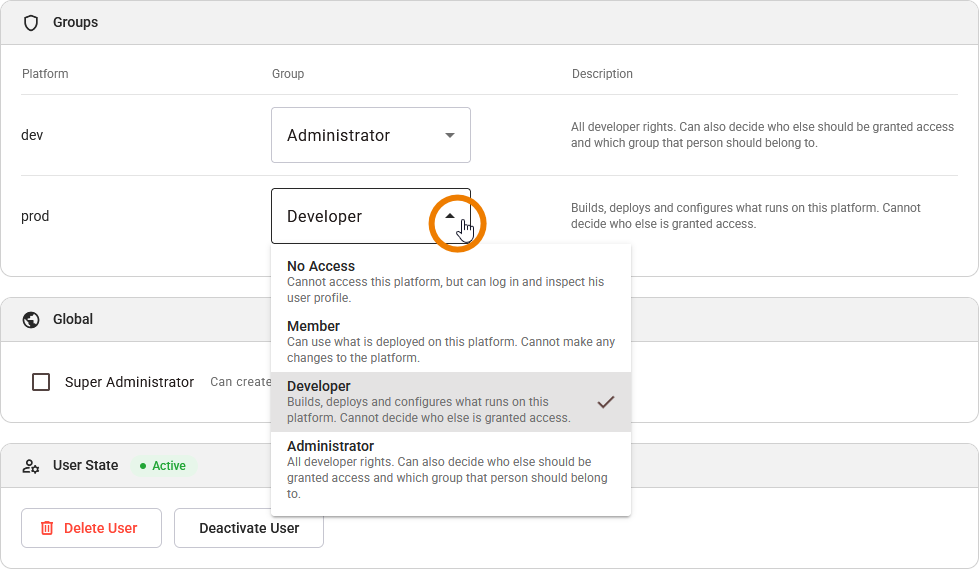
A user needs a separate group for each individual platform (e.g. dev, test, qa, prod etc.). A group determines what the user is allowed to do on that platform. The following groups are available:
|
Group |
Scope |
Description |
|---|---|---|
|
No access |
One platform |
Cannot access this platform, but can log in and inspect his user profile. |
|
Member |
One platform |
Can use what is deployed on this platform. Cannot make any changes to the platform. |
|
Developer |
One platform |
Builds, deploys and configures what runs on this platform. Cannot decide who else is granted access. |
|
Administrator |
One platform |
All developer rights. Can also decide who else should be granted access and which group that person should belong to. |
|
Super Administrator |
All platforms |
Can create, deactivate, and delete users on all platforms. This group does not grant access to the processes running on a platform. A super administrator can only assign groups. However, they may do so for any user, including themselves, on any platform. |
Section Groups displays one row for each platform for which you have administrator rights. A platform for which you are not an administrator will not be displayed. Each row shows the name of the platform, the group, and what the group allows.
-
To change a group, select another group in the row of the platform.
-
To remove a group, select No access.
Granting Super Administrator Rights
Section Global is only displayed to super administrators. It shows the groups that apply to all platforms. Currently, this is only the group Super Administrator.
A Super Administrator can use this section to grant another user super administrator rights. Enable the checkbox to give the group Super Administrator to this user.

Saving Your Changes
At the bottom of the user details page, the buttons Discard Changes and Save Changes are always shown. But they are only enabled, when you have changed something on the page.
-
Click Discard Changes to restore all values.
-
Click Save Changes to save your changes.
The Control Hub saves changes in two steps: first the details, then the groups. One step can succeed while the other fails. The toast messages give you corresponding feedback:
|
Result |
Toast Message |
|---|---|
|
Both steps succeeded. |
One green message: the user was saved. |
|
The details were saved, but the groups were not changed. |
A green message that the details were saved, and a red message that the groups could not be changed. Save again to change the groups alone. |
|
The details could not be saved. |
One red message. The groups are also not changed. |
Activating and Deactivating a User
Section User State shows whether the user can sign in, and offers the following actions:
|
Action |
Effect |
|---|---|
|
Deactivate User |
The user can no longer sign in. Running sessions end, and the user loses access to all platforms. All content the user has created on the platform will be preserved. |
|
Activate User |
The user can sign in again. If the groups of the user are still saved, the user has the same groups as the page shows. |
Deactivate User asks you to confirm. The dialog Confirm User Deactivation states what happens. Click Deactivate User in the dialog to confirm, or Cancel to change nothing:
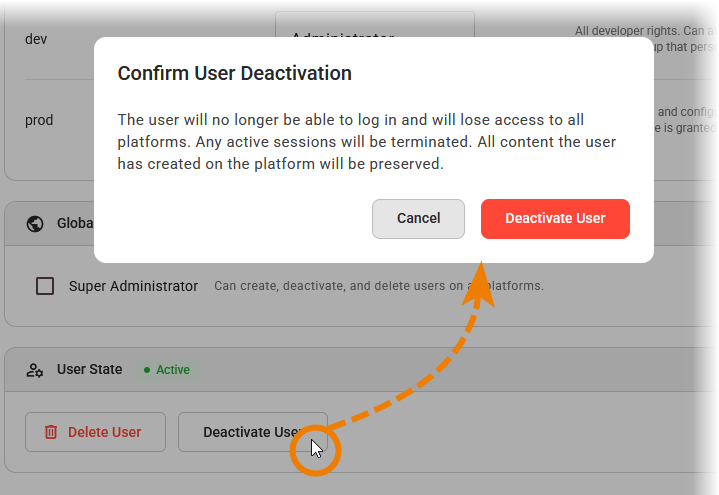
Activate User will not ask for confirmation.
Both actions take effect at once. They do not depend on Save Changes: Values that you have changed and not saved stay changed.
The Control Hub confirms the result in a notice, and the state beside the section heading follows it.
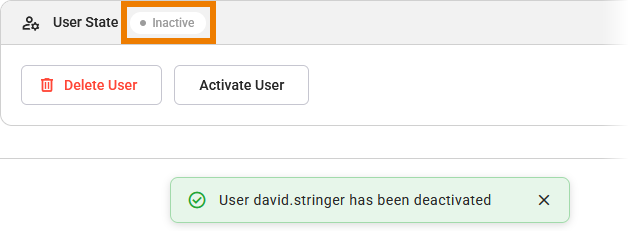
It is not possible to deactivate the last Super Administrator. In that case, you will get an error message.
Deleting a User
To delete a user from all platforms, click Delete User in section User State. This will remove the user and all their configured groups on all platforms.
The action cannot be undone. Therefore, you need to confirm your choice. Click Delete User in the dialog to confirm, or Cancel to abort.
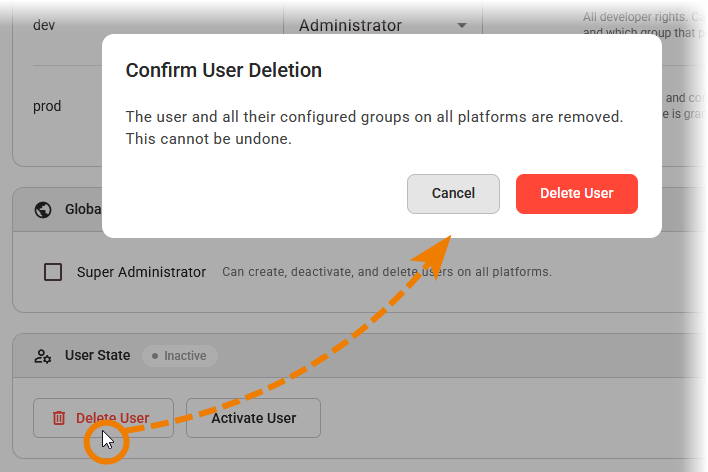
After successful deletion, you will return to the Users view where a success message is displayed.
It is not possible to delete the last Super Administrator. In that case, you will get an error message.
Feedback Messages
Each action on the user details page ends with a message that also names the user:
-
A green message if the action succeeded
-
A red notice if the action failed, including the reason for the failure.
Refer to Error Handling Users for further details.
Related Content
Related Pages: