
Prerequisites
To create a new user in the Control Hub, you must be a Super Administrator or Administrator (for the platform on which you want to create the user). If you do not have the appropriate permissions - or while the Control Hub is still verifying your permissions - the New User button will be grayed out.
Click New User above the table in the Users view. The New User page opens. The page consists of the three parts:
Global (displayed only to Super Administrators)
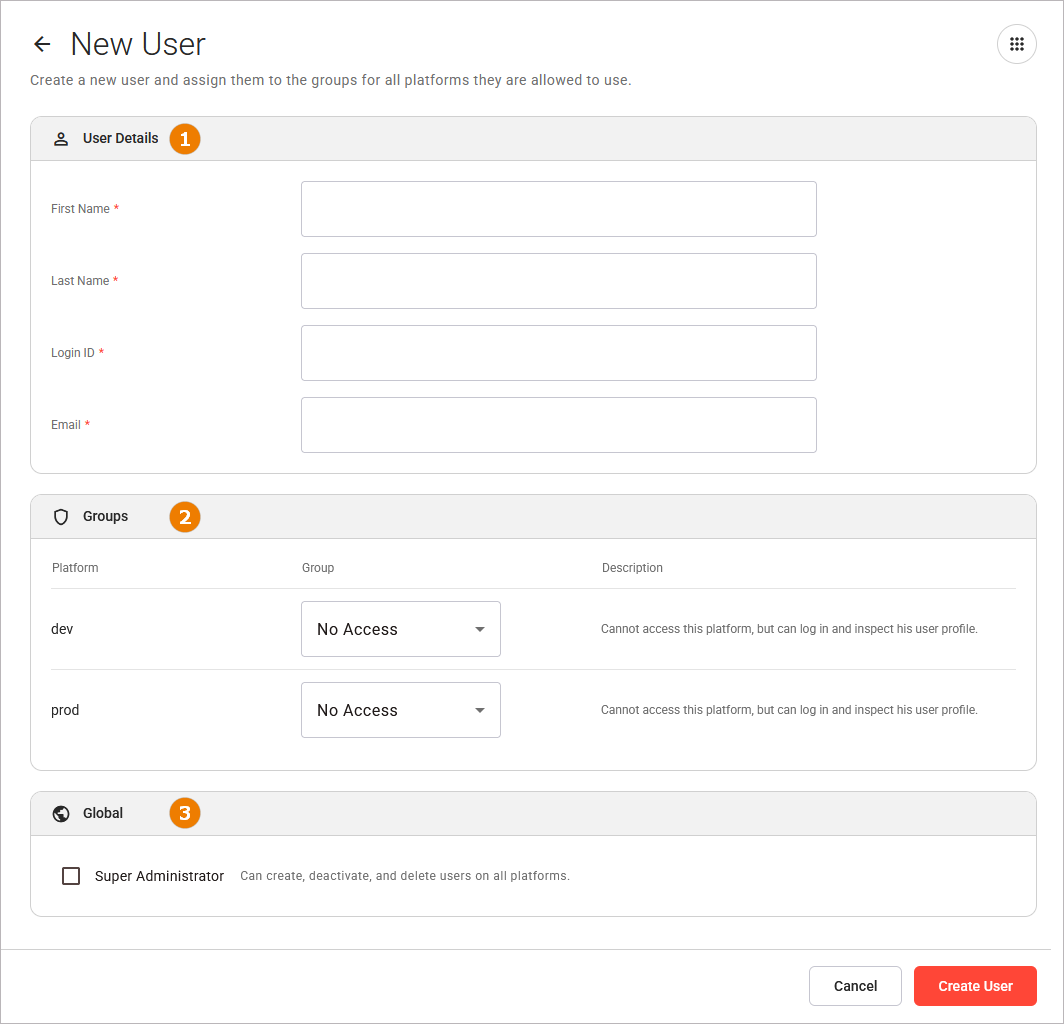
To leave the page without creating a user, click the arrow beside the heading or click Cancel.
Entering the User Details
All values in section User Details are mandatory:
|
First Name |
Enter the first name of the user. |
|---|---|
|
Last Name |
Enter the last name of the user. |
|
Login ID |
Enter the identity the user will use to log in. It must be unique and cannot be empty. A user's login ID can no longer be changed once the user has been created! |
|
|
Enter the user's email address. The user will receive instructions on how to set a password at this address. |
The following behavior applies during user creation:
-
The Control Hub removes blanks before and after a value.
-
If a value is refused, the Control Hub marks the field and shows the reason beneath it. It shows the reasons for all refused values at once, so you can correct them in one attempt.
-
The Control Hub refuses a login ID that is blank or too long, and an email address that is not valid.
Assigning Groups
Section Groups is where you assign groups to the new user.
A user needs a separate group for each individual platform (e.g. dev, test, qa, prod etc.). A group determines what the user is allowed to do on that platform. The following groups are available:
|
Group |
Scope |
Description |
|---|---|---|
|
No access |
One platform |
Cannot access this platform, but can log in and inspect his user profile. |
|
Member |
One platform |
Can use what is deployed on this platform. Cannot make any changes to the platform. |
|
Developer |
One platform |
Builds, deploys and configures what runs on this platform. Cannot decide who else is granted access. |
|
Administrator |
One platform |
All developer rights. Can also decide who else should be granted access and which group that person should belong to. |
|
Super Administrator |
All platforms |
Can create, deactivate, and delete users on all platforms. This group does not grant access to the processes running on a platform. A super administrator can only assign groups. However, they may do so for any user, including themselves, on any platform. |
Section Groups displays one row for each platform for which you have administrator rights. A platform for which you are not an administrator will not be displayed. Each row shows the name of the platform, the group, and what the group allows.
-
Every row starts with No access. A user receives a group only if you select one.
-
Select one group per platform.
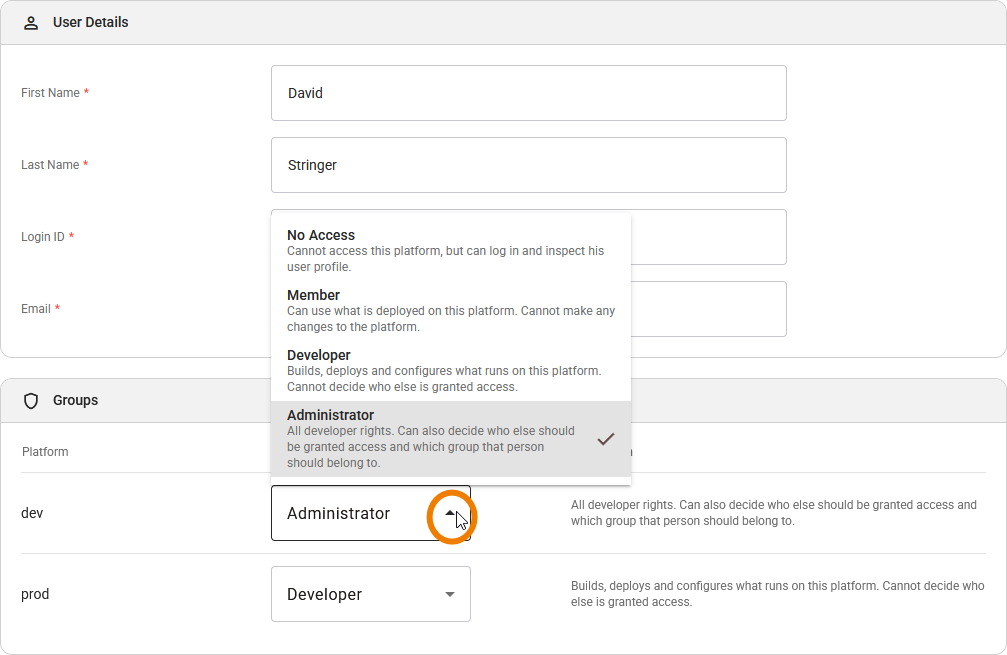
Granting Super Administrator Rights
Section Global is only displayed to super administrators. It shows the groups that apply to all platforms. Currently, this is only the group Super Administrator.
A Super Administrator can use this section to grant another user super administrator rights. Enable the checkbox to give the group Super Administrator to this user.
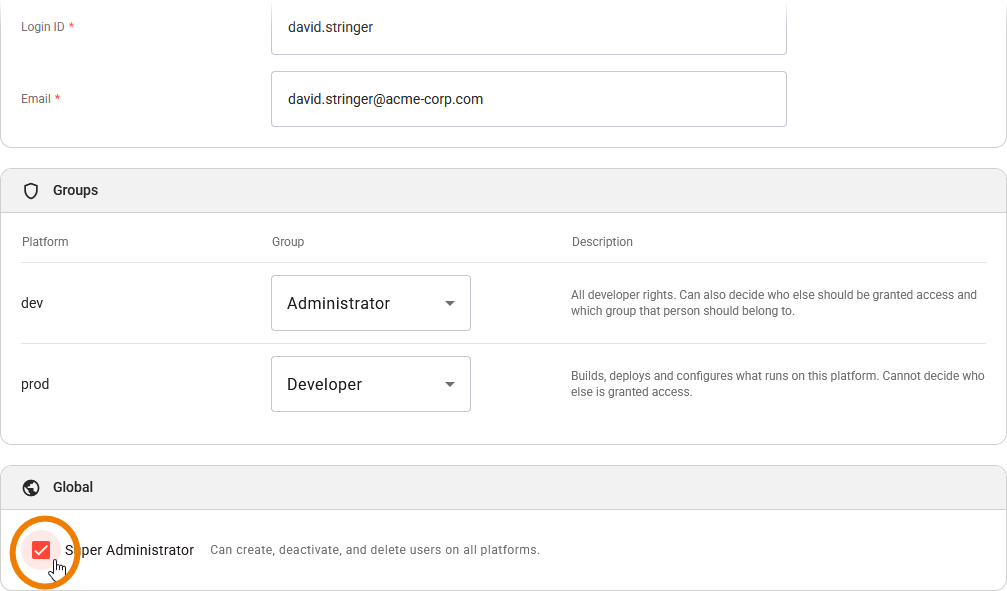
Creating the User
Click Create User to start the creation process. The Control Hub creates the user first and then assigns each group, because a user must exist before it can receive a group. The user is created when all steps have succeeded.
When a user is created, a one-time invitation email is sent to their email address. Since you cannot resend the email through the Control Hub, please double-check the email address you entered before clicking Create User.
A green notice tells you that the user was created. The Control Hub opens the user’s detail page. Refer to Managing a User for details.
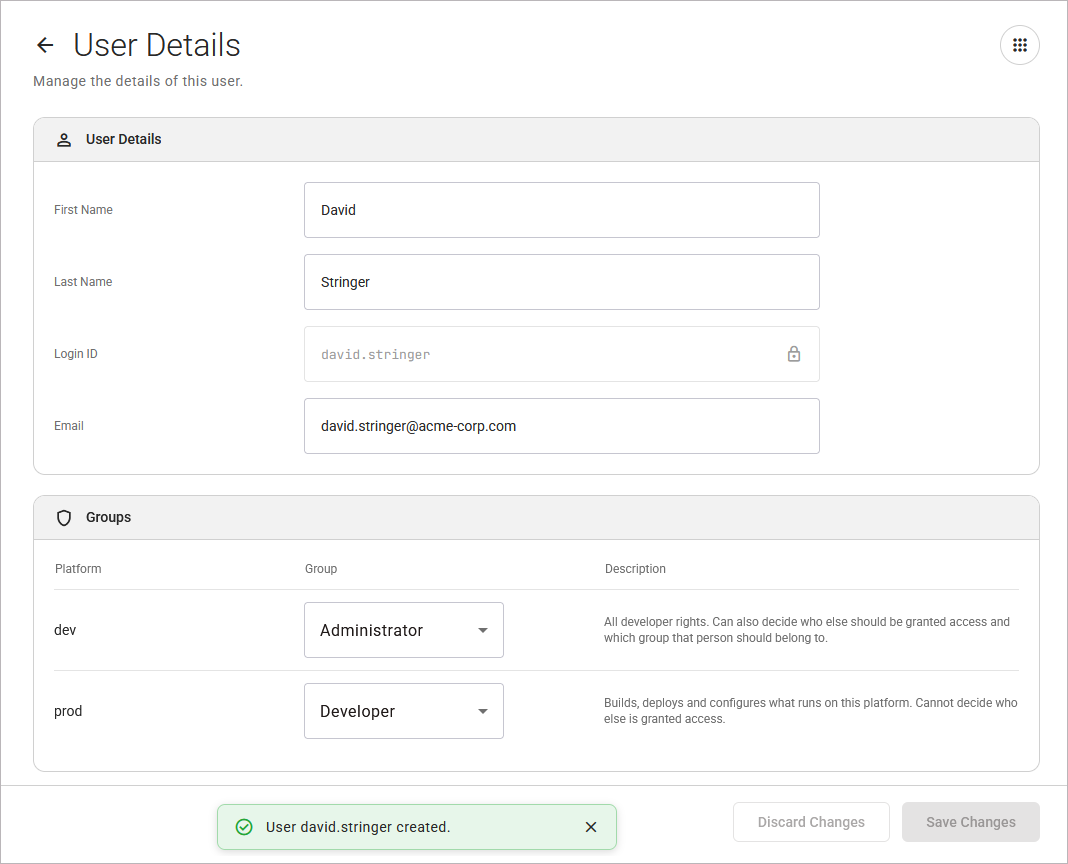
If the creation does not complete, the Control Hub tells you in a red notice. Refer to Error Handling Users for details on the messages.
Related Content
Related Pages: