On this Page:
The resources are imported into the E2E Builder projects directory structure within the resources folder. The resource folder will be packed within the service repository that will be deployed, if the deploy checkbox is checked.
Example File (Builder project Advanced Modeling/Resources):
| <your example path>\Advanced Modeling\Resources\resourceArchive.xml |
Importing Single Resource Files
Start the import of resources by selecting Import > File Resource (XSLT, Jar, Text, etc.) from the E2E Model Compiler menu.
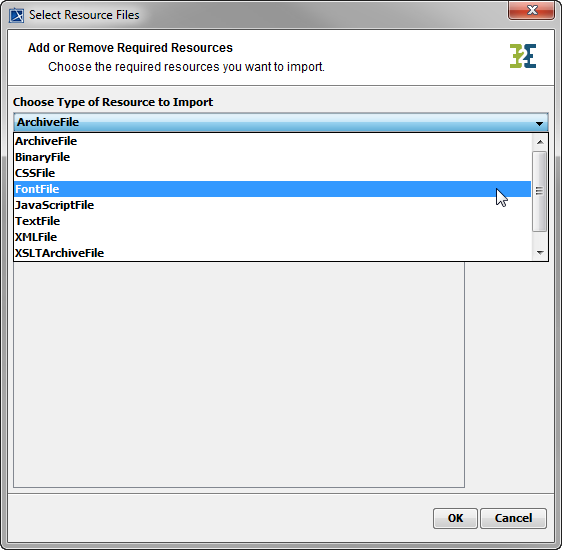
| The resource importer dialog window displays you options to add specific resources. As a first step select the type of resource you want to import.
Select the resource type you want to add to your E2E Builder Project. Some Types are very specific like the XMLFile resource type, while other types are open like the TextFile. Setting the correct type will allow in some cases the use of a specific editor within MagicDraw. |
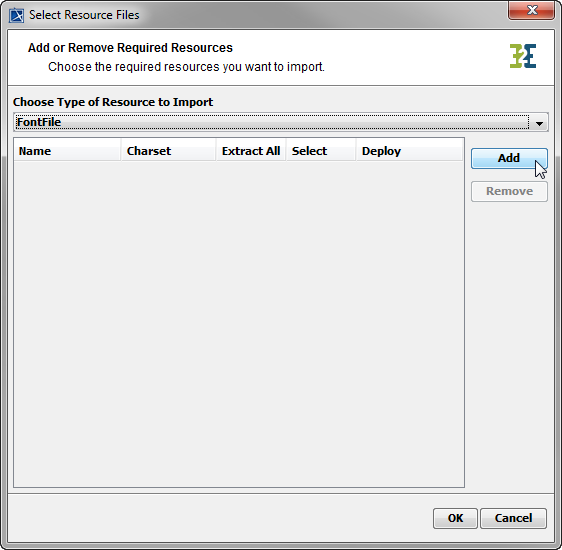
| Click Add to add file resources to the import list. |
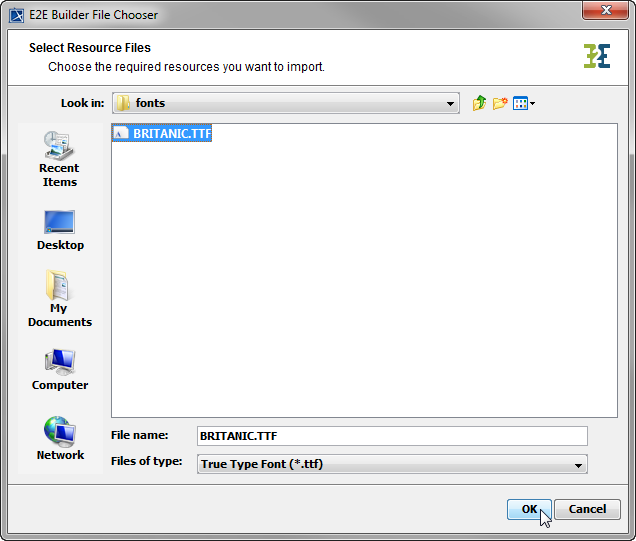
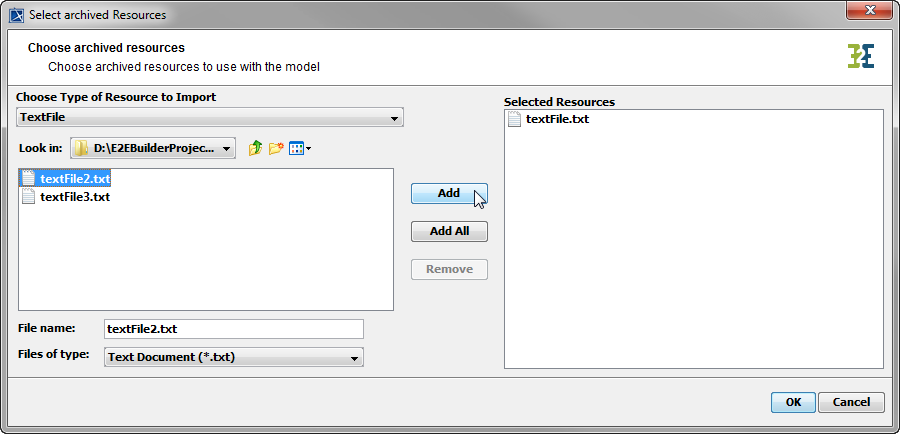
| Navigate to the directory containing the files and select the resource file(s). You can select multiple files of the same type. Click OK to proceed. |
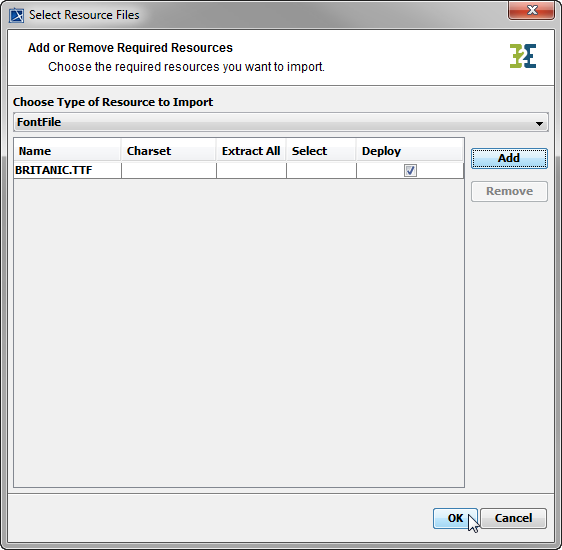
| Within the resource importer dialog window you will see the previously selected file(s) listed in a table view. The Deploy checkbox gives the option to either deploy the resource together with the service repository or just leave it as a non-deployable resource within your E2E Builder Project. In the latter case, you'll need to manually provide the resource to the deployed xUML service. Selecting the imported resource within the resource table view enables the Remove button. By clicking on the button the resource will be taken off the list without any further confirmation and thus will not be imported. When all the needed resource files are chosen, click OK to start the import process. |
If the list is complete, you can decide for each file resource archive, if it will be deployed together with the xUML service repository via the Builder.
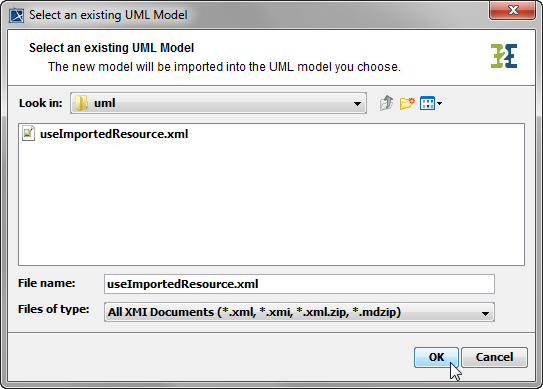
| The resource importer will ask you to select a model to import the resources to. Choose the model the resource should be available to. Click OK to continue. |
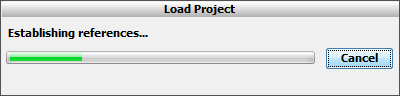
| After a few seconds, the chosen target XMI file will be loaded. |
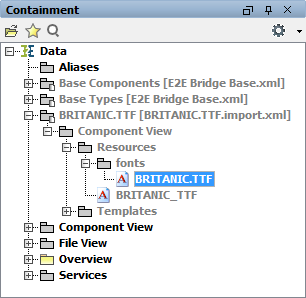
| You can find the imported resource in the containment tree in package Data/<Resource Name>. The importer has set up the resource within the E2E Builder Project with all necessary references and artifacts. |
You need to save ![]() the UML model to persist the imported entities and packages.
the UML model to persist the imported entities and packages.
More information, e.g. on how to use imported resources, is provided by the Reference Guide, e.g. in 2020-04-30_17-10-34_Resource File Artifacts.
Importing Resource Archives
A very convenient option is to import archives, meaning jar or zip files. The resource importer can analyze the archive and it is possible to just select one or a few needed files from within a zip or jar file. The following steps describe the steps and options for importing archive resources.
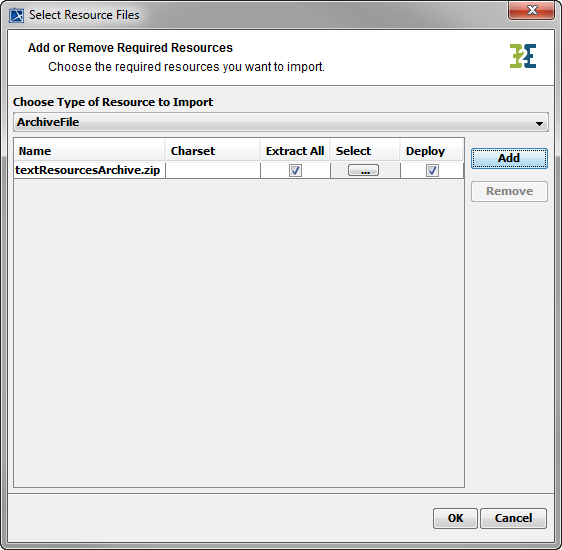
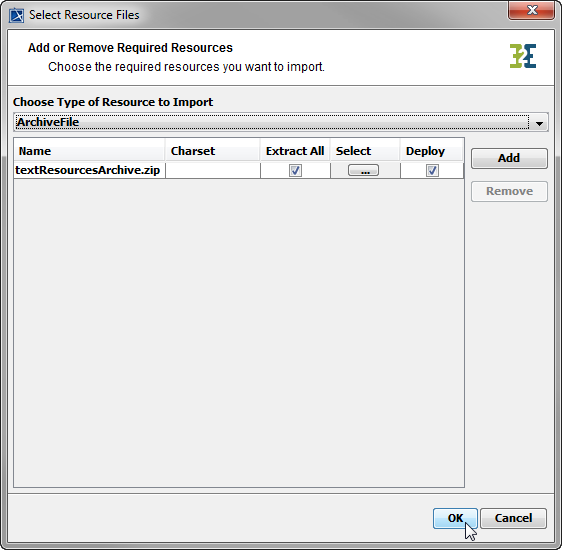
| After selecting the archive file (in this case a zip file), the resource will show up within the resource table view with additional options. Extract All will extract the complete content of the archive when deployed on the E2E Bridge Server. The Select button on the resource row gives the option to select just the needed file from an archive. To select just the needed files from an archive click ... . |
A window to select specific files will open.
At first, choose the Type of Resource to Import.
In the archive hierarchy browser select the file(s) you want to import and add them to the Selected Resources container by clicking Add. Wanting to add all files at a time click Add All.
The list of files may be filtered by selecting a file type from the corresponding drop down box.
| When all needed archive resources and files within them are selected, click OK to start the import process. |
| Select the UML model, in which the data should be imported. The uml source path of the current Builder project will be suggested. |
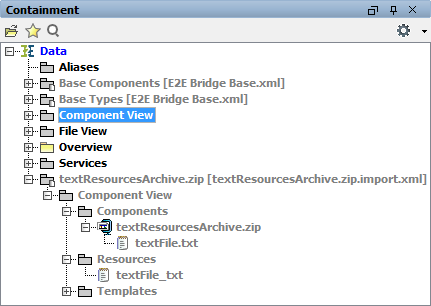
| The import result is shown in the containment tree. The previously selected resource file can be found within the Resources repository, the selected archive belonging to the resource within the Template repository package. |
You need to save ![]() the UML model to persist the imported entities and packages.
the UML model to persist the imported entities and packages.
Using Imported Resources
Usage of resources can be added to the component diagram in certain contexts, manually or using the Components Wizard.
These are the contexts, you can use imported resources in:
| Context | UML Element | Description | Documentation Link |
|---|---|---|---|
| File | <<FileAlias>> | Deploy a file together with the service. | File System Components |
| <<FlatFileAdapter>> | Deploy a flat file used for parsing together with the service. | Flat File Adapter Reference | |
| SQLite | <<SQLAlias>> | Deploy an SQLite database together with the service. | SQLite Deployment Using a File Resource |
| Java adapter | <<JavaComponent>> | Deploy Java archives together with the service. | 2020-04-30_17-10-34_Java Archive Artifacts |
| <<ResourceFile>> | Deploy resources together with the service. | 2020-04-30_17-10-34_Resource File Artifacts | |
| UI | <<HTMLElement>> | Add resources which are common in web applications, e.g. a company logo embedded into the UI application as a image resource, and deploy them together with the service. | HTML Utilities |
| <<UIDeployment>> | Add a design agency and deploy it together with the UI. | Working with Design Agency | |
| JMS adapter | <<JMSClient>> |
Overwrite Resources
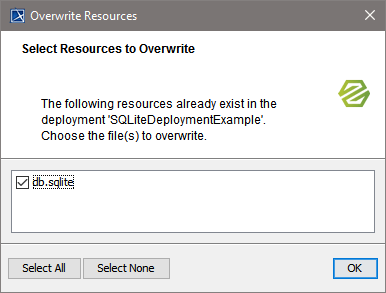
On opening a model that uses resources, you can get the following pop-up:
Each imported resource is saved in two places into the project:
- as a resource template (e.g. empty database) to <project folder>/resources/templates/<file type>/
- as a specific resource to <project folder>/resources/<model name>/<component name>/resources/
On opening a model, the E2E Builder generates the specific resource from the template. If the deployed resource already exists, you can decide to keep it or overwrite it.
Overview
Content Tools