With PAS 23.1, the development process in the Designer has been optimized. To speed up and simplify the development process, we have decoupled development from deployment: Developers now work in a test environment where they can get constant feedback on their changes and can test them directly against the service preview.
The new approach also improves the work of fusion teams on a microservice: Developers can now make a finished feature or an intermediate state of a service available to other team members for testing while continuing to work independently on the same service.
| Your benefits:
|

New: Test Environment
When you create a new service or open an existing one, you are automatically working in the test environment. Its status is displayed in the Controls panel. The test environment is automatically started and stopped: The test environment has not yet been started or has expired.
![]() icon.
icon.![]() .
. Status Message Description 

The Designer is preparing the test environment. 
The test environment is ready. You can access the application preview.
Using the Test Environment
The test environment is initialized automatically when you start working on a service. As soon as you make changes in the Designer, the test environment is updated to reflect your changes. In addition, your actions are constantly compiled and validated. Compilation errors are displayed in the validation panel. Check the panel for errors and warnings to resolve any problems that occur in your service. Go to Designer Guide > Validation Panel for details.
You can disable the auto validation, refer to Designer Guide > Managing the Service Details for further information.

| The new Controls panel contains options to support you during the development process:
|

Using the Service Preview
Accessing the test service is possible without deployment. Open the service preview via the controls panel and the service start page will open in a new tab:

| You have direct access to your service(s):
|
| The preview is fully operational. Use it to check functionality, layout and design of your process and its forms. |


Deploying the Service
Especially in fusion teams, developers want to make a finished feature or an intermediate state of a service available to other team members for testing while they continue to work on the same service. This is now easily possible in the Designer: Just deploy the version you want to make available to others and continue working on the service independently in the test environment.
The Deployment Controls have been moved to the service details page. Click on the Service panel tab (service name) to open the details page:

| Select your deployment target the first time you deploy. Prerequisites
Refer to Administration Guide > Overview of Standard Profiles. Use the target switch in section Options to select your desired deployment target. | ||||||||||||
| We recommend to enter a version number and increase the number with each deployment.
Expert Advice By default, each newly created service gets number 0.1.0 assigned. We recommend to increase the version number before redeploying each time you have made relevant changes to the service. You can change the version number in section General of the Deployment Properties. Follow the concept of semantic versioning. In case of deployment problems, comparing the version number and the number of the deployed version can help to find out which version of the service is running.
| ||||||||||||
| Now use the deployment controls to deploy the service to your chosen target:
|


Executing the Service
The deployed service is accessible via option Open Application in the deployment controls section. The start page of the deployed service looks exactly the same as that of the test service: The handling of the deployed service is also the same: The difference is: The deployed version does not change, even if the developer changes the service in the test environment.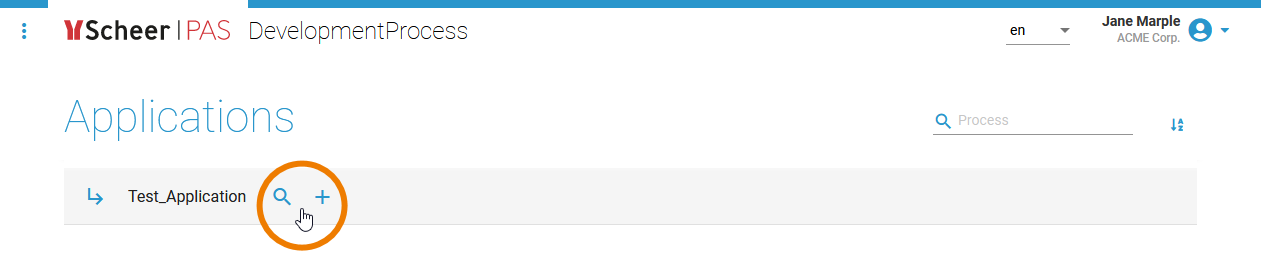
Example: Test Service vs. Deployed Service
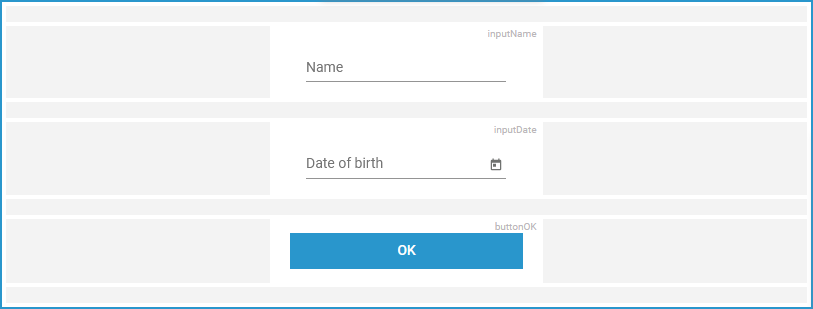
| A developer created a simple test application, containing only a user task with an assigned test form. |
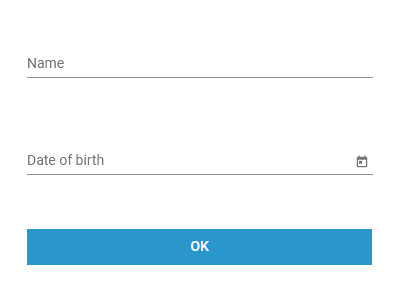
| The test form contains two input fields and a button. |
| The developer deploys this version. |
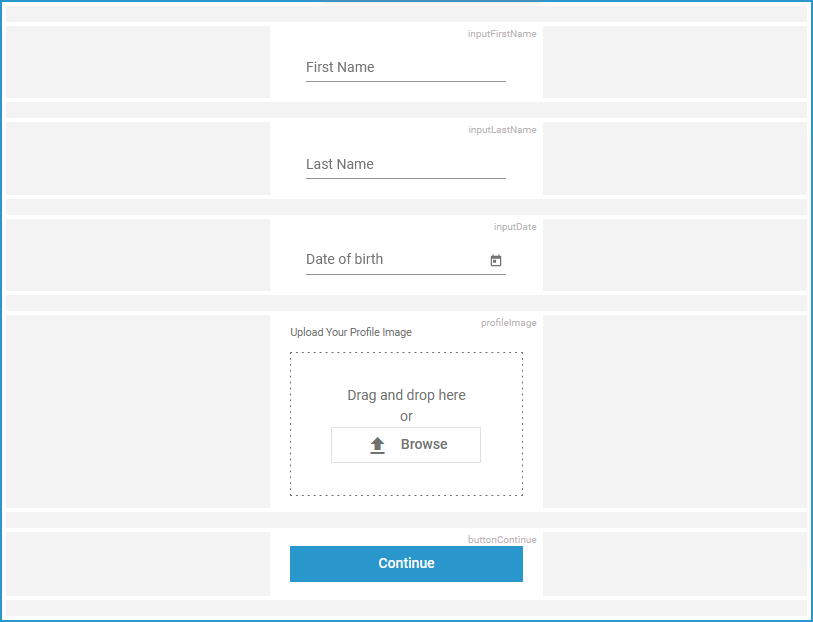
| After the deployment of this version, he starts to extend the test form. |

On this Page:
Related Pages:
Related Documentation:
Test Service
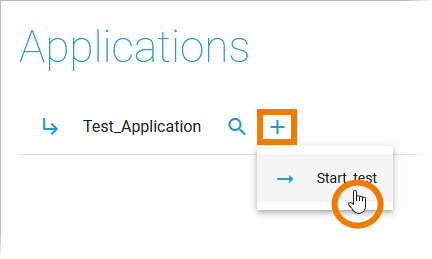
The developer opens the test service. The developer starts the process to create a new instance. 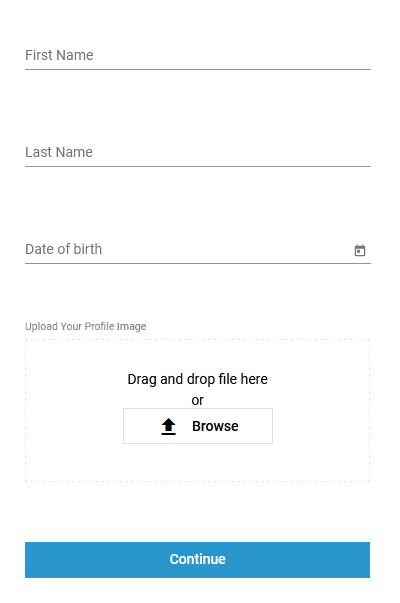
The adapted form opens.
Deployed Service
| The tester opens the deployed service. |
| The tester starts the process to create a new instance. |
| The deployed version of the form opens. |

Overview
Content Tools