A Service contains one executable micro service. Services are created in the Explorer tree. The necessary settings for your service such as the service properties, the BPMN model, the data model, used libraries and forms are managed within the service. You need to open a service to access its contents via the Service panel, refer to Service Panel for details.
Creating a Service
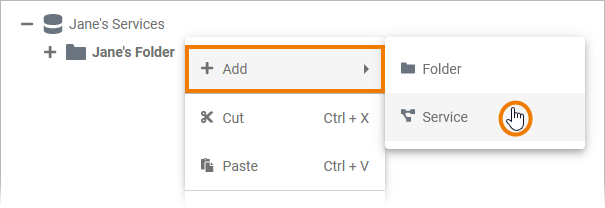
| Services can only be created in folders. To add a service to a folder, right click on the folder and select Add Service from the context menu. |
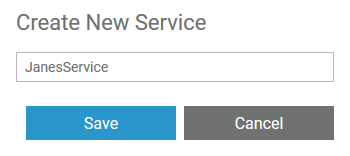
| Enter a name for the service in the pop-up window Create New Service. Click Save. If you want to deploy the service to a container later, please note that on container deployment the service name is automatically changed according to certain rules. Naming of Services for Container Deployment Example:
|
Restrictions on Element Names The only restriction for folder names is that they must not be empty. To all other elements in the Explorer, the following name restrictions apply: Element names...
| |
| The new service is created and displayed in the tree. |
| To open a service, click on the service name in the explorer tree. To access the service, click on the the explorer tab icon or on the service details area to close the explorer tab. Refer to Service Panel for further information. |


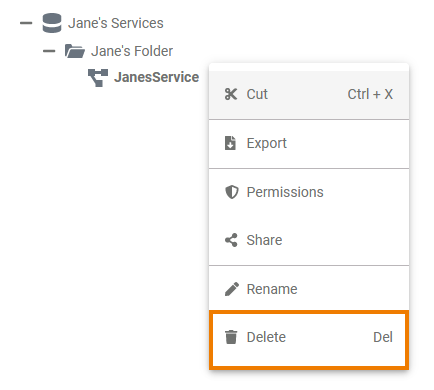
The Service Context Menu
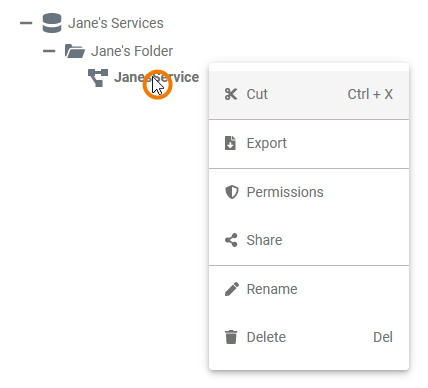
| Right click a service to open its context menu. The context menu displays all options available for a service: |
Cutting and Pasting
|
|
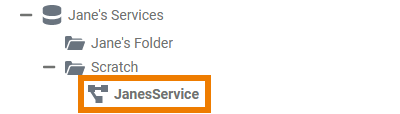
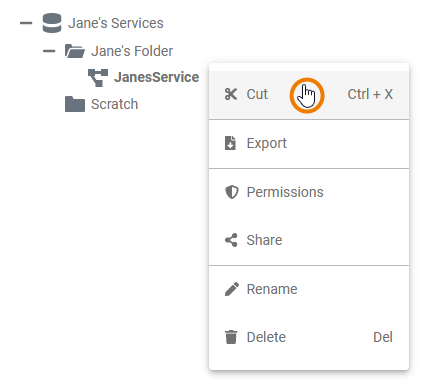
If you want to use an element at a different position in the tree, select the context menu option Cut. |
|
|
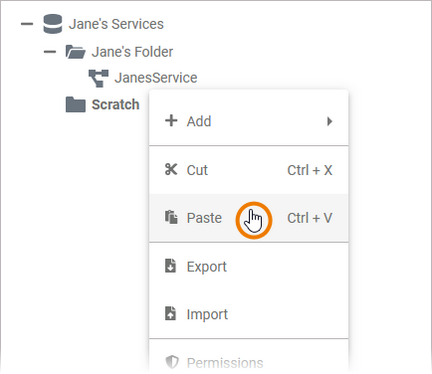
Open the context menu of the element in which you want to insert the cut element and select Paste. Option Paste is only enabled if the elements to be inserted fit into the tree hierarchy. Pasting elements is only possible in the same namespace. |
|
The element is now displayed on its new place in the tree. |
Exporting and Importing
You cannot import elements into a service. But it is possible to export services from folders. For detailed information see page Exporting and Importing Explorer Contents .
Managing the Service Permissions
You can set access restrictions on several levels:
- On namespace in the user management: This level has the highest priority. If a namespace with read-only permission is already assigned to the user in the user management, the permission set in the Designer has no effect. For further information go to the Scheer PAS Administration Guide.
- On a folder: See Folders. Folder permissions affect all sub-elements of the folder, but you can assign permissions to a service within the folder independently.
- On a service: See below. Service permissions only affect the corresponding service.
| Select the option Permissions in the context menu if you want to manage the access to a service. |
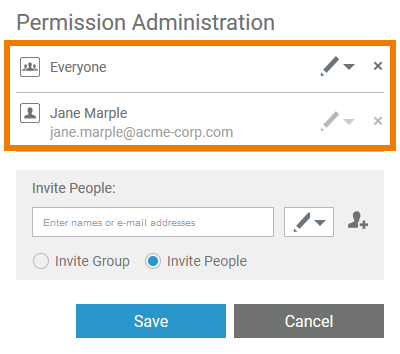
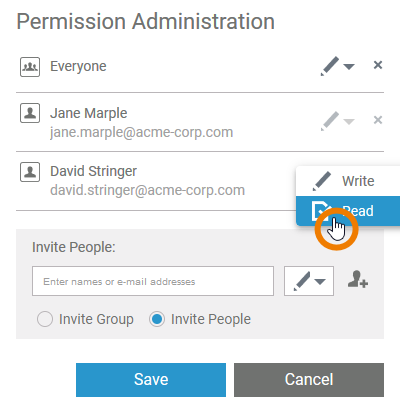
| In the pop-up window Permission Administration you can invite single colleagues or whole groups to access the service. By default, the creator of the service and everyone sharing the current namespace has write permissions. To limit access to the service you can delete the group Everyone or give it read-only permission. |
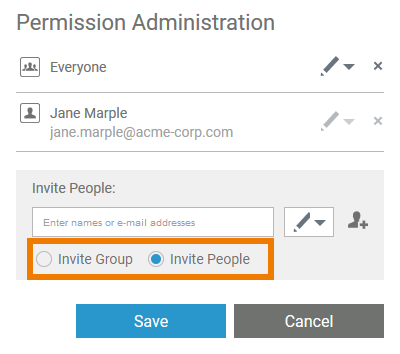
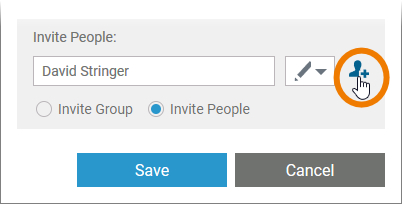
| If you want to add other users, first select one of the options:
Refer to Administration Guide > Managing Roles for detailed information about roles. |
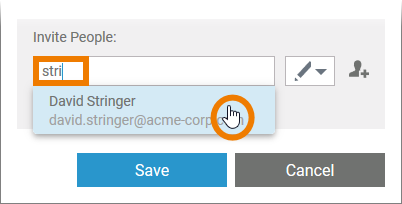
| Enter the name or email address of the group or person in the search field. Matching results are shown in a list. Select the entry you want to use. |
| Click icon |
| Once the user or group has been added, you can set whether the user or the group should have read or write permission. Save your changes. |

Sharing a Service
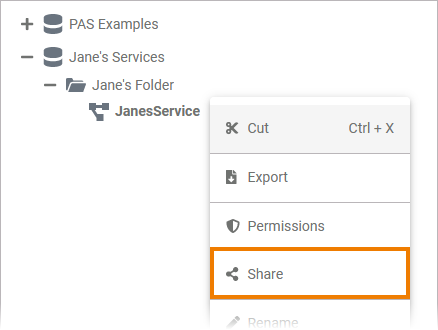
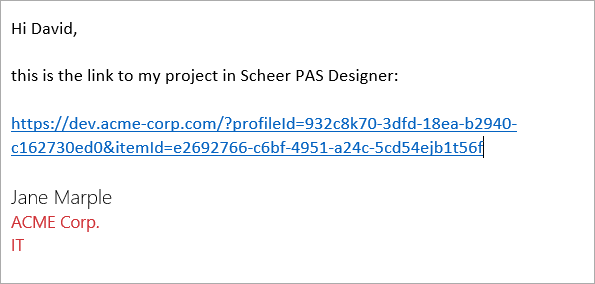
| You can also share the link for a service. Select Share from the context menu to copy the link of the service to the clipboard. |
| The action is confirmed by a toast message. |
| You are now able to paste the URL, for example to an email. |

Renaming the Service
| If you want to change the name of a service, select Rename. |
| Enter the new name in the pop-up window Edit Service. Click Save. MultiExcerpt named note_element_restrictions was not found -- Please check the page name and MultiExcerpt name used in the MultiExcerpt-Include macro |
| The new name is displayed in the tree. |


Deleting a Service
| To remove a service from the tree, open its context menu and select Delete. |
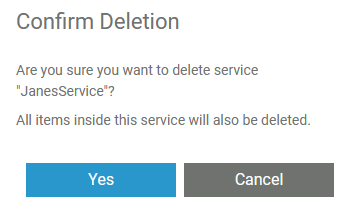
| Confirm the security prompt in the pop-up window with Yes to delete the service from the tree. Please note that all contents of the service are also deleted. |
On this Page:
Related Documentation:
Overview
Content Tools