Page History
Saving Instances
When an app is executed, data records are generated. We call these datasets instances. This data is managed in a so-called container. During the runtime of an app, the data is available in the container, but is not permanently stored there.
In order to save this volatile data permanently, it must be stored in your client database. An individual client is set up for each BPaaS customer, in which his databases are also located. Only the customer's data is stored here.
| Tip |
|---|
Scheer PAS BPaaS processes a workflow in the same way as an assembly line. Further information can be found on page The Container Principle. |
Saving Values in the Container
Multiexcerpt include MultiExcerptName container DisableCaching true PageWithExcerpt The Container Principle
| Tip |
|---|
Additional information can be found at Saving in the Database. |
| Multiexcerpt include | ||||||
|---|---|---|---|---|---|---|
|
Saving in the Database
In order for instances to be stored permanently in the client database, two conditions must be met:
- Your form must contain a Button with the Save Instance option selected, so that saving can be triggered when leaving the form (see Configuring Buttons).
- The form field option Save Value in Instance must be activated.
When you exit a process app, the saved data will be preserved in the database and you can continue working with it at a later time. The simplest example is the overview of all instances: If you call the overview after restarting the app, the saved data is displayed in the instance table.
| Tip | ||||
|---|---|---|---|---|
| ||||
Values do not have to be transferred exclusively to your BPaaS system using forms; they can also be transferred from an external system, for example. This data is also initially volatile and you need to store it permanently using appropriate coding. |
Configuring Buttons
Instances can only be saved permanently if the form contains a button to save instances.
Multiexcerpt include MultiExcerptName rollenpruefung_beim_speichern DisableCaching true PageWithExcerpt INTERNAL:_Excerpte_BPaaS
Buttons are not only important for saving instances. Buttons are also necessary to exit a form or to move the process to the next step. When a new form is created, three default buttons are already available:

The default buttons are configured differently:
| Multiexcerpt include | ||||||||
|---|---|---|---|---|---|---|---|---|
|
| Tip |
|---|
All configuration options are explained in detail at page Form Elements > Button. |
| Tip | ||||
|---|---|---|---|---|
| ||||
|
Deleting Instances
Deleting instances contradicts the principle that Scheer PAS BPaaS is your process memory - and therefore does not forget. So, instances stored in the database cannot be deleted. However, you can deactivate them. This is possible for individual instances or entire collections of instances.
Deleting Individual Instances
| Deleting Instances using a Button | |
|---|---|
| You can assign the option Delete Instance to the form element Button. If a button is equipped with this option, the dialog shown in the screenshot appears when a user clicks the button. The instance in question is marked as deleted as soon as the user confirms the dialog with Delete. The data record can then no longer be found in the search overview. |
Deleting Instances from an Instance Table | |
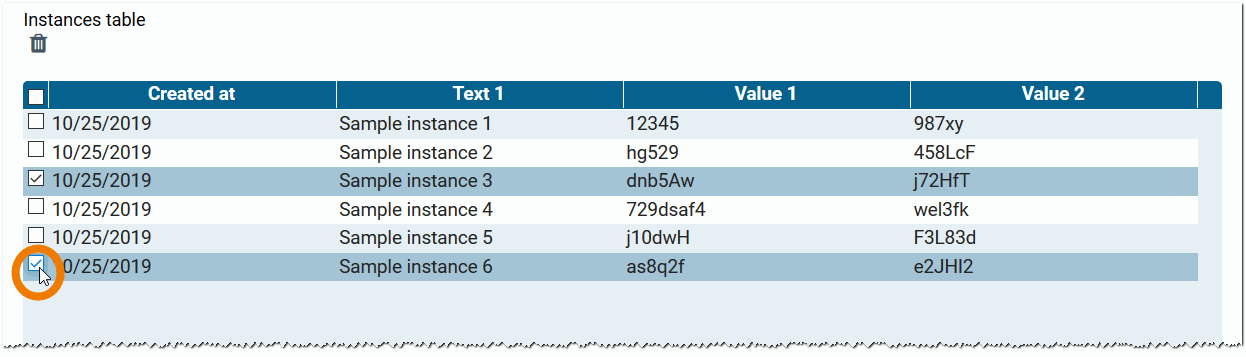
| You can also delete individual instances using the Instance Table in the app's overview. Each instance table has the option Display Button 'Delete'. If you activate this option for an instance table, a trash can is displayed during execution. In addition, a column with checkboxes is added to the front of the table. |
| You can now select individual instances using the checkboxes. Clicking the checkbox in the top row will select all instances of the currently displayed table page. |
| Click the trash can - the dialog Delete Instances appears. |
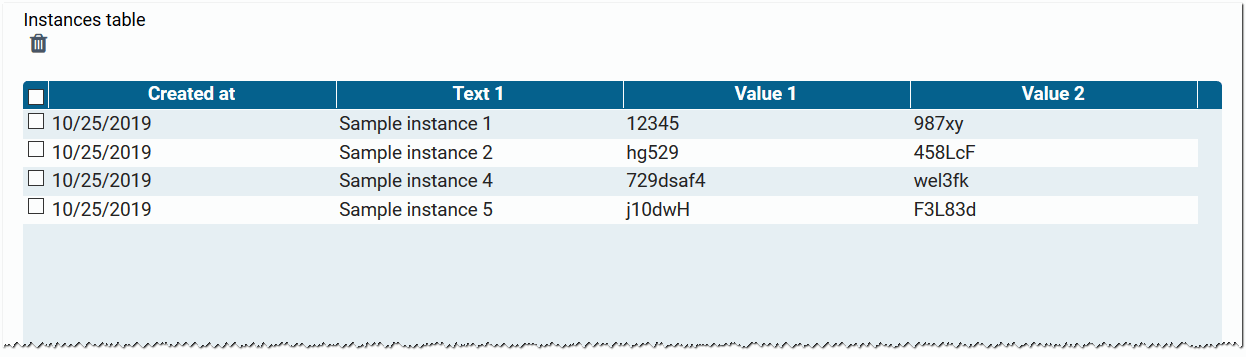
| Once you confirm with Delete, the marked instances are removed from the table. |


| Info |
|---|
Data records "deleted" by button or instance table are not removed from the database, but archived there. |
Deleting a Collection of Instances
Instances can also be deactivated en bloc. For example, after a test phase you may want to remove the whole test data from the overview table to clear the app for the productive data. In that case, you can just change the Collection Name in the properties of the app project.
 | The collection name is the key under which the whole dataset is stored in the database. You will find the Collection Name in the properties of the element App Project. During the creation of an app project a default collection name is set. The instances of the app will be stored in the database under this namespace. However, the name of the collection can be changed at any time. Changing the Collection Name results in a new database area being assigned. The instance table in the overview is therefore initially empty, the data is "deleted". If the collection name is reset to the old value, the old instances also appear again in the overview. So the instances are not really deleted from the database - the user simply has no further access to the corresponding database area in which the instances are located. |
| Panel | ||||||||
|---|---|---|---|---|---|---|---|---|
| ||||||||
|
| Panel | ||
|---|---|---|
| ||
|
| Panel | ||
|---|---|---|
|
| Otp | ||||
|---|---|---|---|---|
|
| Panel | ||
|---|---|---|
| ||
Overview
Content Tools