Processes are based on data that is going in, is processed, and coming out. Scheer PAS Designer allows to create forms that can be used to provide data into a process. A form sends so called trigger events on certain human interactions with the form. These trigger events can be used to trigger different process steps or executions.
Available trigger events are:
| Trigger Event | Description | Example |
|---|---|---|
<button>.click | Trigger event provided if a button is present on the form. This event is triggered if the button is clicked by the user. | button_Cancel.click |
| <data table>.rowClick | Trigger event provided if a data table is present on the form. This event is triggered if a row of the data table is clicked by the user. | table_OrderPositions.rowClick |
Trigger events can be assigned to user tasks and (plain and message) boundary events to continue the process with the flow starting from this task or event (see example on the right).
Button Handling
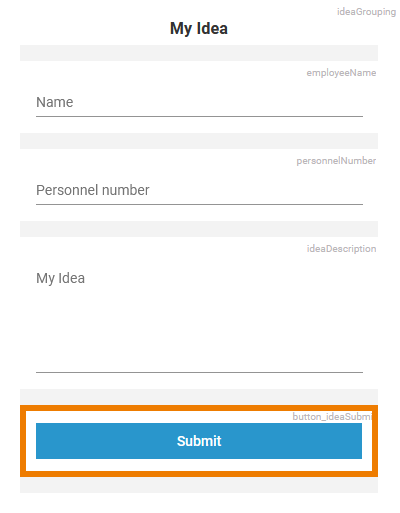
| When the user has completed the form, he has to click a button to continue and process the entered data - the button click triggers the next process step. So if you create forms for your process, you need to insert at least one button. |
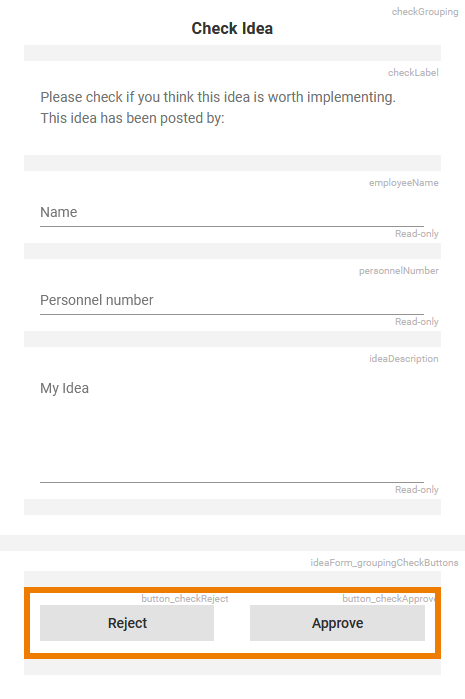
| The example on the left shows a form with multiple buttons that are used to implement a decision. Example: In the ACME idea management process, the CEO has to decide if a reported idea should be implemented or not. Therefore the form IdeaCheck contains two buttons:
|
| The different button events correspond to different possible process flows. Work with boundary events to define the additional process flows. Example:
|
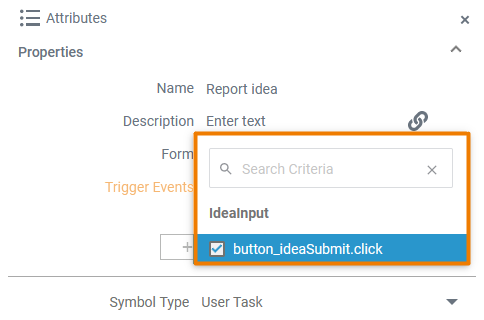
| Use the attribute Trigger Event to define for each button in the form which process flow is to be triggered when clicking it. The trigger event defines which button event should trigger the execution of the related element. You can find the attribute Trigger Event in the attributes panel of
Before you assign a trigger event, make sure that the form you want to use is assigned to the user task in the Form attribute. If no form is assigned, there are no trigger events available. |
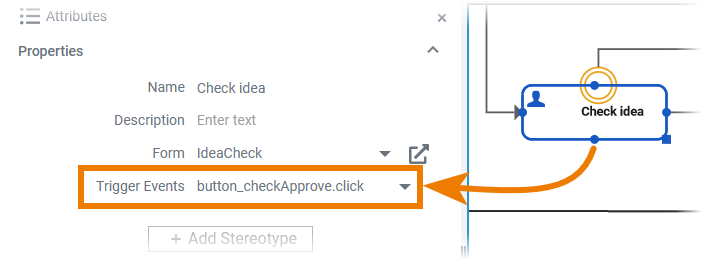
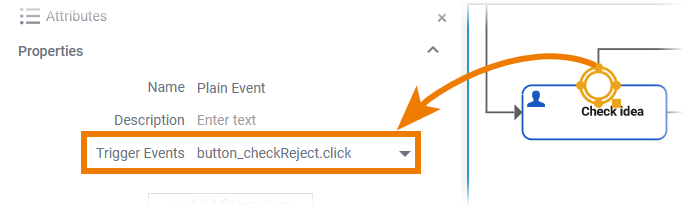
| If the assigned form contains one button only, assign this button as trigger event on the user task to define the default process flow. Example: The Approve button is assigned to the user task Check idea. |
| Use the Trigger Event attribute of each boundary event, to define additional process flows. Example: The Reject button is assigned to the boundary event. |
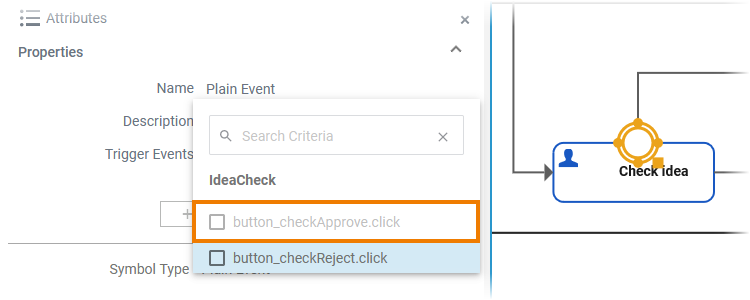
| A button event cannot be assigned twice as a trigger on the same form. Once you have assigned it to an event or form, it is greyed out on the other element(s) and you cannot select it anymore. Example: The Approve button has already been assigned to the user task Check idea, therefore it is greyed out in the selection list of the boundary event. |
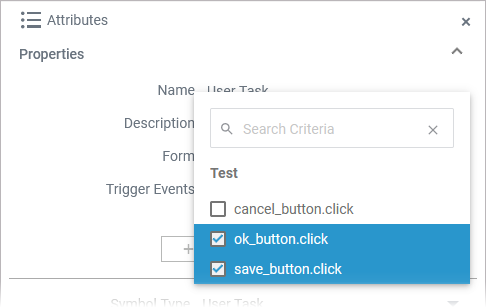
| However, it is possible to assign several trigger events to one BPMN element to ensure that multiple buttons can trigger the same process flow. If multiple buttons are available in a form, you can use the search box to find the button(s) you want as trigger event(s). For detailed information on how to use the search box, refer to Searching in the Designer. |
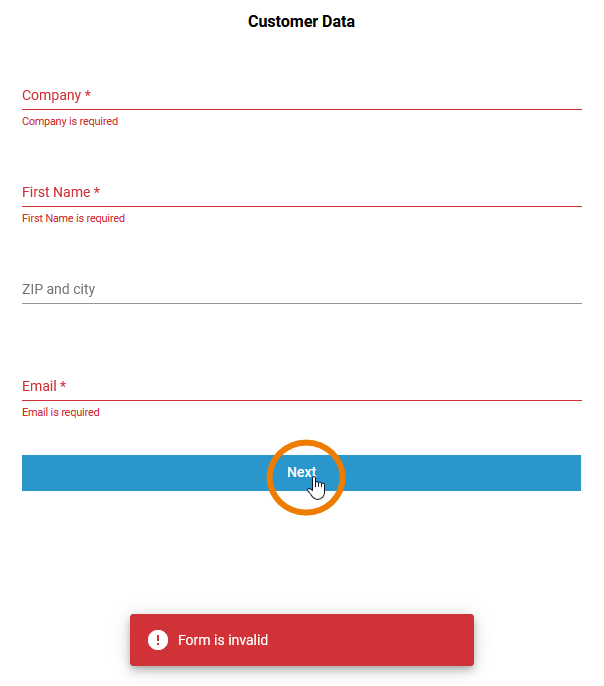
| Expert Advice If a form contains form fields that are marked as mandatory, form buttons cannot be used until all mandatory fields have been filled in. However, in some cases it may be required to have a usable button in the form, for example to enable a return to the previous form (e.g. with a Back button). For this use case, you can work with events. Example: Modeling a Back button:
|

On this Page:
Idea_Management_Example
| Click the icon to download a simple example model that shows what you can do with Lanes and Forms in Scheer PAS Designer. It also contains a configured instance list and shows the usage of trigger events. |
Overview
Content Tools