This page explains the REST Adapter in Bridge context. If you were looking for the same information regarding the PAS Designer, refer to REST Adapter in the Designer guide.
It may be that the import of the YAML file fails or the REST service provides no description file at all. In this case, you can draw the REST interface definitions manually. On REST Import Rules you can find an overview on how OpenAPI entities are mapped to UML elements.
Example File (Builder project Add-ons/REST):
| <your example path>\Add-ons\REST\uml\accessJIRAviaRestAdapter.xml |
REST Alias
Add a REST alias to your component diagram. How to manually create an alias is described on Backend Components > Creating an Alias. Apply stereotype <<RESTAlias>> and provide the necessary tagged values as described on REST Adapter Reference > <<RESTAlias>>.
API Classes
Collect all parameter and type information from the REST API documentation, draw the necessary classes and their relations. If you have an XML Schema (XSD) of the classes, you can import the XSD. The E2E REST Importer would import the type information to a package <your API name>/Types and we recommend to do the same.
Figure: JIRA Create Issue Classes
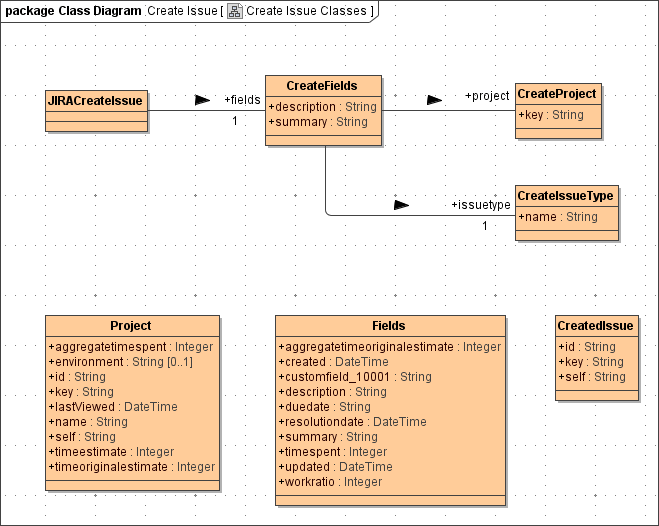
You do not need to depict the complete interface - it is sufficient to draw the needed classes for the resources you want to access and the properties you want to deal with.
If the REST service provides additional error information in his response, create an error class, too, and apply stereotype <<RESTError>>.
API Interface
Collect all needed information on the REST resources you want to access from the documentation of the REST service.
Defining a REST interface to access a REST service with the REST Adapter resembles defining the interface of a REST service itself. You can find more information on that on Defining a REST Service Interface. You need to create all service elements that are listed as mandatory in the table below.
A REST interface consists of:
| Element | Stereotype | Mandatory | Tagged Values Reference Link |
|---|---|---|---|
| a REST interface UML package | <<RESTInterface>> | <<RESTInterface>> | |
| REST resource classes | <<RESTResource>> | <<RESTResource>> | |
| REST operations | <<REST>> | <<REST>> | |
| REST parameters | <<RESTParameter>> | ( | <<RESTParameter>> |
| REST error class(es) | <<RESTError>> | <<RESTError>> | |
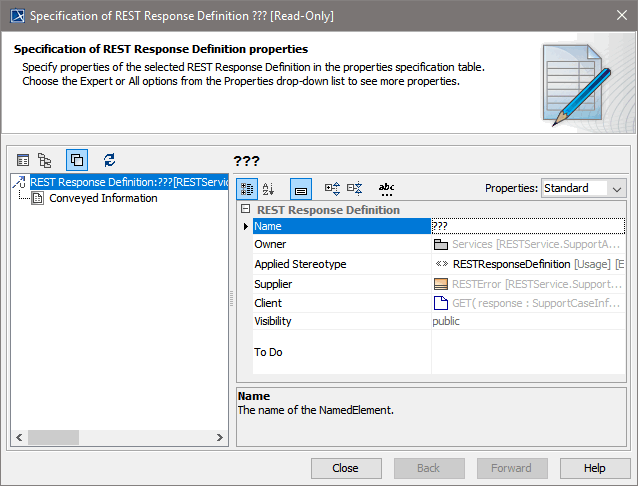
| REST response definitions | <<RESTResponseDefinition>> | <<RESTResponseDefinition>> |
REST interface documentation and tags as described on Defining a REST Service Interface are not relevant in this case and you can leave them out.
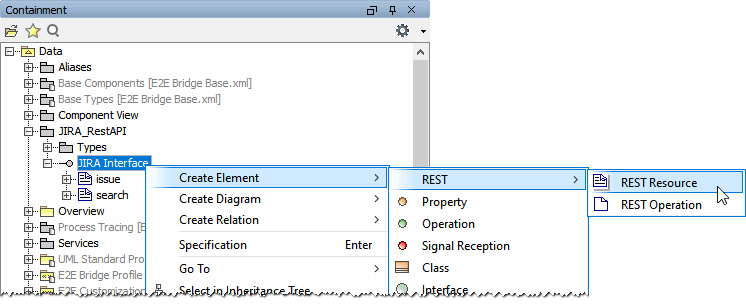
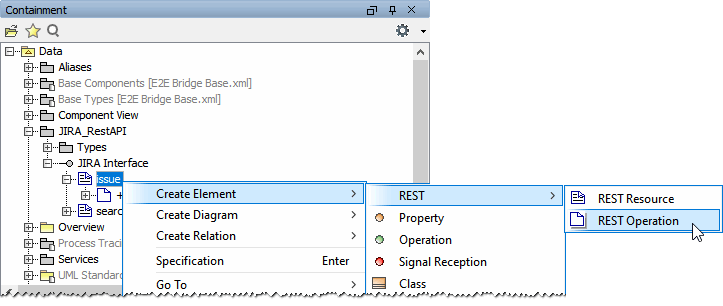
Steps to Create a REST Interface
- Create a package <your REST interface> under package <your API name> and assign stereotype <<RESTInterface>>.
- In this package, create REST resources (stereotype <<RESTResource>>) and their operations (<<REST>>) and parameters (<<RESTParameter>>) according to the REST service documentation.
If the REST operation path contains fix segments (like e.g.
date=) that should not be URL encoded by the E2E xUML Runtime before accessing the resource, set tagged value isVerbatimPath to true. Refer to REST Adapter Reference for more details on this.
If a REST parameter has an ugly name that would have to be escaped, use tagged value externalName. Refer to REST Adapter Reference for more details. - If the REST service provides additional error information in his response, you need to create use dependencies (stereotype <<RESTResponseDefinition>>) from the defined REST operations to the error class being used in this case.
On this Page:
Related Pages:
Overview
Content Tools