Instead of creating an API, you can also import an API. There are two different ways to import APIs:
Import from API Catalog
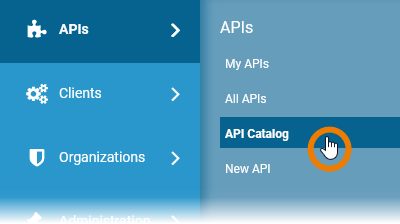
| The catalog is supplied along with API Management. You can find it in the sidebar menu, item APIs. |
The API Catalog lists all SOAP or REST services provided by the Scheer PAS integration component.
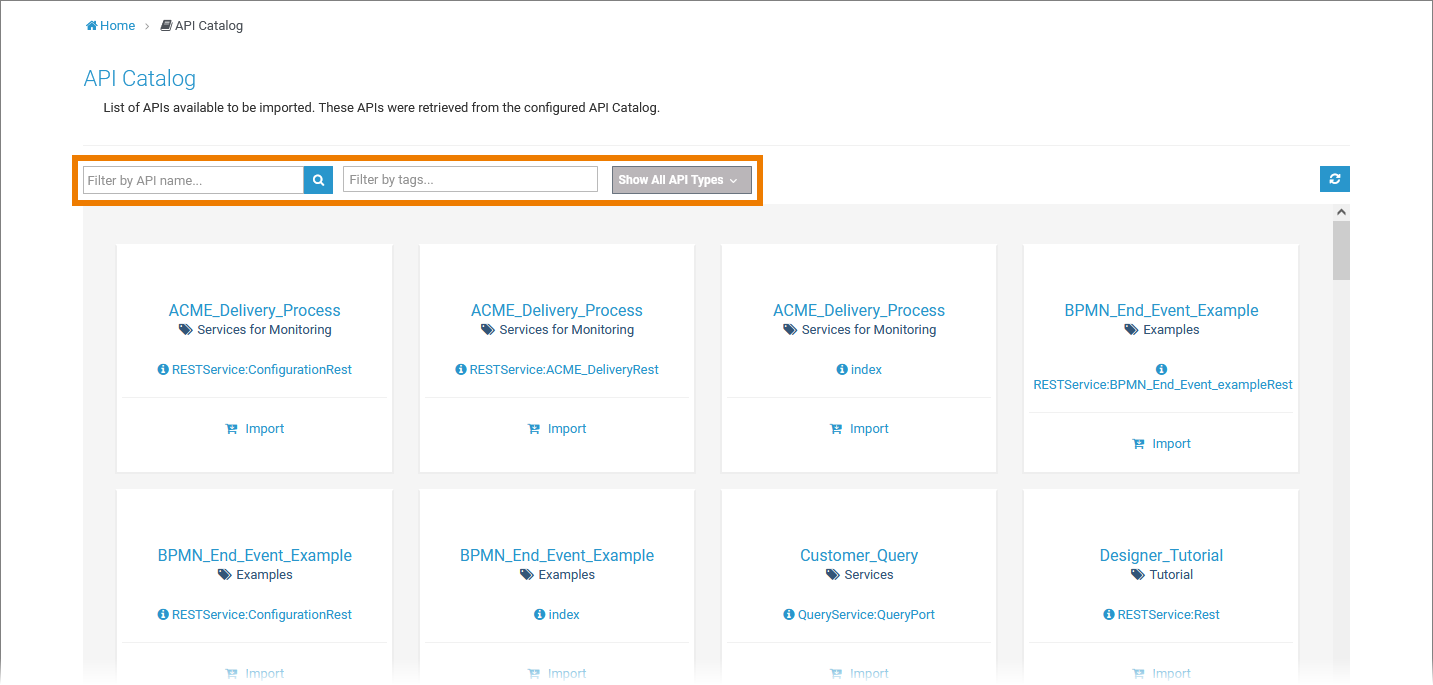
Three different filter options allow to search the catalog:
- Text filter: Filters by API name.
- Tag filter: Every service contains a tag corresponding to the category of an xUML service (see BRIDGE Documentation for further information on frontend components). Use this filter to list all services with the same tag.
- Type filter: Displays all REST or all SOAP services.
Search the catalog to find the API you want to use.
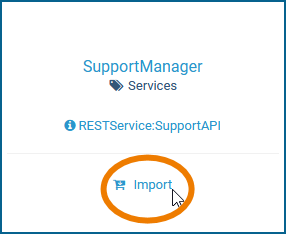
| Click Import on the API tile. |
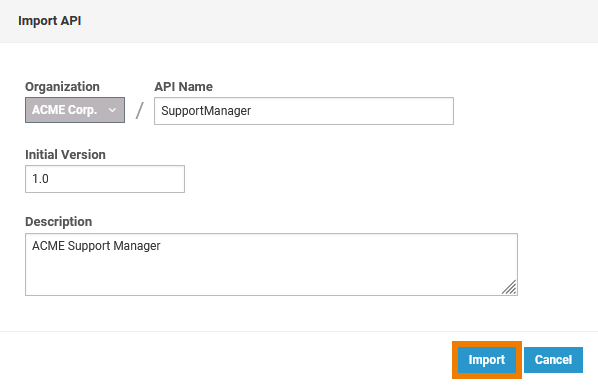
| The Import API dialog opens.
Click Import to start the API import, or Cancel to abort. |
After a successful import, the detail page of the API is displayed and you can directly customize the imported API:
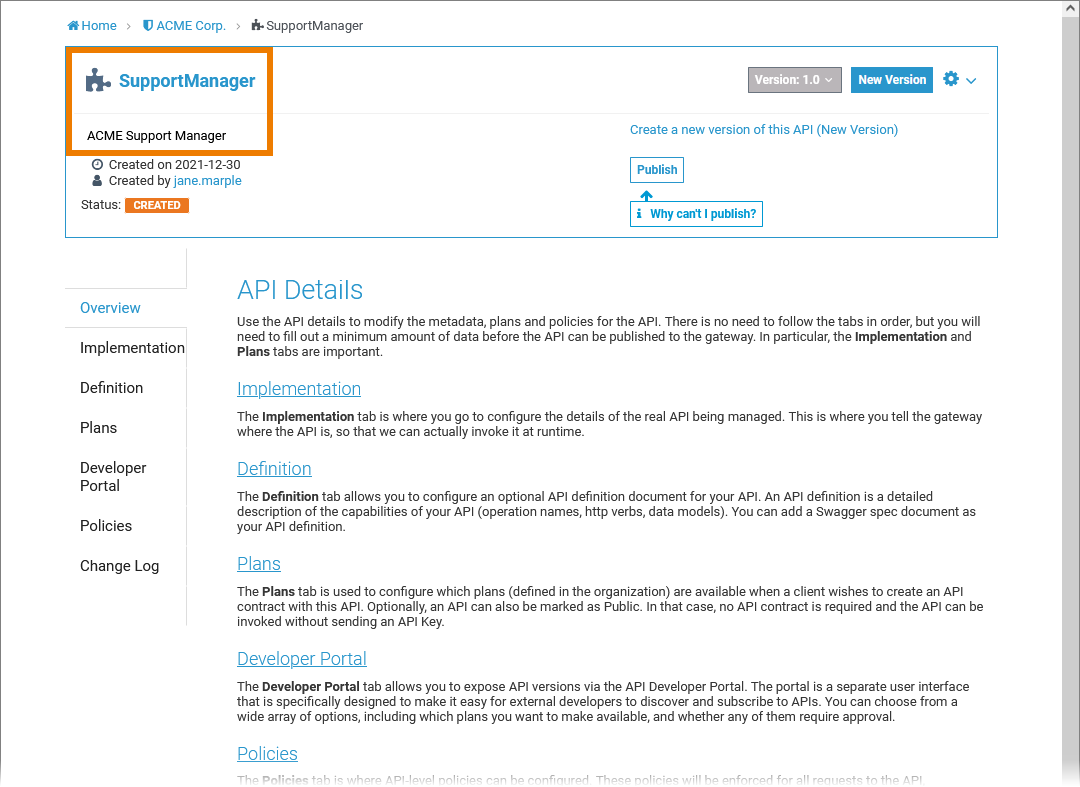
Go to Finding APIs to learn more about the configuration options of APIs.
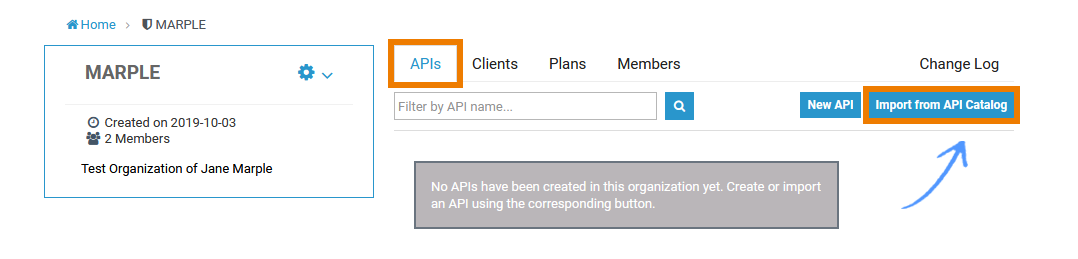
Import from Organization Details Page
You can also start an API import from the organization details page. Choose option Organizations > My Organizations from the sidebar menu and open the details page of one of your organizations. If you go to tab APIs of the organization, a button Import from API Catalog will be displayed on top right:
Page Import from API Catalog opens. It enables you to directly import the desired API(s) to the corresponding organization in three steps:
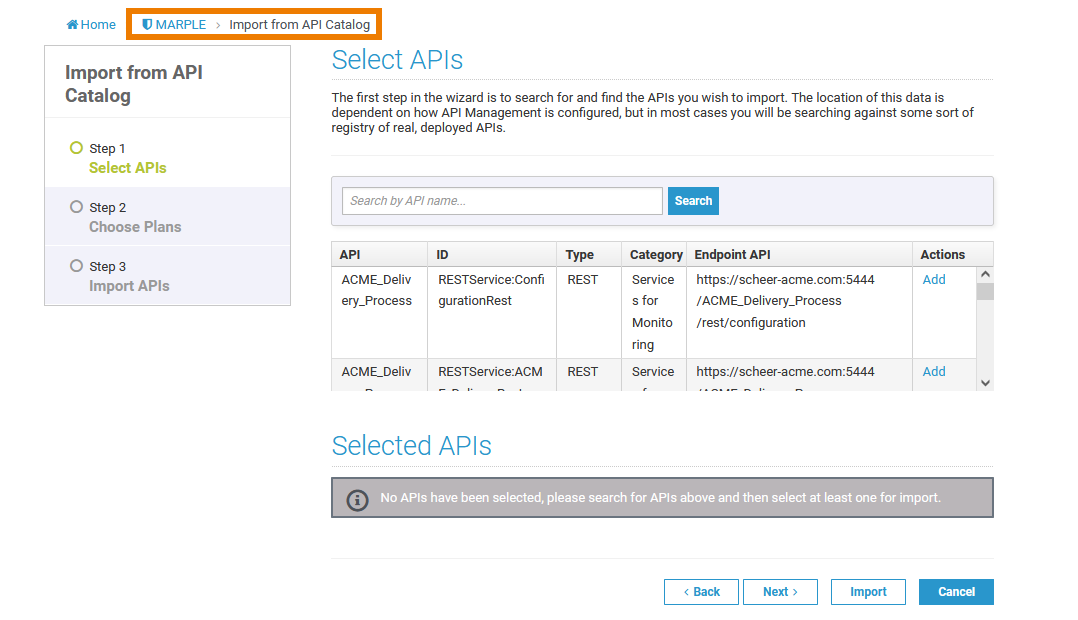
Step 1: Select APIs
In the first step, use the search field to find the API you wish to import and click Add to select it. The selected APIs will be listed underneath the search list. Use the link Remove if you have added an API by mistake. You can repeat this process as often as you like.
Once you have selected the API or APIs you wish to import, click Next to continue:
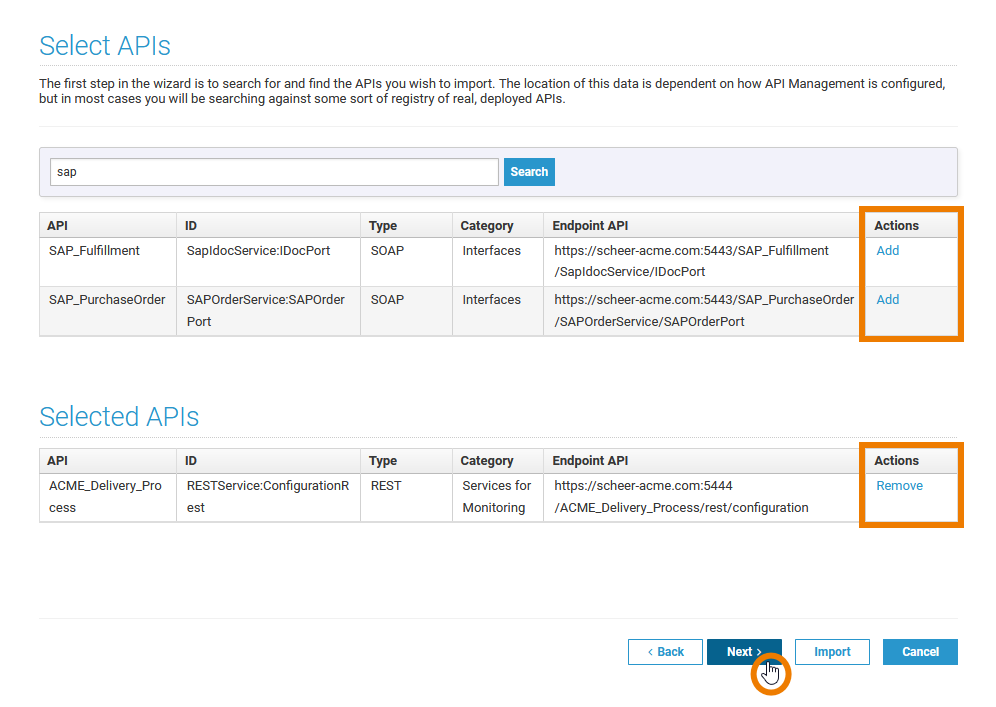
If the Add link is missing in column Actions, an API with the same name already exists in your organization. In that case, you cannot add this API.
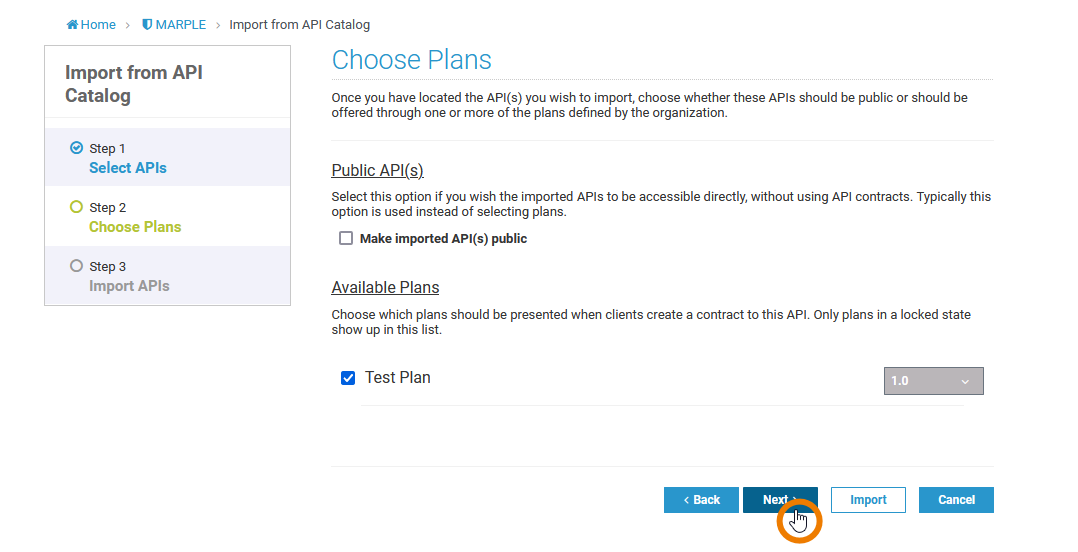
Step 2: Choose Plans
In the second step, choose whether these APIs should be public or private:
| Option | Desciption |
|---|---|
| Public API(s) | Enable checkbox Make imported API(s) public if you want the imported API(s) to be accessible by any invoker. |
| Available Plans | Choose the plan or the plans that should be presented to a client who wants to create a contract to this API. Plans must be locked to be available in this section. On page Locking a Plan you can find out how to lock plans. |
Click Next to continue.
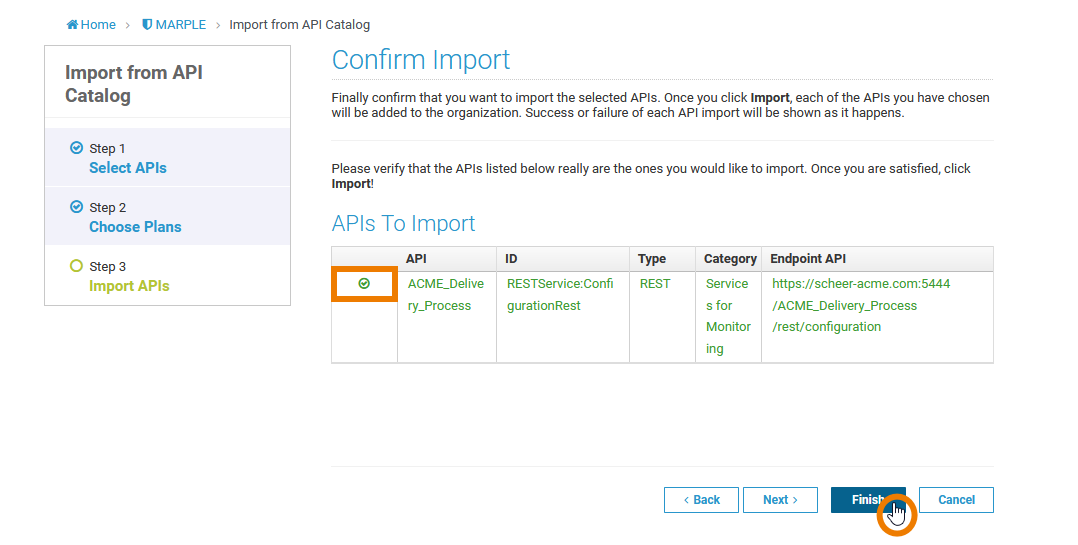
Step 3: Import APIs
In the last step, you need to confirm that you want to import the selected APIs. Once you click the button Import, all selected APIs will be added to the organization:

Success or failure of each API import will be shown as it happens. Click Finish to complete the import:
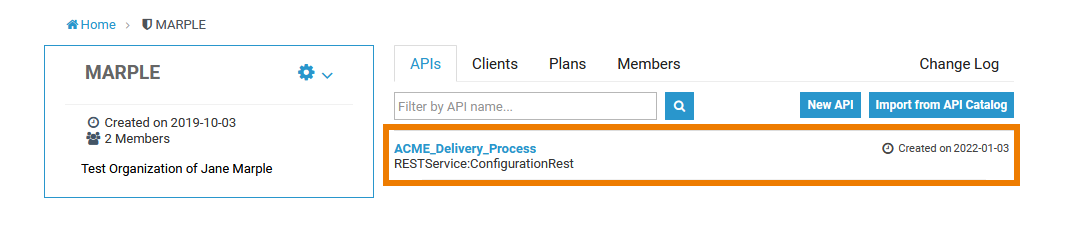
You will return to the organization details page, where the imported APIs are listed in tab APIs:
On this Page:
Related Pages:
Related Documentation:
Overview
Content Tools