Your app does not only consist of the input forms. The app always contains an overview in which you can search through the stored data. You will now configure the overviews of your app: Since you are using responsive and mobile forms, you must also configure responsive and mobile overviews.
Refer to Configuring Tables and Configuring Overview Tables for further explanations on this topic.
Configuring the Responsive Overview
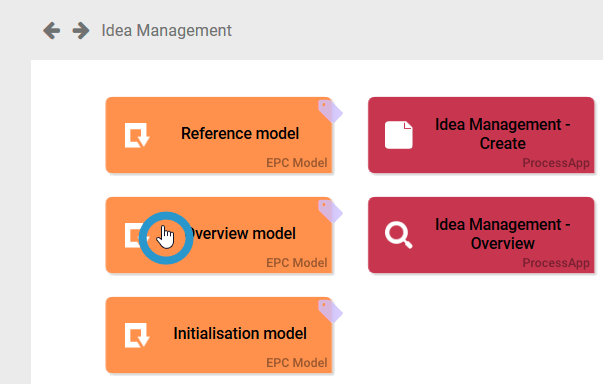
| You will now configure the overview of your app project according to your requirements. In the app project you can find the Overview model. Open it. |
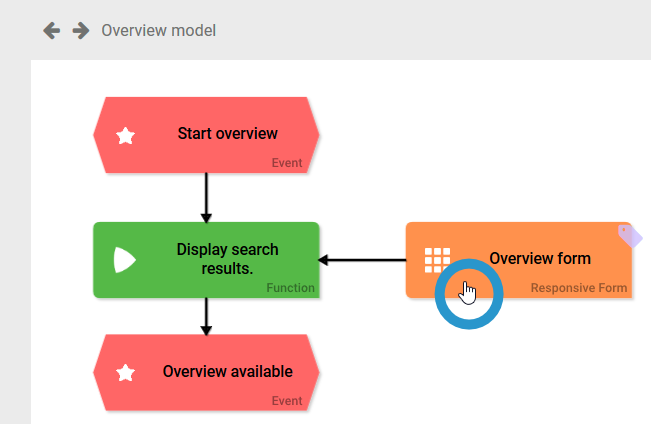
| In the model, open the Overview form. |
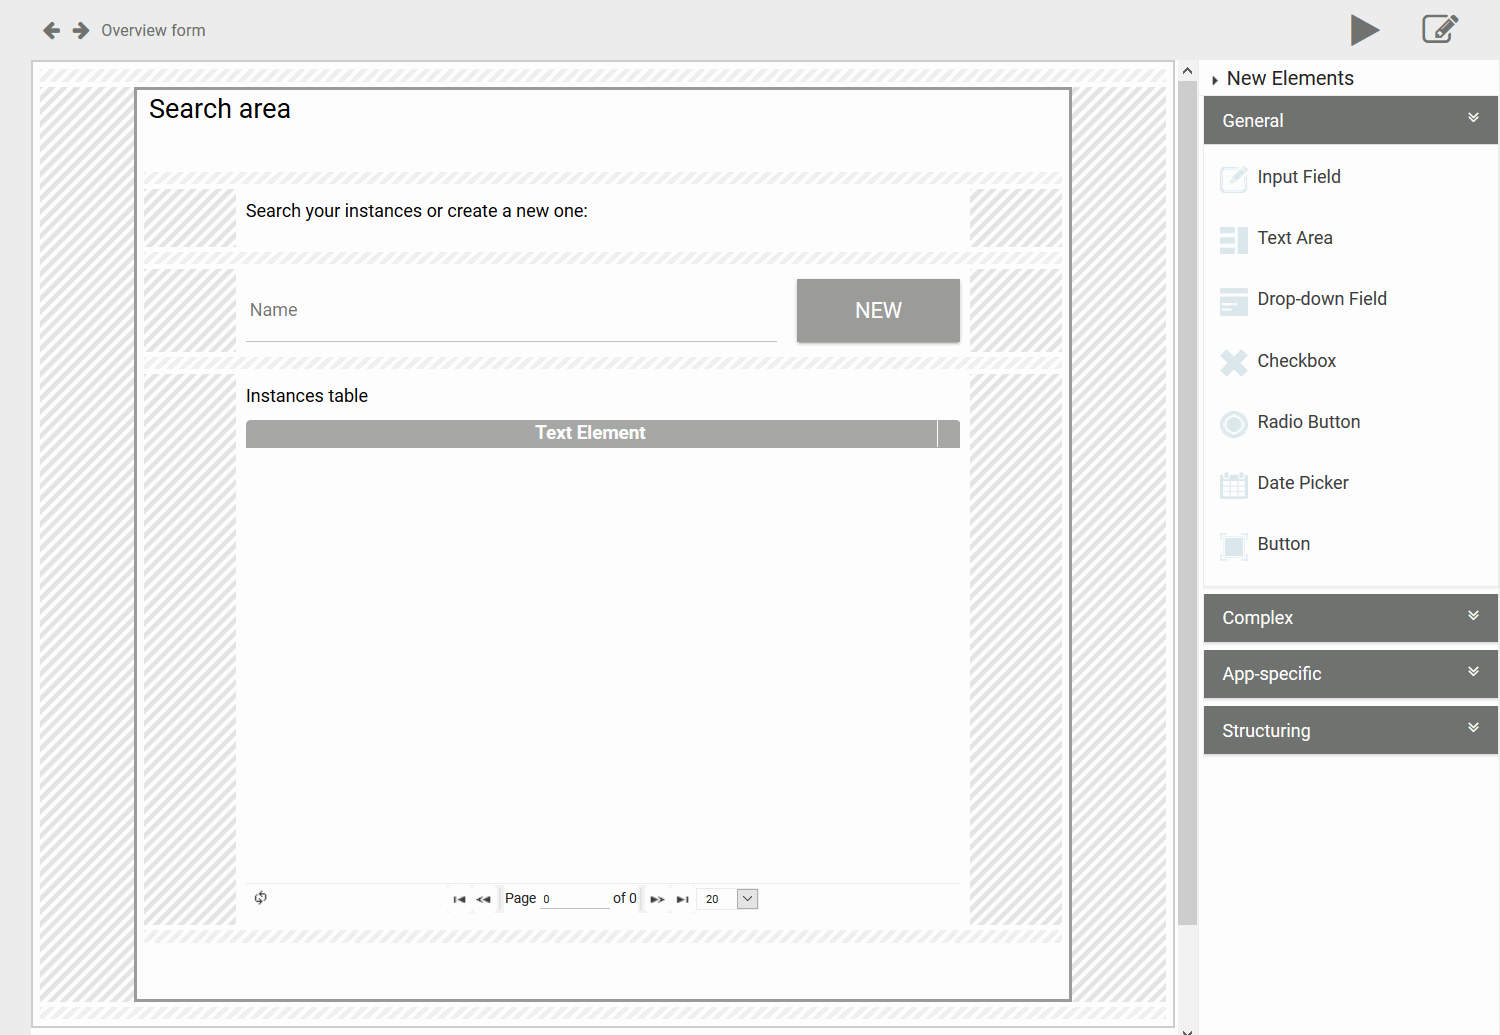
| Just like the input form, the overview form consists of a preconfigured area including:
You will create instance data with your input form. If you want to be able to search for the data created, you now have to adapt the instance table. The instances created in the app will then be displayed in the table according to your definitions. |
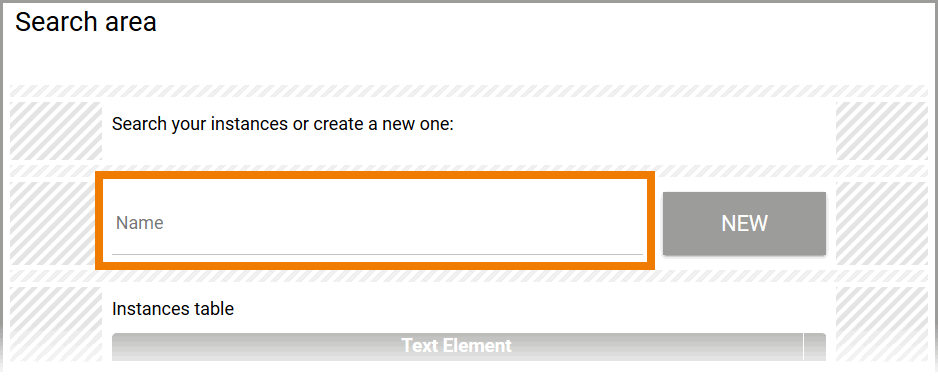
| Above the table you can insert form elements that serve as filters for the instance table's content:
In the overview form, the field serves as filter. If you enter a search term in this field, the instance table will only display instances matching this term in the input field Name. |
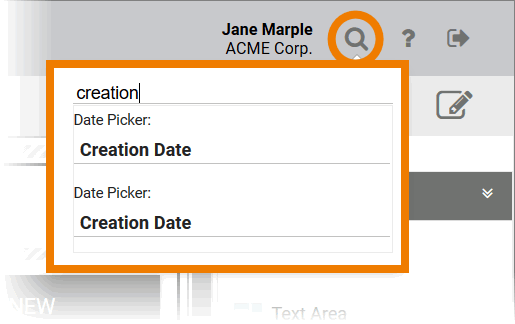
| Use the search function Enter the name of an already created form field to obtain suitable hits. You can drag and drop the elements from the hit list onto the workspace. The fields of both forms are thus linked. All inserted form fields can be used as filters to reduce the content of the instance table. Some fields require special configuration. |
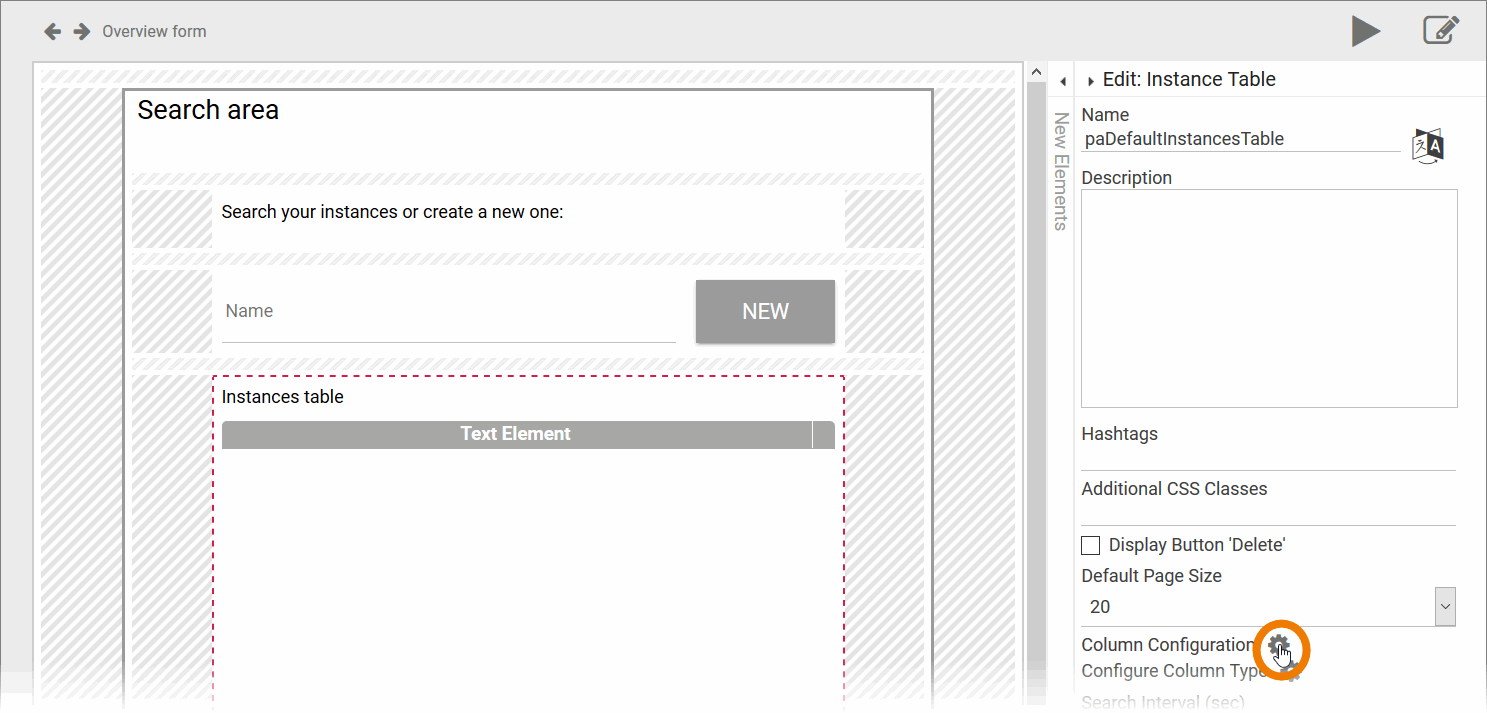
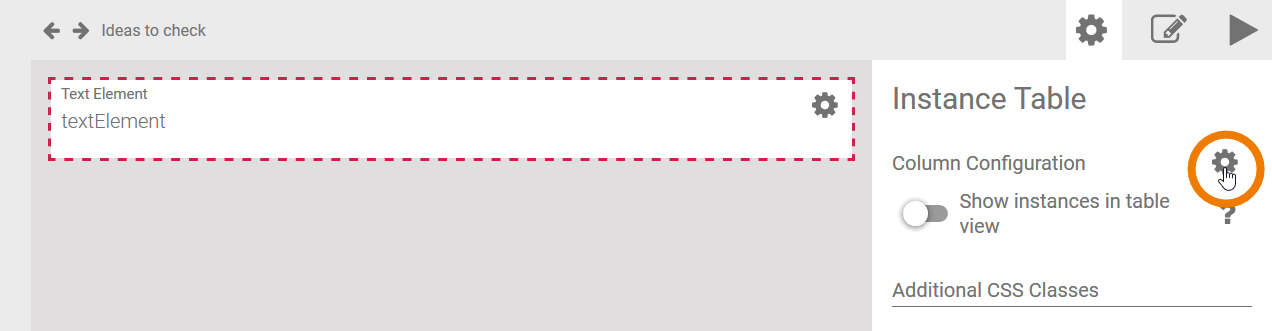
| You must now define which fields are displayed in the instance table. Select the table and expand the Edit Sidebar. Click on the gear wheel of the option Column Configuration. |
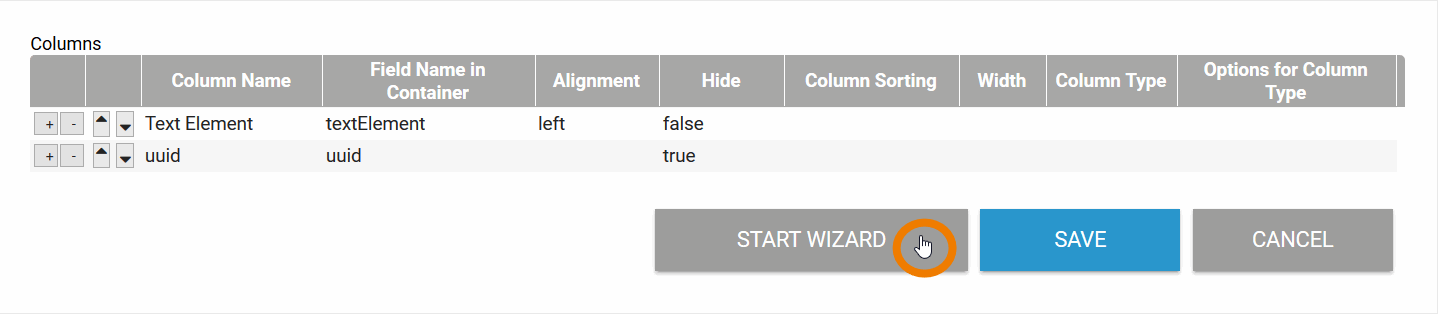
| The column configuration opens in a pop-up window. In this window, you can configure the instance table of the overview according to your requirements. Two default columns are already defined:
You can configure the table manually or use the column wizard, which assists you during configuration. Click on the button Start Wizard. |
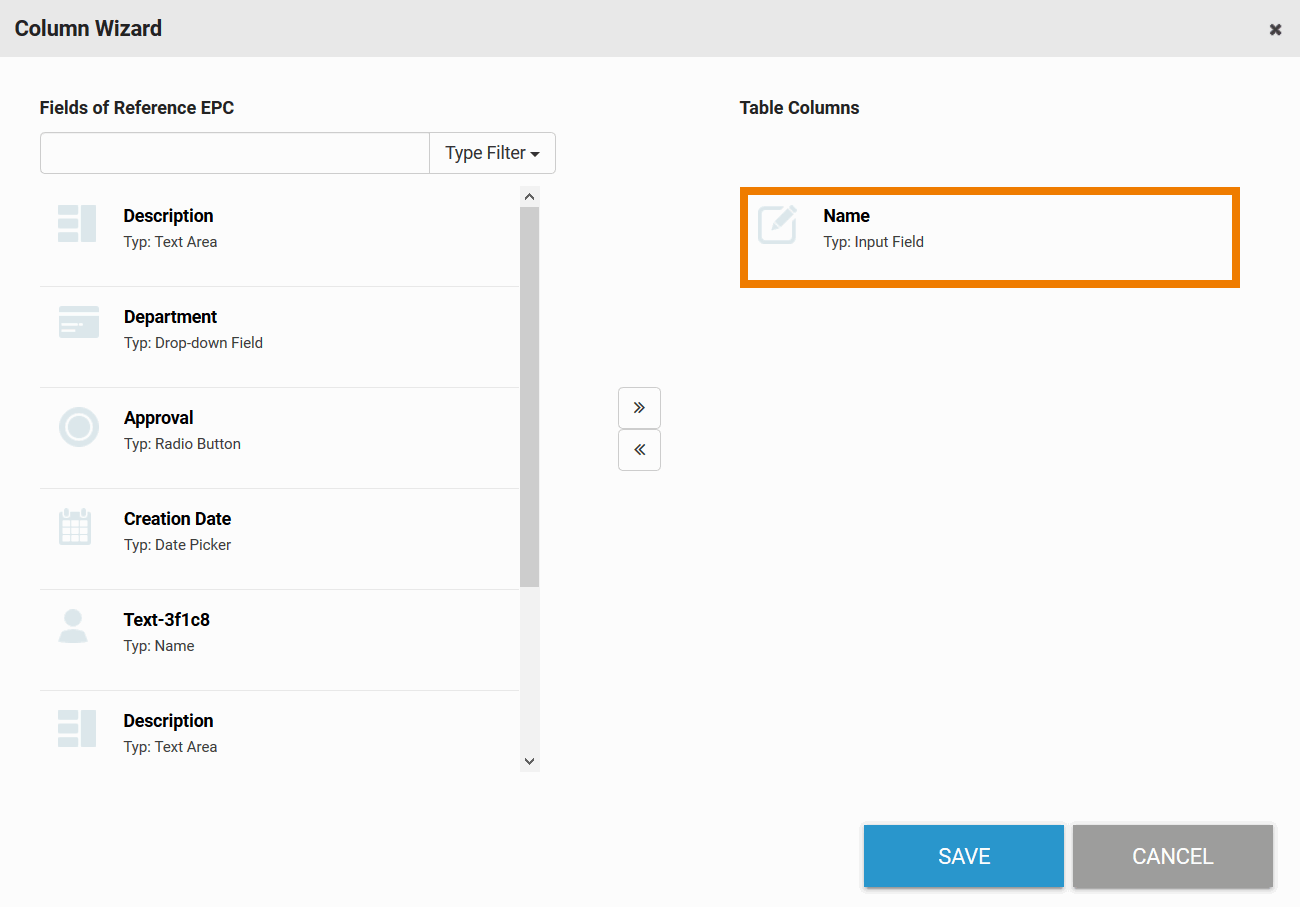
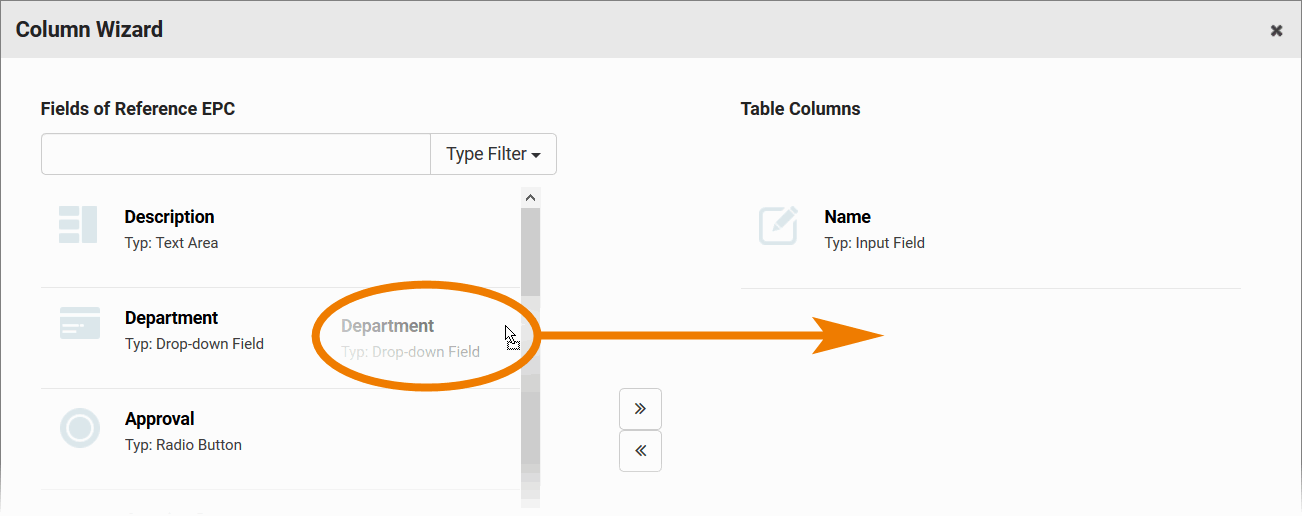
| The wizard is divided into two parts:
If you want to use all fields as table columns, click button >> to take the wohle content over. Accordingly, a click on the button << removes all fields from the overview. |
| Transfer the fields you want to display in the overview by either pressing the button >> or dragging and dropping the fields of your choice from the left to the right side of the wizard. |
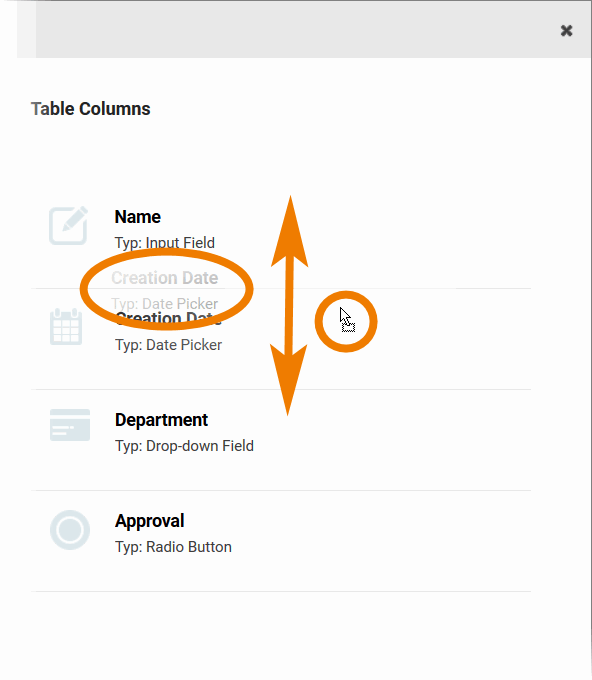
| The columns in the overview are created according to the sequence in the list. Change the order in the Table Columns list by simply moving the objects up or down. |
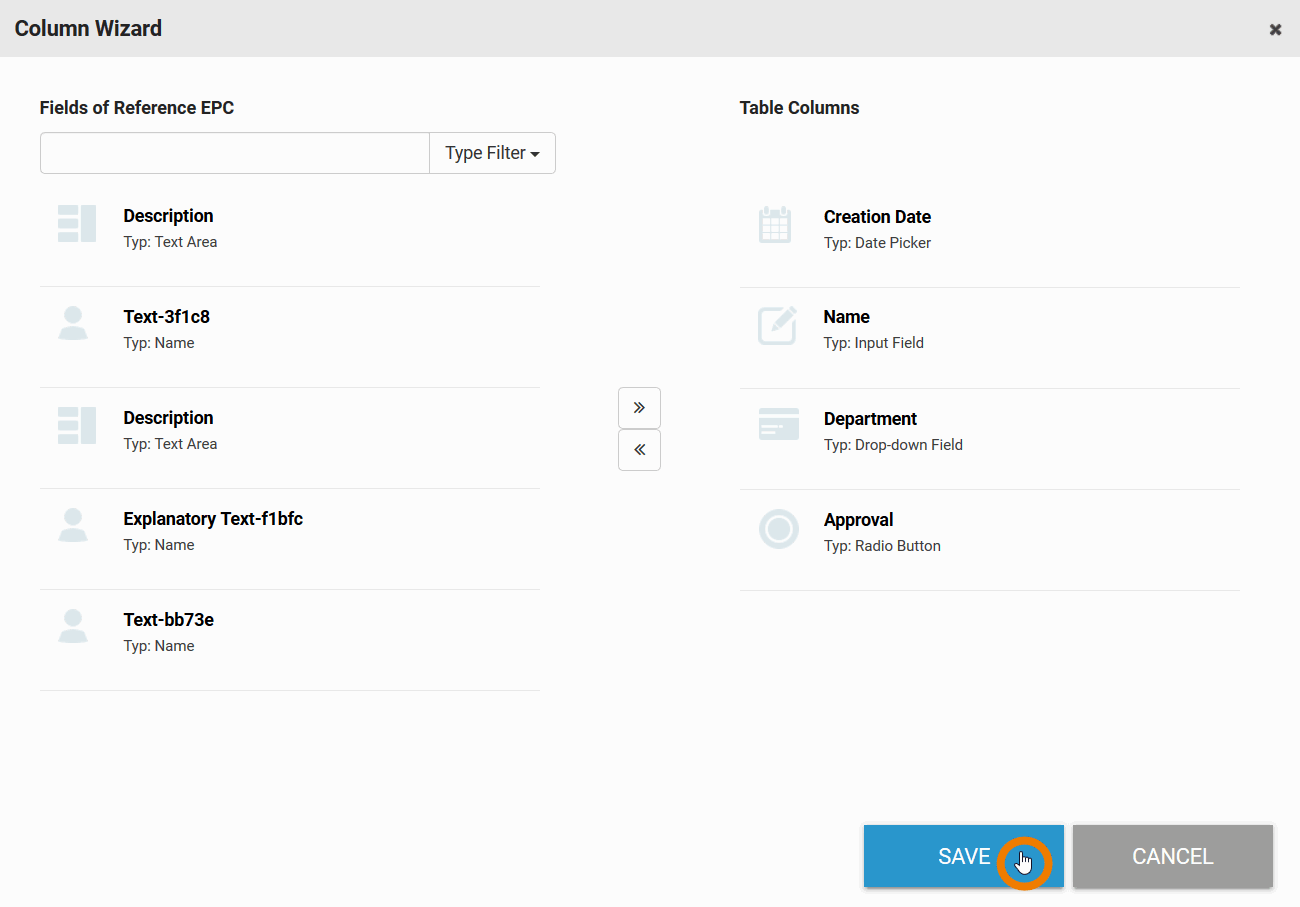
| Once you have arranged all the fields in the desired order, close the wizard by clicking Save. |
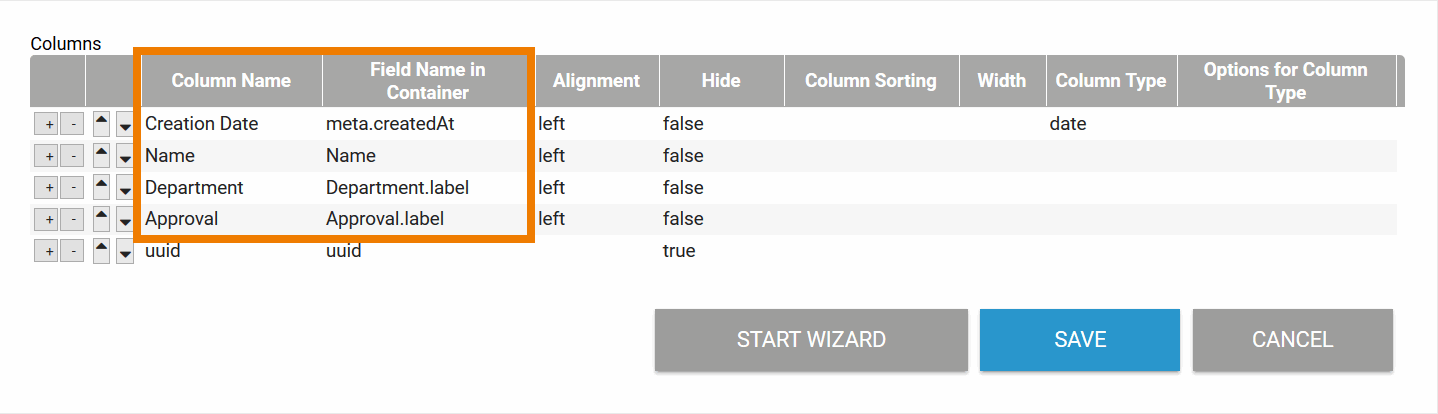
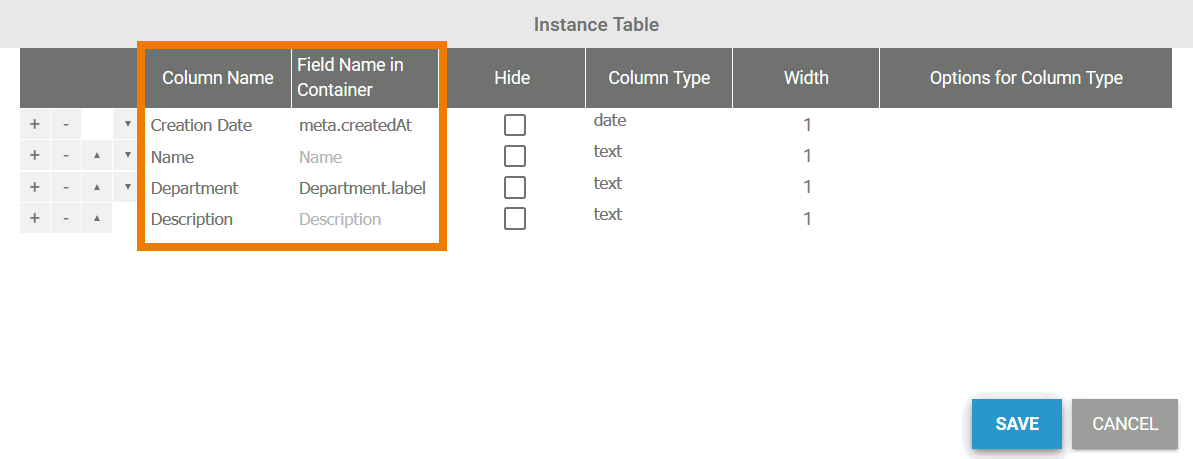
| The table of the overview is now configured according to the input in the wizard. The column wizard supports you in configuring the overview. It also inserts the correct Field Name in Container of each form element. However, you can also define all content in the instance table manually. |
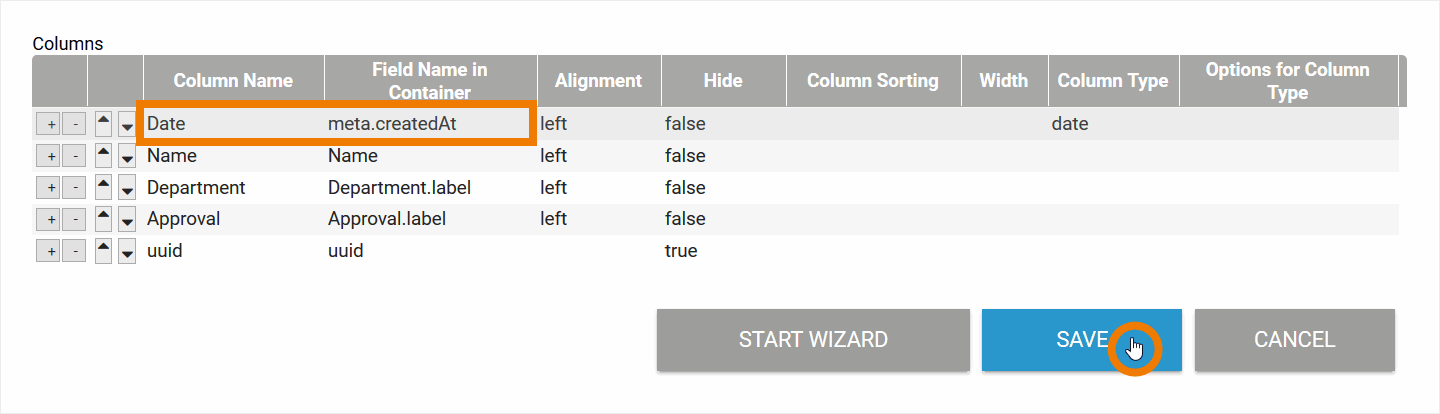
| The wizard copies the fields as they were defined in the input form. Sometimes you may want to display the fields under a different name in the overview. The reference for the columns content is the Field Name in Container. If you want the column to display a different name, change the content of Column Name. In our example, we want the content of field Creation Date to be displayed as Date in the overview. Save your changes. |
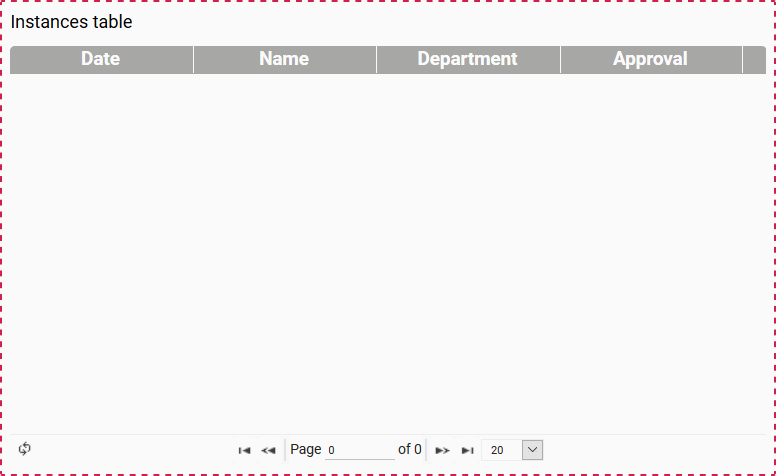
| The instance table now displays the columns as defined:
If you want, rework the layout of the overview form, for example by adding more filter fields. |
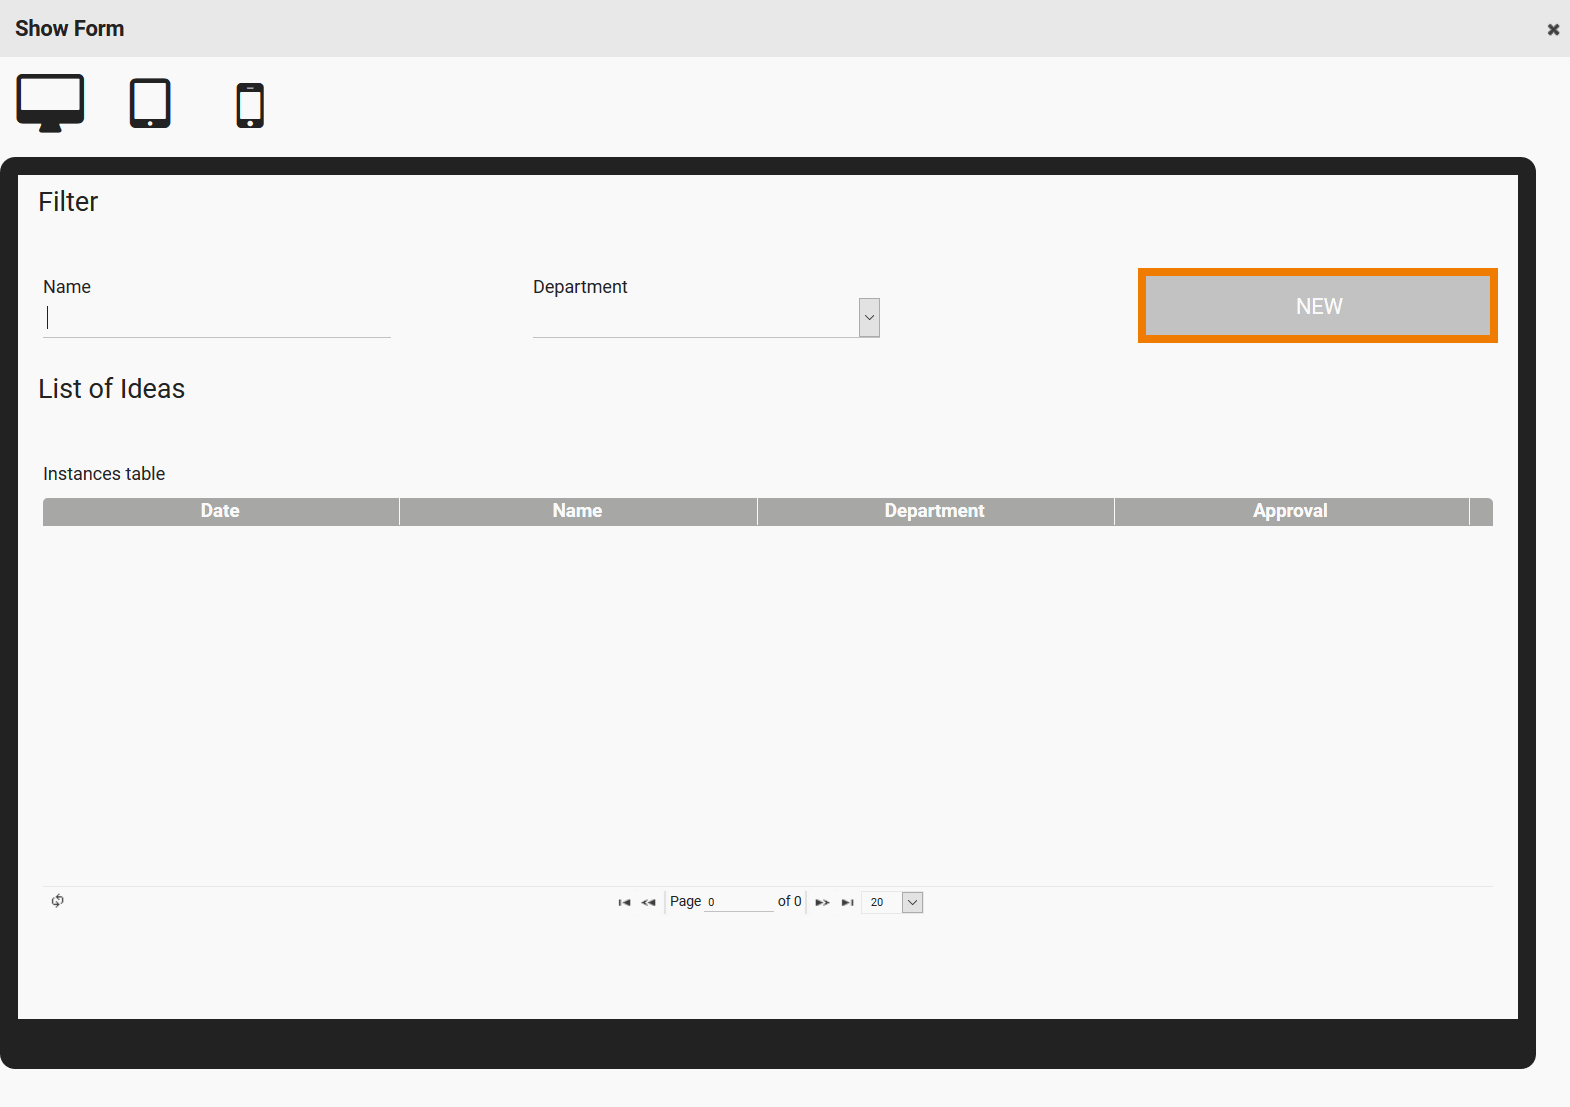
| You can use the button |
| The New button for creating instances branches to the reference model and cannot be tested from the overview model in play mode. |
| If you are satisfied with the configuration of the overview form, navigate back to the overview model. |


Configuring the Mobile Overview
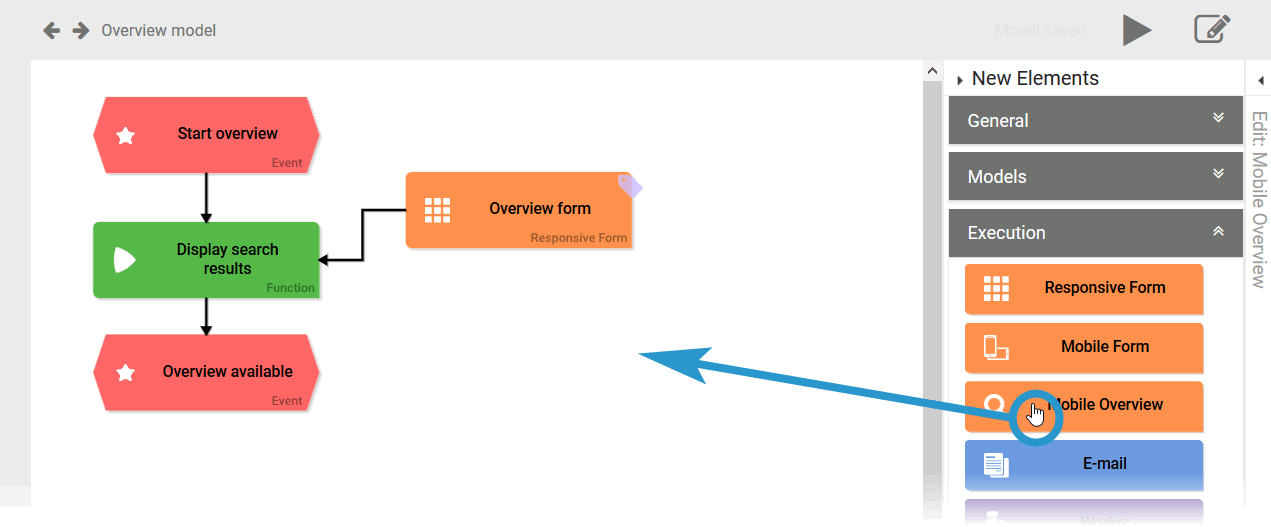
| Since you are using a mobile form in your EPC, you must also configure a mobile overview. Complete the overview model by adding a Mobile Overview element to the function. You can find the element in the sidebar category Execution.
|
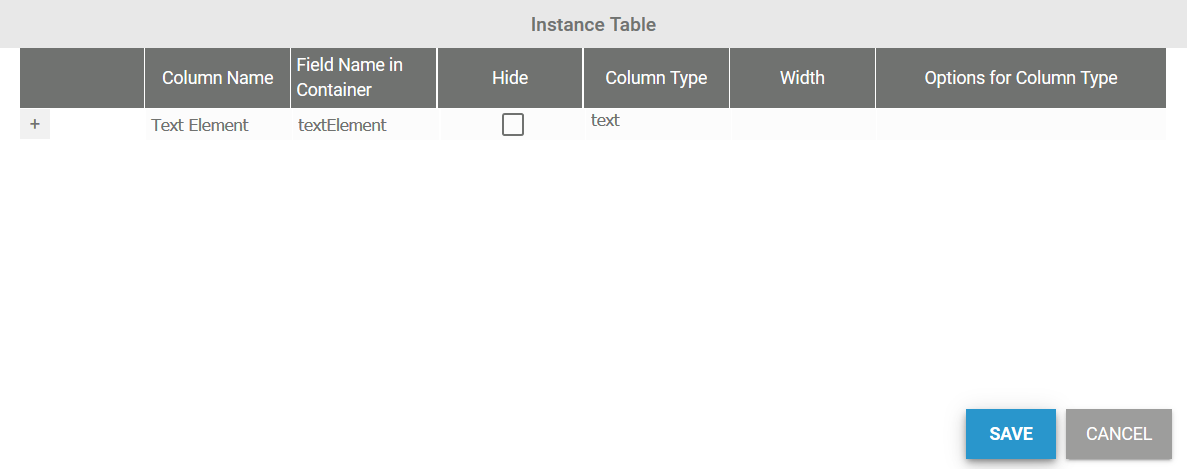
| The form contains an instance table including one entry for the default field Text Element. The instances created in the app will later be displayed in the table on your mobile device according to your definitions. You must now define which fields are displayed in the instance table.
|
| The column configurator opens in a separate window. In this window, you can configure the instance table of the mobile overview according to your requirements. One default column is already defined:
Jane now has to define, which content she wants to display. Since the supervisor should be able to approve an idea, he will need all necessary information such as:
|
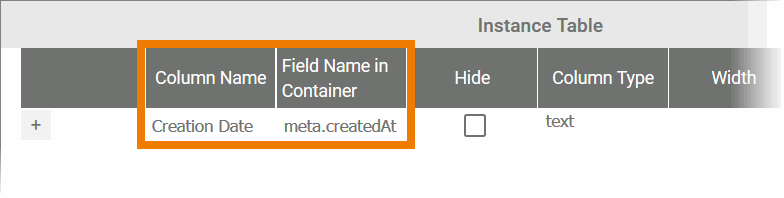
| Change the Text Element sample line to display the Creation Date:
|
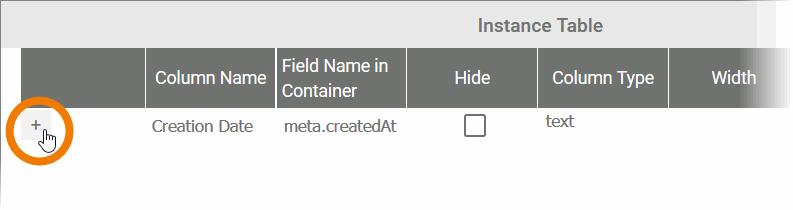
| Now use the + button to add new lines for the following fields:
|
| Make sure that you use the same Field Names in Container for each field as in the responsive form Idea. Since the form field Department is a drop-down field, you need to add the extension .label to its Field Name in Container. |
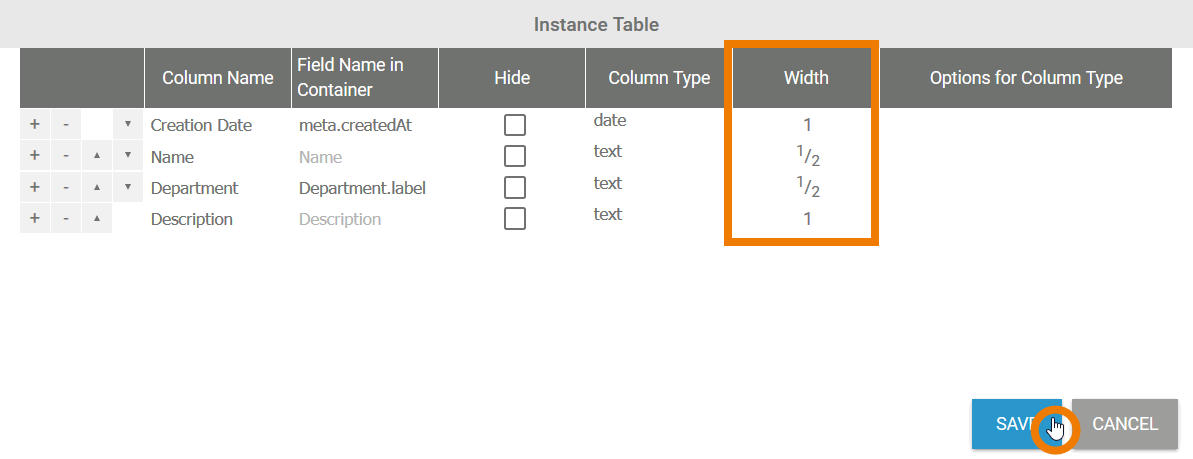
| On a mobile device, a table can display a maximum of four columns next to each other. In the Width column, you can specify how much space a field should take up. A new line is always created with a standard width of 1. |
| Change the width of the Name and Department column to 1/2. Save your input. |
| The instance table now displays the fields as they appear later in the mobile overview:
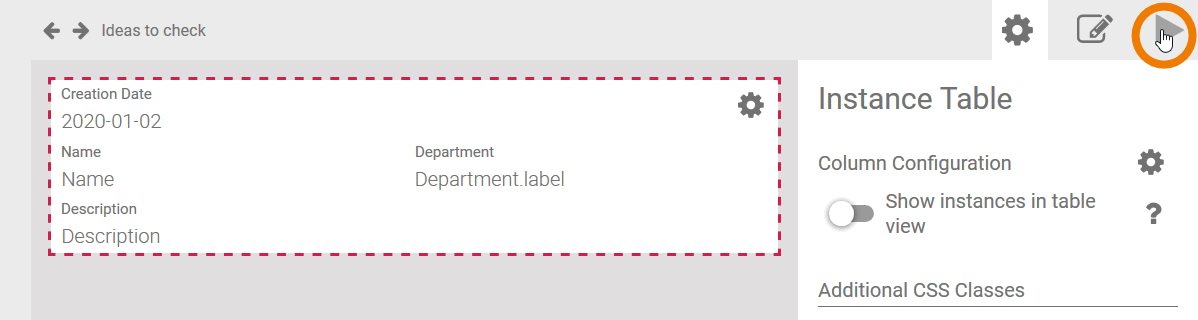
Use the Play button to show a preview of the overview form. |
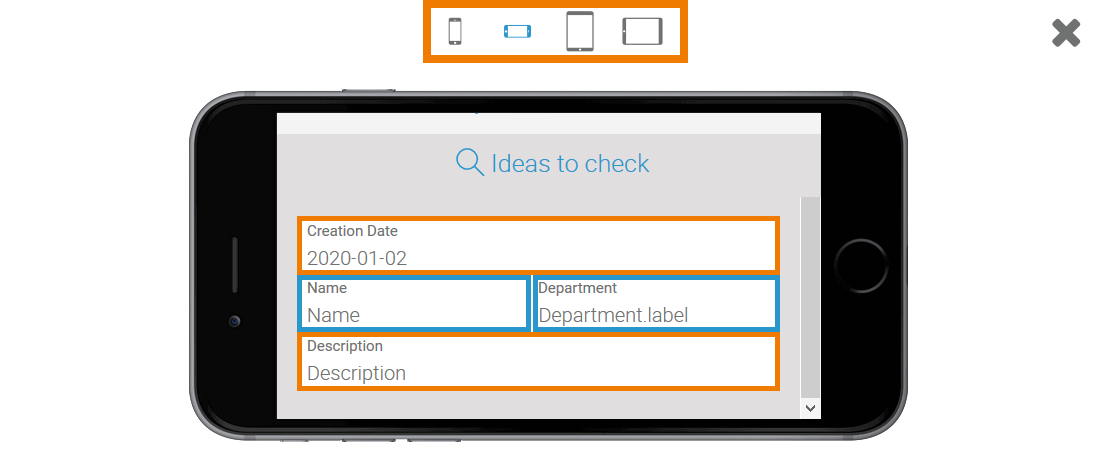
| The selected widths are clearly visible in the preview. The icons at the top of the screen allow you to switch between the different views:
Try different views, then close the window. |
| When you are satisfied with the display of your mobile instance table, switch back to the app project. |

Creating the Mobile Start Links
| Until now, only two start links exist in your app project:
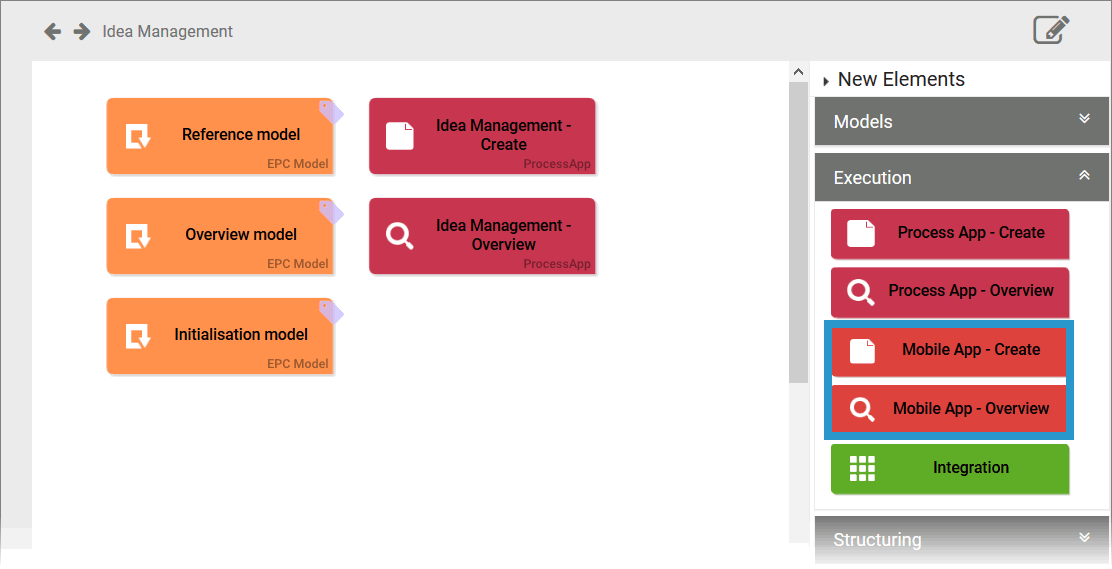
Since you are using a mobile form in your EPC, you will also need to create start links for mobile execution. Open the Sidebar New Elements. In the category Execution you can find the two elements:
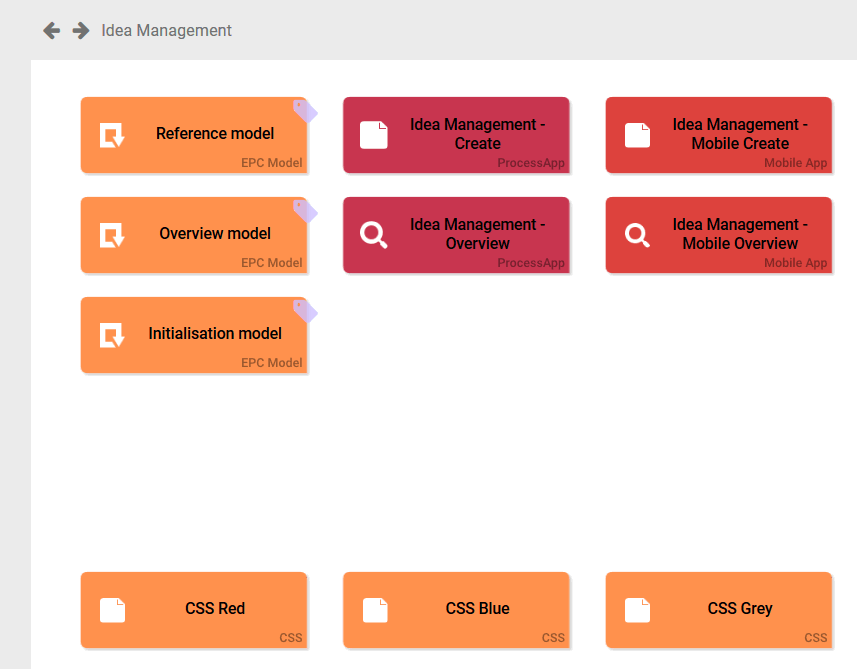
Create one of each. |
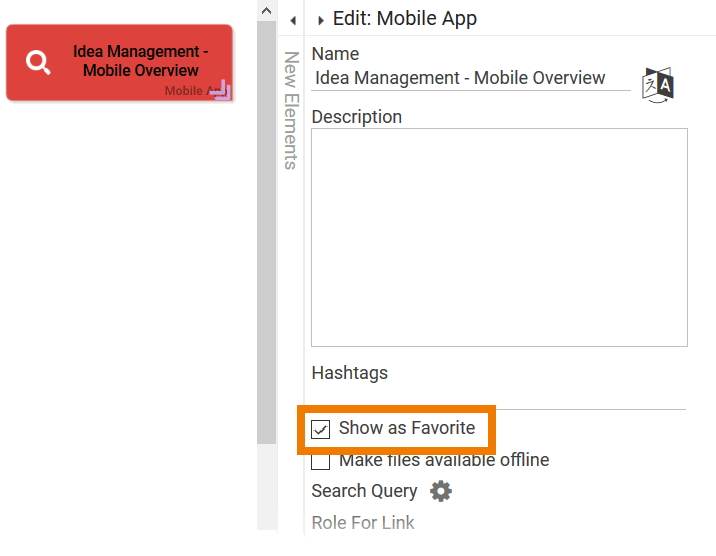 | Activate the option Show as Favorite for the element Idea Management - Mobile Overview. |
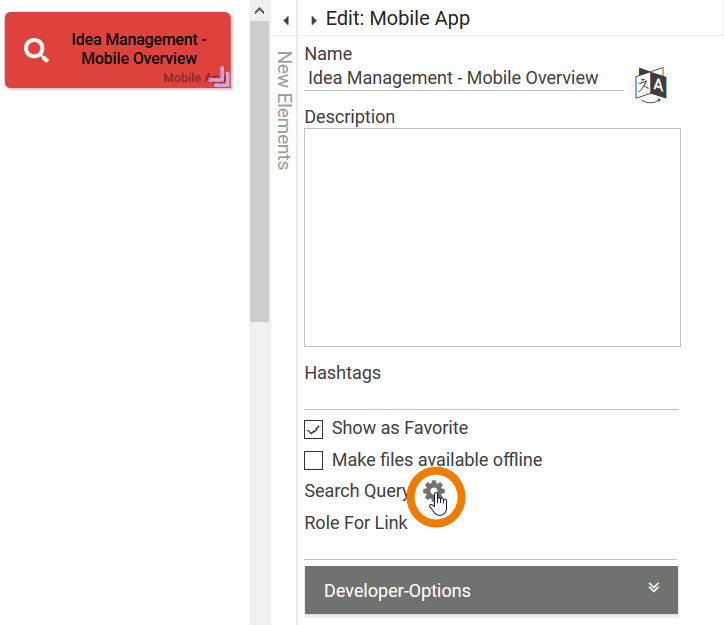
| Jane wants the supervisor to only see instances that are waiting for approval. Therefore she needs to filter the instances for the element Idea Management - Mobile Overview. Only instances in process step Check idea should be shown. Open the sidebar of the Mobile App - Overview element and open the Search Query property. |
| An editor opens. Enter the search query that filters instances in step Check idea: Don't forget to save your input. |
| The content of your app project is ready for execution now. But your process does not yet reflect the fact that the approval can be either positive or negative. To extend the process, open the Reference model again. |

On this Page:
Related Documentation:
Overview
Content Tools