You will now model the approval process and create the necessary constraint definitions.
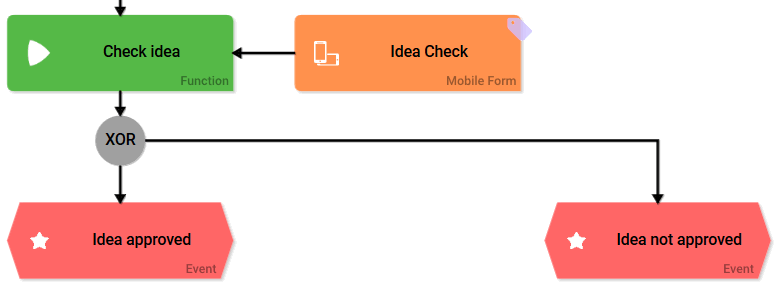
| Extend your EPC with an XOR connector and add the two possible events:
|
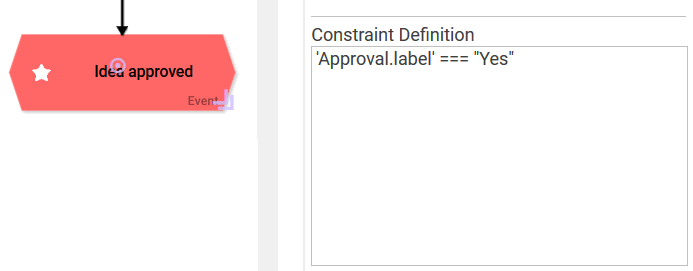
| Each event contains the Constraint Definition field, in which the designer must enter the conditions that are used to decide which process string is to be run through. The form Idea Check contains the radio button Approval:
In order to prevent an EPC from being ineffective always verify event and counterevent when designating constraints. Example: A form offers the answers YES a nd NO . In the process, yes-answers shall follow a different path than no-answers. Therefore it has to be verified which of both paths needs to be followed after the form has been saved. Instead of checking if YES or NO was specified, check if YES or NOT YES was entered. This enables you to also pick up cases where neither answer was specified. The counterevent to YES is not NO, but NOT YES! Enter the correct constraint definitions:
|
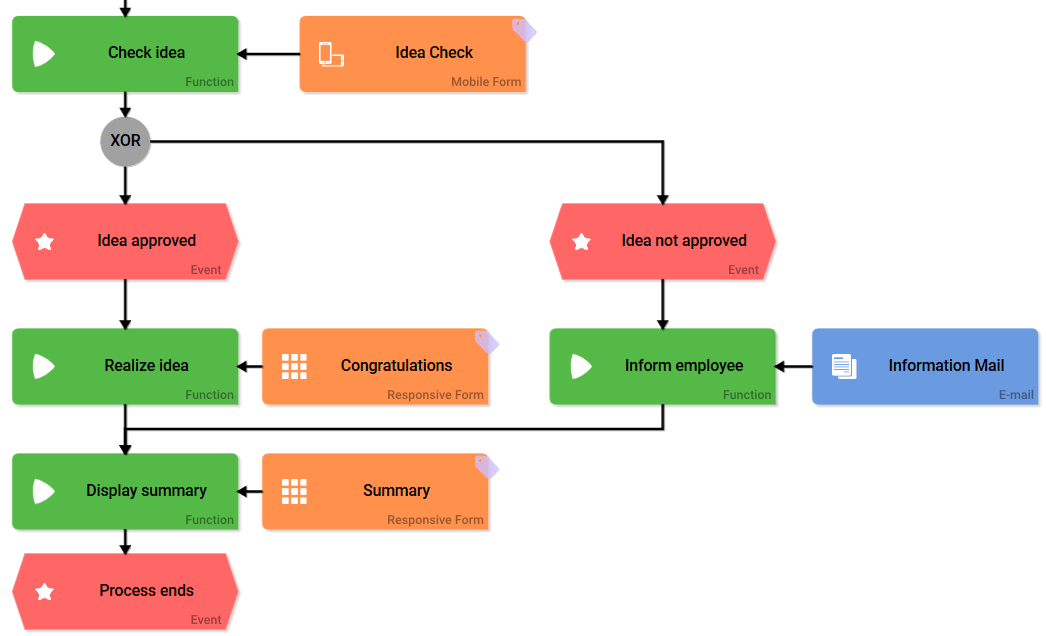
| Now you have to model the next process step after each event. Reuse the existing process steps and elements:
|
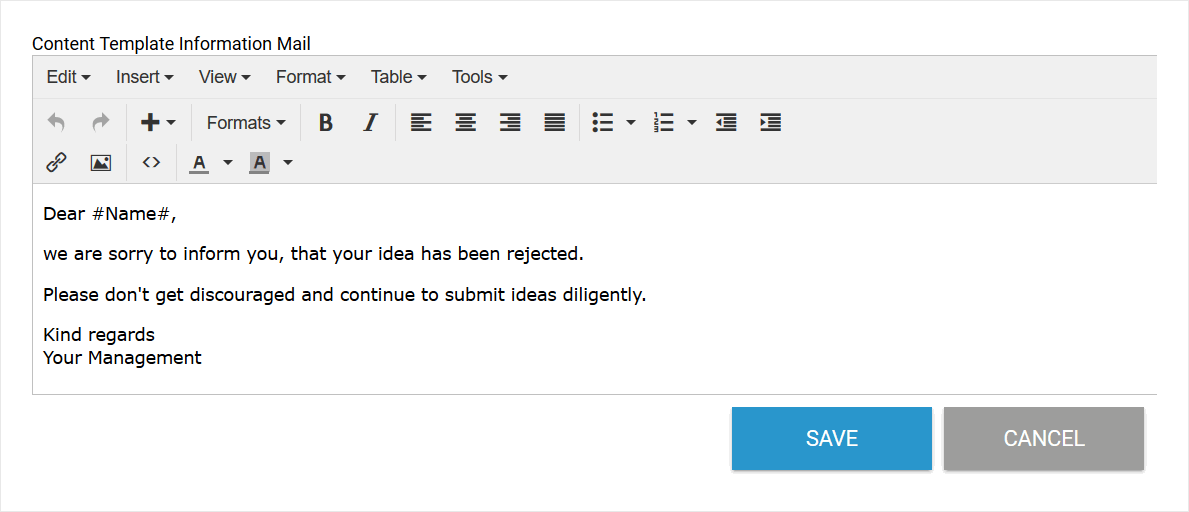
| Rework the email content so that the employee is informed of the rejection of his idea. |
| Now your process is ready for execution. Navigate back to the cockpit and open the Sidebar New Elements. |
Related Documentation:
Overview
Content Tools