Next, you are going to configure your private API: You will attach plans and define their visibility.
Follow Our Example User Story
David Stringer wants the API to be available to customer developers. However, he would also like to be able to grant some customers privileged access. He therefore attaches various plans for the API.
Attach Plans and Define Visibility
In step 2 of this tutorial you have created two plans in your organization. You will now attach these plans to your API and define their visibility.
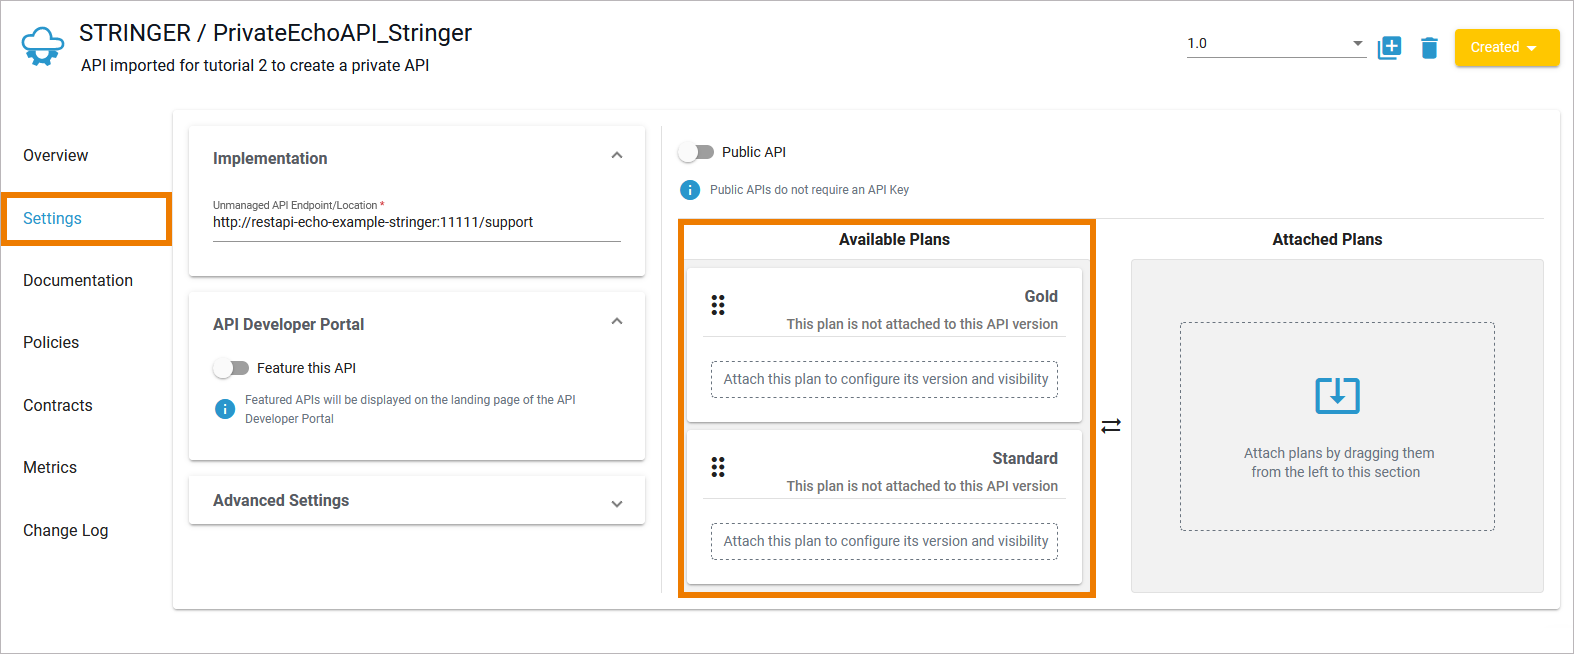
| In tab Settings of the API details page all available plans of the organization are displayed. |
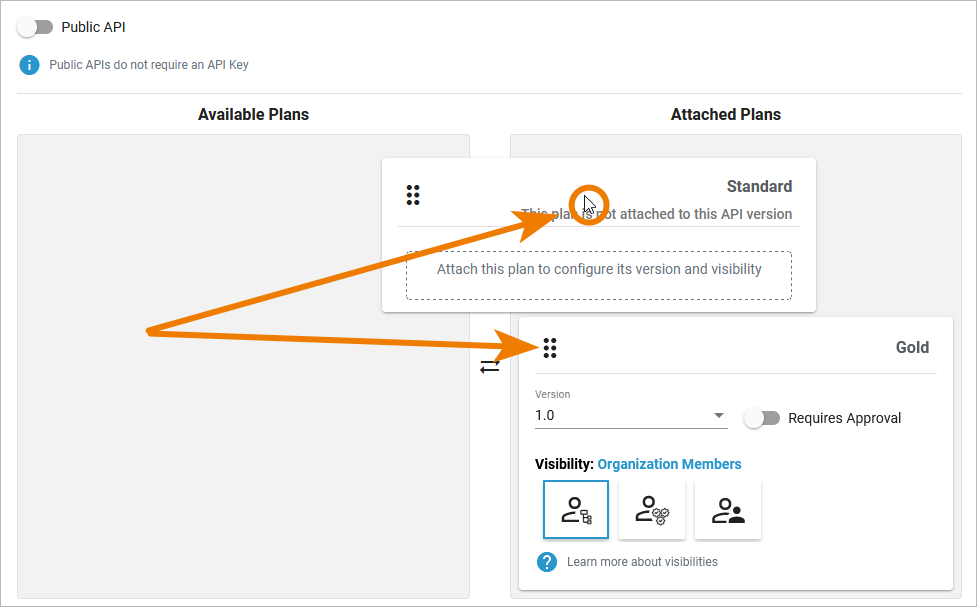
| Attaching plans to the API is simple: Just drag them from column Available Plans to column Attached Plans. Attach both the Standard and the Gold plan to the API. |
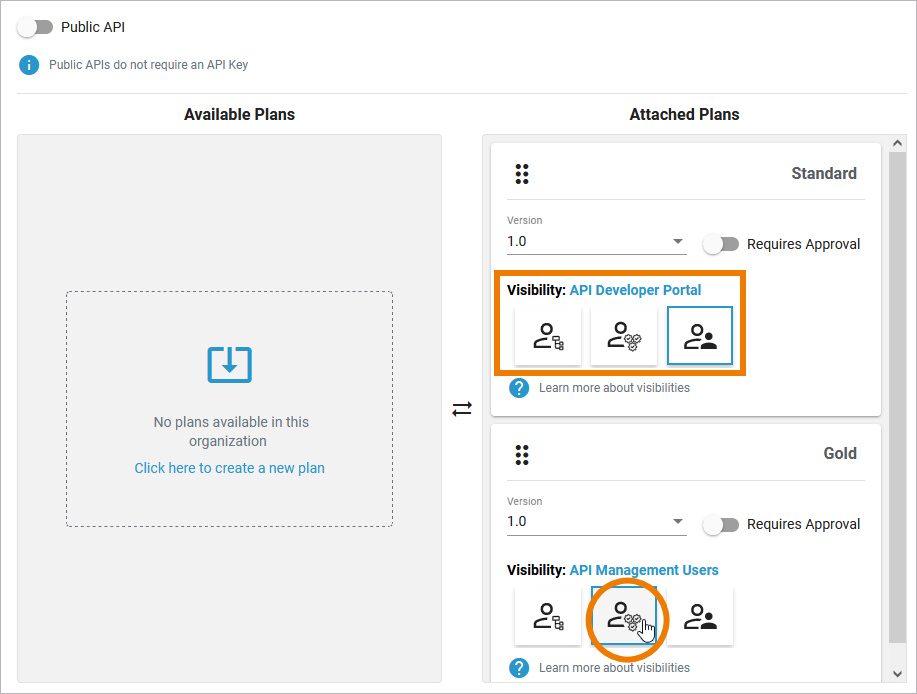
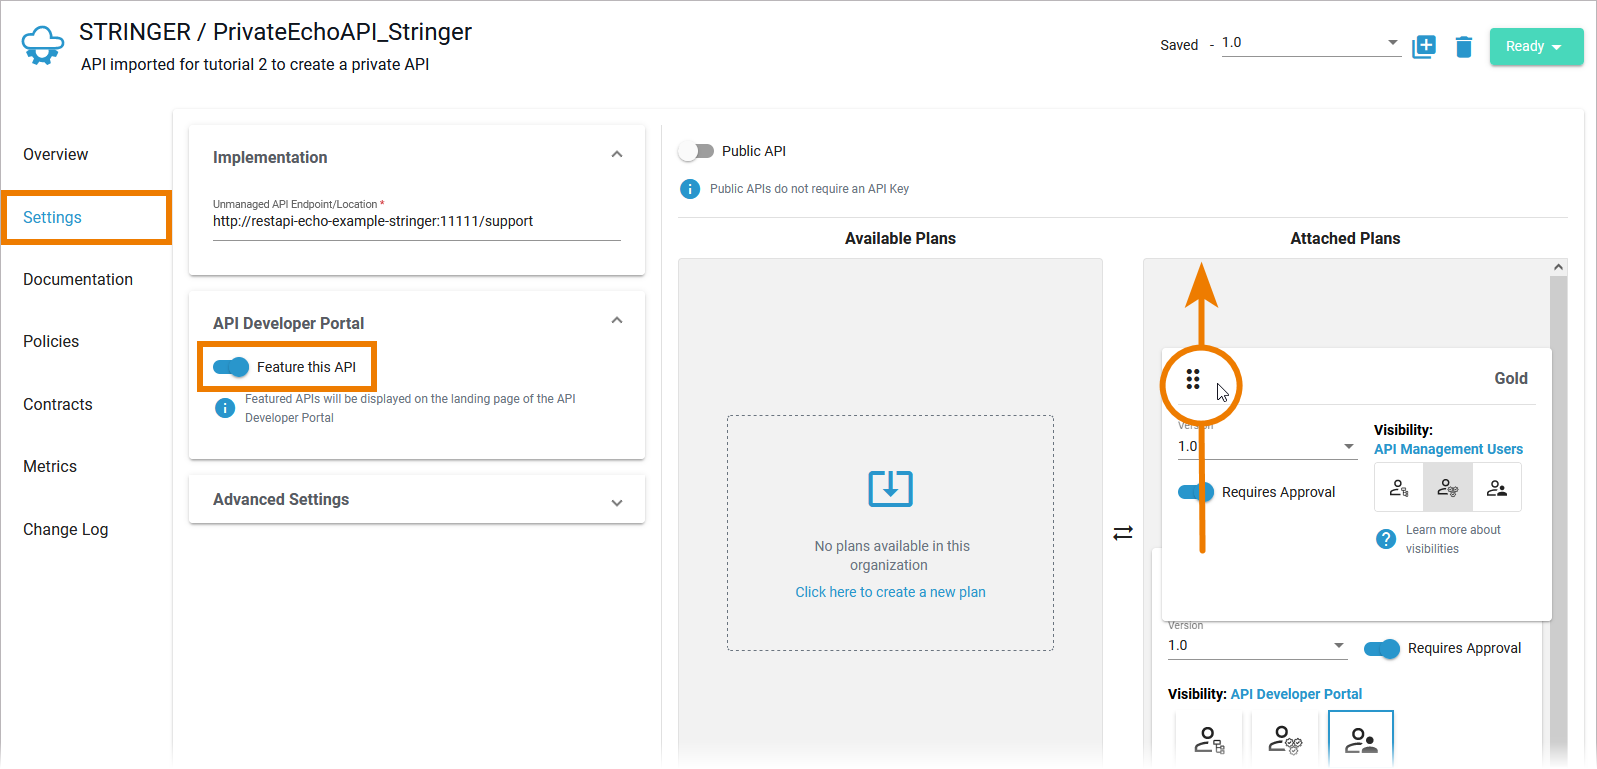
| Plan Standard should be shown to all developers, plan Gold only to API Management users.
|
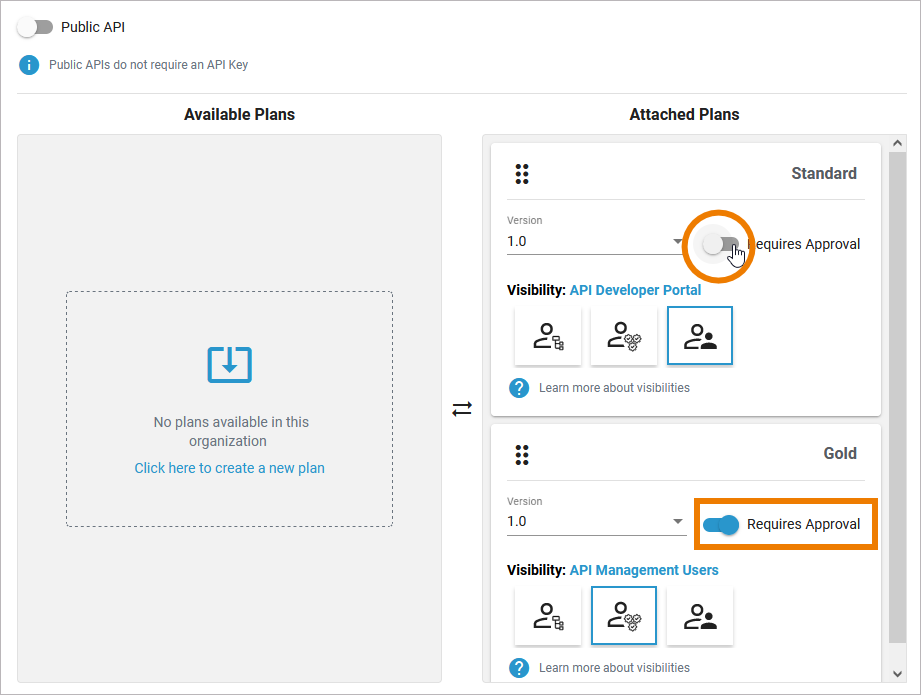
| David wants to keep track of who is using this API, so potential users of the API should have to apply for approval:
|
Define API View in API Developer Portal
You have determined, who can see the API in the Developer Portal, now you can define its view.
| David wants to highlight the API in the Developer Portal by displaying it directly on the start page. He also wants to show plan Gold first. In tab Settings of the API details page...
|
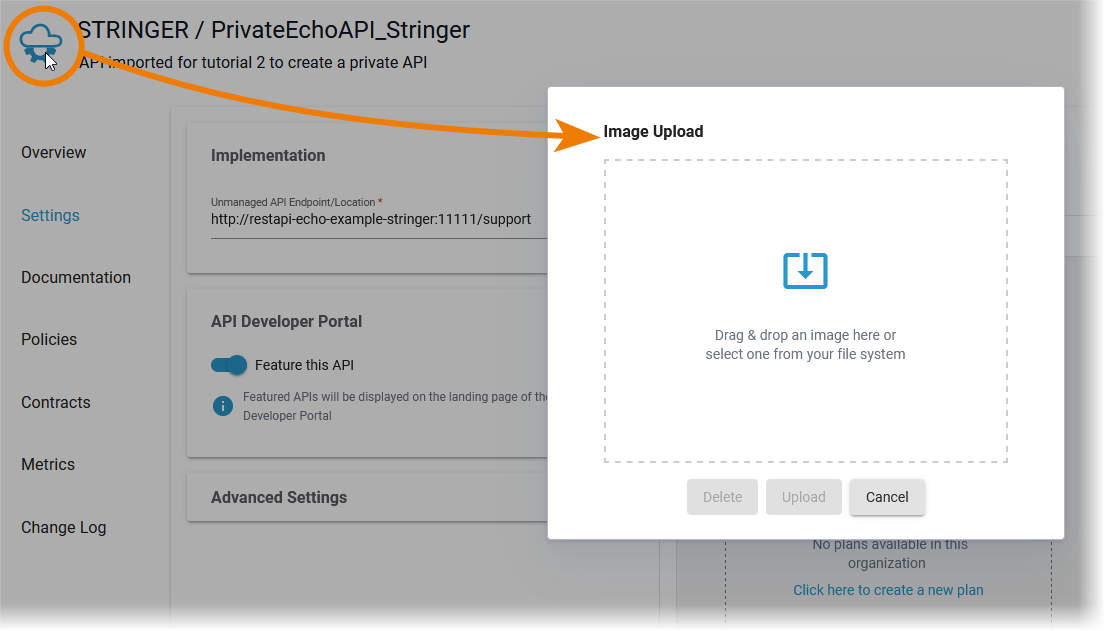
| The API should also be displayed with its own icon. Click here to download a support icon for the next step. Click on the API logo on top left to open the image upload. |
| Drag & drop the icon into the window or click to search it on your computer. Click Upload to save your changes. |
Publish the API
Your private API is now configured and can be published. Only published APIs can be consumed by clients. Open the status drop-down on top right and click Publish.
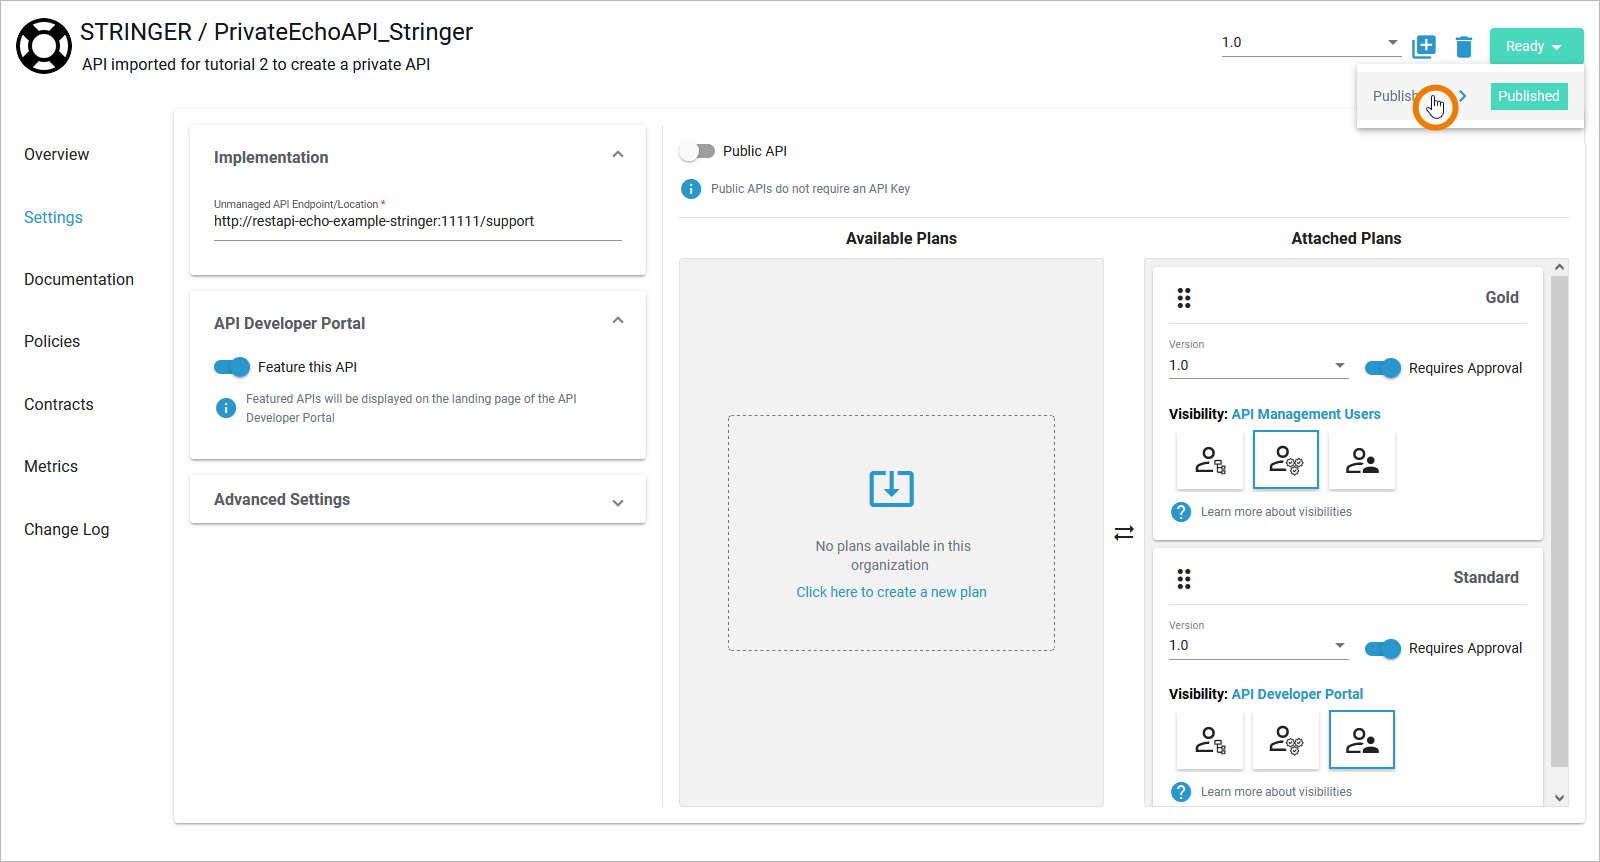
The new status of the API is displayed:

Test the Different Visibilities
| Go to the PAS Portal and open the API Developer Portal. |
| You API is displayed correctly with its logo on the homepage of the Developer Portal. Click Learn more to display the API details. |
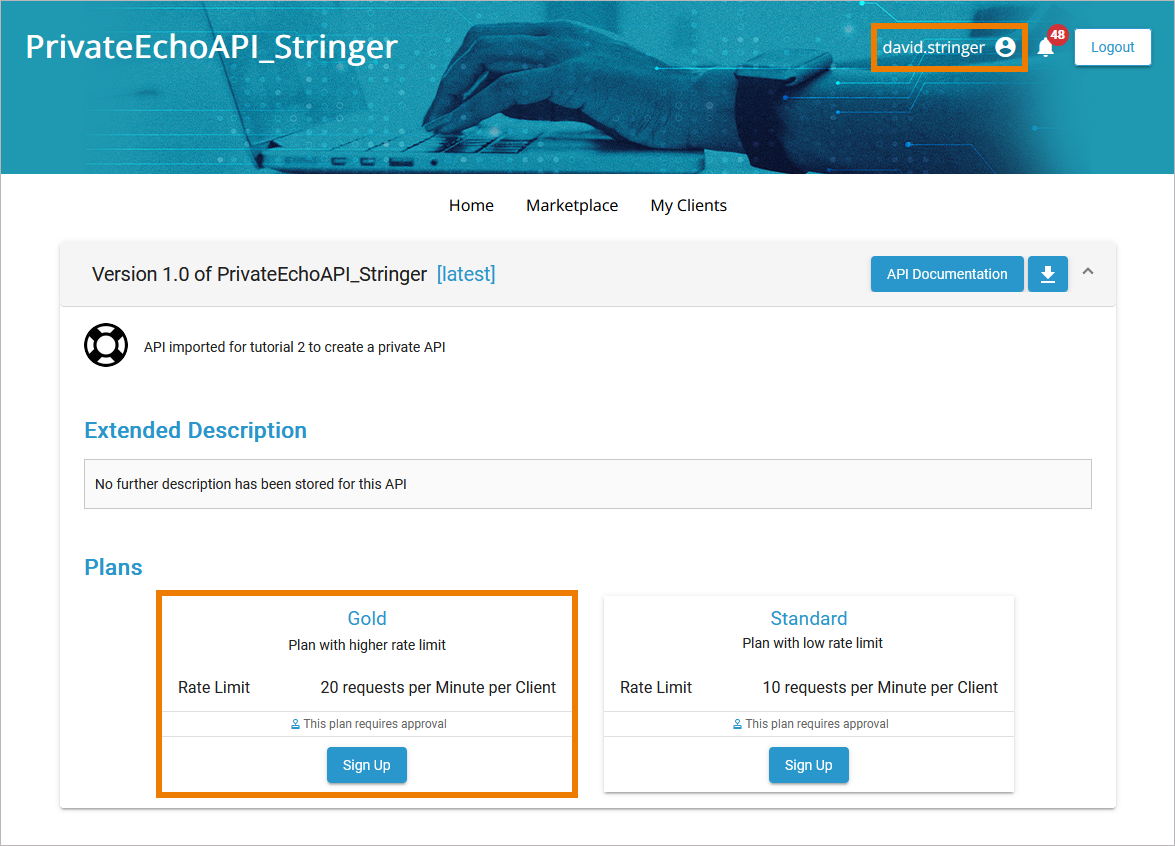
| Since your user is an API Management user and you are logged in to the portal, you can see both plans in the API details. Plan Gold is displayed first as intended, both plans require approval. |
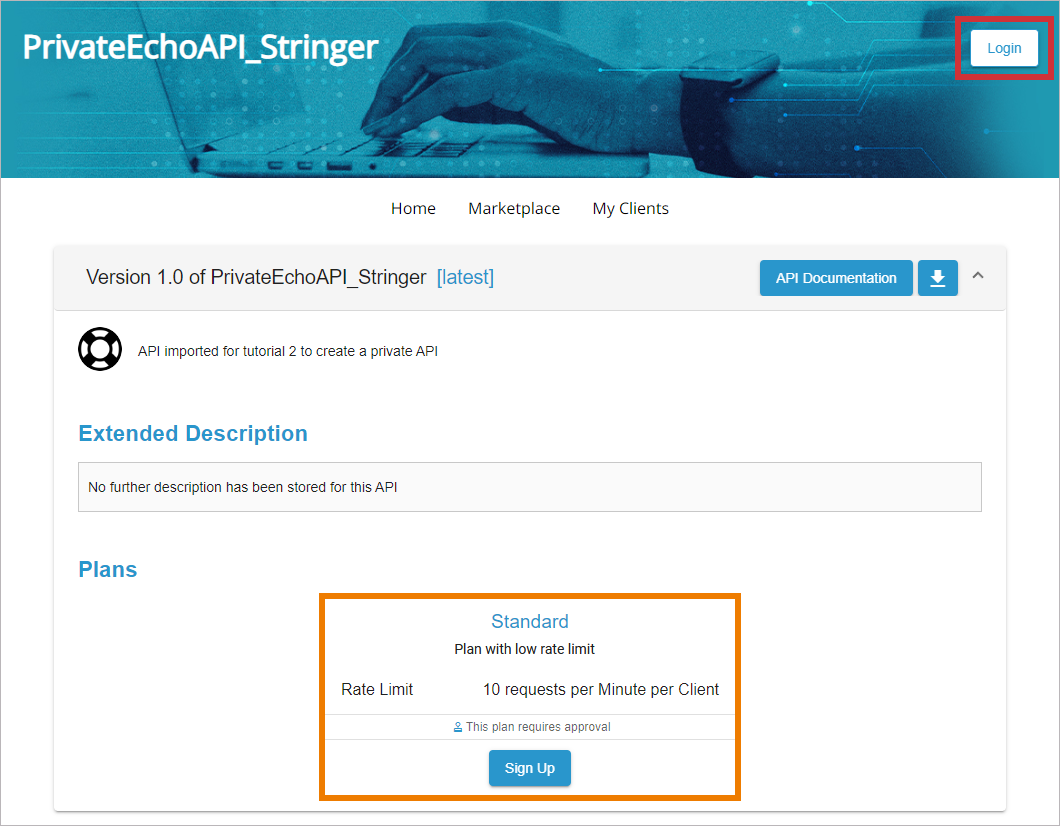
| Open the API Developer Portal of your PAS installation and make sure that you are not logged in with your PAS user. Recommendation: Open the portal in an ingocnito window of your current browser or open it in a different browser. Now, you are using the portal as any other visitor without account. Open the details of your API: Only plan Standard is displayed. The configuration of your private API is applied as intended. Your API is ready for testing. |


Overview
Content Tools