David Stringer wants to display the related vendor name, item and quantity in the instance list. This data must be persisted so that it can be displayed in the instance list. |
Create Persisted Variables
| In tutorial 1, you have created the service Order_approval_1. Open your service. It forms the basis for the following steps. Click user task Enter web order to open its execution diagram. |
| In the service panel, expand folder Base Types, go to Bridge Base > Base Types and select type String from the list of available types. |
| Drag and drop it to the Persisted area. The newly created persisted variable should store the vendor name. |
| Double-click on the current name of the variable and change the name to vendorName:
|
| Proceed in the same way to create further persisted variables to store the information for item and quantity.
|
Create the Mapping
To actually persist the incoming data from the form, David needs to map the information between the form input and the persisted variables. |
This can easily be done with a mapping diagram.
Create the Mapping Diagram
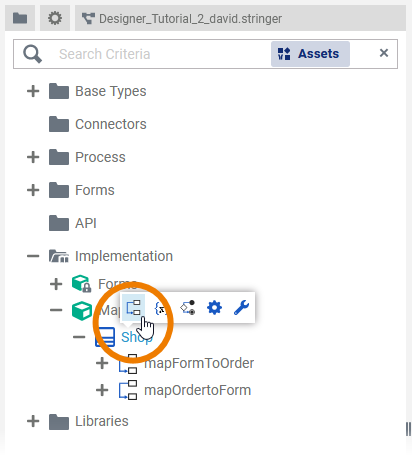
| Go to the service panel and open package Mapping in folder Implementation. In class Shop, create a new mapping operation persistDataForInstanceList. |
| Create three parameters for the operation persistDataForInstanceList:
|
| Switch to the mapping diagram and expand ( |
| Click the Expand item [0] clicking the arrow icon ( |
| Connect the corresponding data items of Input to the Output side with an object flow. |
Refer to Modeling Data Mapping for more information on how to work with the Mapping Editor, and to Mapping Data Structures for reference information regarding data mapping with the Designer.
Add the Mapping Operation to the Process
Now, David needs to add the mapping operation he created to his process in user task Enter web order. |
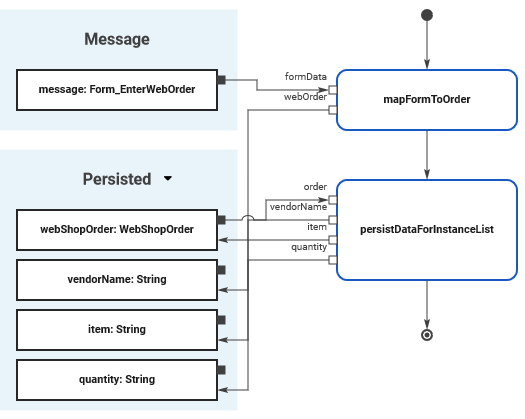
| Click user task Enter web order from your process to display the related UML diagram on the execution pane. | |
| Select the operation persistDataForInstanceList you have created in the previous steps. Drag and drop the mapping operation to the activity flow in the execution diagram. | |
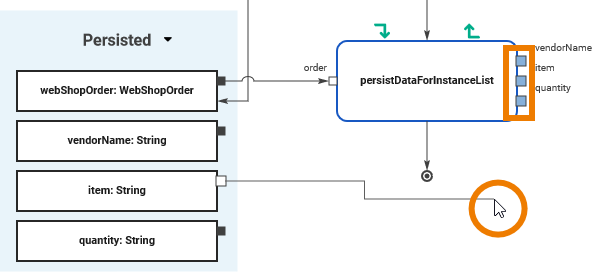
| Pins on the left of the action node indicate needed incoming object flow, pins on the right indicate outgoing object flow. Operation persistDataForInstanceList needs an incoming object and provides three outgoing objects. | |
| You need to provide the form data you want to map as input. Connect variable webShopOrder with pin order of the mapping operation. | |
| Now connect the output pins of the mapping operation to the corresponding persisted variables vendorName, item and quantity.
|
The form data now is persisted to three variables and therefore available throughout the process.
For more information on how to handle the execution editor, refer to Working with the Execution Editor in the Designer guide. For more detailed information on operations in general and where you can use them, refer to Adding Operation Calls in the Designer guide.


 .
.
