| Chapter | Name | Excerpt |
|---|
| Managing Projects | bpmn_created | The new BPMN model is created and a new tab opens where you can directly start to model. If you switch back to the explorer tab, the new BPMN model is also displayed in the tree. |
| Managing Projects | create_bpmn | Enter a name for the BPMN model in the pop-up window Create New Model. Click Save. |
| Managing Projects | create_folder | Enter a name for the folder in the pop-up window Create New Folder. Click Save. |
| Managing Projects | create_project | Enter a name for the project in the pop-up window Create New Project. Click Save. |
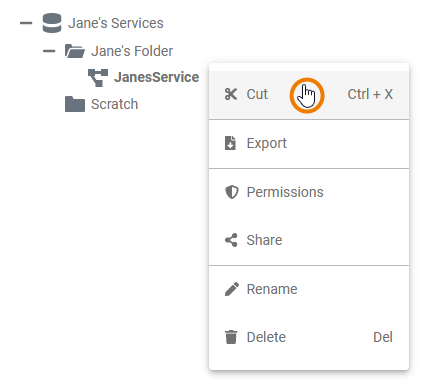
| Managing Projects | cutting_and_pasting
|
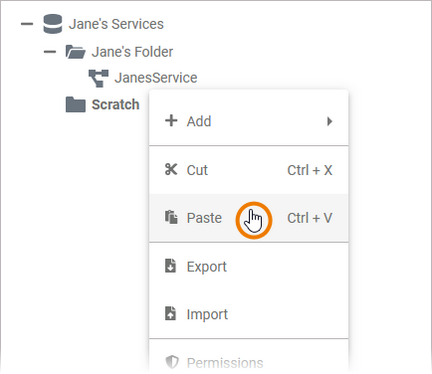
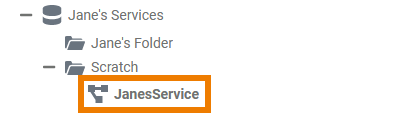
Cutting and Pasting | If you want to use an element at a different position in the tree, select the context menu option Cut item. | | Open the context menu of the element in which you want to insert the cut element and choose Paste item. | | The element is now displayed on its new place in the tree. | |
| Managing Projects | description_editor | Enter your text in the editor. Various formatting tools are provided |
| Managing Projects | description_editor_save | Click Save and close to confirm your text or Cancel to abort the action. |
| Managing Projects | folder_created | The new folder is created and displayed in the tree. |
| Managing Projects | info_libraries_mandatory | |
| Managing Projects | note_element_restrictions | |
| Managing Projects | paste_url | You are now able to paste the URL, for example in an email. |
| Managing Projects | project_content | Each newly created project contains already a folder Libraries and a folder Models. |
| Managing Projects | project_created | The new project is created and displayed in the tree. |
| Managing Projects | tip_profiles_admin_guide | |
| Managing Projects | toast_confirmation | The action is confirmed by a toast message. |
| Managing Projects | tree_export |
Export | The export is an available option for the following elements: - Folder
- Project
- Model
- BPMN model
If you want to export an element, for example to create a backup copy of your model, choose the option Export in the context menu. | | Open the drop-down list Select Format in the export pop-up window to choose the format for your export. | | Supported formats are: Choose one of the formats and start the export by clicking the Export button. | | A toast message confirms the successful export. |
|
| Managing Projects | tree_import |
Import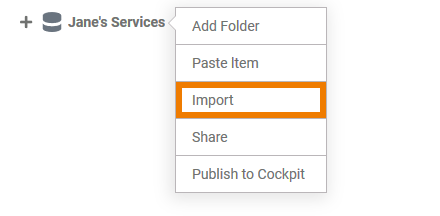 | The import is an available option for the following elements: If you want to import an element, for example to transfer a backup copy to another namespace, choose the option Import in the context menu. |  | Open the drop-down list Select Format in the import pop-up window to choose the format for your import. | | Supported formats are: Choose one of the formats, then select the import file and start the import by clicking the Import button. |  | A toast message confirms the successful import. | 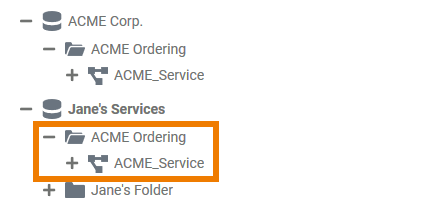 | The imported element is displayed in the tree. |
|
| Modeling Services | execution_toolbar |
The execution toolbar assists you during modeling on the execution canvas. The following table explains the available tools: |
| Modeling Services | model_toolbar |
The model toolbar assists you during modeling on the BPMN canvas. The following table explains the available tools: | Tool Icon | Tool Name | Description |
|---|
| | Export | Use this icon to export your BPMN model. In the export dialog you can choose the format for your export. Currently JSON and XML are supported. |  | Report | Click the Report icon to print your model. You have two options: You can send your model directly to a printer or save it as a Word document. |  | Share | If you click the Share icon, the URL of your BPMN model is copied to the clipboard and you can paste it elsewhere, for example in an email. | | | Publish to cockpit | If you want direct access to your BPMN model in your Scheer PAS Cockpit , click on the icon Publish to cockpit. If you open your cockpit the next time, an external link tile grants you direct access to the model. |  | Toggle grid | You can display the grid on the BPMN canvas or disable it. Use this icon to display or hide the grid. | | Show invalid | Activate the icon to display invalid connections in your BPMN model. | | Tooltip | Use this icon to manage the tooltips displayed on the BPMN canvas. You have three options: - = Tooltips are disabled.
- = Long version of the tooltip is displayed.
- = Short version of the tooltip is displayed.
| | Deploy service | Use this icon to manage your service. You have four options: - = Deploy the service.
- = Start the service.
- = Stop the service.
- = Open your Scheer PAS BRIDGE.
| | Free text | Click the text icon to create a text box on the BPMN canvas. |  | Add image | If you want to add an image on the BPMN canvas, click the Image icon. |  | Insert/Remove horizontal space | Use this icon if you need more or less space on the canvas. Click on the canvas to display the start line, the second click marks the end line and defines the size of the area to be added. To add space, click from left to right to define the area. If you want to delete a horizontal space, click from right to left to define the area. |  | Insert/Remove vertical space | Use this icon if you need more or less space on the canvas. Click on the canvas to display the start line, the second click marks the end line and defines the size of the area to be added. To add space, click from top to bottom to define the area. If you want to delete a vertical space, click from bottom to top to define the area. |  | Undo | If you want to cancel your last action on the BPMN canvas, use this icon. |  | Redo | Use this icon to restore the action that you had previously undone. |
|
| Supported BPMN Elements | objects_config_options | Open the object properties panel to use the configuration options of the element. |
| Supported BPMN Elements | objects_font | Use this section to change the font of the current object. You have also several formatting options. |
| Supported BPMN Elements | objects_shape_tab |
Shape | If you want to change the background color of the object, click on the color placeholder to display the color picker. Use the color picker to select a new color or enter the hexadecimal code of the desired color: 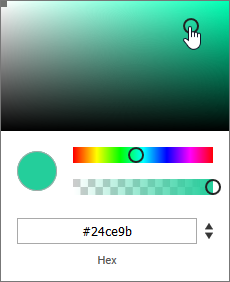
| | If you want to change the border color of the object, click on the color placeholder to display the color picker. | | Changes of the opacity apply equally to background and border color. |
|