You can enhance the instance list with custom data from your process, e.g. user data from a form or data from a backend system. To do this, perform the following two steps:
- Save the data you want to use in the instance list to a persisted variable.
- Configure the instance list to display the persisted variable.
Step 1: Save Data to Persisted Variable
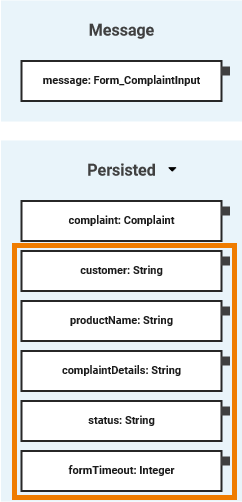
| Custom data to be displayed as a column in the instance list must first be defined as persisted variables. Example:
For further information on how to add variables to the execution pane and persist data, see Adding Variables and Persisting Data. |
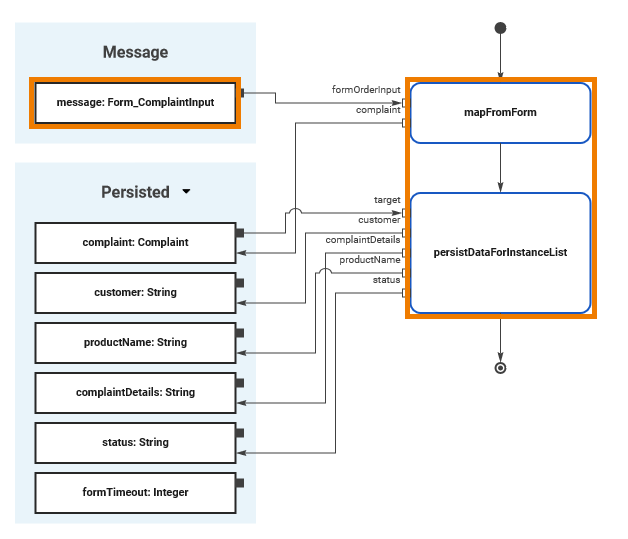
| In the Instance_List_Example, the entered data is transferred from Form_ComplaintInput via the mapping operations mapFromForm and persistDataForInstanceList to the persisted variables. |
Step 2: Configure Columns to Display Persisted Variables
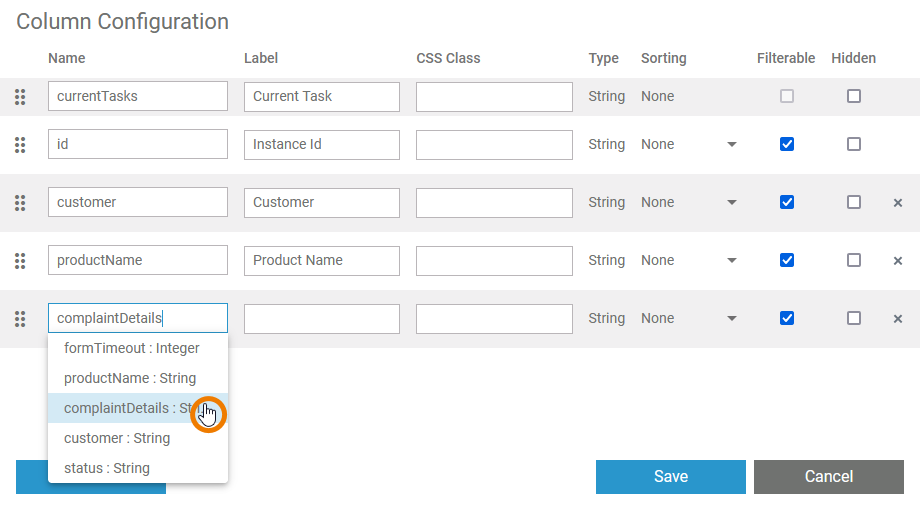
| Persisted variables are available in the column configuration of the instance list.
For further information refer to Configuring the Instance List. |
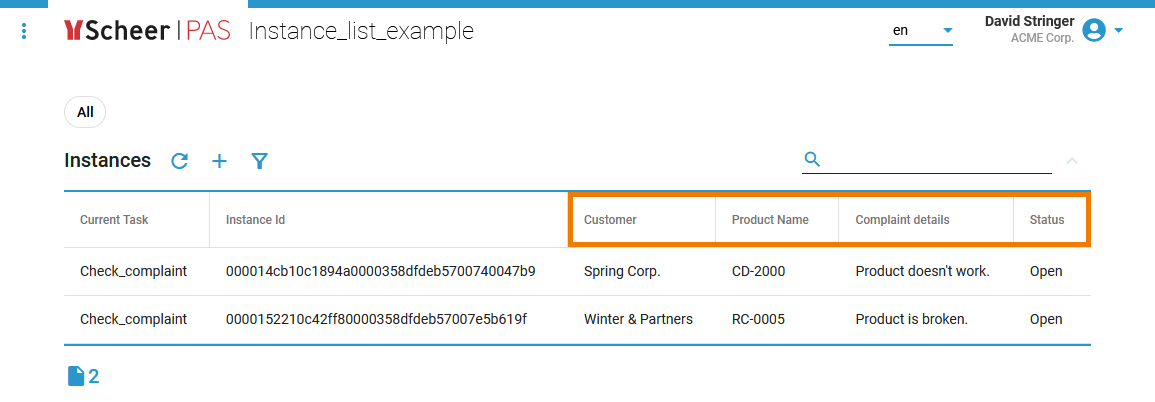
| In the executed application, the values of the selected persisted variables are each displayed in a separate column of the instance list.
|
On this Page:
Instance_List_Example
| Click the icon to download a simple example model that shows the usage of the instance list in Scheer PAS Designer. |
Overview
Content Tools