Page History
Adding Variables to the Execution Pane
| Multiexcerpt include | ||||||||
|---|---|---|---|---|---|---|---|---|
|
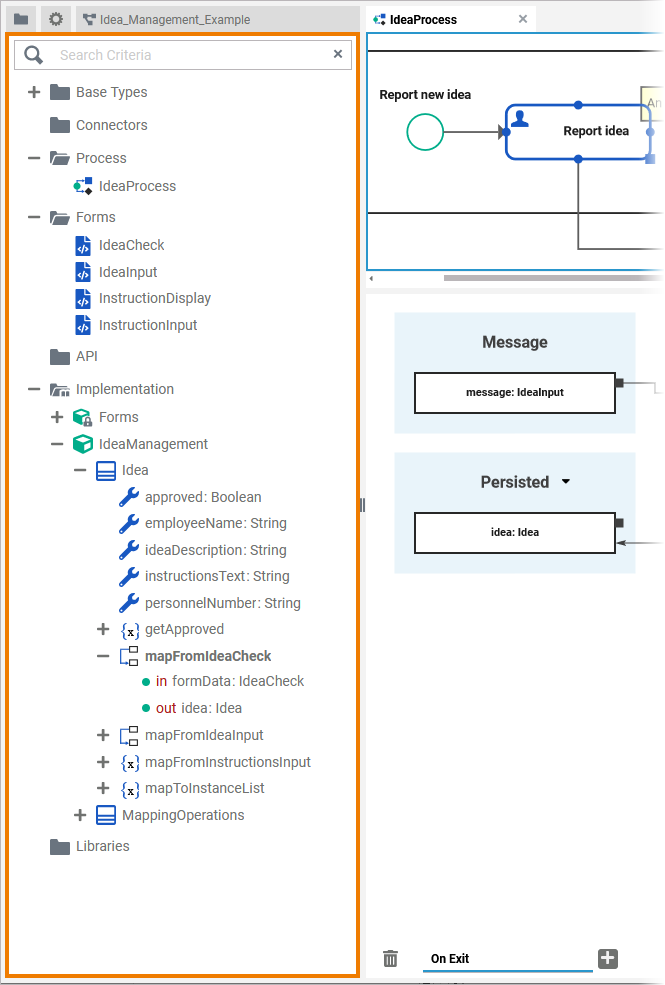
Select BPMN Element
| To add any execution objectelement, you must first select the BPMN element on the BPMN canvas diagram pane to which you want to add the execution. | |||||||||||
| The related execution part will be displayed in the execution canvaspane. As no execution has been implemented yet, the panel shows an empty UML diagramoperations flow. | ||||||||||
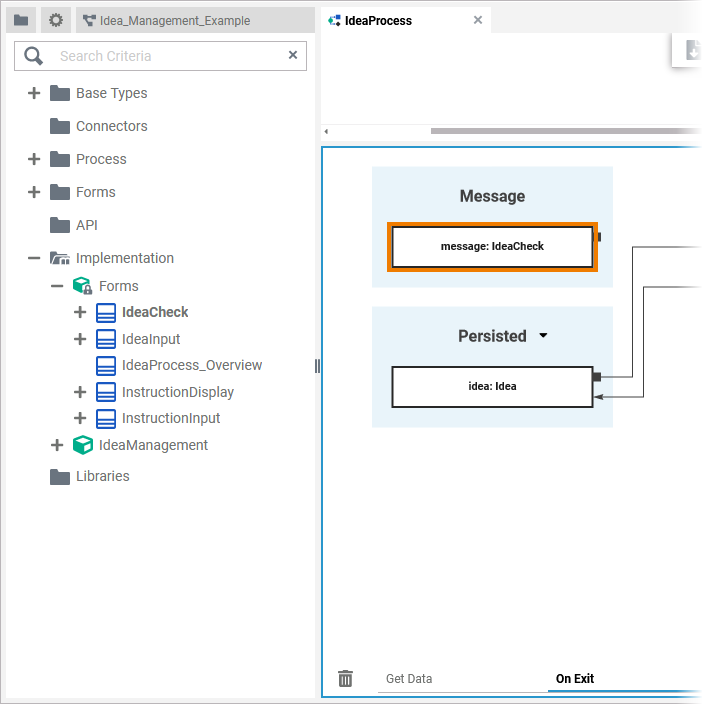
If the selected BPMN element is a Message Start Event, the execution pane also shows section Message with an incoming variable message of type Any.
| |||||||||||
| If you have selected the outgoing relation of an Exclusive Gateway, section Return is displayed, containing the unchangeable variable return of type Boolean. |
Select Type
| Now go to the Library panel and expand the library you want to use.
| ||||||||||
|
Drag to Execution Pane
Adding variables to the execution pane is simple:
There are different targets to drop an element to:
| |||||||
You can cancel the operation by pressing Esc or dropping the element outside the execution pane.
|
Adding a New Variable
You can add a new variable by dropping it in section Persisted or Local.
| |||||||||||||||||
| This applies to variables from your own customized libraries as well as to the Bridge base types. | |||||||||||||||||
| |||||||||||||||||
|
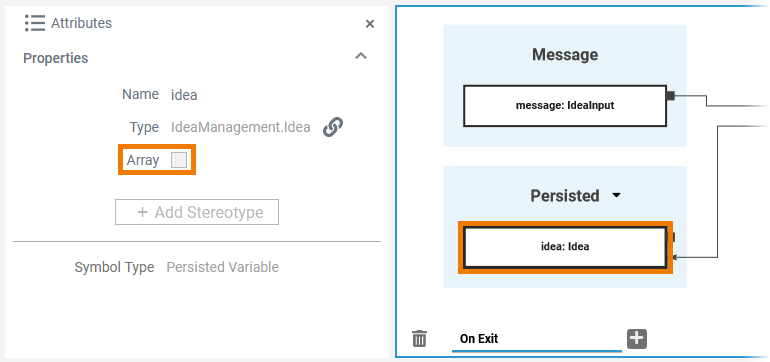
Adding Multiplicity
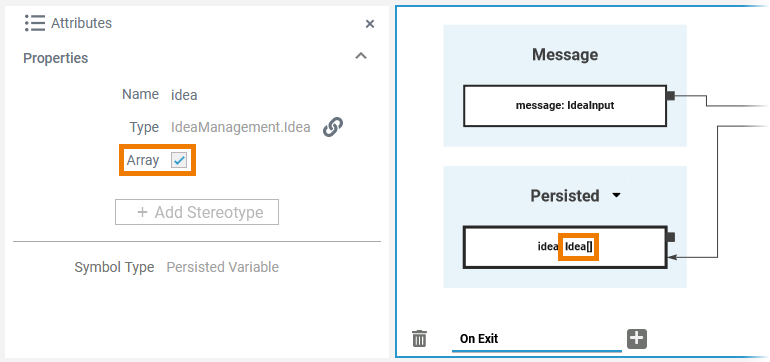
| Once you have dragged a variable to the execution pane, you can add multiplicity. Open the attributes panel for the variable in question. Here you will find the attribute Array. To add multiplicity, activate the checkbox. |
| If the checkbox is activated, the variable has the multiplicity 0..* and the element on the pane is extended by a pair of square brackets: |
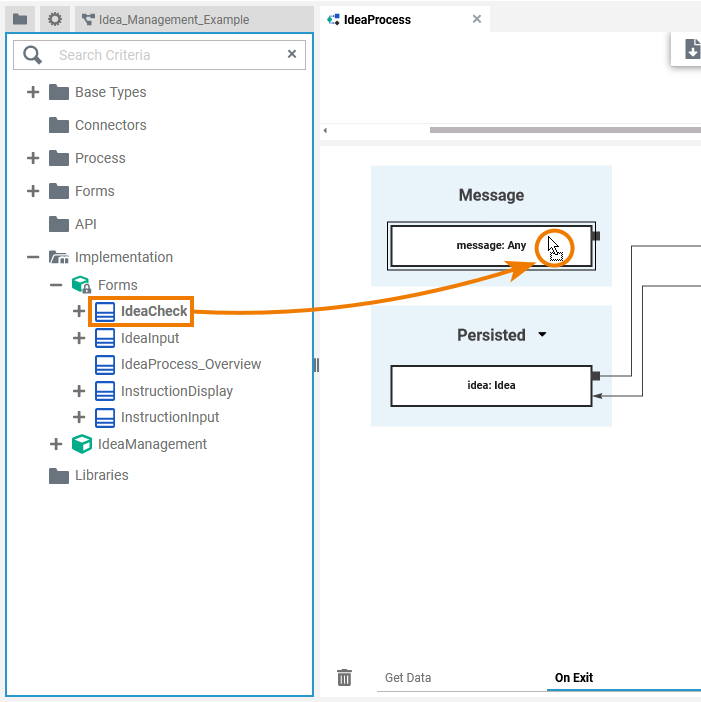
Changing the Type
| You can change the type of any variable if you drag a type from your library and drop it on the variable itself. Example: | |||||
| After you have dropped the type on the variable, it has changed its type. Example: | |||||
| ||||||
| Object Variable message cannot be of simple type. If you try to drop a simple type other than default type Any on the message element, a red frame indicates that this is prohibited. |
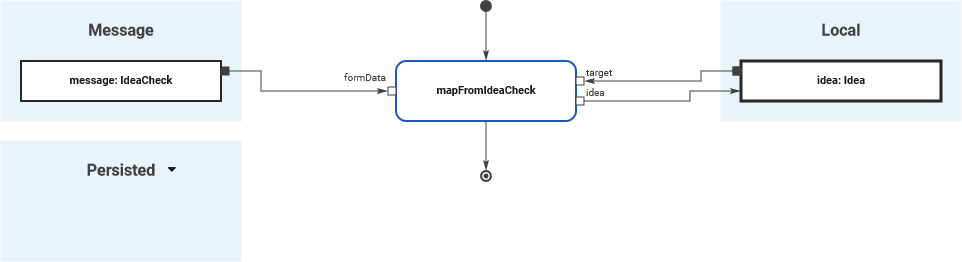
Changing the Section
It is also possible to change the section for a variable. You can drag & drop variables:
- From Local to Persisted
- From Persisted to Local
- From Message to Persisted or Local
|
|
|
|
|
|


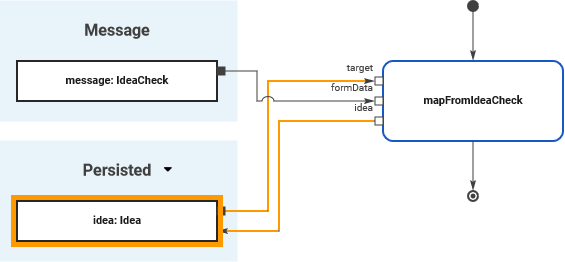
Special Case: Adding Persisted Variables
| Tip |
|---|
For detailed information see page Persisting Data. |
| If you add variables to section Persisted, they are usable in all executions of the BPMN model. | ||||||||
To use a persisted variable, click the icon | |||||||||
| |||||||||
|
| Otp | ||||
|---|---|---|---|---|
|
| Rp |
|---|
| Rde |
|---|
Overview
Content Tools