Page History
The Create New Analysis Wizard supports you during the creation of an analysis.
- In step 1 the user must select a chart type.
- In step 2 the process to be analyzed is selected
- In step 3 the axis allocation for the analysis is configured.
- In step 4 the user can finally create filtersfor their analysis.
Only the first three steps are obligatory for the creation of an analysis. The creation of a filter is optional.
Creating a Filter
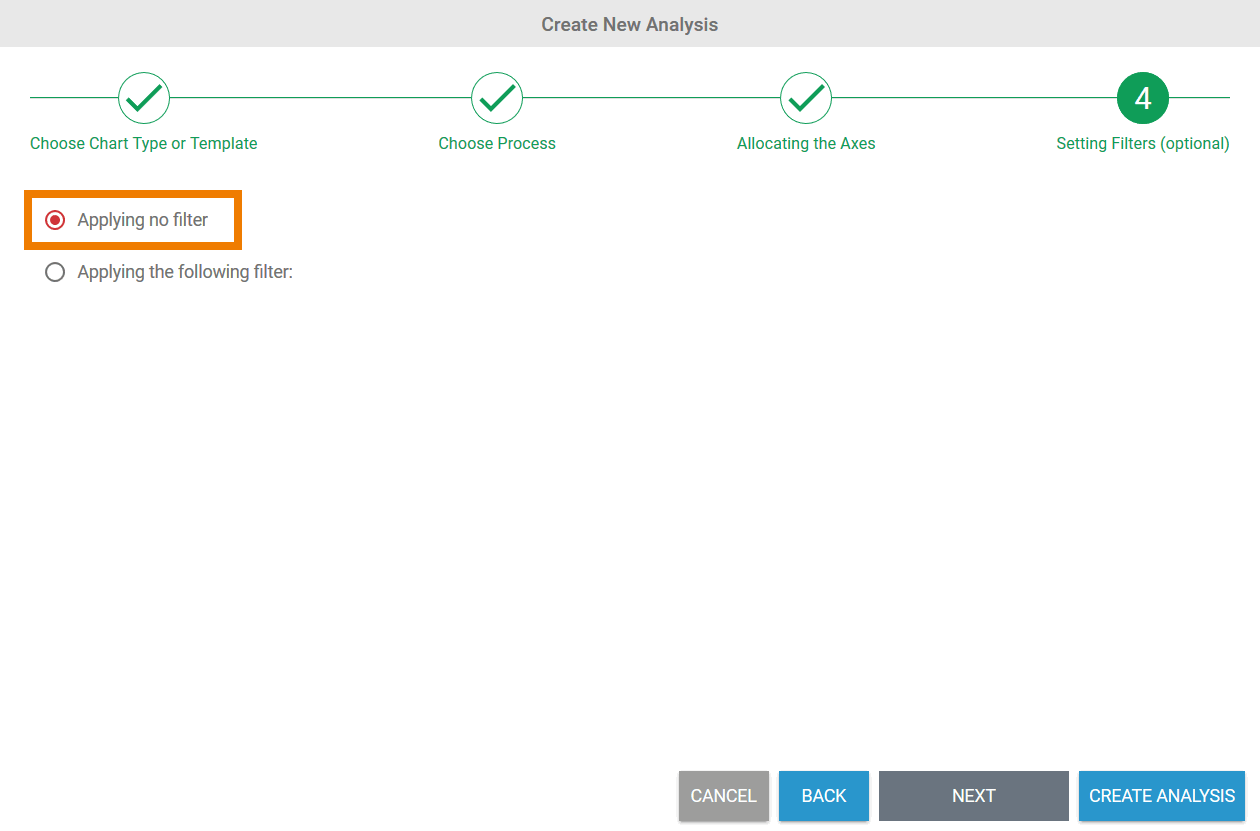
| In step 4, the option Applying no filter is selected by default. This means that all instances of the process selected are evaluated in the analysis. In step 4 it is still possible to create an analysis directly without a filter using the Create Analysis button. | ||||||||
|
| ||||||||
|
| ||||||||
|
|
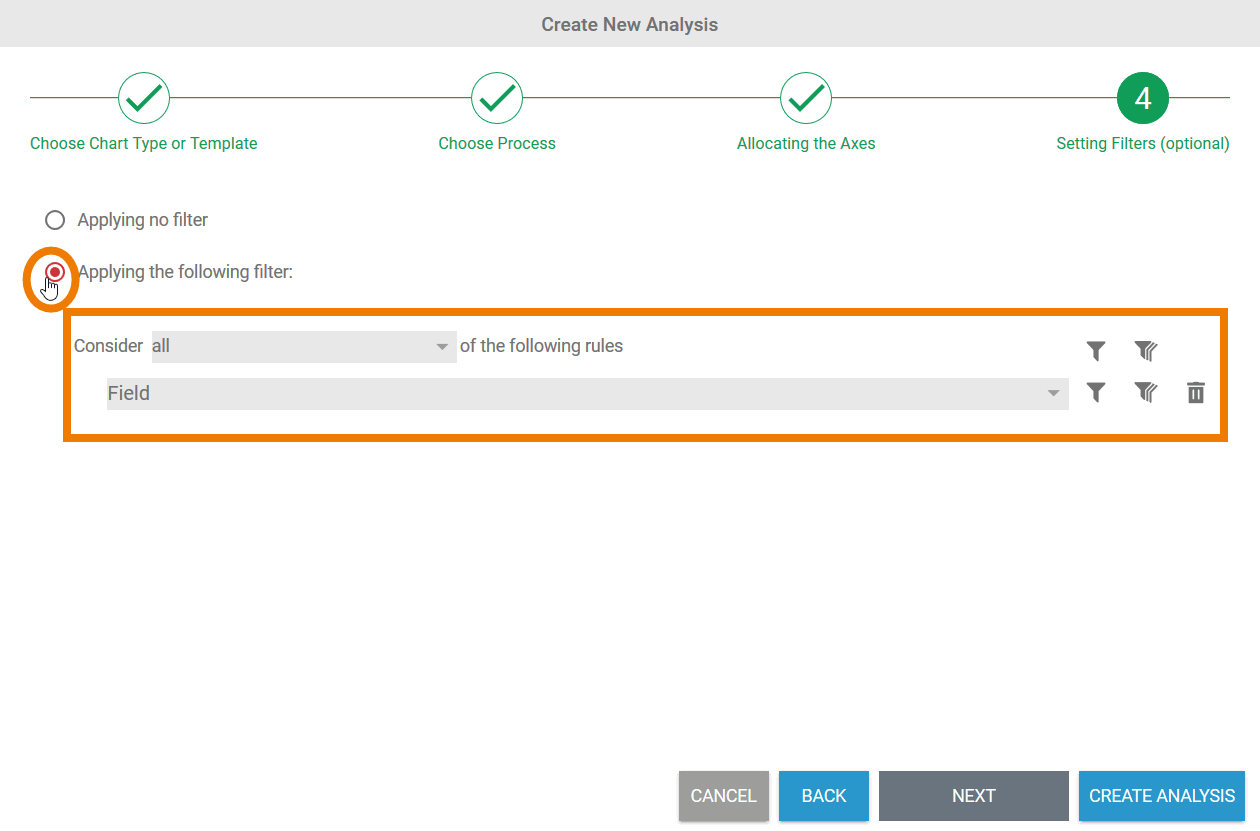
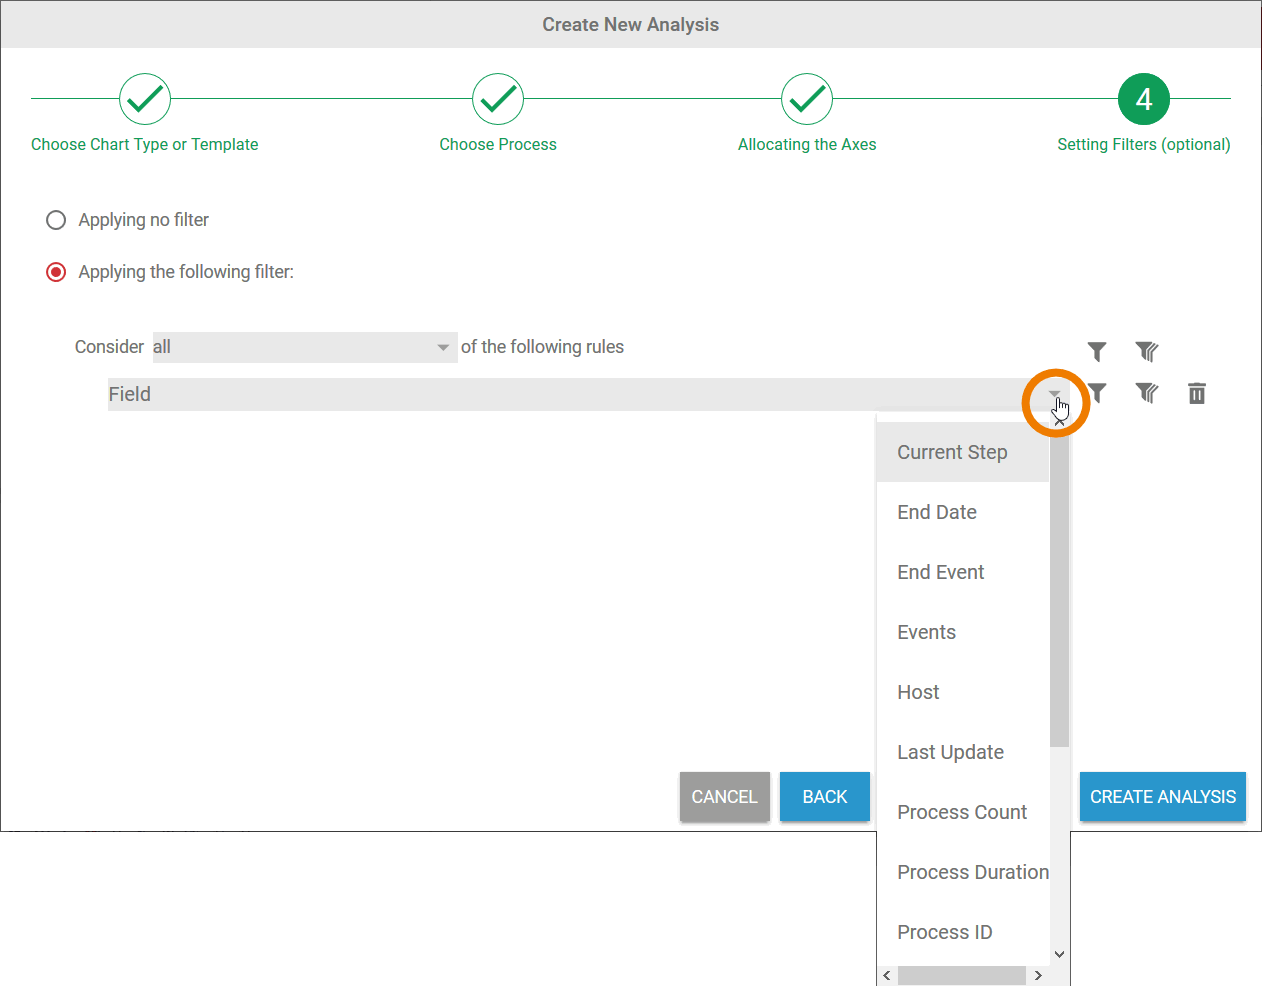
Creating an Attribute Filter
|
| ||||||||
|
|
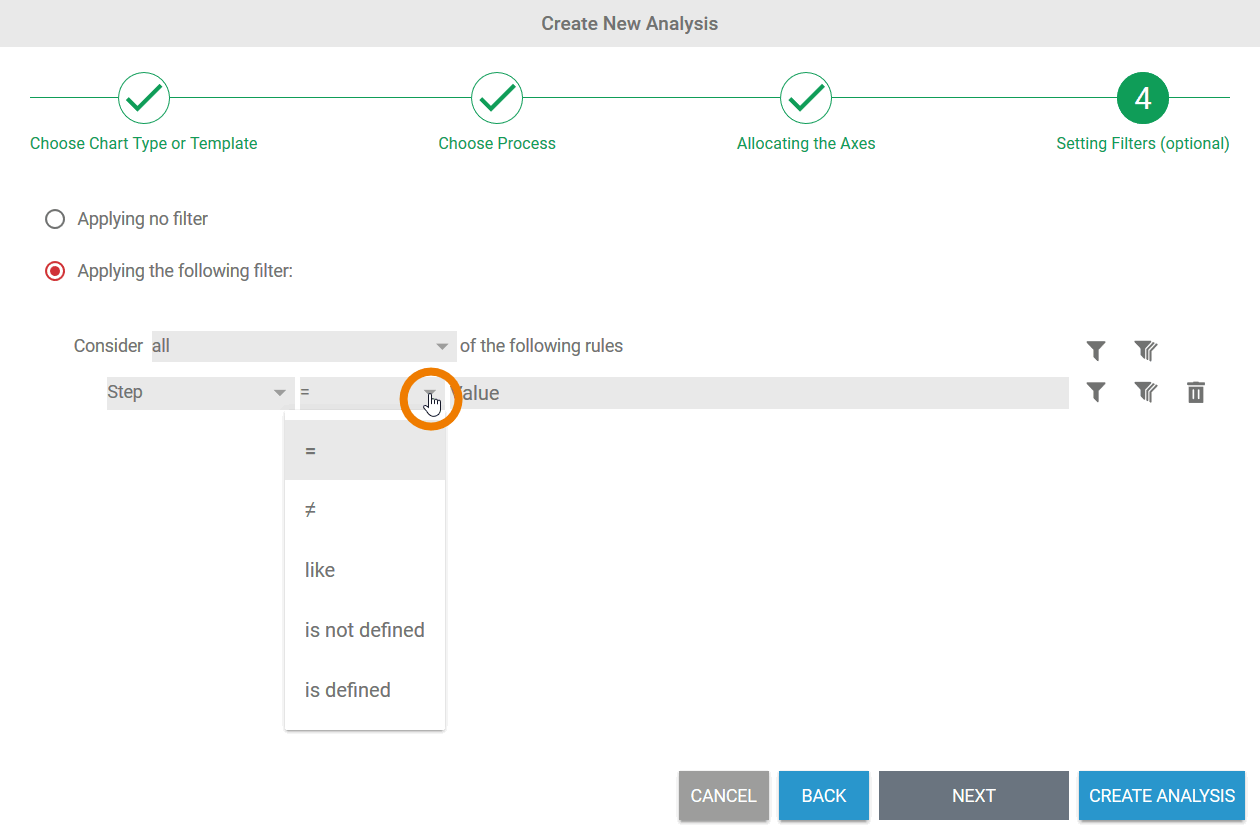
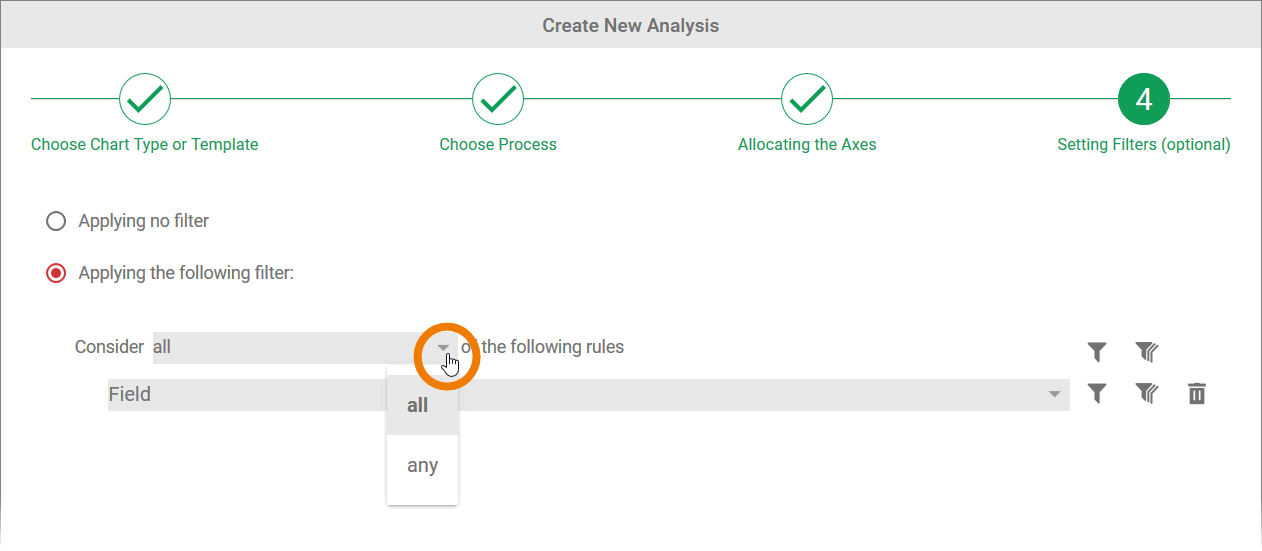
Available Operators
| Multiexcerpt include | ||||||
|---|---|---|---|---|---|---|
|
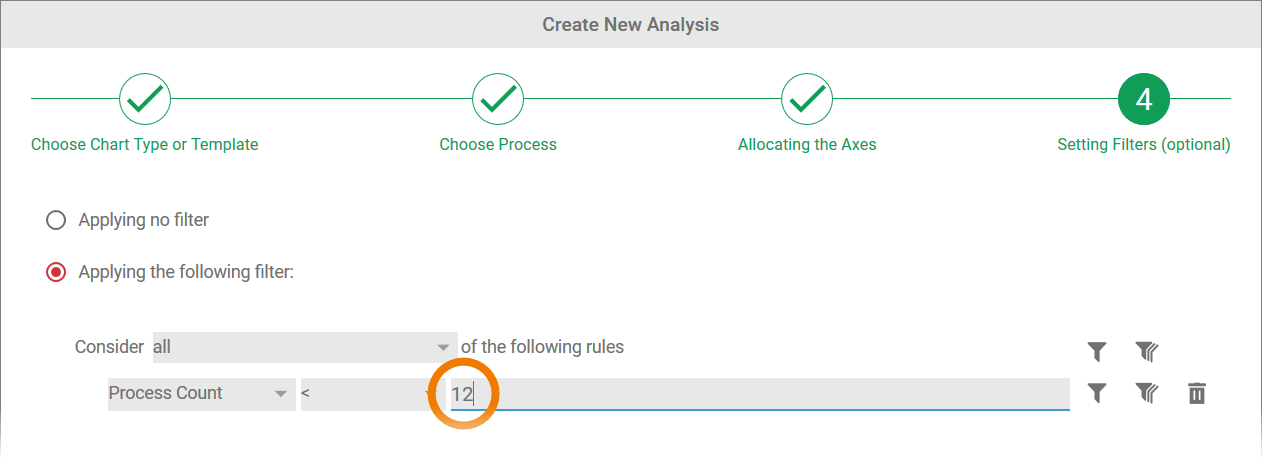
Inserting Values
|
|
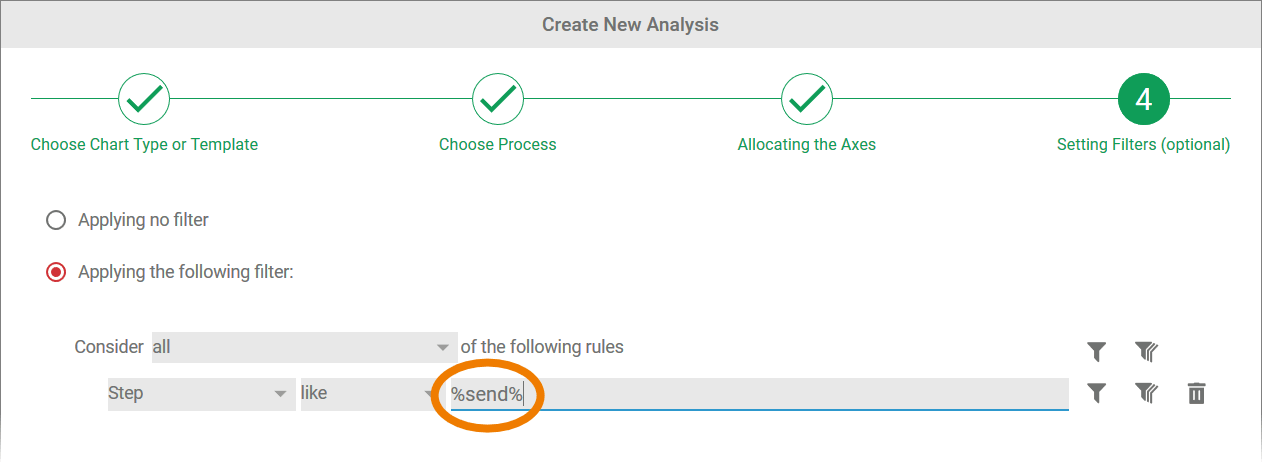
Using Wildcards
|
| ||||||||
|
|
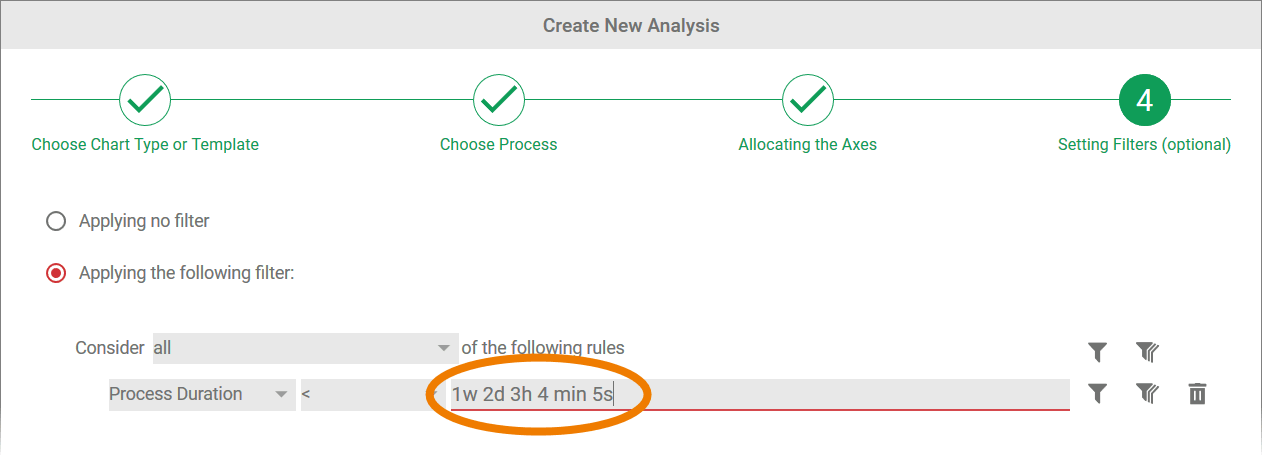
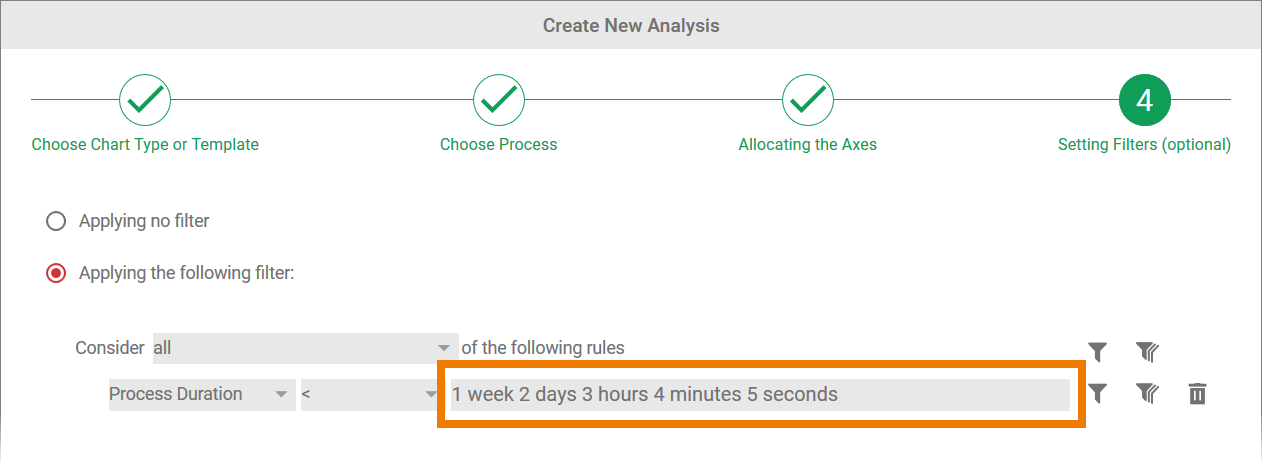
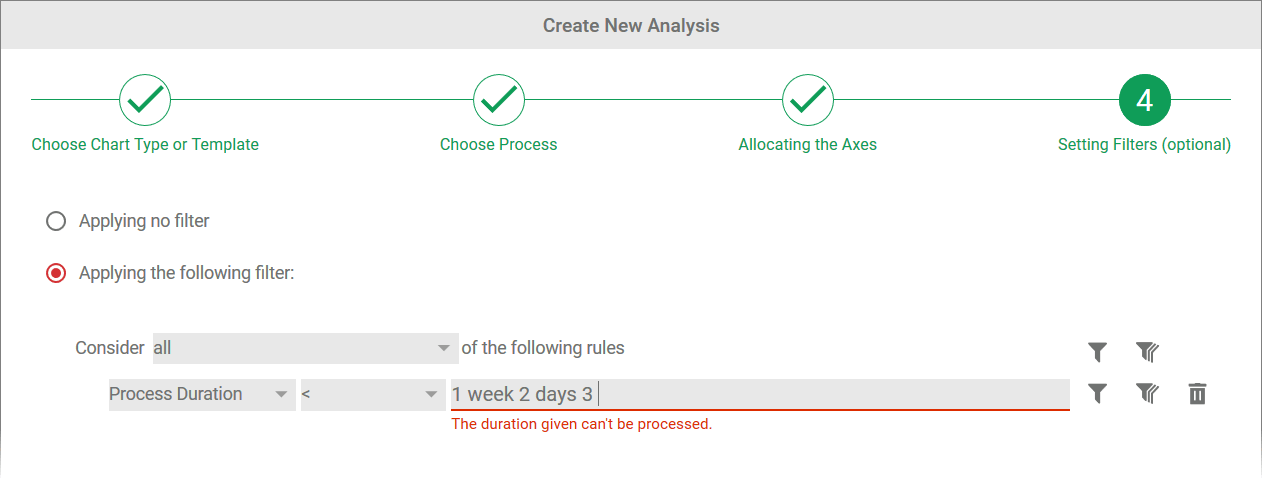
Entering a Duration
| Anchor | ||||
|---|---|---|---|---|
|
|
|
| Multiexcerpt include | ||||||
|---|---|---|---|---|---|---|
|
|
| ||||||
|
|
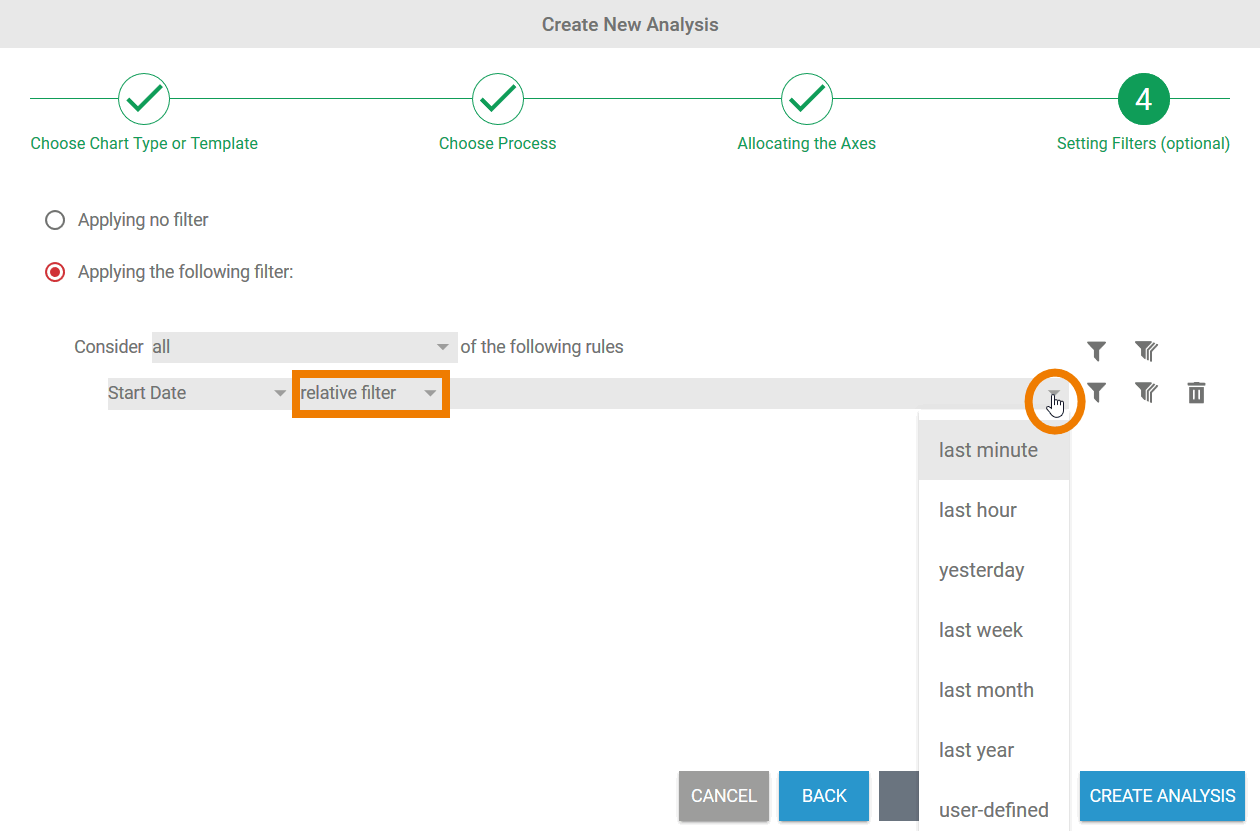
Relative Filtering
The operator relative filter is available for the instance attributes End Date, Last Update, and Start Date.
| A further selection list can be used to set predefined filters. The following selections are available:
|
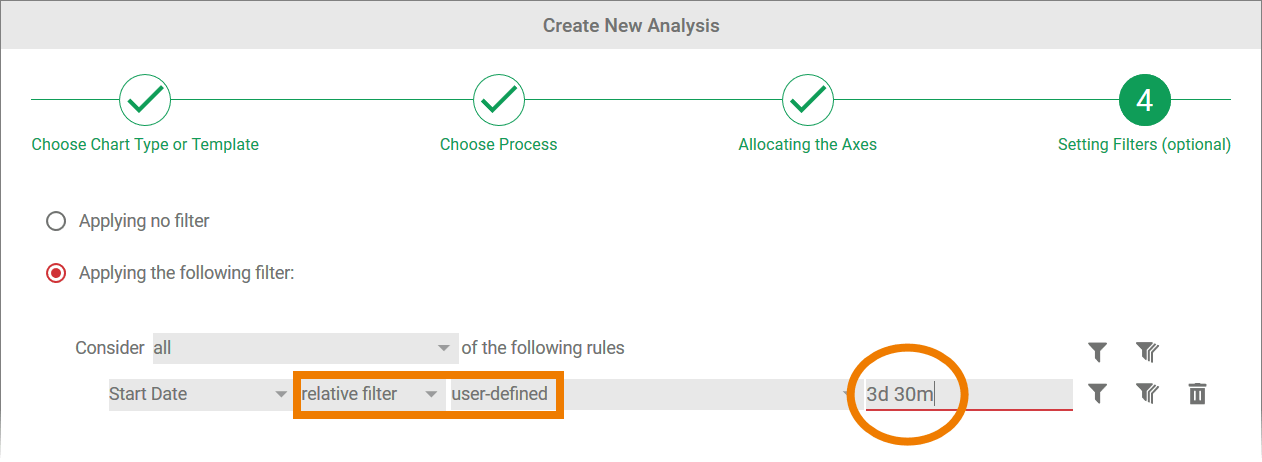
| If the option user-defined is used, the duration desired can be entered manually (see Entering a Duration). |
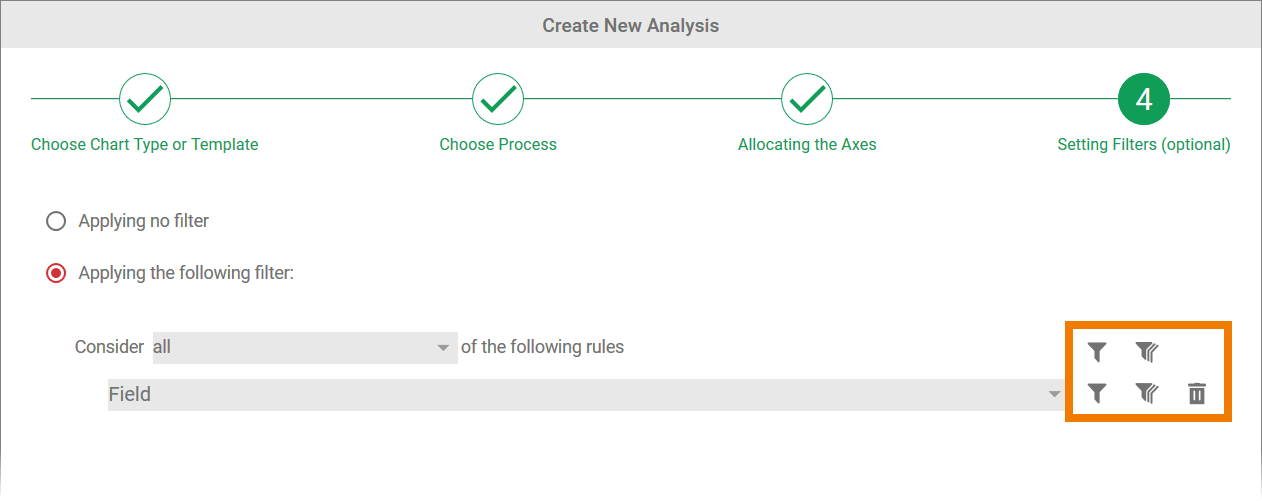
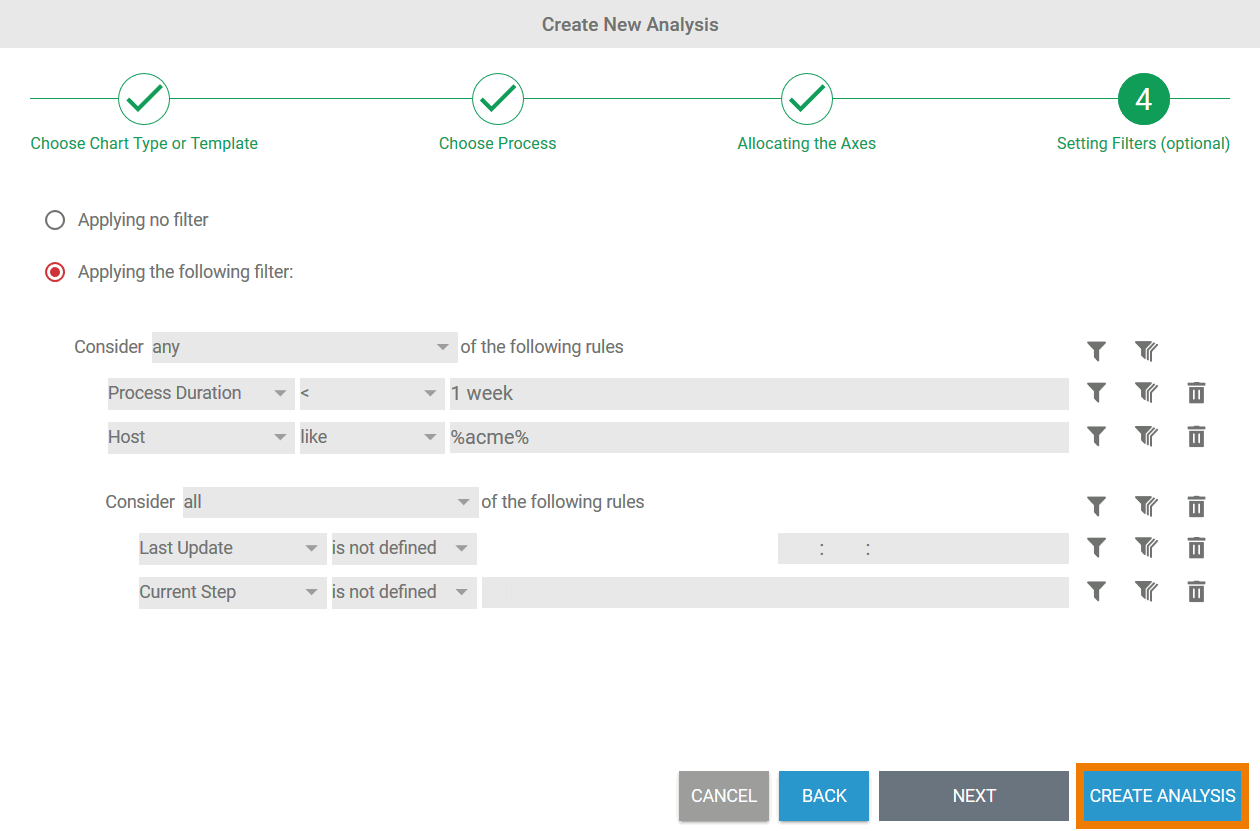
Nesting Filters
| You can create as many filters as you wish. Filters can also be nested to any depth. Once you have finished entering the desired filter, you can create the analysis using the Create Analysis button. |
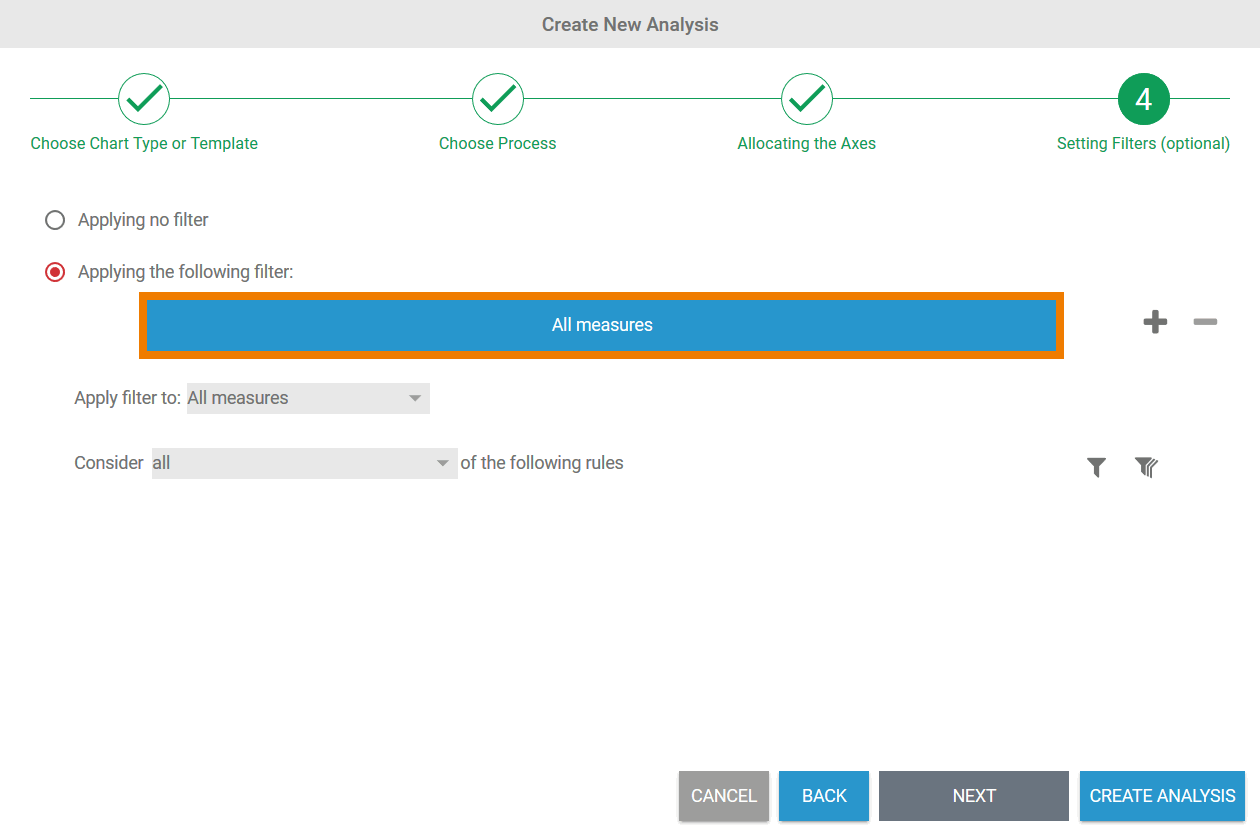
Creating Filters specific to Measures
If an analysis has been configured with several measures (see page Configuring Axis Allocation), filters specific to measures can be created.
| Info |
|---|
The creation of filters specific to measures is not available for pie charts and tachometer charts as these charts can only be configured for one index number at a time. |
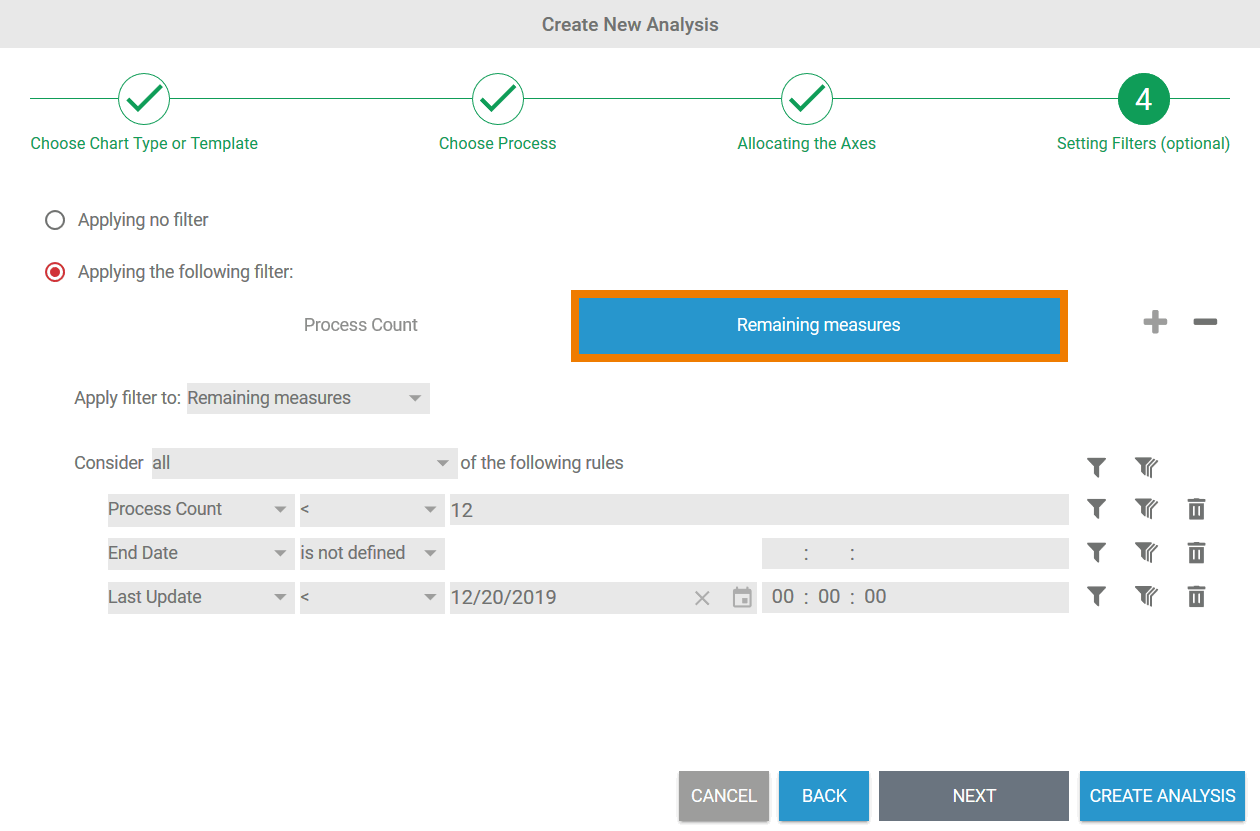
| If a user has saved several measures on an axis during the axis allocation, the All Measures tab appears when the filter wizard is opened. Filters configured by the user in this tab are applied to all measures allocated. |
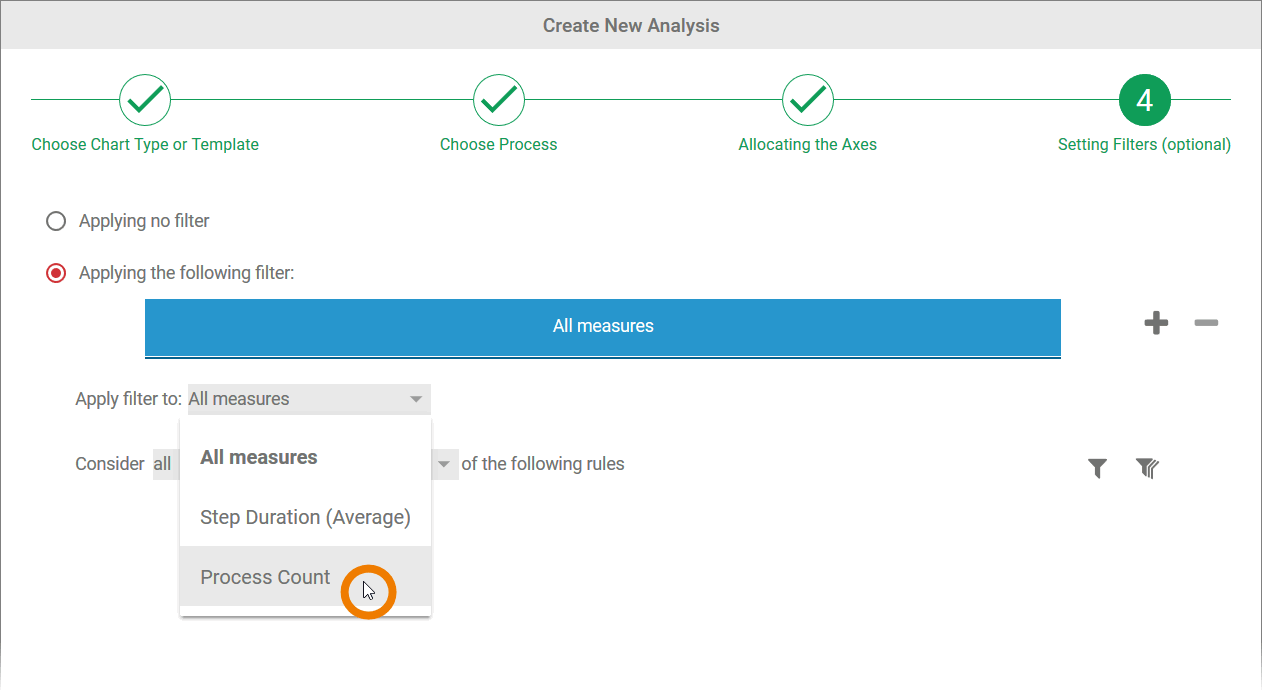
| In addition to the global All Measures filter, filters specific to measures can also be created. To change the existing global filter to a filter specific to a key measures, open the selection list Apply filter to and select the corresponding measure. |
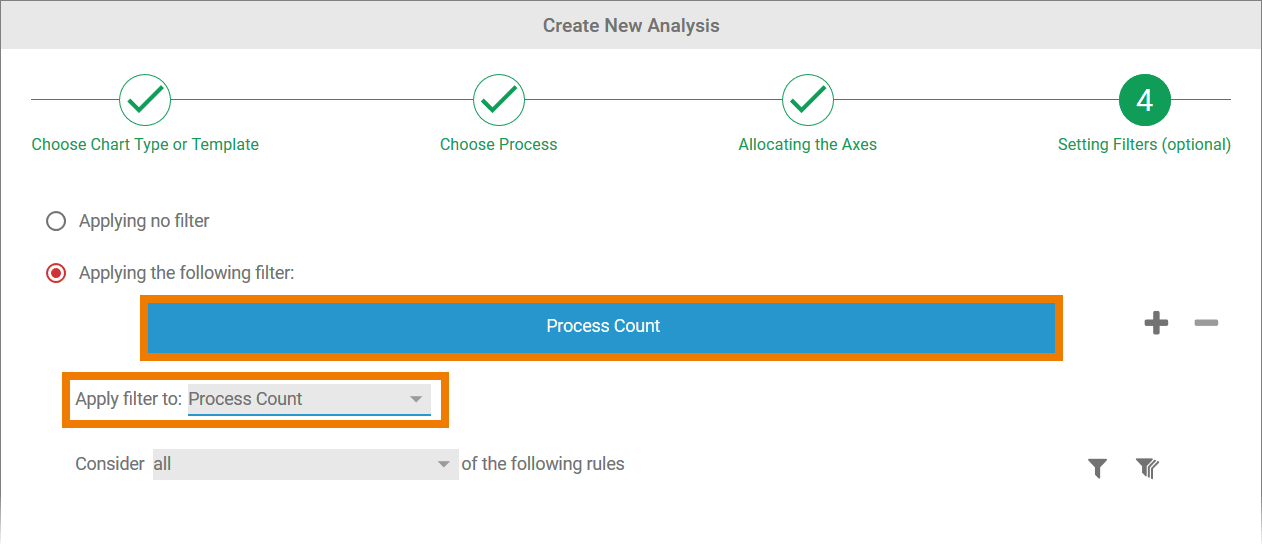
| The measure selected is transferred to the tab. All filters that are now created only affect the measure selected. |
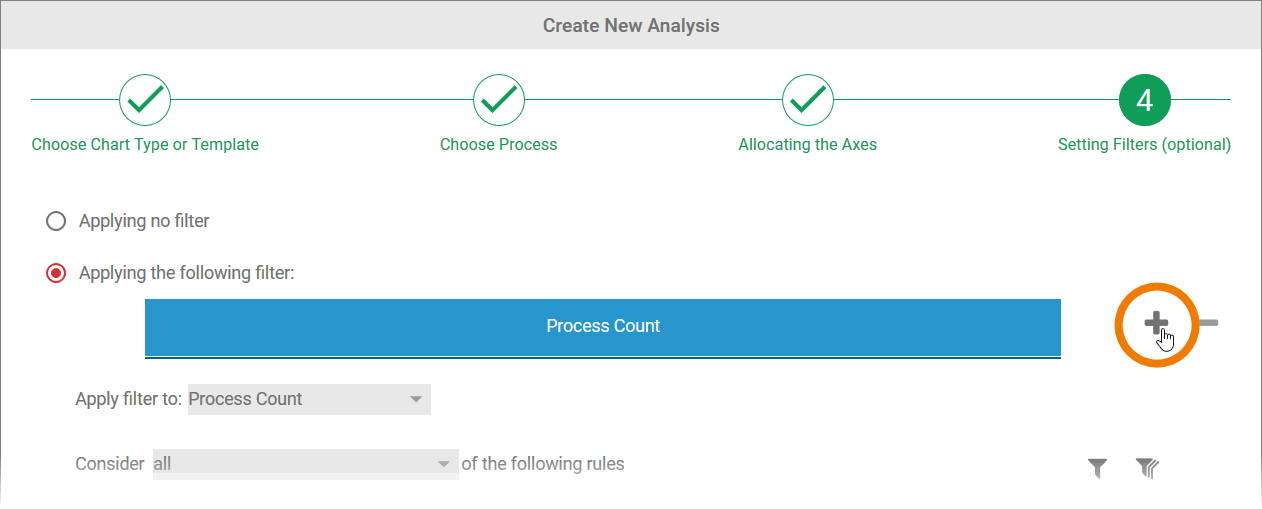
| If you wish to create additional filters specific to measures, add more tabs via the |
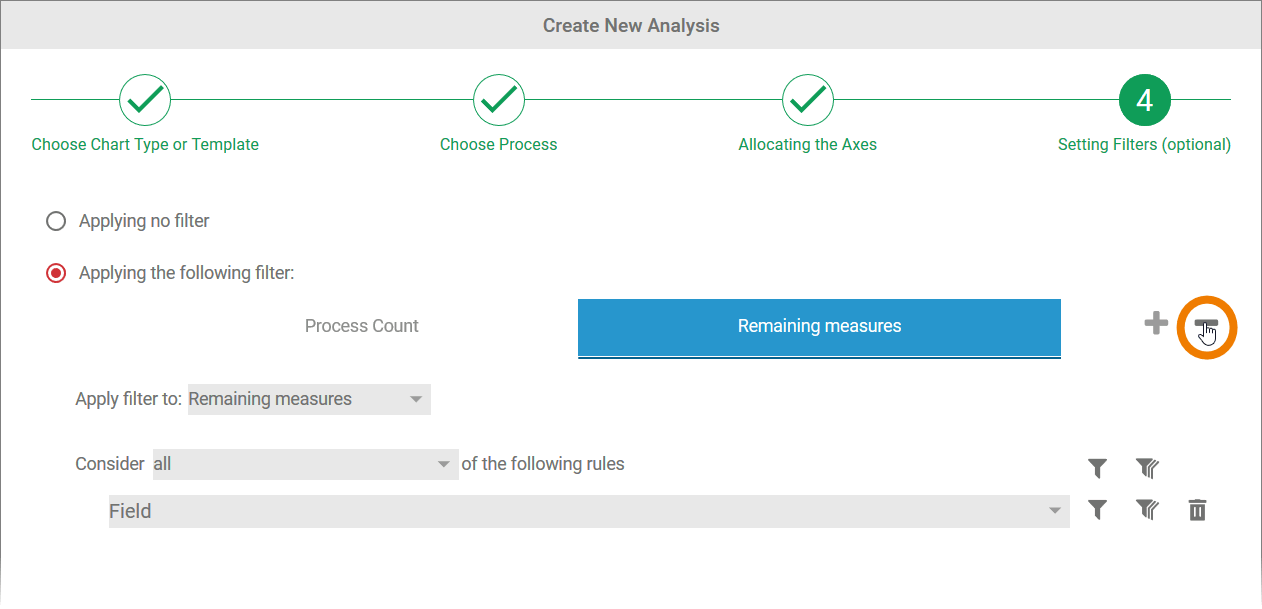
| Use the icon |
| Once a filter specific to a measure has been created, the global filter no longer applies to this measure. The name of the tab therefore changes from All measures to Remaining measures. Example: The filter Process Count < 12 in tab Remaining measures will not be executed. Filters to be applied to the Process Count must be saved in the Process Count tab. |
Changing Filters
When all the filters required have been created and the analysis has been created, the chart is displayed in the Process Analyzer. The settings for the analysis are shown in the sidebar:
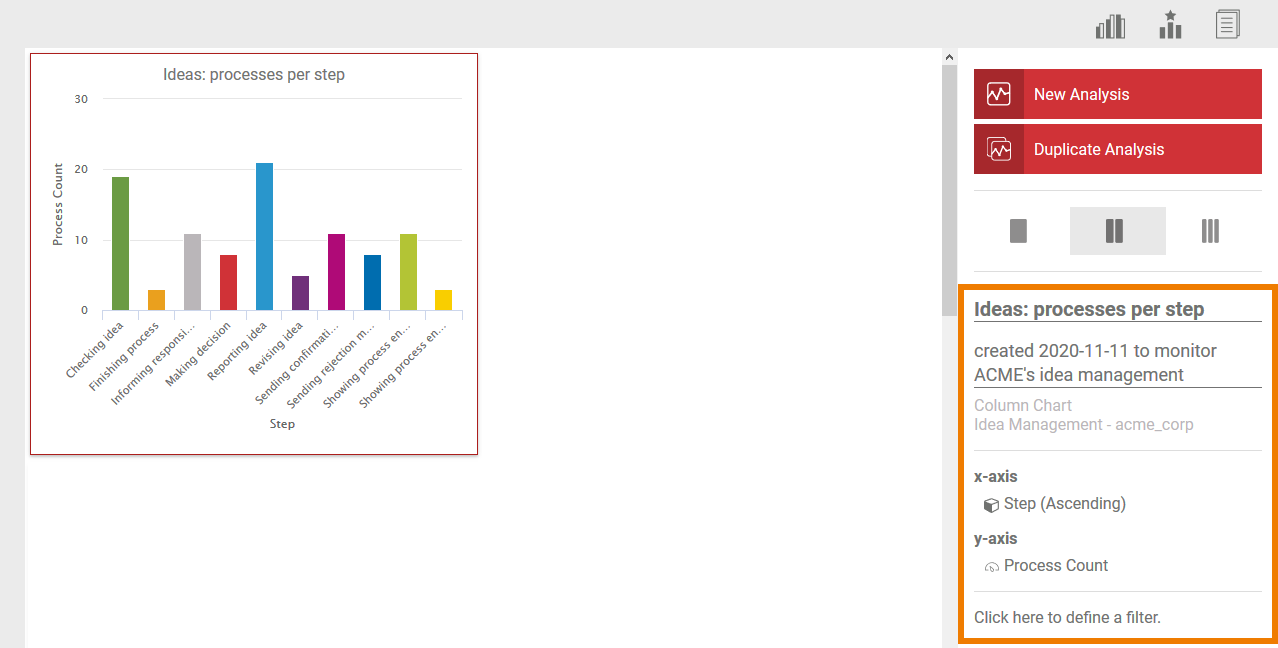
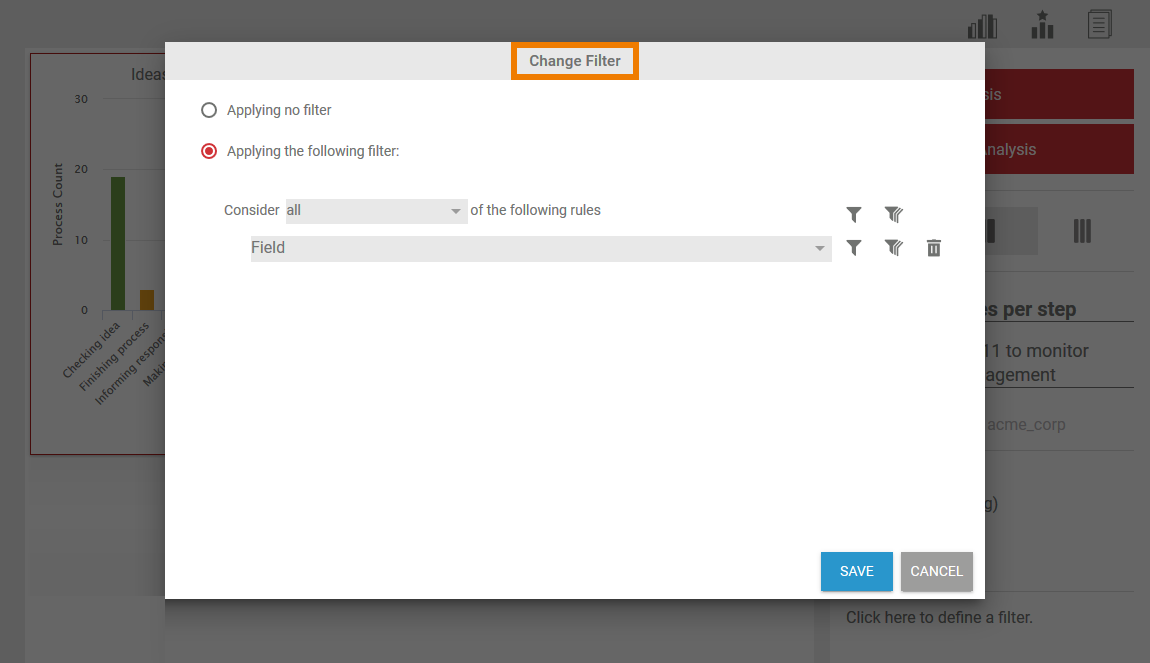
Use the sidebar to assign a name and a description to the analysis. The filter settings can also be edited via the sidebar. Clicking the Filters section in the sidebar opens a pop-up window in which existing filters can be changed and new filters created:
| Panel | ||
|---|---|---|
| ||
|
| Panel | ||
|---|---|---|
|
| Otp | ||||
|---|---|---|---|---|
|
Overview
Content Tools