The E2E Components Wizard helps you to define all components, classes, interfaces, artifacts, and dependencies that are needed to build a complete component diagram. It guides you through all necessary steps and supports you with the customization of all artifacts.
It is possible to create complete component diagrams from scratch by using the main Components Wizard. It can be started by selecting the menu icon E2E Component Wizard in he menu bar shown below. It is used when starting a new component diagram.

Alternatively, you could choose Tools > Components Wizard from the Model Compiler window. Each step to create a component diagram from scratch is described in Creating a Component Diagram.
DeprecatedBridge 7.0.0-beta1 The usage of the components wizard of E2E Builder before version 6.0 (![]() ) is deprecated. Since Bridge version 7, the E2E Compiler does not support the old component diagram anymore. In this case, refactor your service.
) is deprecated. Since Bridge version 7, the E2E Compiler does not support the old component diagram anymore. In this case, refactor your service.
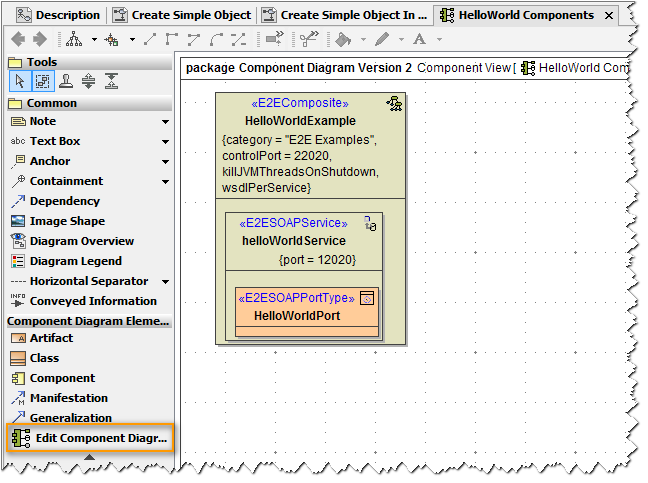
Wanting to edit an existing component diagrams use the E2E Edit Component Diagram Wizard that supports you in changing a specific part of the component diagram. It can be started by selecting the appropriate icon from the middle bar of the component diagram.
The E2E Components Wizard Window is composed of four parts:
- a tree panel (1) on the left side,
- a heading area (2) on the top,
- a customization panel (3) on the right side of the window and
- a message area (4) below the customization panel.
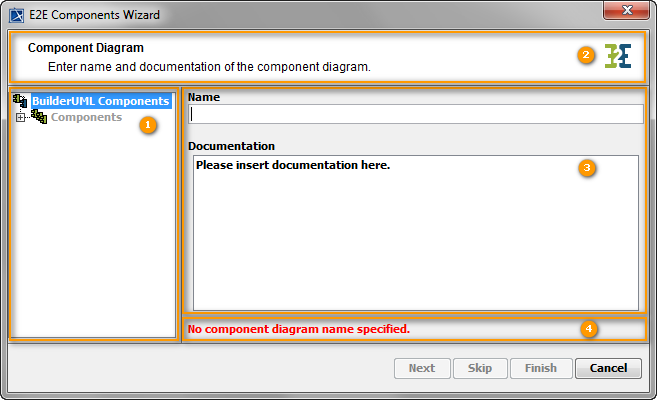
The tree shows the components and the customized artifacts of the component diagram and their dependencies. It provides an overview about the UML elements of the component diagram that will be drawn when finishing the Components Wizard. You can select an element node in the tree to continue defining elements from this point.
The heading area shows general information on the customizations that can be applied on the selected element.
In the customization panel on the right, the main part of the Components Wizard dialog is displayed. Apply the necessary customizations here.
Below the customization panel in the message area, error messages thrown by the Components Wizard are displayed.
Each dialog of the Components Wizard provides different buttons. Some buttons are only enabled if the previous step has been completed.
| Button | Description |
|---|---|
| > | Instantiates the selected component or type from the list. |
| < | Removes the selected instantiated element. |
| New | Defines a new component or type. |
| Next | Continues with the next step. |
| Skip | This button is enabled, if it is possible to skip some steps (defined frontend, backend, or proxy services need to be completed). You may continue with the definition of E2E Bridge nodes, backend nodes, proxy servers, or dependencies. It may also be possible to finish the Components Wizard and confirm to draw the component diagram. |
| Finish | Closes the Components Wizard and draws all defined elements in the component diagrams. This button is only visible in the last step. |
| Cancel | Quits the Components Wizard and discards all elements that were defined since starting with the first step. |
The Components Wizard leads you through all steps of creating a component diagram. In the tree panel, the diagram part components are currently added to is always highlighted.
Overview
Content Tools