There are three possible options to create new elements in your editor. These are valid for both the Project and the Process Editor.
Creating new Elements via the Sidebar
One option for creating new elements on your work surface is using the Sidebar New Elements.
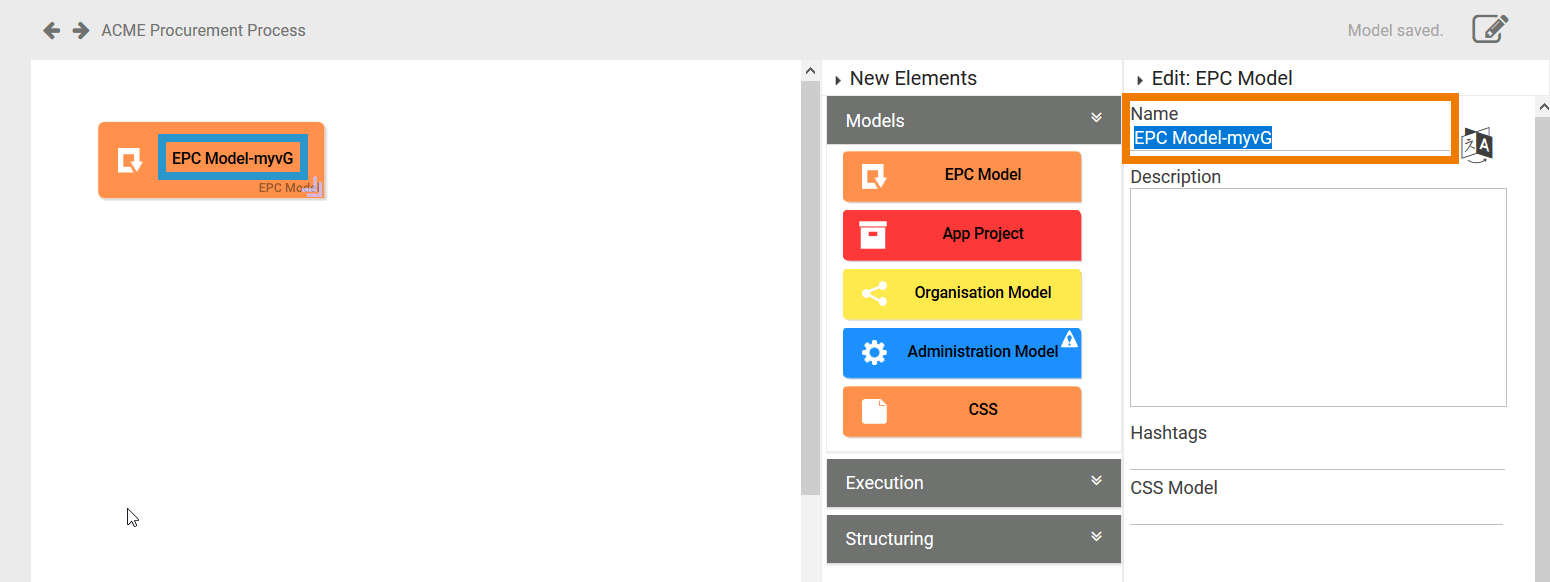
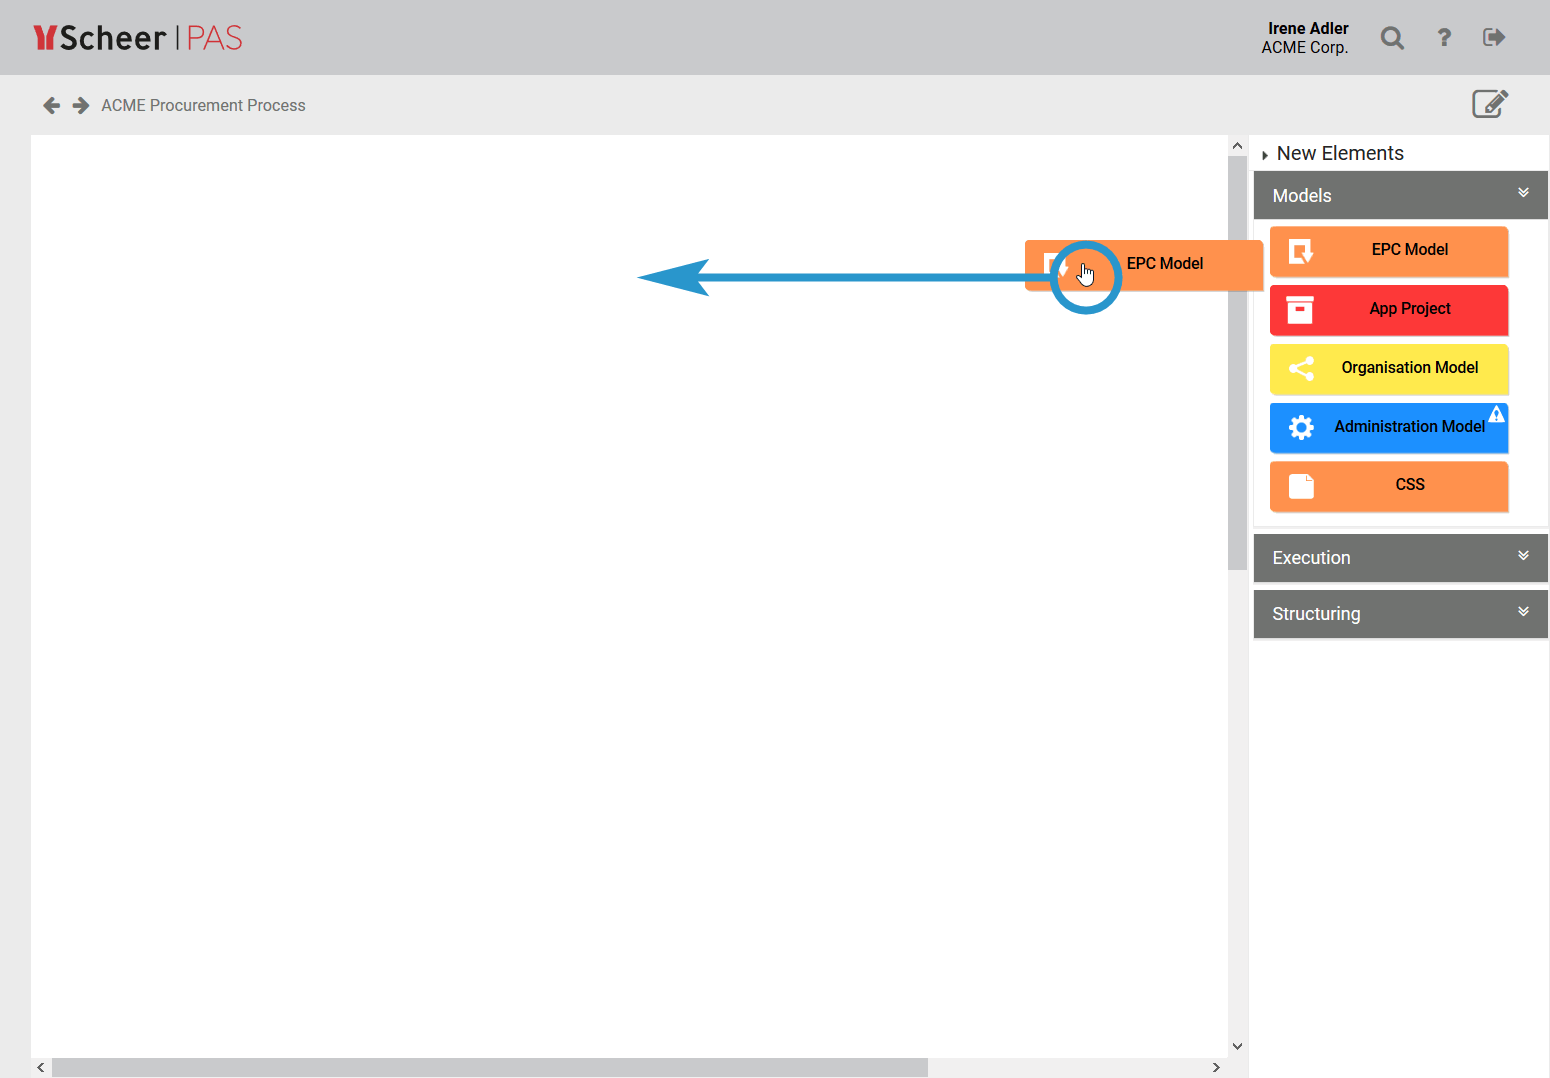 | You can create a new EPC in the Project Editor by dragging the EPC Model element from the sidebar on your work surface. |
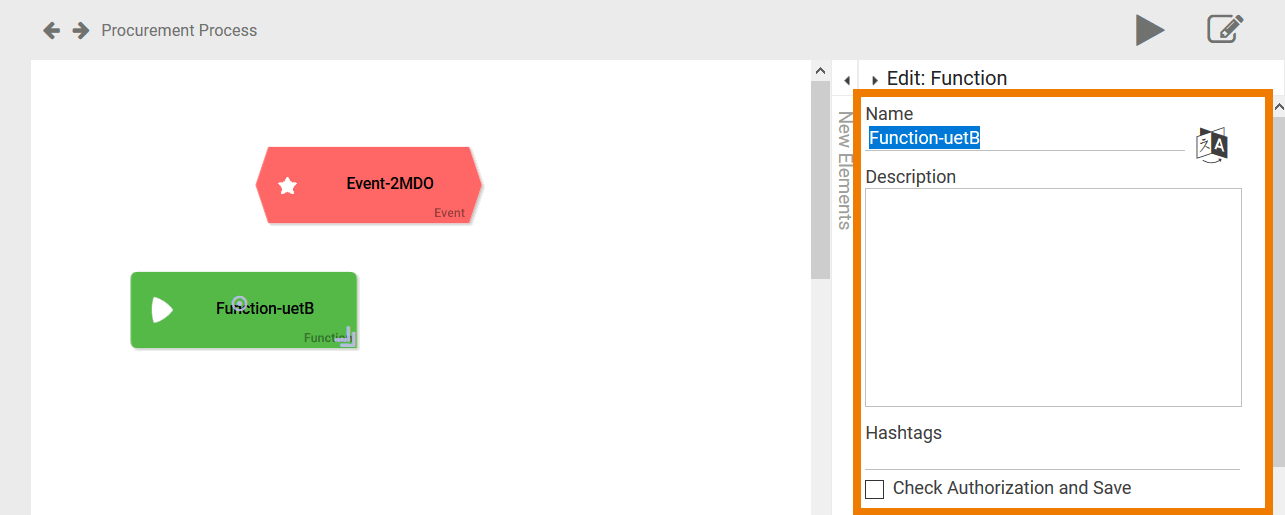
| As soon as you drop the element on your work surface, it is assigned a key (for example EPC Model-myvG). Furthermore the element's editor opens in the sidebar and the model's name is already displayed in edit mode. |
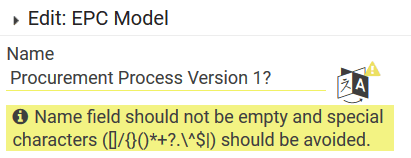
 | Overwrite the key in the Name field with a new title for your EPC, for example Procurement Process. Then press ENTER to save your input. Clicking on another element or on the work surface will attain the same results. |
| Make sure to always name your elements. This name may not contain any of the following special characters: $ * + ? . ( ) [ ] { } / \ | ^ |
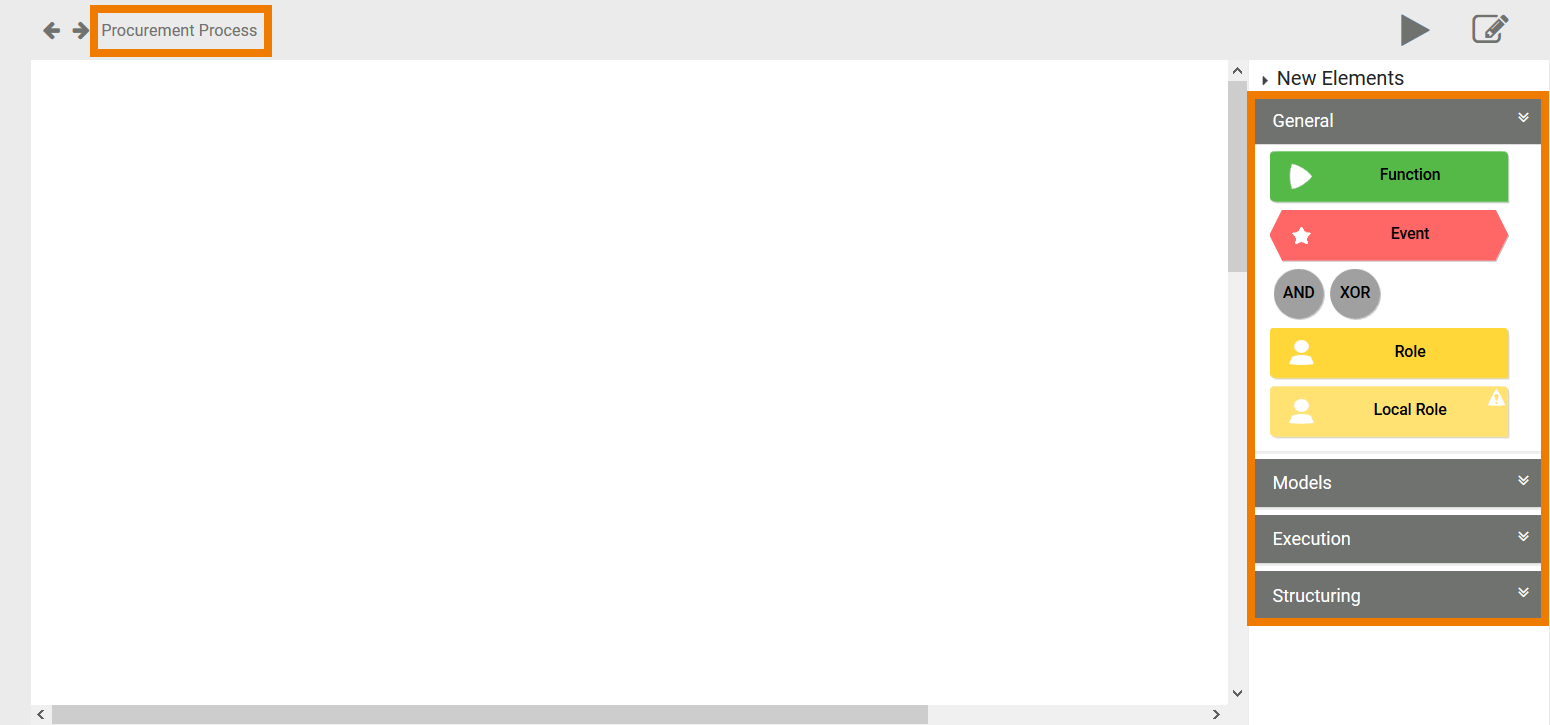
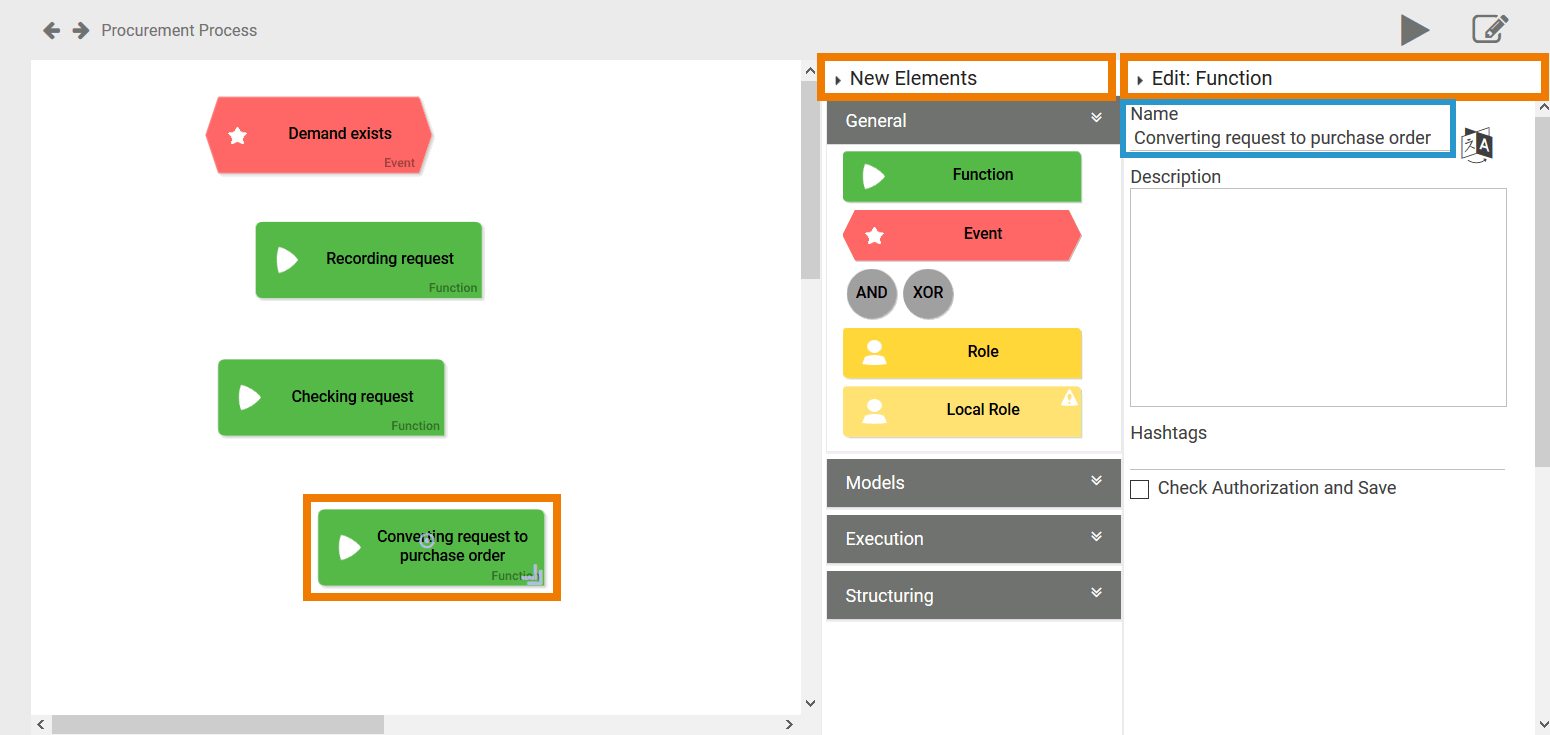
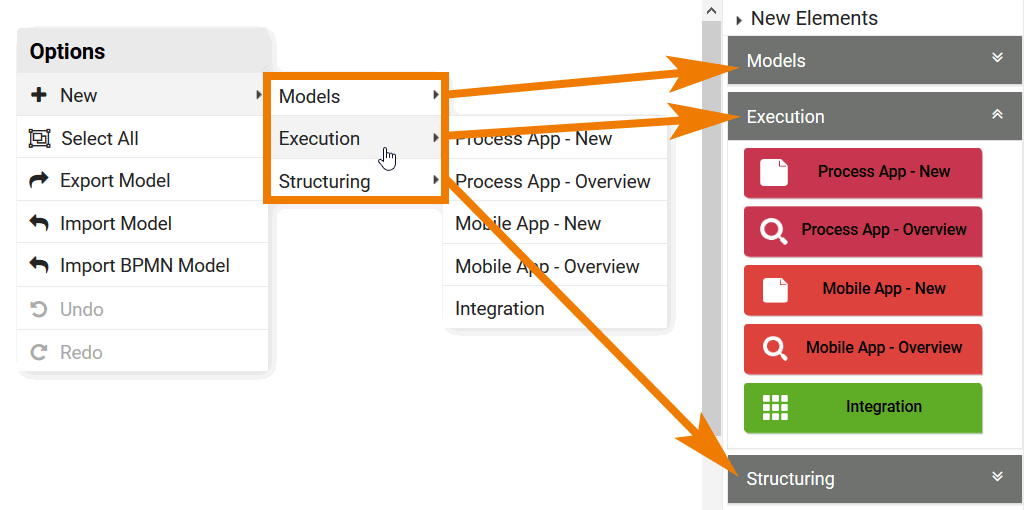
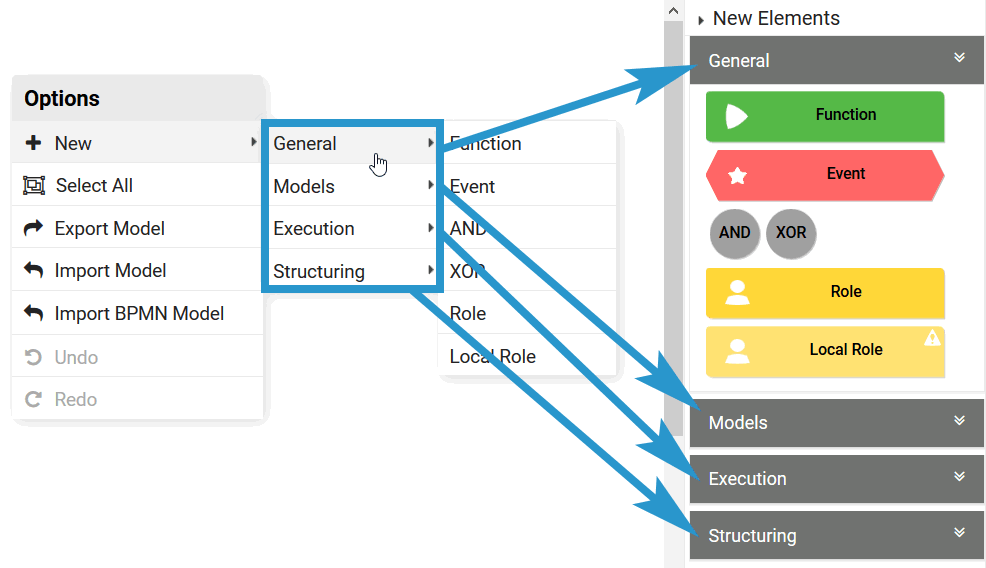
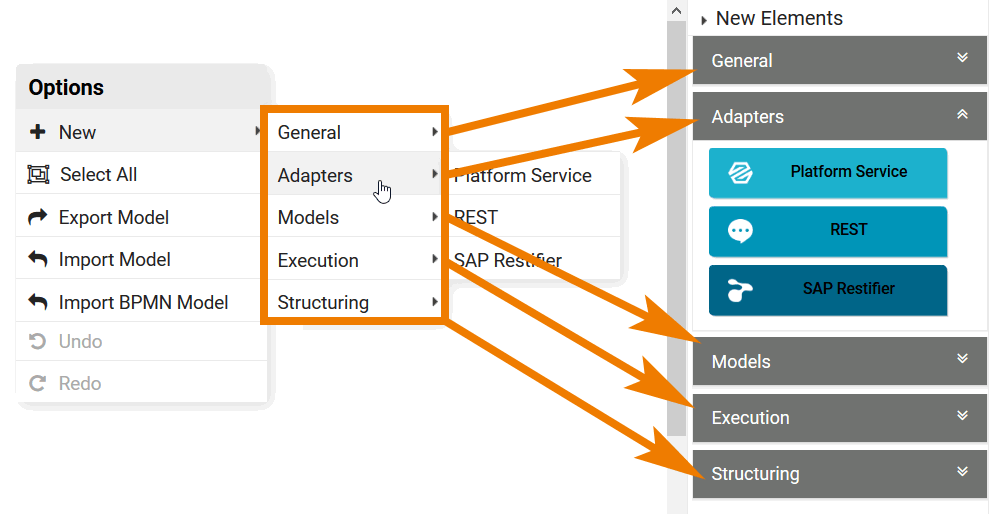
| With a double click on the EPC Model you enter the Process Editor. The sidebar's element selection adjusts accordingly. Click on the categories General, Models, Execution and Structuring to display available EPC elements. The additional category Adapter can be found inside the Integration element. |
| Simply drag an element from the Sidebar New Elements to the work surface to get started. The Edit Sidebar is situated to the right of the Side bar New Elements. Here you can edit the characteristics of the selected element, for example change its name or enter a description. Helpful tips for modeling an EPC can be found on the page Modeling Conventions.
|
The Sidebars can be opened or closed via the triangular button. This enables a better overview when modeling on your work surface. | |
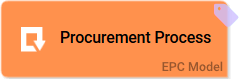
Example: Drag Points in Event, Function and Connector
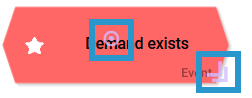
| Drag points (Indicators) appear with a click on the elements:
|
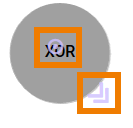
Example: EPC Model without a central drag point
| Not all elements can be linked via connections. If an element cannot be connected, it will not contain the central drag point. An EPC Model can only be connected to another element if it is situated in the work area of the Process Editor (within a superior EPC Model). An EPC Model in the Project Editor does not contain a drag point. An EPC Model element within another EPC Model is however connectable via a drag point. |
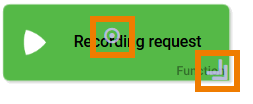
Example: Organization Model with label  | Some elements can be opened to save content on lower levels. A label in the upper right corner marks elements that already hold content. |

Creating new Elements using the Context Menu
Project, EPC and form elements can also be created via the Context Menu instead of using drag & drop.
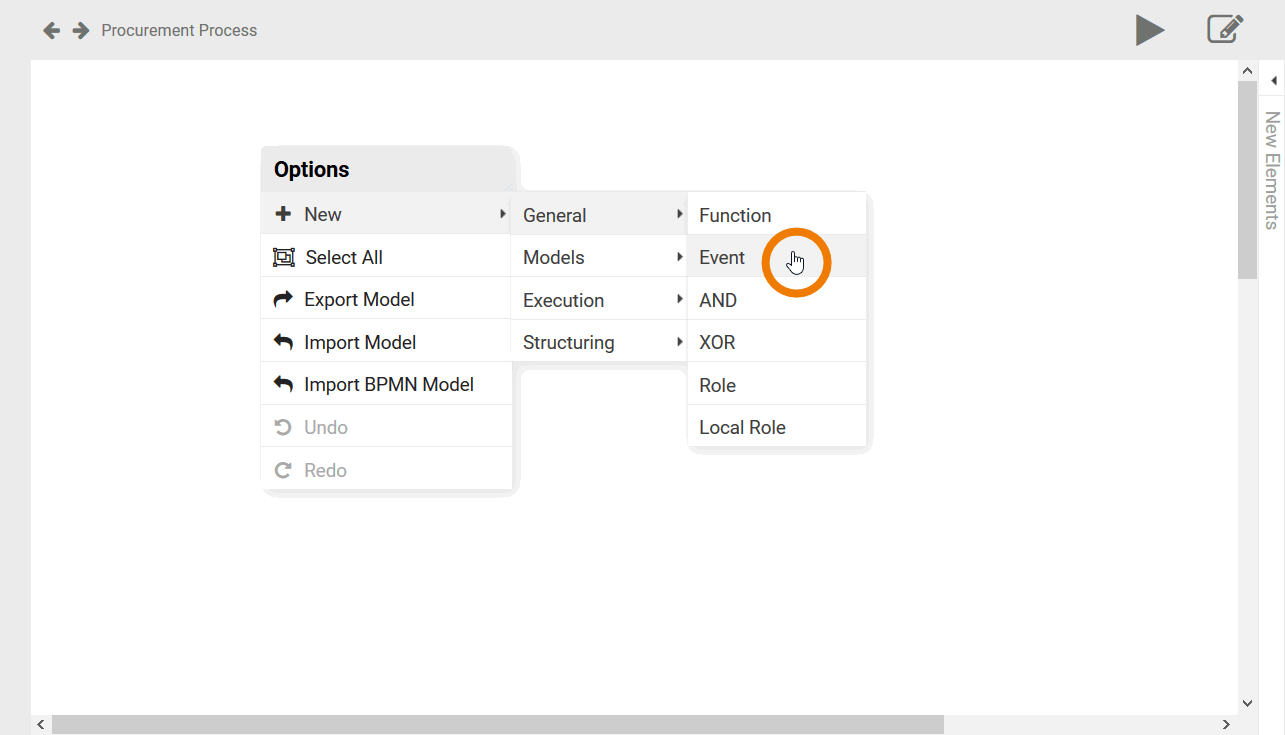
| Open an EPC Model. Now use a right mouse click on your work surface to open the Context Menu. Choosing the option New displays all element categories that are also available in the Sidebar New Elements. Move your mouse over the displayed categories to show available elements. Create the desired element, for example an Event, with a click of your mouse. |
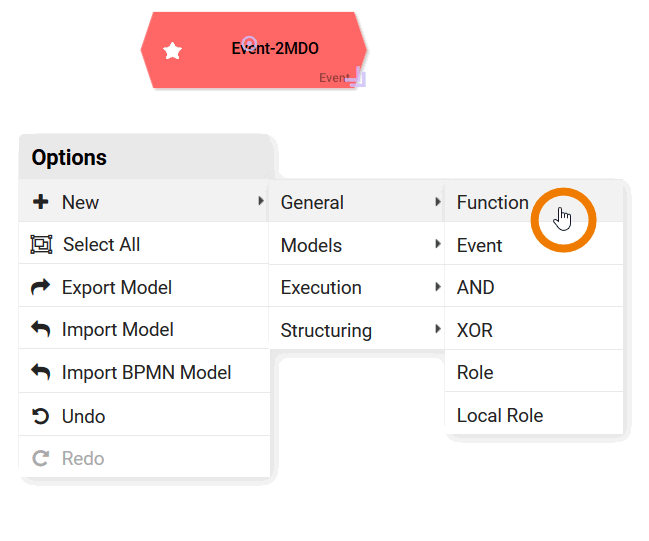
| The event is created and you could now repeat the procedure with for example a function. |
| Move the element to the desired location. As soon as an element is created on your work surface, you can mark it in order to display the Edit Sidebar. |
Overview of the Context Menu Option "New"
The option New supports you during creation of elements. Use the arrow ![]() to show a list of available categories. Within the categories in the context menu you will find the same elements as in the Sidebar New Elements:
to show a list of available categories. Within the categories in the context menu you will find the same elements as in the Sidebar New Elements:
| Categories of available elements in the Project Editor's first level. |
| List of available categories in the Project Editor within an App Project (second level). |
| List of available categories in the Process Editor's first level. |
| List of available categories in Process Editor inside of an Integration (second level). |

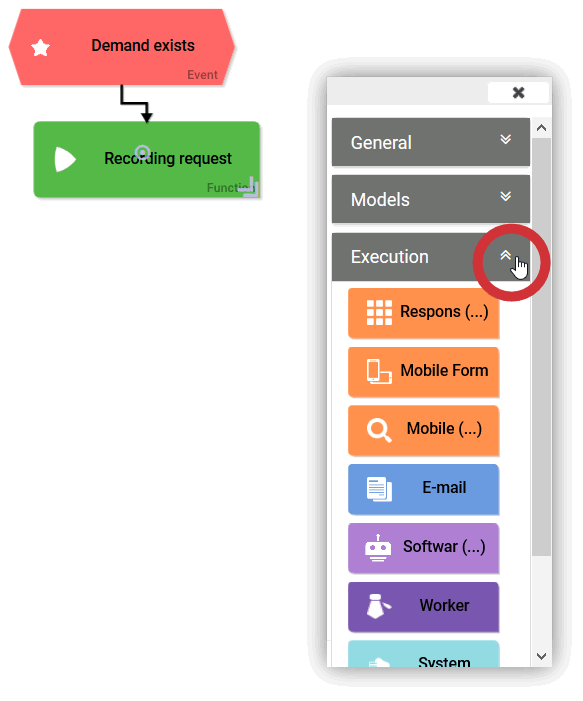
Generating Predecessors or Successors
EPC elements can be connected with each other. However not all connections are acceptable if the process shall remain executable. To support you in creating executable EPC models, the context menu offers you another function.
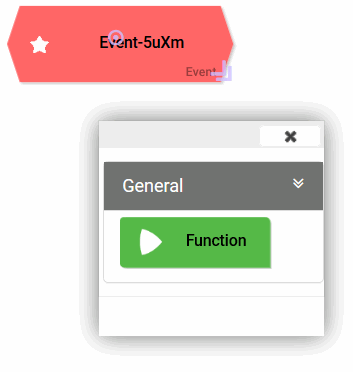
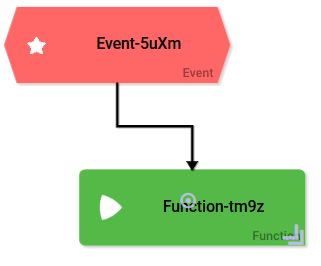
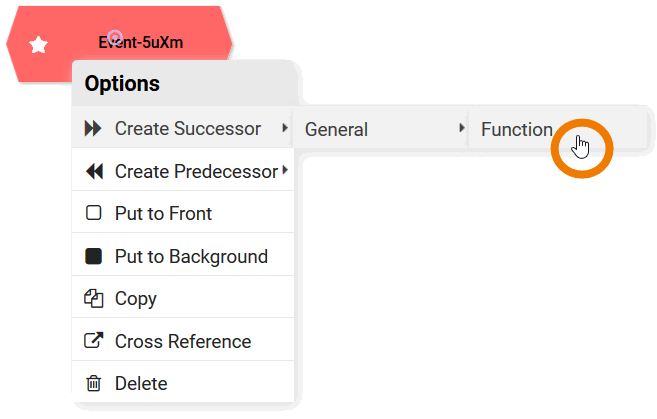 | If you open the context menu directly on an EPC element, then instead of option New the options Create Successor and Create Predecessor appear. These menu items will only offer matching successors or predecessors to the already created element. A click on the arrow |
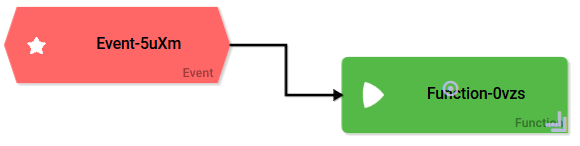 | If you select one of the permitted successors or predecessors from the list this element will not only be created. It will also directly get connected to the already existing element. |
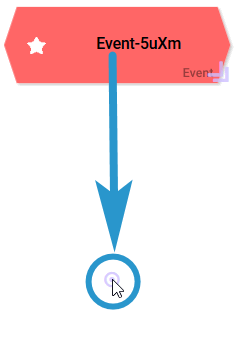
Create New Elements via Drag Point
The following procedure is a combination of drag & drop and the context menu. A first element must already exist. For our example we created an Event.
| Drag the central drag point outside of the element and release the mouse key. |
 | Now a pop-up window opens displaying corresponding successor elements. |
 | Now drag the desired successor element from the pop-up and drop it to the work area. The new successor element will automatically be connected to the previous element and the pop-up window closes. |
| A repeat may generate different content depending on context:
The connection's direction will be determined automatically. |
On this Page:
Overview
Content Tools