Running a Test Suite
Before you can have a look at the test case results, you have to run the test suite. Make sure that the PurchaseOrderExample service is still running on localhost (for more information on how to do that refer to Starting and Stopping xUML Services).
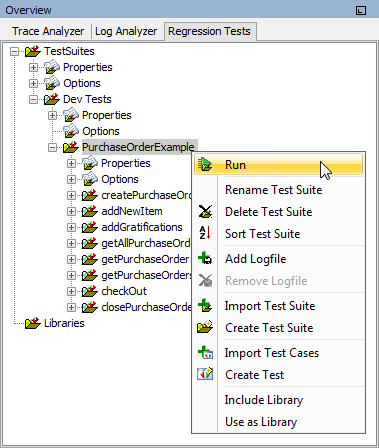
| Select Run from the context menu of the test suite. |
The test progress is indicated by the progress bar in the contents pane. The results of the test case run are displayed below the progress bar.
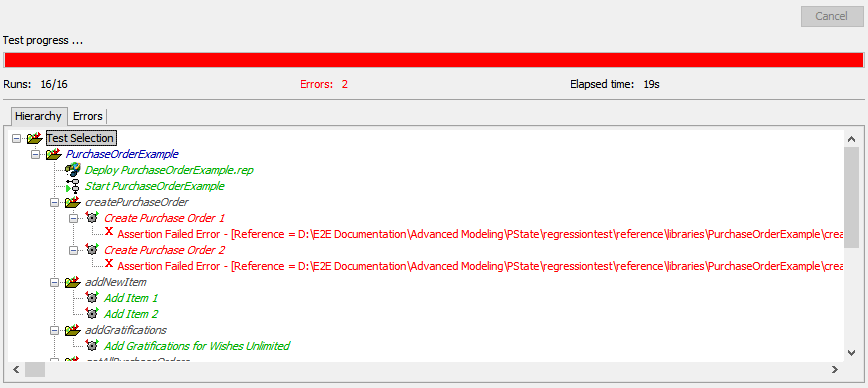
Green test case names indicate, that the test case run was successful. That means, the test case was executed and the test case results were corresponding to the reference data.
Red test case names indicate, that something went wrong during test case execution. Either the test case could not be run (e.g. because the service could not be found) or there was a mismatch between test case result and reference data. These test cases have to be carefully inspected.
The color of the progress bar also indicates the overall test case results. As long as no errors occurred the bar stays green. With the first error occurring the color changes to red.
Below the progress bar the number of test cases and the number of test failures is displayed.
Tracking Down the Cause of Test Case Failures
In our sample test cases, the two createPurchaseOrder test cases didn't succeed. The error message reads [...] Create Purchase Order 1\response.log ][different] [...]. This suggests that the test case response did not correspond to the reference data.
To analyze that, click the erroneous test case Create Purchase Order 1 and look at the lower window part, which is divided in two.
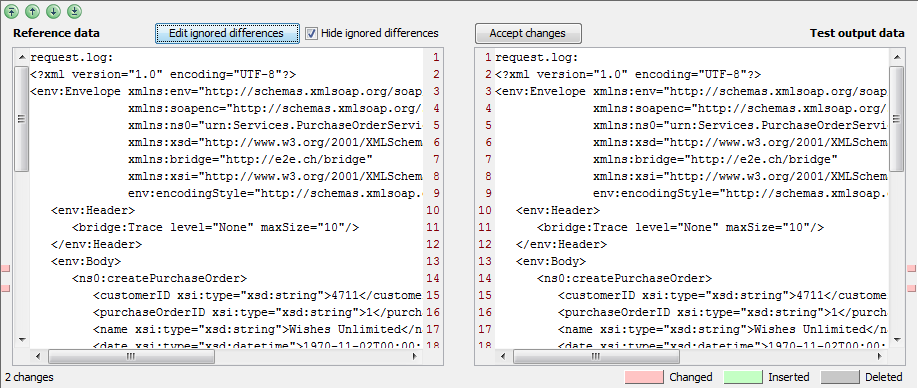
The left part of the window shows the reference data, that was build up during the test case runs with the Trace Analyzer. The right part of the window shows the actual test output data. Differences between the two are marked with colors: changes are marked in red, insertions are marked in green and deletions are marked in grey.
In the lower left corner a message indicates that there are 2 changes resp. differences.
You can jump between the changes using the arrow buttons:
| Jump to the first change. | |
| Jump to the previous change. | |
| Jump to the next change. | |
| Jump to the last change. |
Click ![]() to jump to the first difference.
to jump to the first difference.
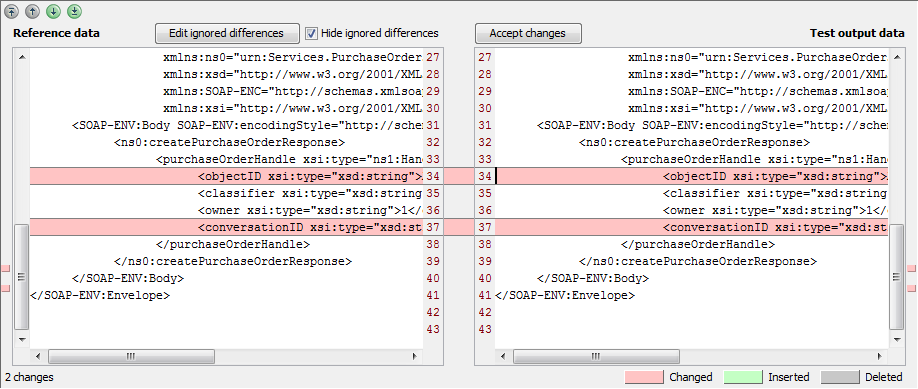
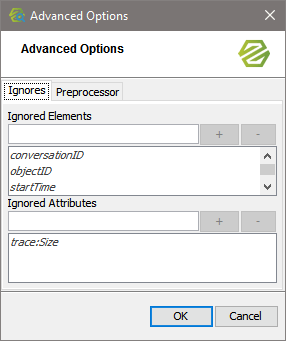
The XML elements objectID and conversationID contain different ID numbers. These ID will always differ from run to run and these differences can be ignored by the Regression Test Tool. They are not indicating, that there was an error executing the SOAP operation.
To ignore these differences click Edit ignored differences.
| In this dialog, enter XML elements or XML attributes that should be ignored when comparing the test output with the reference data.
|
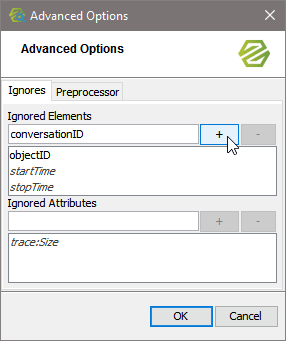 | Enter objectID and click  to add the the XML element to the list of ignored elements. Do the same with to add the the XML element to the list of ignored elements. Do the same with conversationID. |

The same applies to the second test case.
Universalizing Ignored Differences
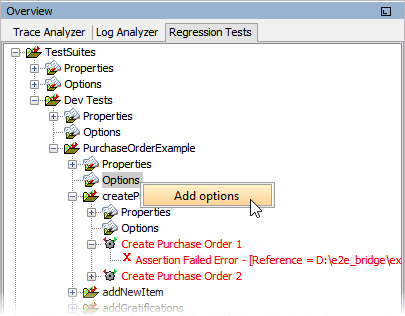
When there are several test cases that should ignore the same differences, it would be be annoying to add the same ignored differences to all test cases. For that reason, the Regression Test Tool gives you the possibility to add options to a test suite. One of these can be an option concerning compare the result of a Bridge request.
| On the Options node in the PurchaseOrderExample test suite, select Add options from the context menu. |
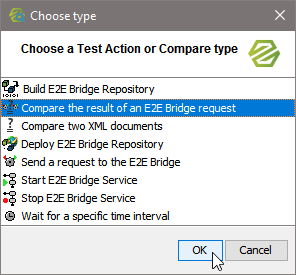 | Select Compare the result of a Bridge request to add compare options and click OK. |
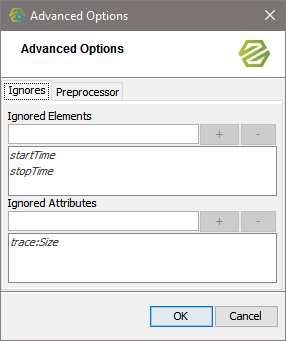
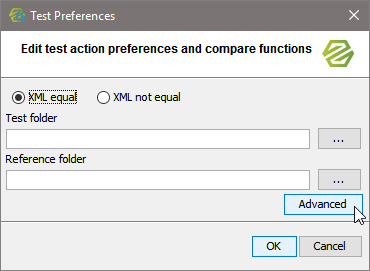 | In the Advanced options you can define ignored differences. |
| Add the same ignored differences you defined before. |
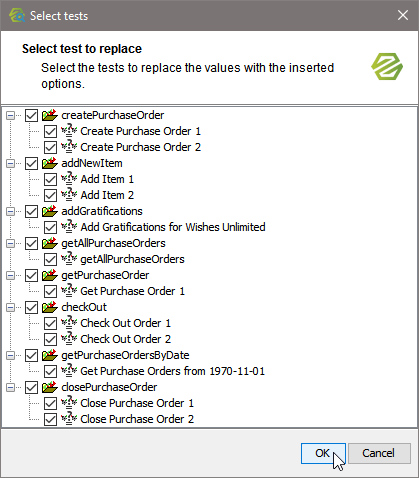
| There may be tests having the same ignored differences as defined via the options (in our case this is Create Purchase Order 1). Deselect all tests where the test specific definitions should not be removed. In our case you may just leave all tests checked. The previously defined differences to ignore you defined on Create Purchase Order 1 will get removed and substituted by the values from the options. |
 | The differences to ignore on test case Create Purchase Order 1 have been removed and substituted by the ones coming from the test suite. This is indicated by the italic font. Options coming from a superior definition are marked with italic font. |

On this Page:
Overview
Content Tools