All errors can be added to one or more error groups for centralized downtime administration.
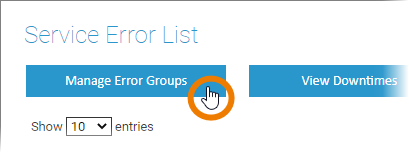
| Click button Manage Error Groups on the main screen to manage the error groups. |
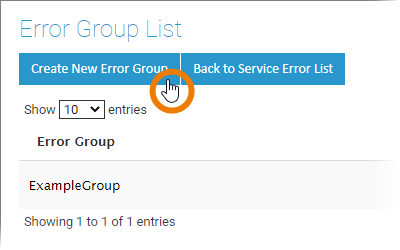
| Click the Create New Error Group button to create a new error group. |
| In the pop-up window, enter a name for your new error group and click Create. |
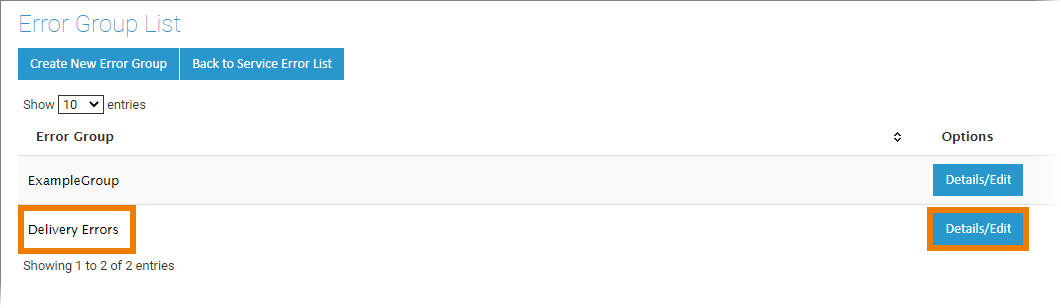
| The group is added to the error group list. For each group you can find the Details/Edit button. |
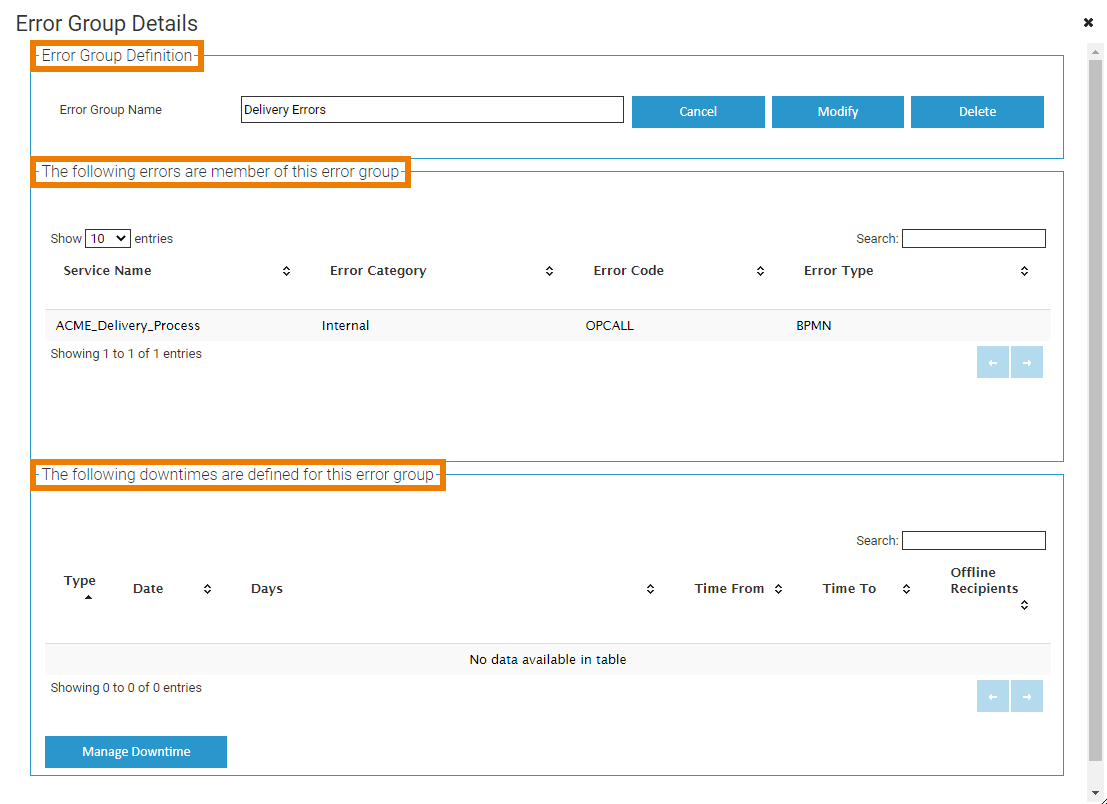
| Click button Details/Edit to inspect the details of an error group, like
|
| If you make changes in the Error Group Details:
|


Error Group Downtimes
The downtime defines the service downtime during which occurring errors should not be notified. If you add a downtime to an error group, it is applied to all errors assigned to that group.
How to Set a Downtime
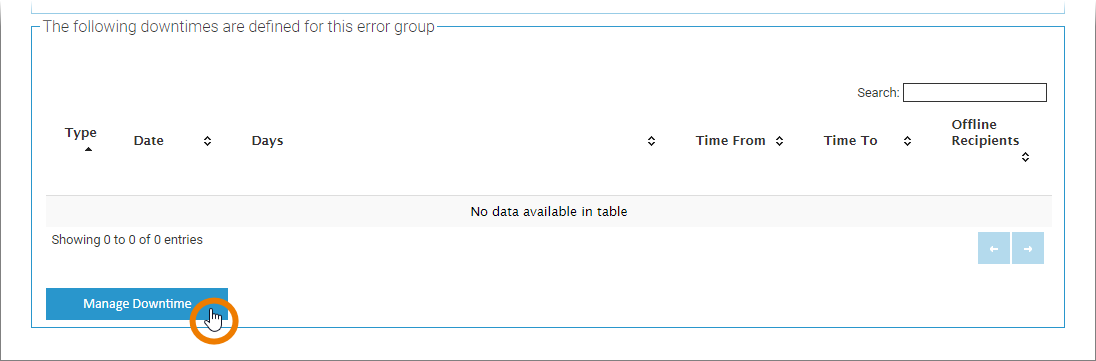
| Use the Manage Downtime button to change the downtimes for that error group. Go to page Downtimes and Change Log for further details. |
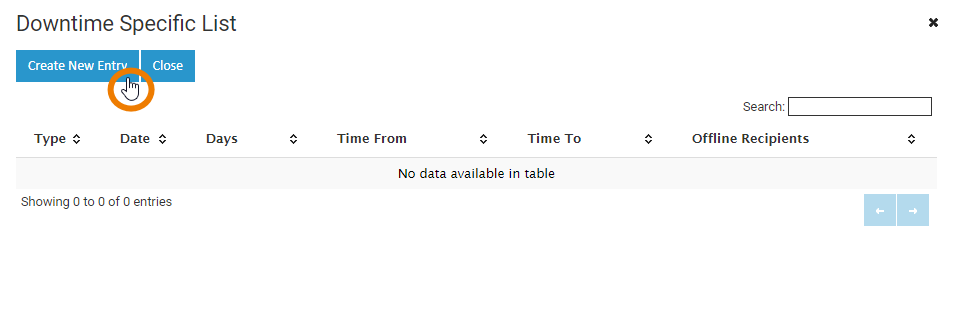
| The downtime specifics will open in a pop-up window. Click Create New Entry to enter a new downtime. |
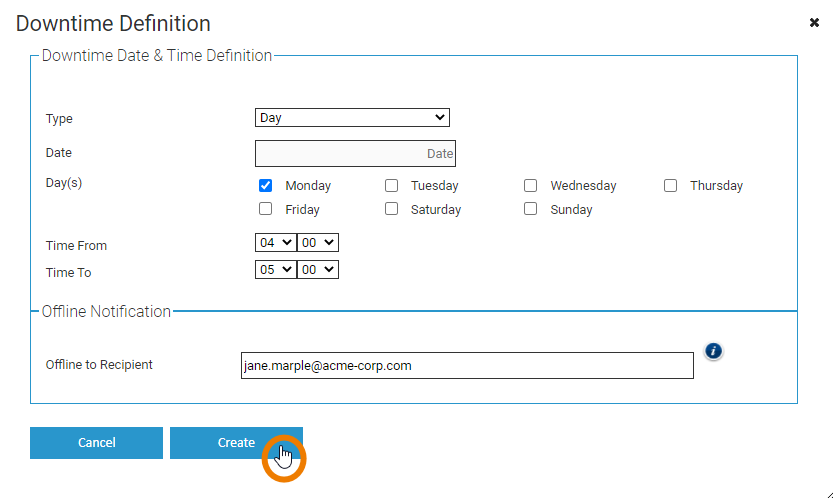
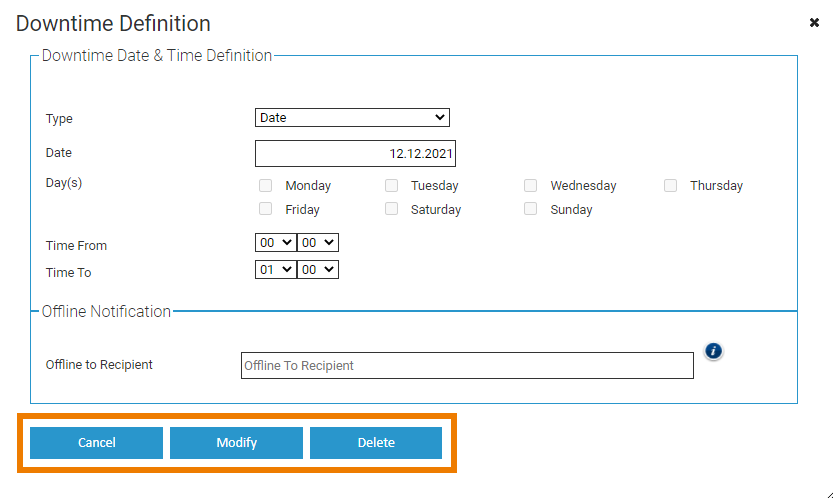
| Set the new downtime in the Dowtime Definition pop-up. Downtimes can either be created for a certain date, or on a day pattern. |
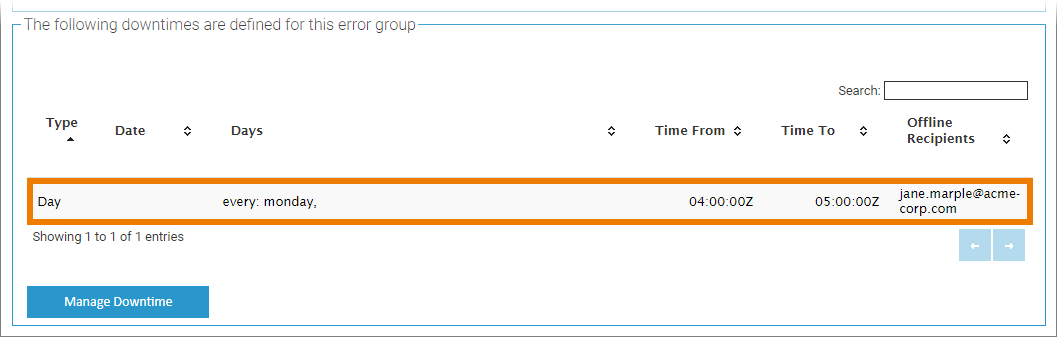
| The downtime is added to the error group details. |
How to Change or Delete a Downtime
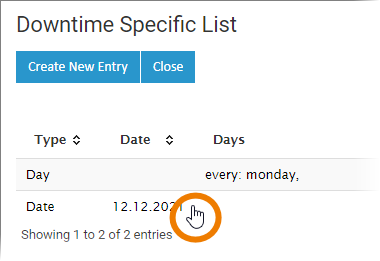
| Click Manage Downtime to open the downtime specifics. |
| Double-click the downtime entry you want to change or delete. |
| The dowtime definition of this entry will open.
|

On this Page:
Overview
Content Tools