Cron Job Data Sheet
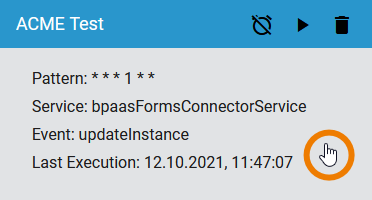
| Click on a cron job to open the data sheet. |
| The data sheet of a cron job consists of different areas:
|
How to Edit a Cron Job
Options
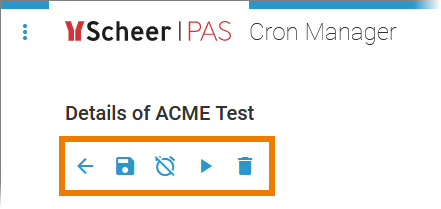
| In the navigation bar of the job data sheet you find different options:
|


Editable Settings
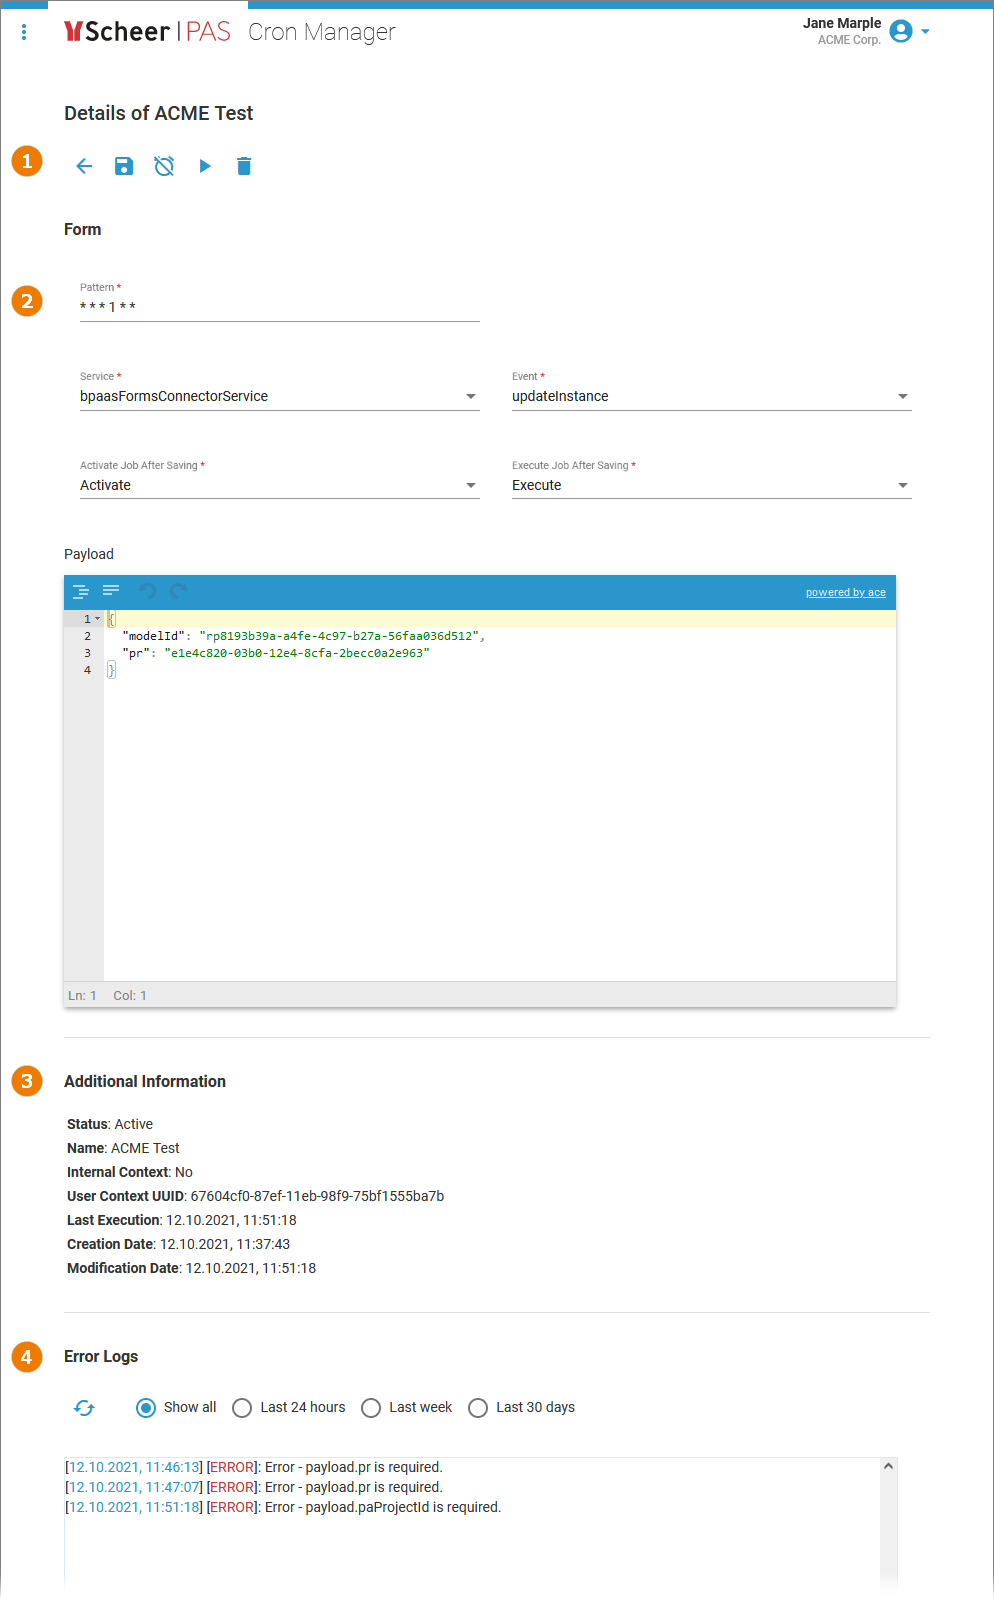
The following cron job settings can be edited after the cron job is created:
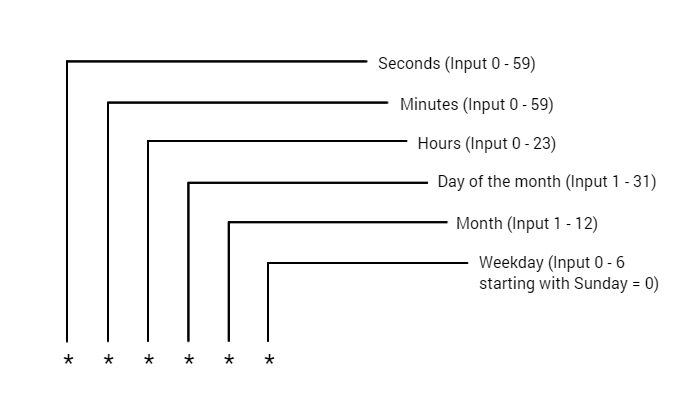
| Pattern You can enter a six-digit pattern. If you use only five digits, the seconds are omitted. The pattern defines the schedule of the job. Using the correct pattern, you can determine whether the job should be executed at fixed times, dates, or intervals. Formatting of the Pattern: Frequently Used Patterns | ||||||||||
| Service Open the drop-down list to select the appropriate service. Scheer PAS Cron Manager can address platform services only. Customer-specific services are currently not supported. | ||||||||||
| Event Open the drop-down list to select the appropriate event. The list shows all events that are available in the selected service. | ||||||||||
| Activate Job After Saving The field allows you to activate the job directly:
| ||||||||||
| Execute Job After Saving The field allows you to initiate the first execution of the job regardless of the pattern:
| ||||||||||
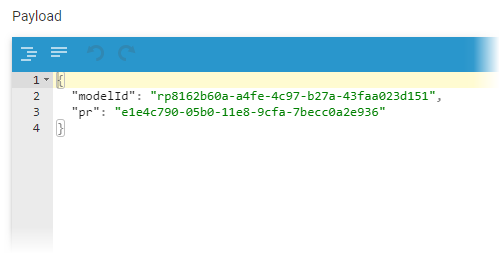
| Payload Enter your service request in the editor. The payload must contain a valid JSON. The editor supports you to insert valid JSON:
|


Don't forget to save  your changes before you leave the data sheet.
Additional Information and Logs
The cron job data sheet also contains further details of the job in read-only mode.
| Additional Information | |
|---|---|
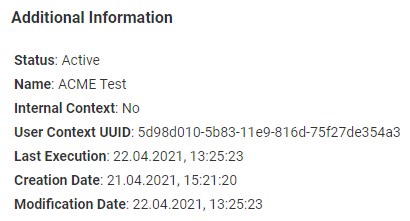
| Section Additional Information contains the meta information about the job such as:
|
Error Logs | |
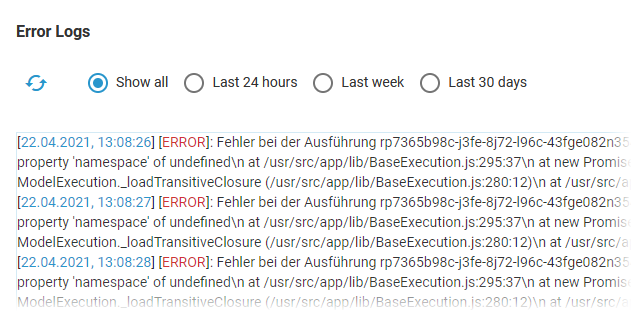
| Section Error Logs allows the user to search the logs of the cron job. See page Reading the Logs of a Cron Job for further details. The maximum size of the error log for each cron job is per default 100. You can adjust the value in the service-specific configuration file, refer to Adapting Integration Service Configuration for further information. In the configuration file, adjust the property errorLogMaxSize and restart the cron-service. Please note that old logs will be deleted if you decrease the value (sorted by their creation date). Changing the value affects all cron jobs. |
On this Page:
Related Pages:
Overview
Content Tools