Step 1: A customer is requesting to use an API
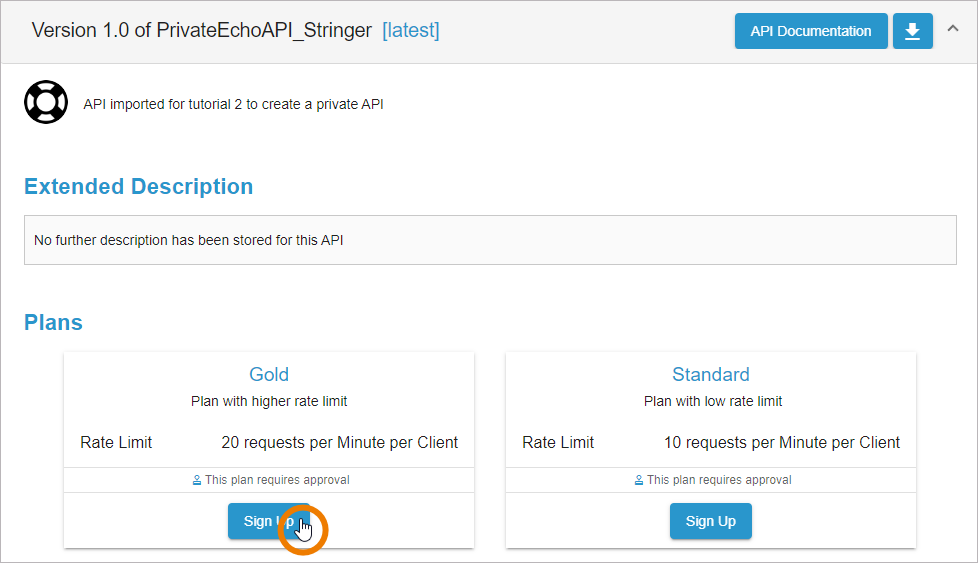
| John Snow detected, that there are two plans for the PrivateEchoAPI_Stringer. He wants to sign up for the Gold plan now. John clicks the Sign Up button for plan Gold. |
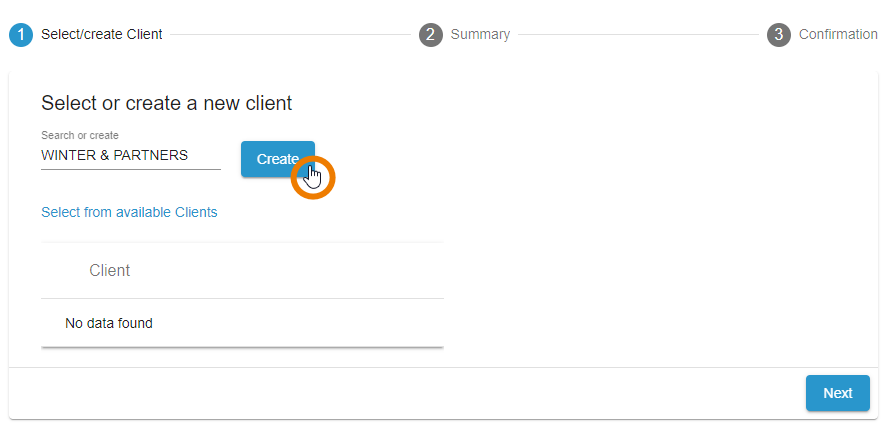
| John does not have any client yet, he needs to create one. He enter the name for his new client, WINTER & PARTNERS, and clicks Create. |
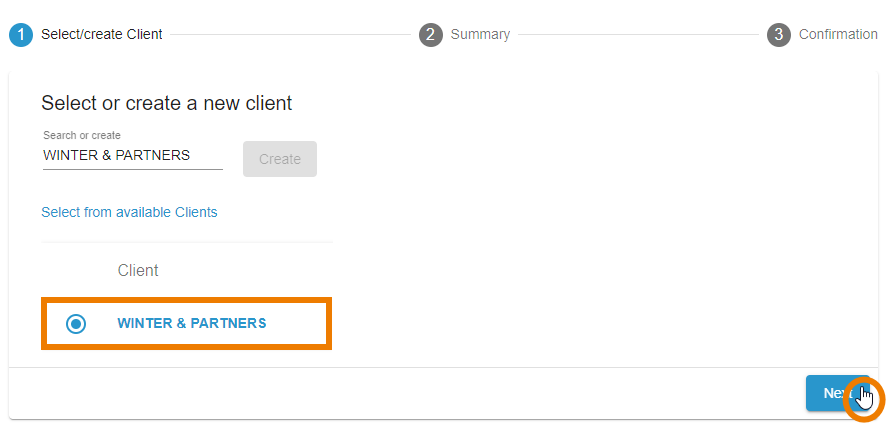
| The new client is created and selected. John continues to the next step. |
| |
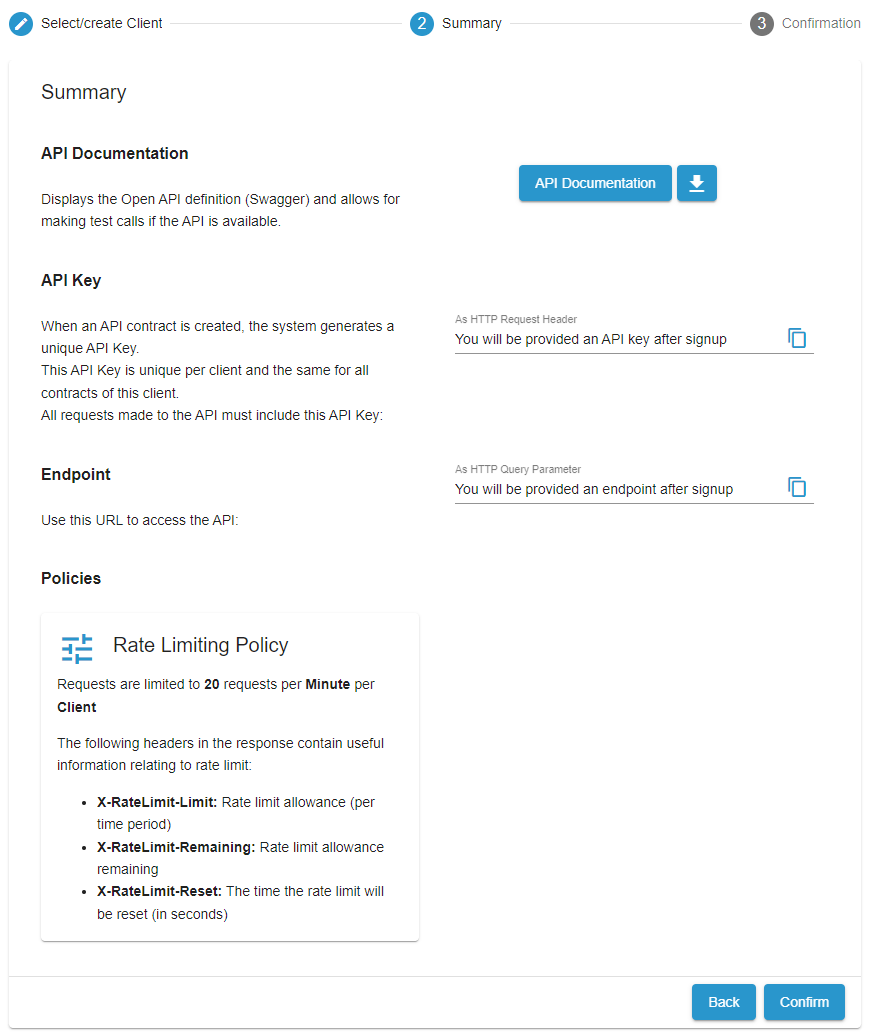
| In step 3 of the wizard, John confirms the summary that is showing all details of the API he wants to assign to. API Key and API Endpoint will be provided later on the client's detail page. |
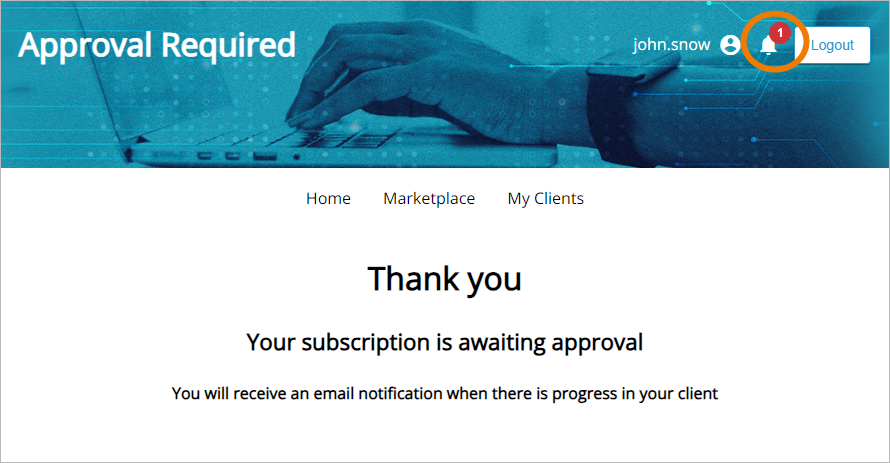
| John is now told, that his request has been submitted and is waiting to be approved. He also got a notification about that. If the email notification feature is enabled on your system, the requester and the approver will also receive emails for each step of the approval process. |
Step 2: Responding to the approval request
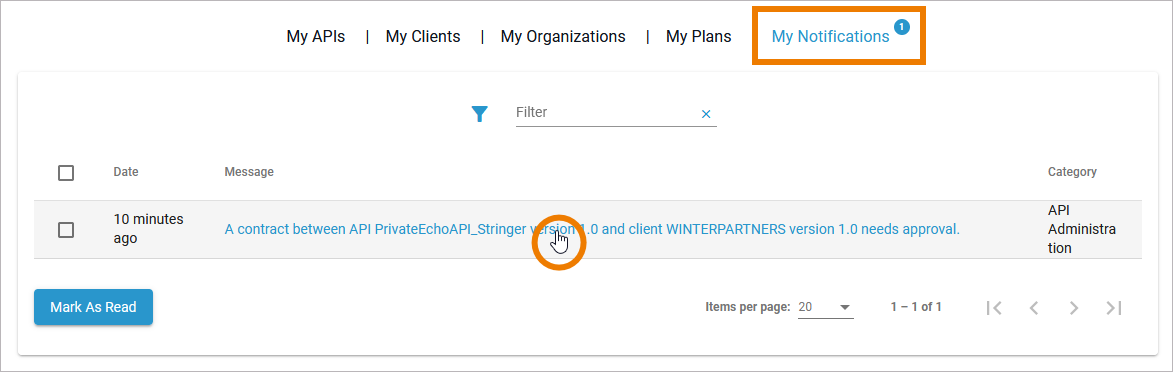
In API Management, David Stringer, who created the PrivateEchoAPI_Stringer, receives a notification that user john.snow wants to subscribe to his API. He clicks on the notification:
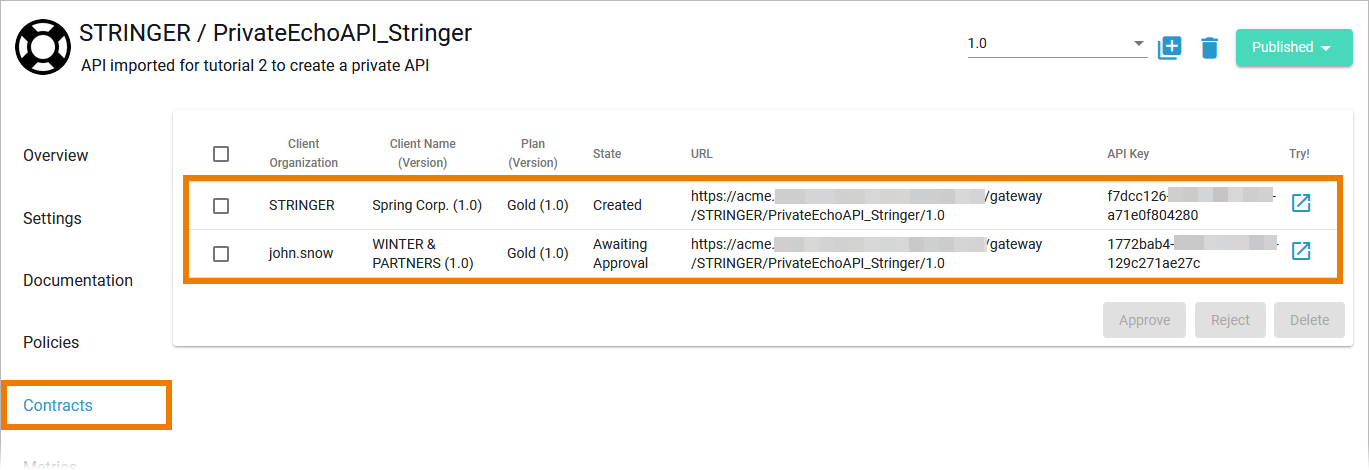
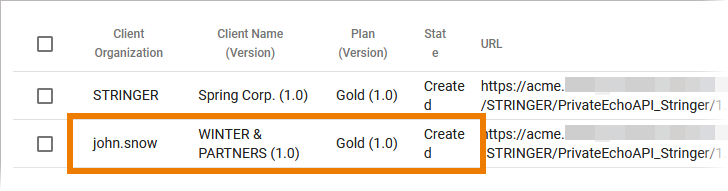
David is redirected to tab Contracts of his API where all contracts and approval requests are displayed:
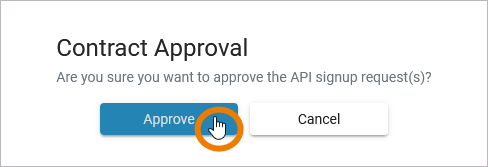
David decides to approve Johns request. He selects the contract to enable the approval options and clicks Approve:
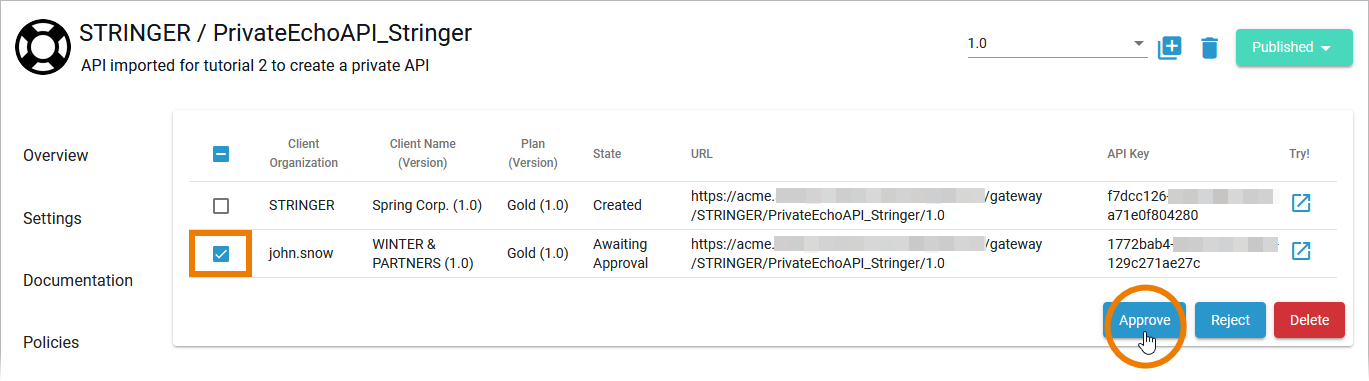
| To avoid erroneous approvals, David has to confirm his choice. |
| A contract is created for Johns request. The contract State is now displayed as Created . |
Step 3: The customer consumes the API
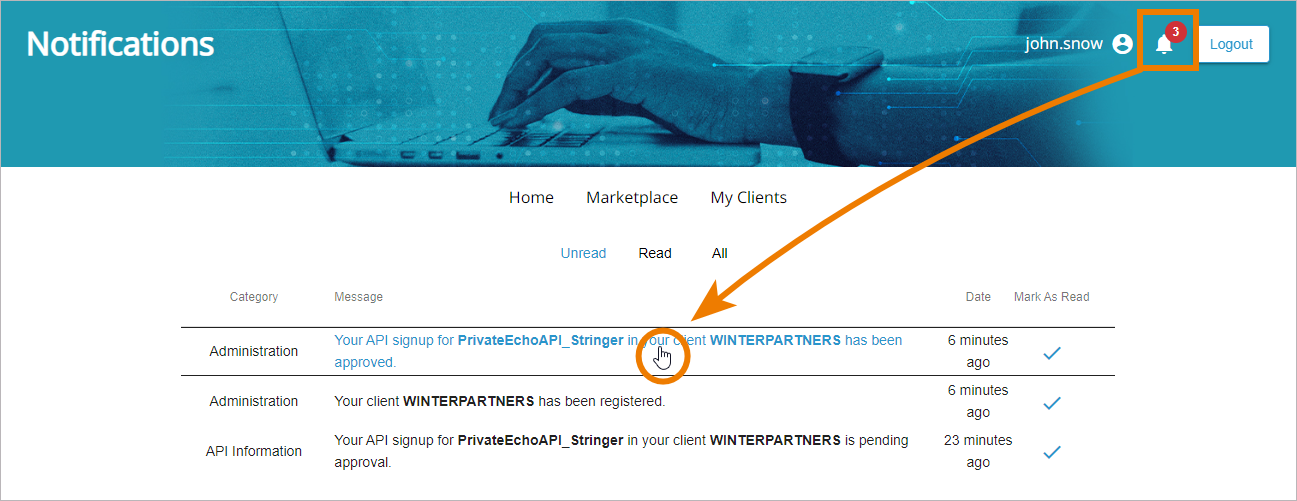
John Snow receives a notification, that he is now allowed to use the API. He clicks on the notification to access the corresponding client:
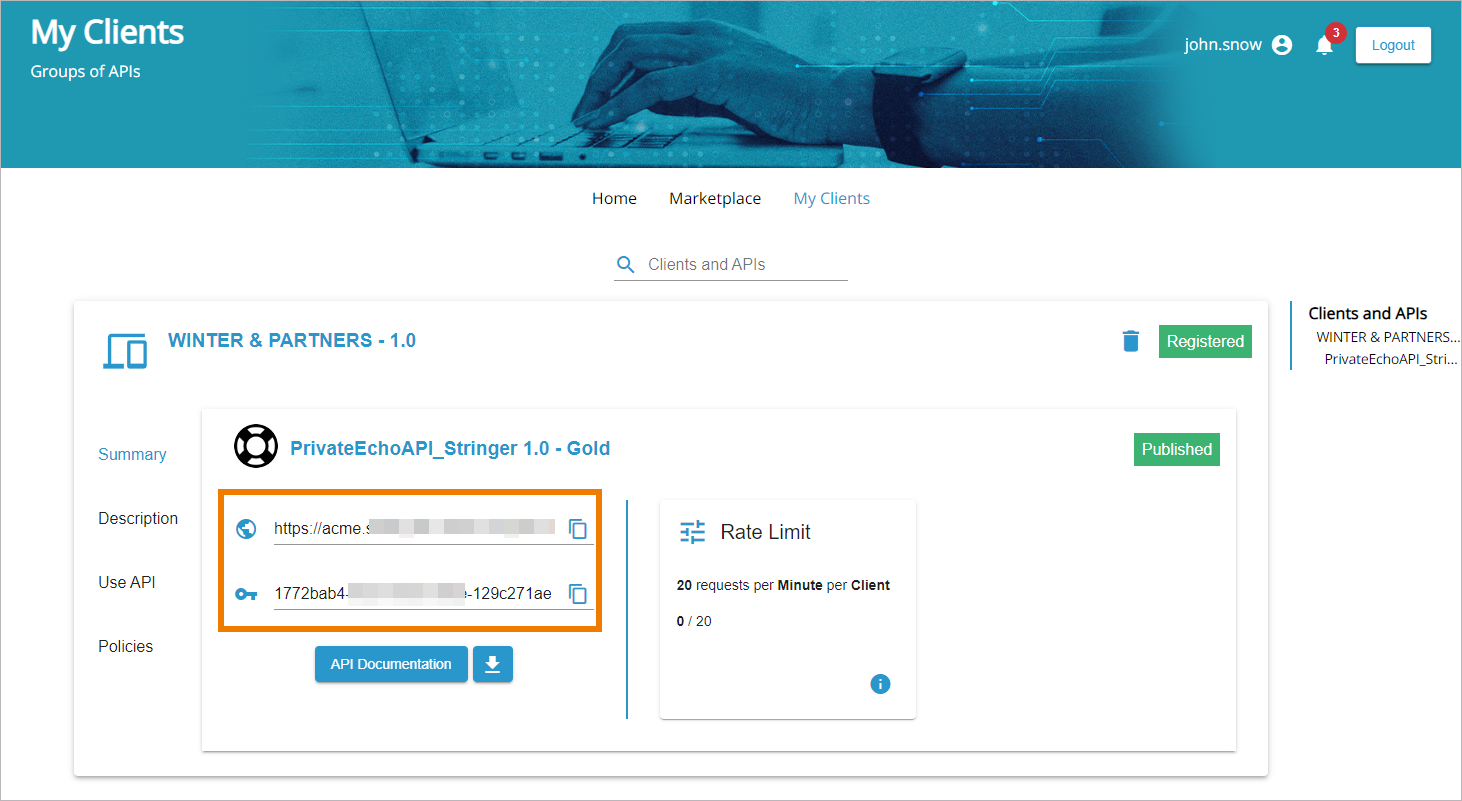
In tab My Clients the newly registered client is displayed and gives John all the information he needs to consume the API. API Key and API Endpoint are displayed and John can Copy  them for direct usage:
| Congratulations - you have done it: You have gone through the approval process! |

On this Page:
Related Pages:
Related Documentation:
Overview
Content Tools