When you open a model from the explorer tree, a second tab will open, displaying the model on the diagram pane. This is where you design your BPMN model.
| The diagram pane consists of different areas: |

Customizing the Diagram Pane
| You have several options to adjust the diagram pane. When you open the pane for the first time, the default view is displayed:
|

Managing the Diagram Pane
MultiExcerpt named state_of_pane was not found -- Please check the page name and MultiExcerpt name used in the MultiExcerpt-Include macro
MultiExcerpt named second_sidebar was not found -- Please check the page name and MultiExcerpt name used in the MultiExcerpt-Include macro | |
MultiExcerpt named enlarge_pane was not found -- Please check the page name and MultiExcerpt name used in the MultiExcerpt-Include macro | |
MultiExcerpt named hide_sidebar was not found -- Please check the page name and MultiExcerpt name used in the MultiExcerpt-Include macro | |
To gain more space for modeling, you can hide the whole execution pane by clicking the icon |
MultiExcerpt named panel_management was not found -- Please check the page name and MultiExcerpt name used in the MultiExcerpt-Include macro
Modeling on the Diagram Pane
| Action | Example | Description |
|---|---|---|
Navigation | You can use the Overview Panel to navigate in your BPMN model. The panel displays your model and a blue frame, representing the content shown on the diagram pane. If you want to work on another part of the model, you can use the frame to quickly change the display. | |
| Zoom | When modeling, you have several options to apply the zoom on the diagram pane.
| |
You can also use the Overview Panel to zoom in or out the model: Hover over the right bottom corner of the blue frame. The cursor changes and you can resize the frame. | ||
| Shifting Content | You have also several options to shift the content on the pane:
| |
| Scaling | MultiExcerpt named fit_model_to_pane was not found -- Please check the page name and MultiExcerpt name used in the MultiExcerpt-Include macro | |
MultiExcerpt named scale_model was not found -- Please check the page name and MultiExcerpt name used in the MultiExcerpt-Include macro |
The Toolbars
Two toolbars are available for work on the diagram pane:
The Model Toolbar
MultiExcerpt named model_toolbar was not found -- Please check the page name and MultiExcerpt name used in the MultiExcerpt-Include macro
The Elements Toolbar
MultiExcerpt named bpmn_elements_toolbar was not found -- Please check the page name and MultiExcerpt name used in the MultiExcerpt-Include macro
The Diagram Context Menus
Various context menus support the user during modeling on the diagram pane:
- The Elements Context Menu
- The Tools Context Menu
- The Extended Tools Context Menu
- The Relation Context Menu
- The Diagram Context Menu
Elements Context Menu | |||||||||||||||||||||||
|---|---|---|---|---|---|---|---|---|---|---|---|---|---|---|---|---|---|---|---|---|---|---|---|
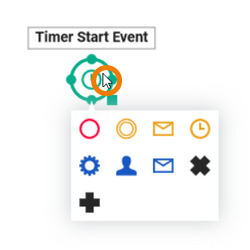
| If you click on an element, the element context menu opens. You can use it to create new elements instead of using the elements toolbar. Choose one of the icons to create the corresponding element:
If you create a new element using the context menu, the relation to the current element is drawn automatically. | ||||||||||||||||||||||
Tools Context Menu | |||||||||||||||||||||||
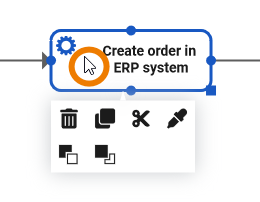
| If you right click on an element, the tools context menu opens. Use it to edit the current element. The following options are available:
| ||||||||||||||||||||||
Extended Tools Context Menu | |||||||||||||||||||||||
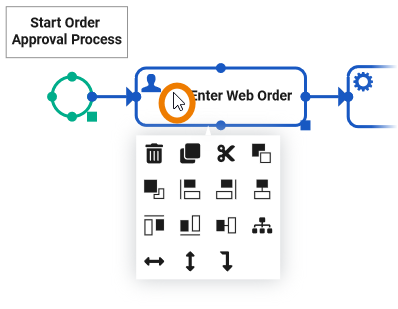
| If you have selected more than one element on the pane, the tools context menu is enhanced with additional options:
The number of displayed options depends on your selection on the diagram pane. | ||||||||||||||||||||||
Relation Context Menu | |||||||||||||||||||||||
| Right-click a relation to open the relation context menu. Only the following options are applicable to relations:
| ||||||||||||||||||||||
Diagram Context Menu | |||||||||||||||||||||||
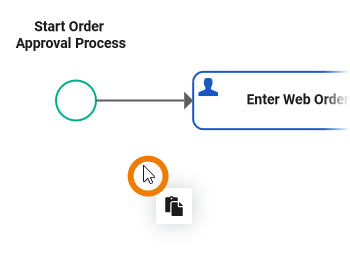
| With a right-click on the diagram pane itself, you open the diagram context menu:
| ||||||||||||||||||||||


Shortcuts
You can also use shortcuts on the diagram pane. The following list of shortcuts can be searched. Enter your search term in the Global Filter field.
On this Page:
Overview
Content Tools