To be able to view the UI with the web browser, the service as well as the UI components need to be deployed and running on the E2E Bridge. The next steps will introduce how the UI components will be added to the component diagram and how the UI can be viewed within the E2E Bridge and web browser.
Draw the component diagram by the help of the E2E Components Wizard (![]() ). For detailed help on how to use the Components Wizard refer to the Builder User's Guide.
). For detailed help on how to use the Components Wizard refer to the Builder User's Guide.
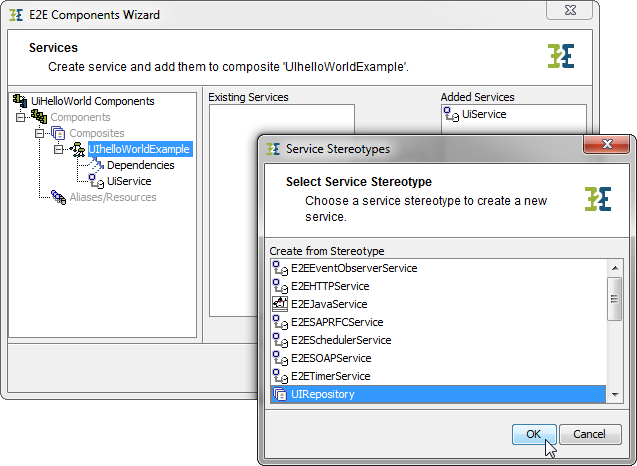 | Define a composite and, in addition to the SOAP service, add a UIRepository to it. |
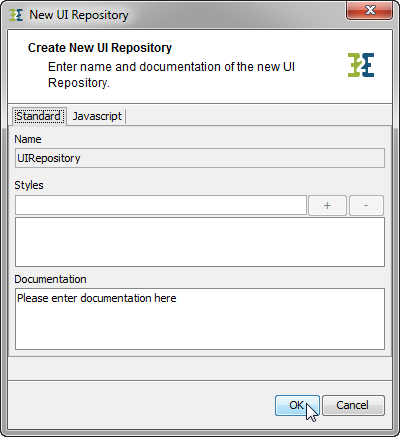 | A dialog pops up where you can adjust some settings of the UI repository. Just click OK. |
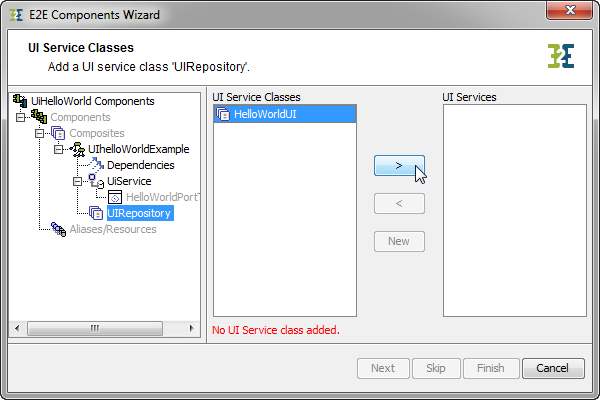 | Clicking Next several times will bring you to the point that the wizard complains about a missing UI service class. Add the UI Service class HelloWorldUI to the UI Services list by selecting it from the left classes list and clicking on > . |
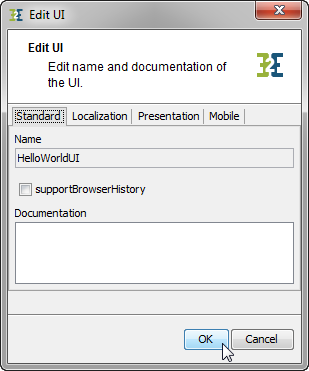 | Within this window, some tagged values can be amended which may influence the appearance of the user interface itself. See the table below for a detailed description of all tagged values.
|
| Tagged Value | Description | Allowed Values | |
|---|---|---|---|
| supportBrowserHistory | If true, each UI state is mapped to an anchor. That is, if the browser's back button is pressed, the UI goes back in time. However, if the UI is embedded in another framework (CMS, SharePoint, ...), it is recommended to set this flag to false. | true | enable browser history |
| false (default) | disable browser history | ||
| Localization | |||
| defaultTheme | Themes are sets of style sheets to define a look and feel of the Ajay application. Choose here one of the visual themes of the selection that can apply to the E2E UI. Details about the theming concept can be found at http://jqueryui.com/themeroller. | None | no theme applied |
| a value from the list of themes | |||
| defaultLanguage | The language used in the UI templates should be the same as used to configure the UI widgets (tables, calendars, ...) By default, the Bridge takes the operation system language as UI language. However, this default language can be overridden using this tagged value. | None | use system language |
| a language of the list of languages | |||
| defaultRegion | The region is used in the UI to format numbers and dates. By default, the Bridge takes the operation system region as UI region. However, this default region can be overridden using this tagged value. | None | use system region |
| a region of the list of regions | |||
| Mobile | |||
| platform | None | ||
| default | |||
| mobile | |||
| Presentation | |||
| title | Specify here the title of the UI, e.g. HTML page title | ||
| defaultLayout | Specify here in which way the template elements should be organized. | floating | all template elements are floating |
| grid | all template elements get a tabled grid layout | ||
| isConsoleUI | A UI application can be used within the Bridge as an application to e.g. configure a service. If this flag is set, the E2E Bridge will embed this user interface. | true | embed this UI in the E2E Bridge |
false (default)
| do not embed this UI | ||
| consoleUIName | If isConsoleUI is set to true, this name is taken as tab name of the Bridge tab the UI is embedded to. | ||
| errorPlacement | If referring to a JavaScript operation, errorPlacement overrides the default error placement when validating forms. The operation has to parameters:
The default operation looks like: var left = element.position().left;
var top = element.position().top + element.height() + 5;
error.css( {
"position": "absolute",
"left": left + "px",
"top": top + "px"});
error.insertAfter(element);
| ||
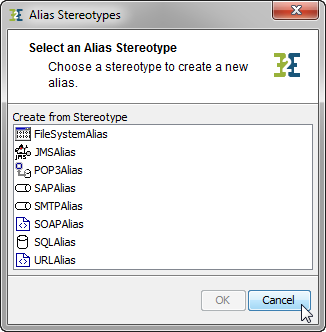 | You don't need any aliases for this tutorial service. Click Cancel and then Next. |
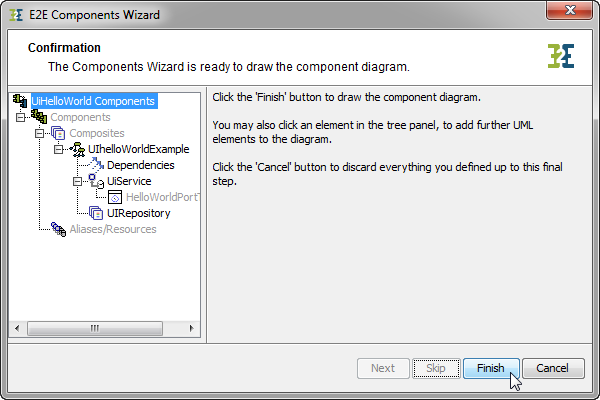 | Click Finish to finish the setup of the Component Diagram and let the component diagram be drawn. |
Deploying the UI using E2E Builder Version 5.1
- Deprecated since Builder 6.0
Start the component wizard by clicking the appropriate icon within the toolbar. | |
Click Next. | |
Click New to create a new Composite Artifact. The New Composite Artifact Window will open. | |
Within the Name field the default Composite name HelloWorldUI is defined by the Wizard. It can be renamed or in this case be left as it is. | |
The HelloWorldUI Composite is now created. | |
The next step is adding the actual user interface artifact to the previously created Composite. Select the UIRepositoryArtifact from the Service/ JVM Components list and use the > button to add it to the Services. | |
Next to the UIRepository, the actual Service that was created before needs to be added to the Service Components. | |
Select the <<E2ESOAPService>> stereotype from the list within the Service Stereotypes window and click OK. | |
If needed, amend any of the parameters (Name, Port, Authentication Method, etc.) within the New SOAP Service Artifact window and click OK to close the window. | |
The basic SOAP Service is now added to the services components. | |
Add the UI Service class HelloWorldUI to the UI Service Artifacts list by selecting it from the left classes list and clicking on > . | |
Within this window, the following can be amended which may influence the appearance of the user interface itself. Default Theme: This is a selection of visual themes that can apply to the E2E UI. For an overview of all supported themes refer to http://jqueryui.com/themeroller. | |
The basic setup for the xUML service to run including the user interface is done now. | |
Select the option Finish and click the OK button to finish the setup of the Component Diagram. |
The resulting Component Diagram shows how the <<UIRepository>> with its settings is embedded.
Figure: E2E UI Component Diagram
To finalize this cycle, create a deployment diagram.
Figure: E2E UI Deployment Diagram

Overview
Content Tools