Page History
Creating a Role-based App in three Steps
You can create a role-based app in three steps:
- Modeling the Process and Defining Roles
- Assigning Users to Roles
- Creating Process Apps and Activating the Role Check
The example of ACME's Procurement Process shows what a roll-based app can look like.
| Multiexcerpt include | ||||||||
|---|---|---|---|---|---|---|---|---|
|
| Anchor | ||||
|---|---|---|---|---|
|
Step 1: Modeling the Process and Defining Roles
| Irene Adler creates the app project Procurement within the project ACME Procurement Process. |
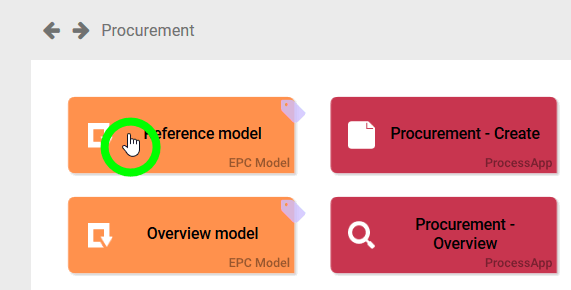
| In the app project, she opens the Reference model. |
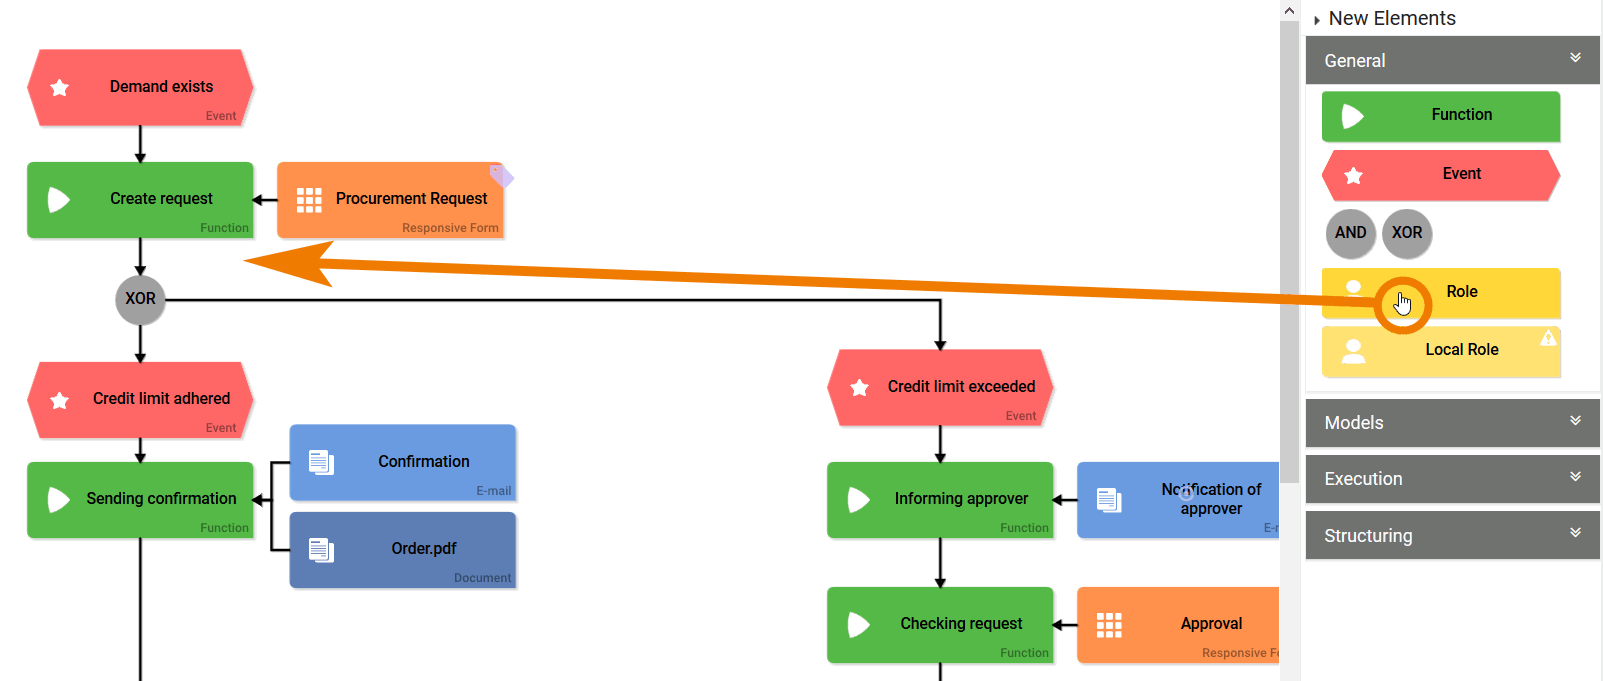
| Irene starts to model the procurement process. Since this is an approval process, she must define various roles. Every employee should be able to execute the process step Create request, while process step Checking request should be executed exclusively by the accounting department. In the Sidebar New Elements, Irene chooses the element Role from the category General and drags it to the workspace. |
| The role wizard opens showing two options:
Since the procurement process is the first business process Irene is modeling, she decides to create a new role. |
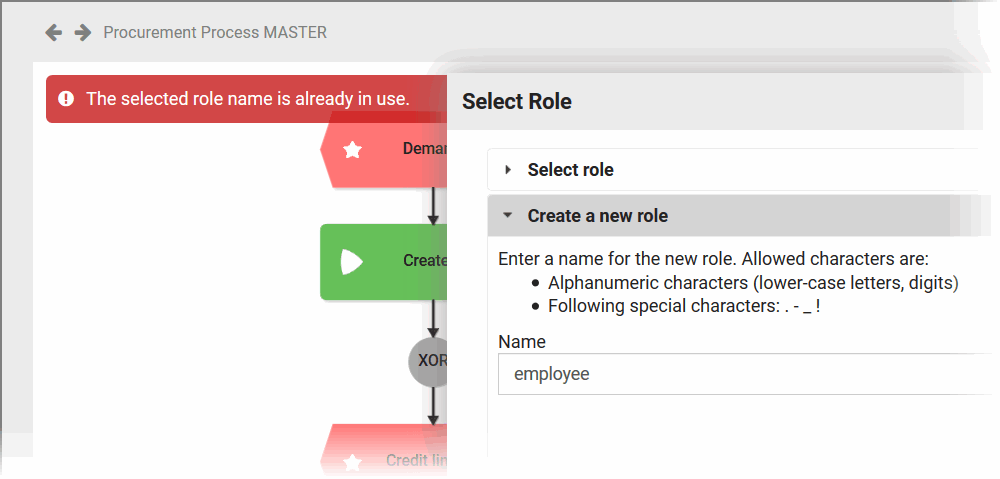
| Irene enters the role name employee and clicks the button Create A New Role. At first Irene is surprised that she gets a warning, saying that her role name is already in use. |
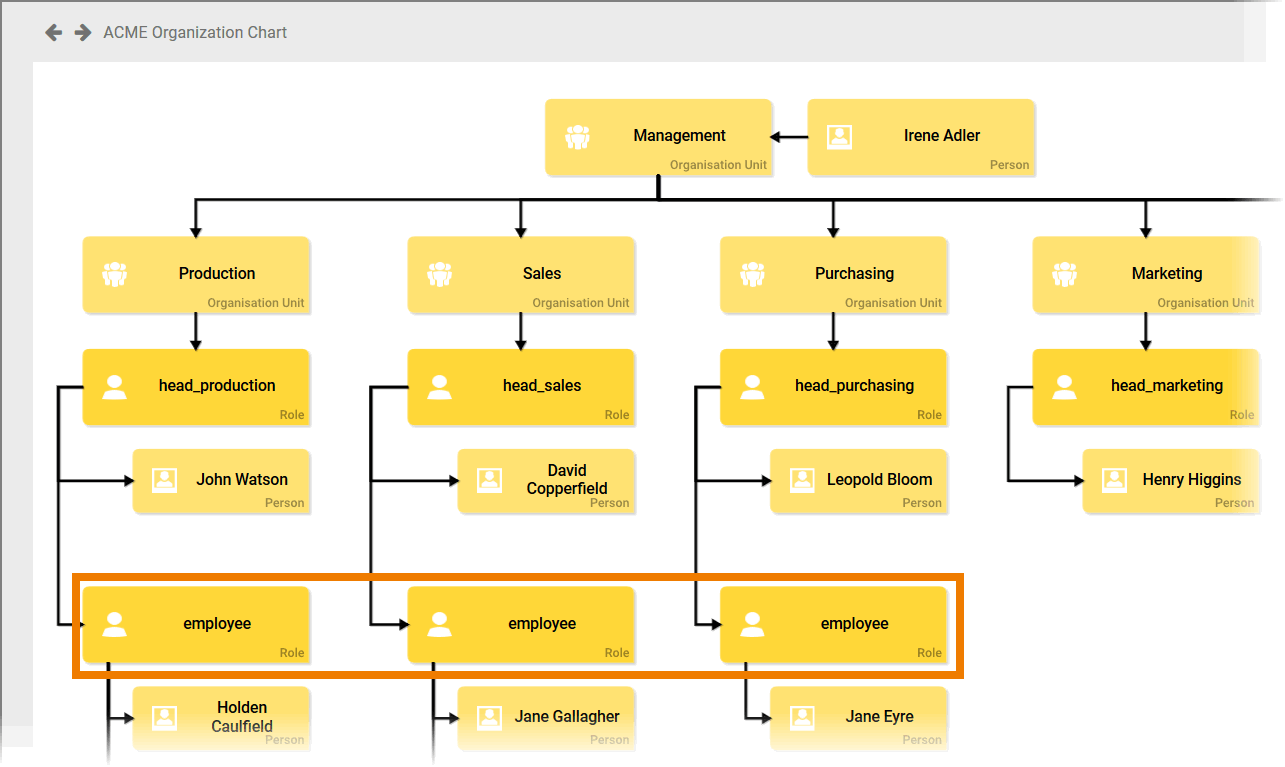
| Then Irene remembers that she has already created an employee role when she modelled the company's organizational chart. |
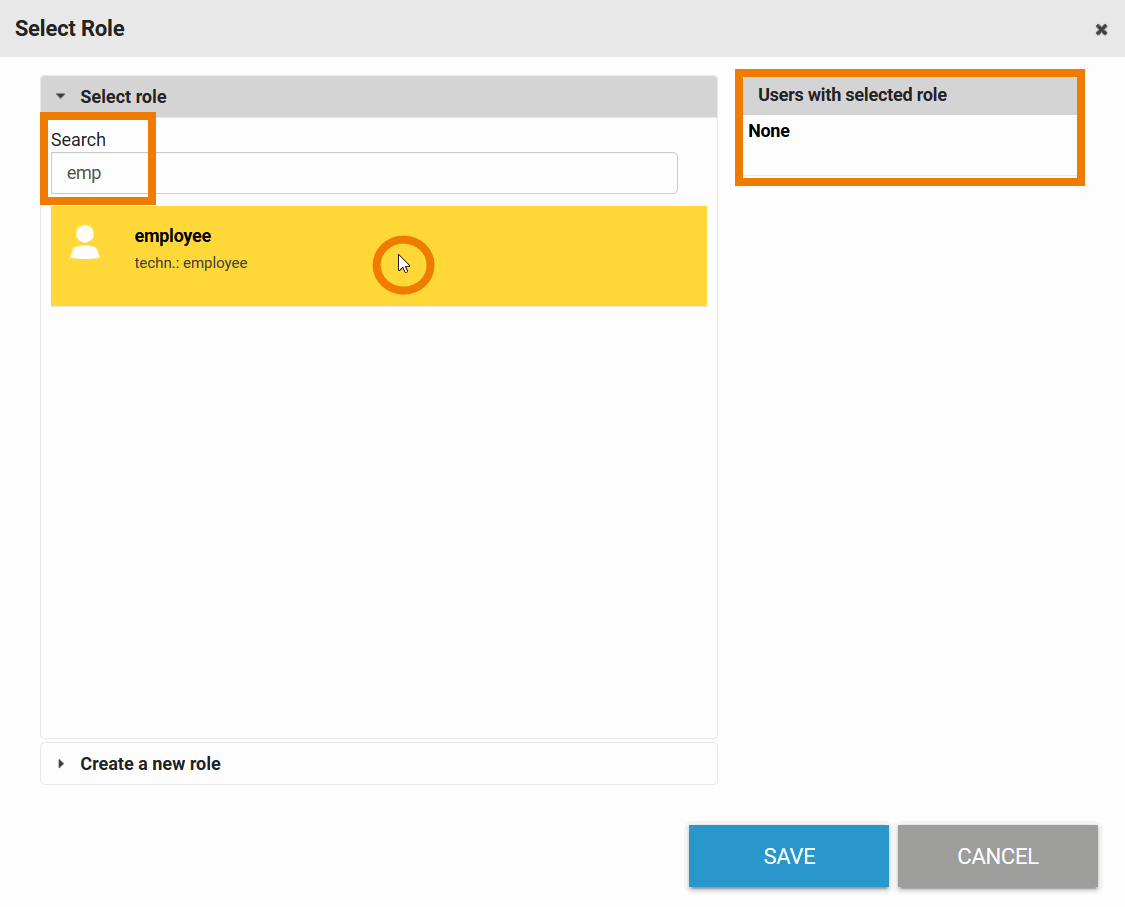
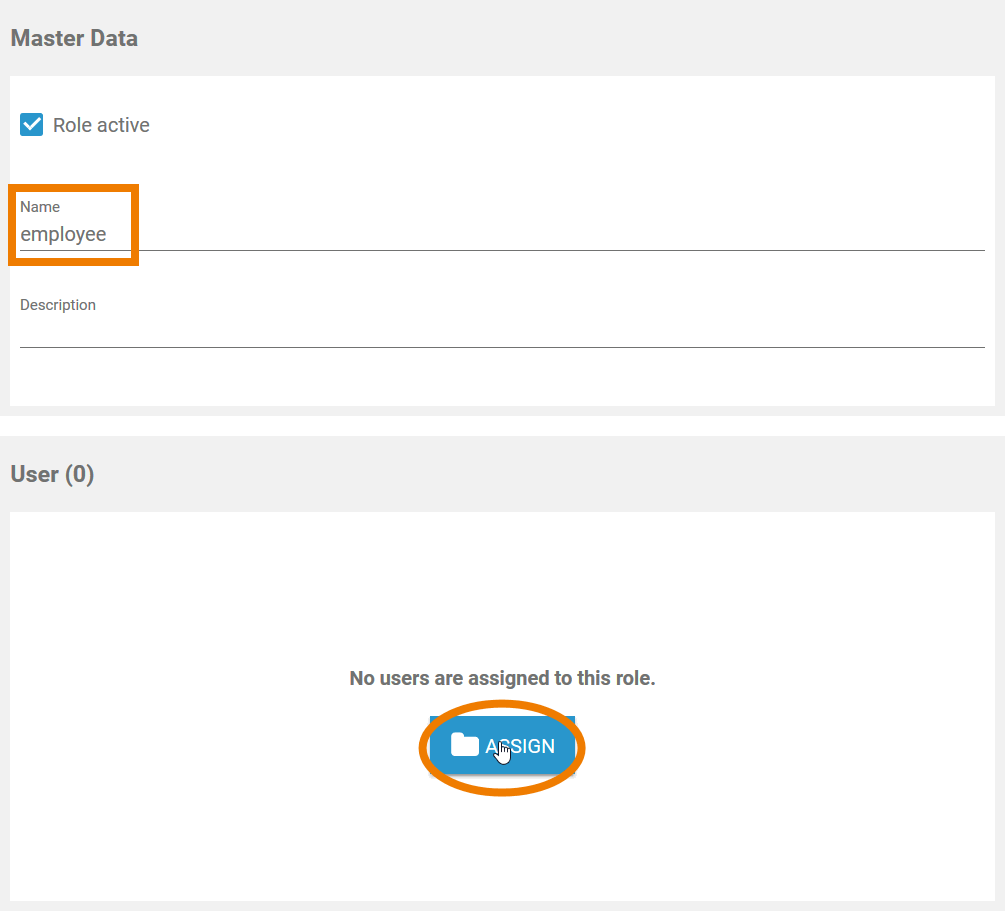
| Irene switches to the Select role tab in the role wizard where she finds the already existing employee role. She clicks on the role to select it. Since Irene has only created the roles in BPaaS so far, no users have yet been assigned to the role. |
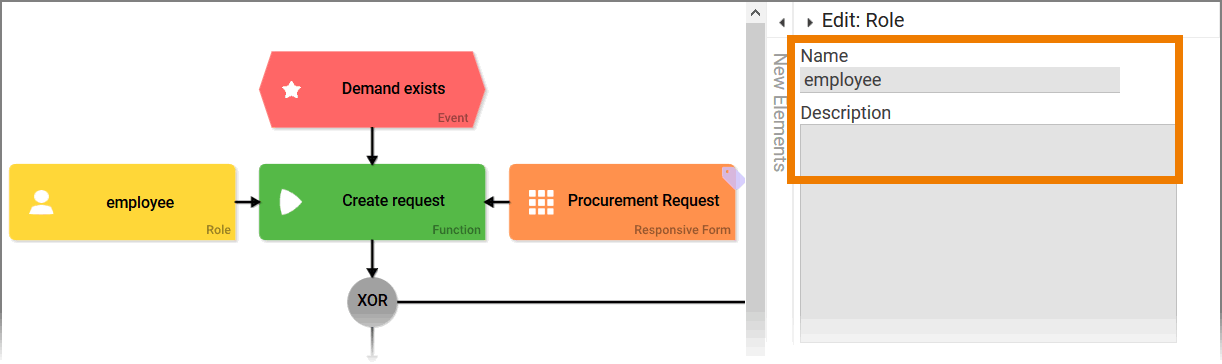
| The role is created as an EPC element and can be placed in the model. The properties of the role element (Name and Description) are only displayed in the sidebar. The editing must be done in the Scheer PAS Administration. |
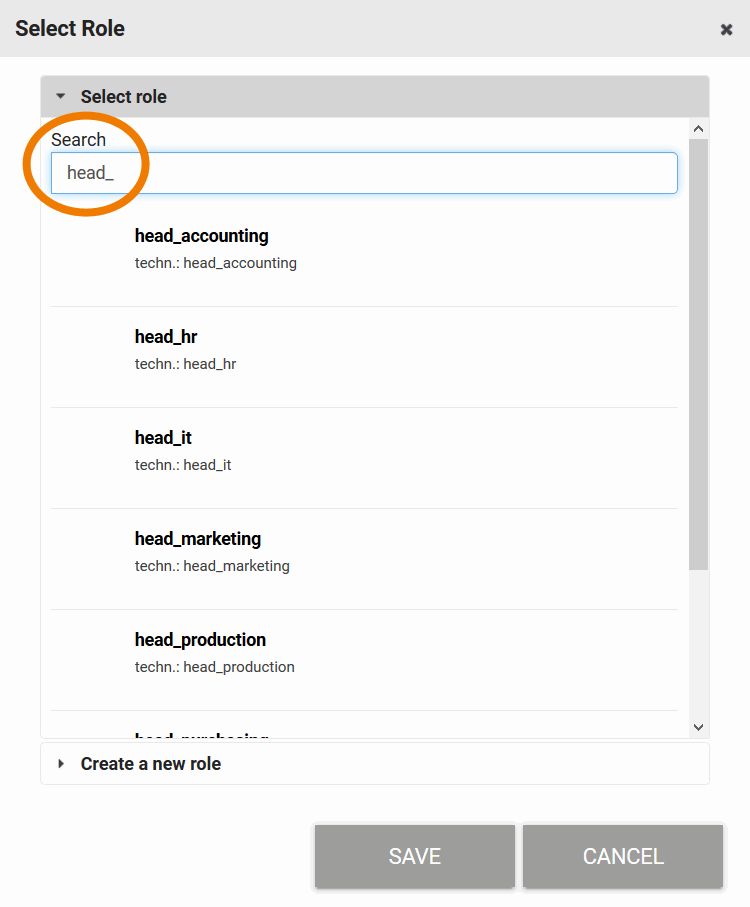
| For further modeling in the EPC, Irene now also uses the roles already created in the organization chart. |
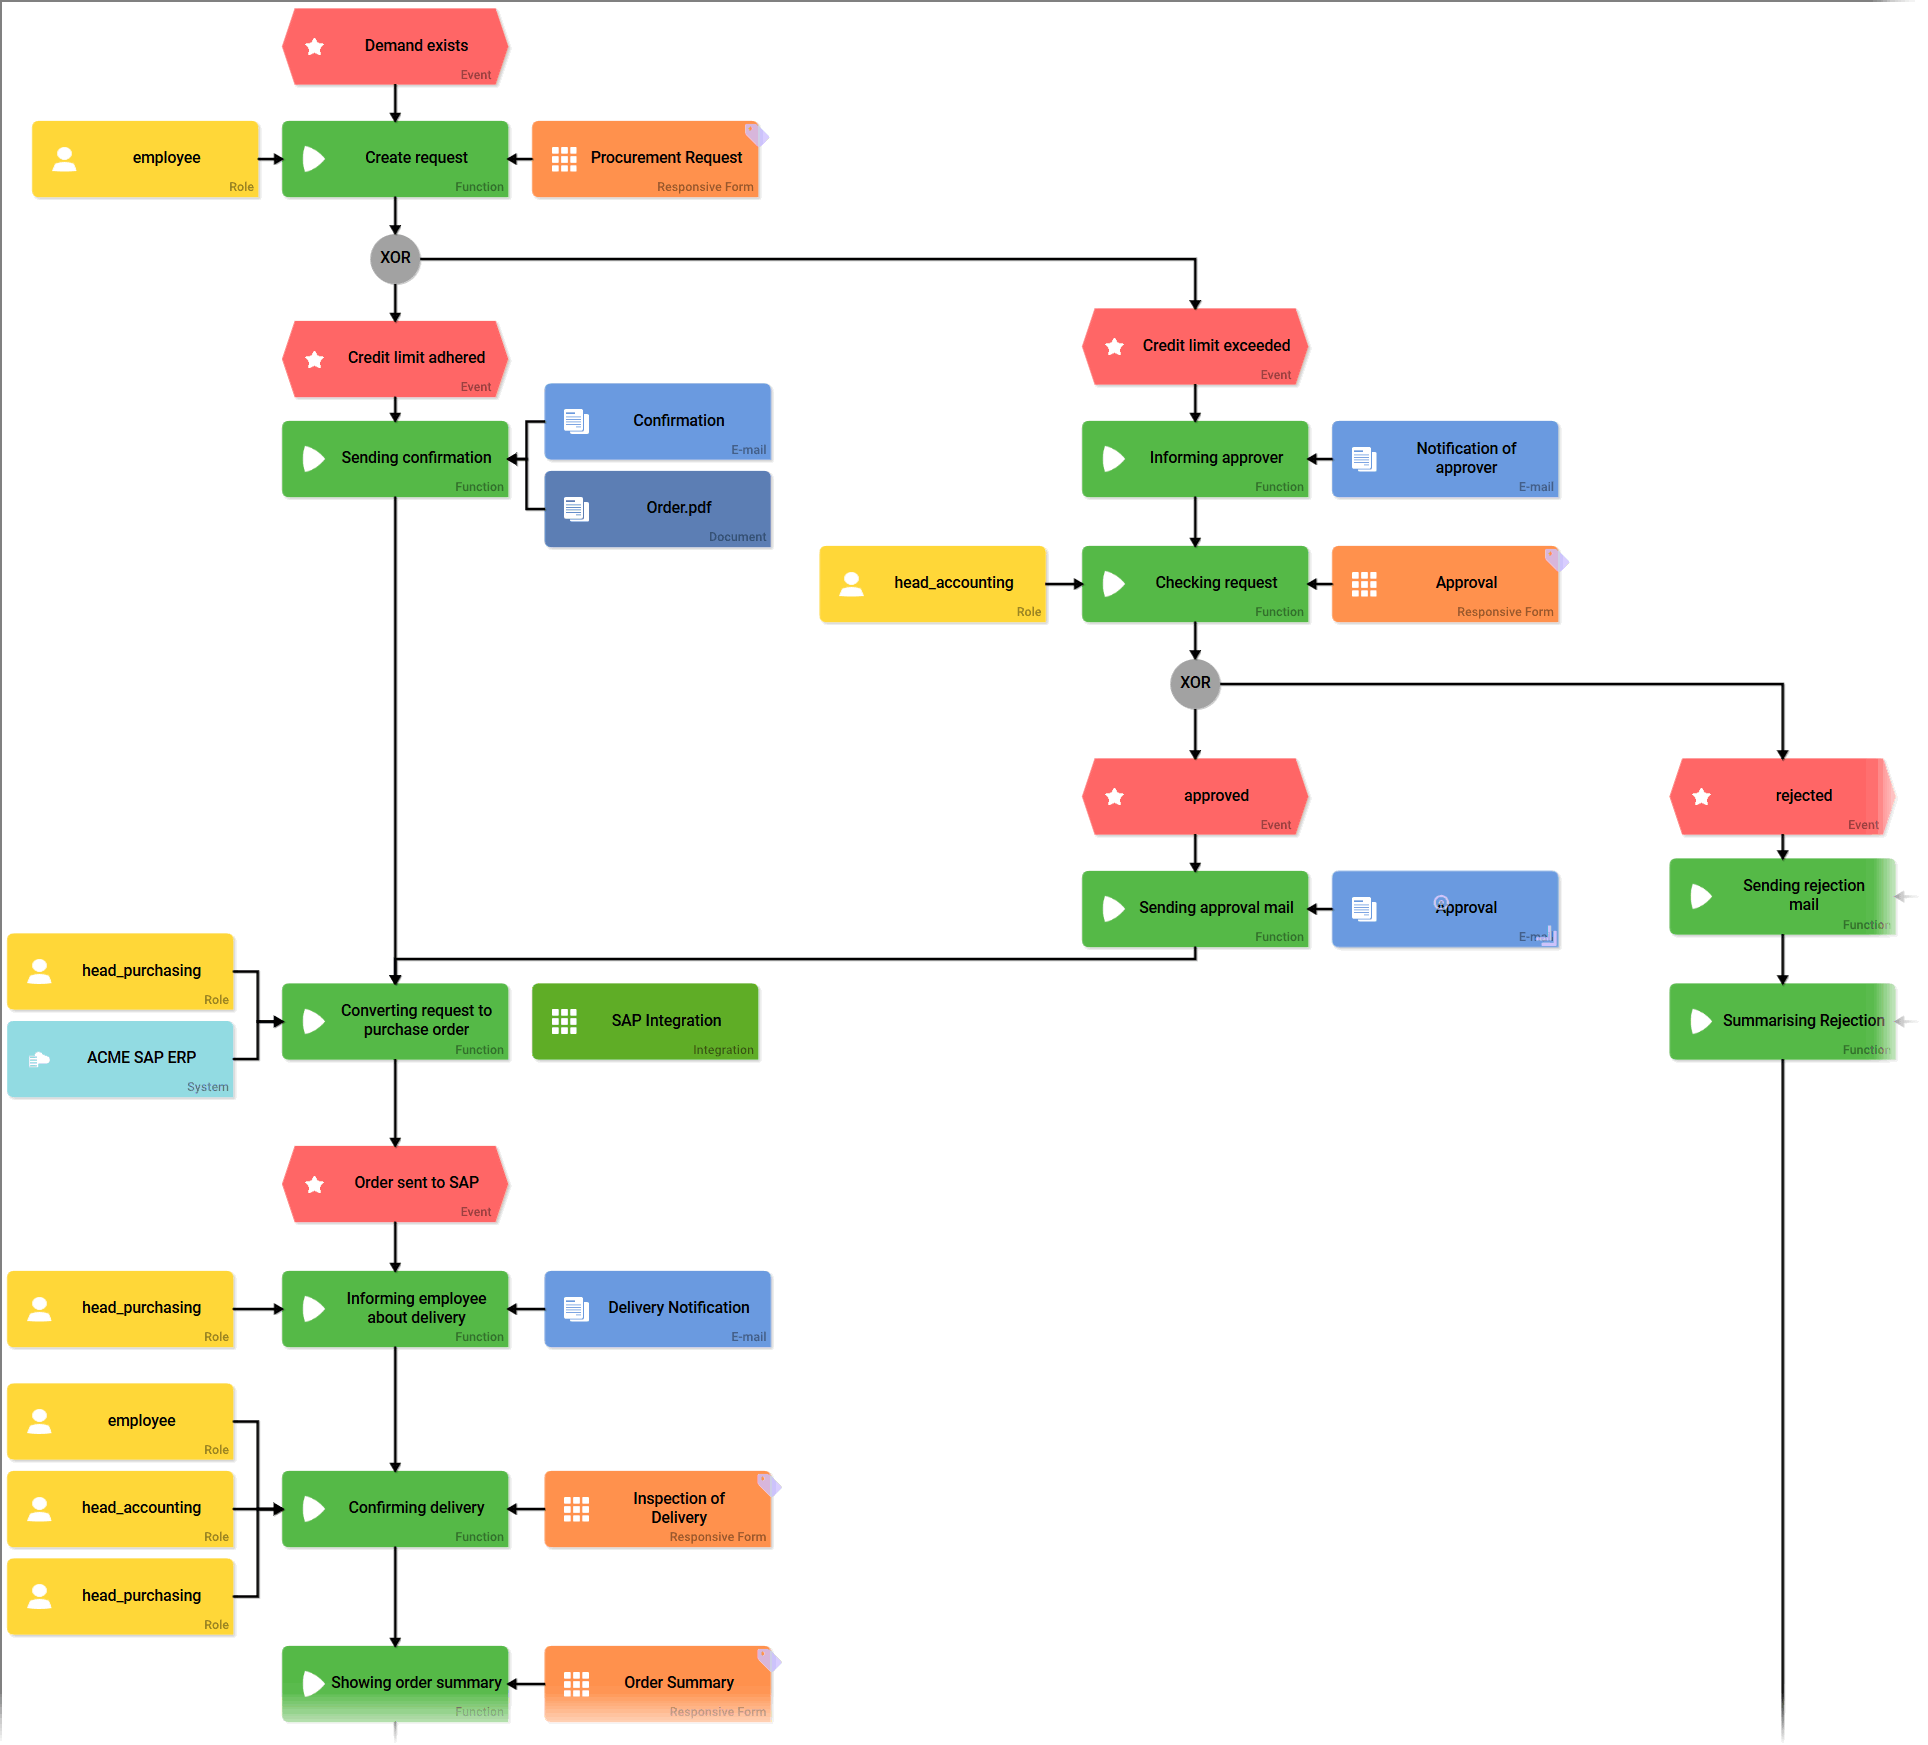
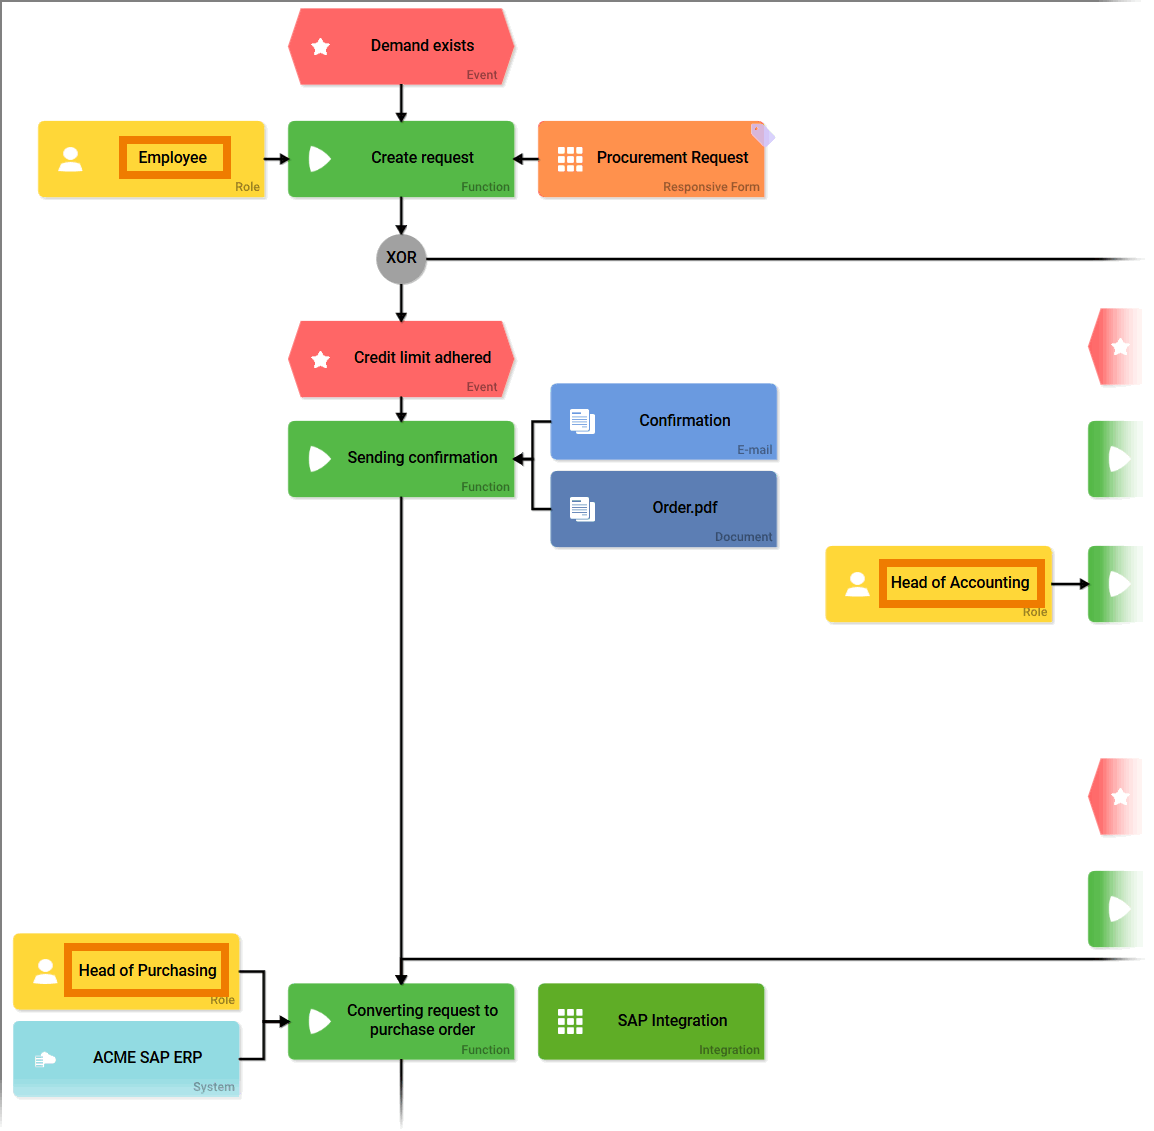
| In the completed EPC, Irene uses the following roles:
The modelled process in short: An employee files a procurement request. The system then automatically checks whether the credit limit has been exceeded or not.
The head_purchasing executes the order and informs the employee when the order has been delivered. When the delivery arrives, the employee must check and confirm it. head_accounting and head_purchasing should also have insight in the form Inspection of Delivery. When everyone confirmed the order, the process ends. |


Irene Adler does not like the look of the technical identifiers of the roles in her EPC. She wants to display meaningful role names. Irene also wants to define some users to test the new app. In the next step, she therefore goes to the Scheer PAS Administration user interface.
| Anchor | ||||
|---|---|---|---|---|
|
Step 2: Assigning Users to Roles
| Tip |
|---|
Visit the ADMIN for detailed descriptions of the configuration options in the Scheer PAS Administration. |
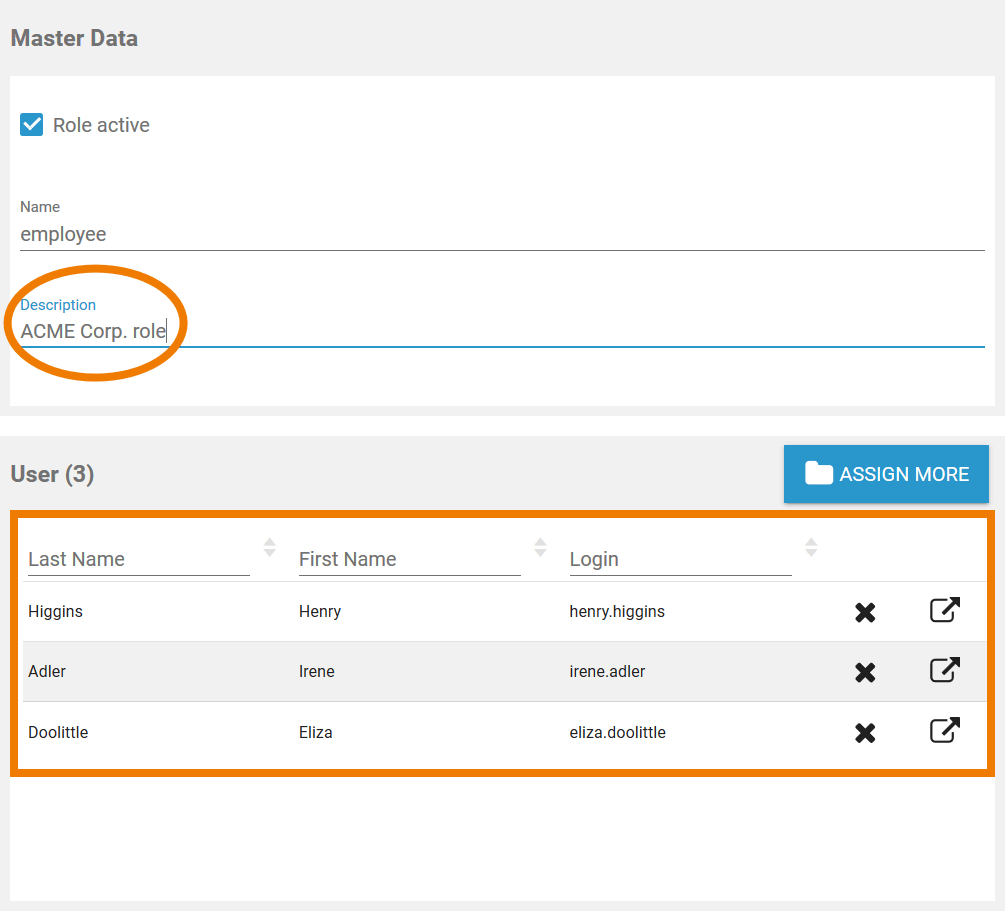
| Irene logs in to Scheer PAS Administration and opens the datasheet of the role employee. In the User window, she can assign the users who are to have this role. |
| In the role's datasheet, Irene can also rework the name and enter a description. |
| In section Translations, Irene is also able to enter display names for the EPC element that differ from the technical identifier. The displayed name depends on the user language set in the user interface of Scheer PAS BPaaS. Currently three languages can be used:
Irene inserts English and German translations for all roles and assigns suitable users to the roles. She then switches back to the BPaaS user interface. |
| As desired, the roles are now displayed with different display names. |
| Anchor | ||||
|---|---|---|---|---|
|
Step 3: Creating Process Apps and Activating the Role Check
Irene must now create corresponding start links for each role in the app project to enable each role to access the process.
Multiexcerpt include SpaceWithExcerpt INTERNAL MultiExcerptName overview_availability DisableCaching true PageWithExcerpt INTERNAL:_BPaaS_excerpts
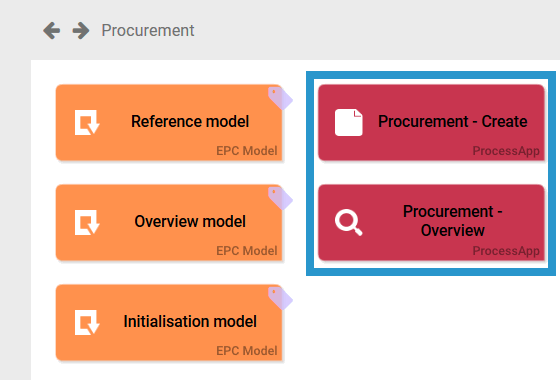
| During the creation of the app project, a Process App - Create and a Process App - Overview element have already been created:
| ||||||||||
| Irene renames the existing Process Apps:
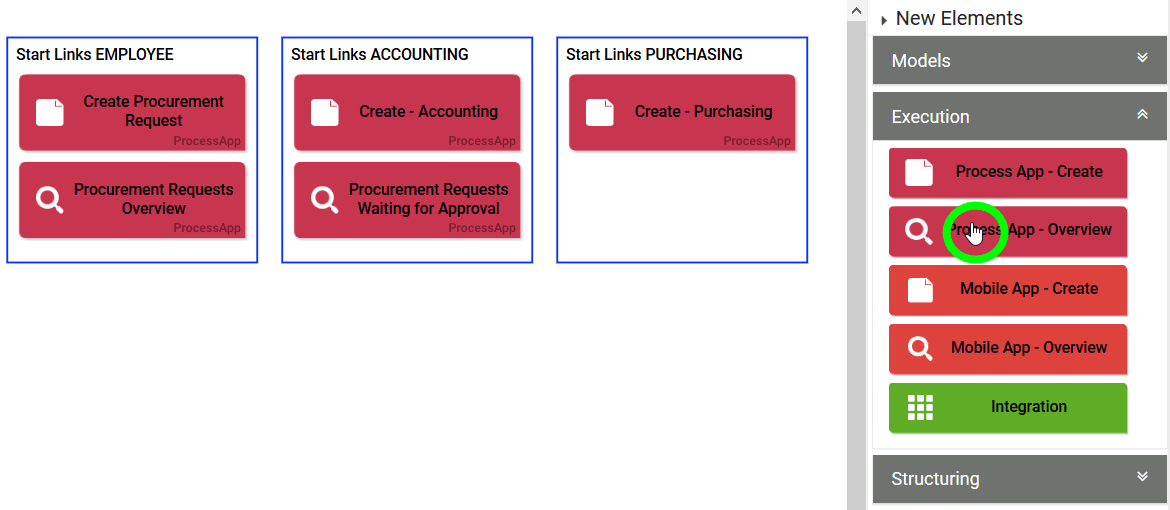
Both elements should become start links for the role employee:
In order to visually combine the two elements, Irene creates the frame Start Links EMPLOYEE. | ||||||||||
| For each additional role, a new Process App - Create and Process App - Overview are added.
| ||||||||||
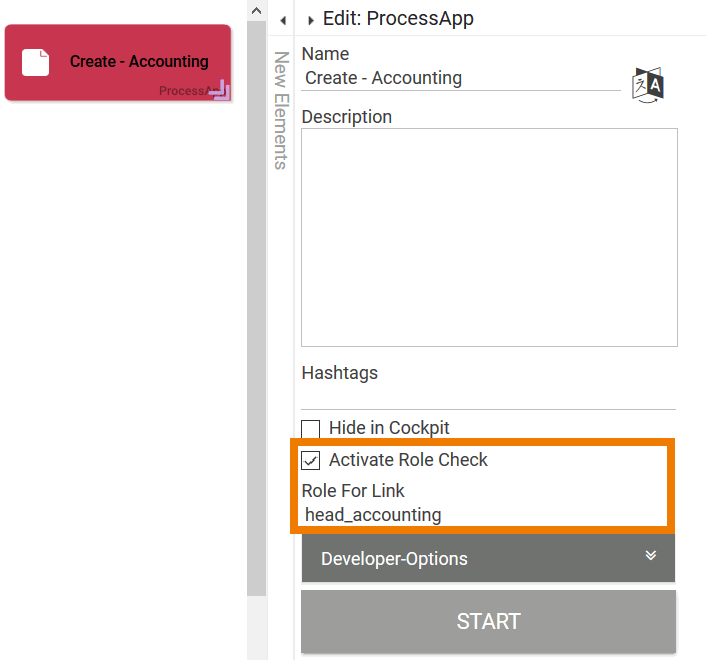
| Irene assigns the appropriate role to each start link and activates the role check at all Process App - Create elements.
| ||||||||||
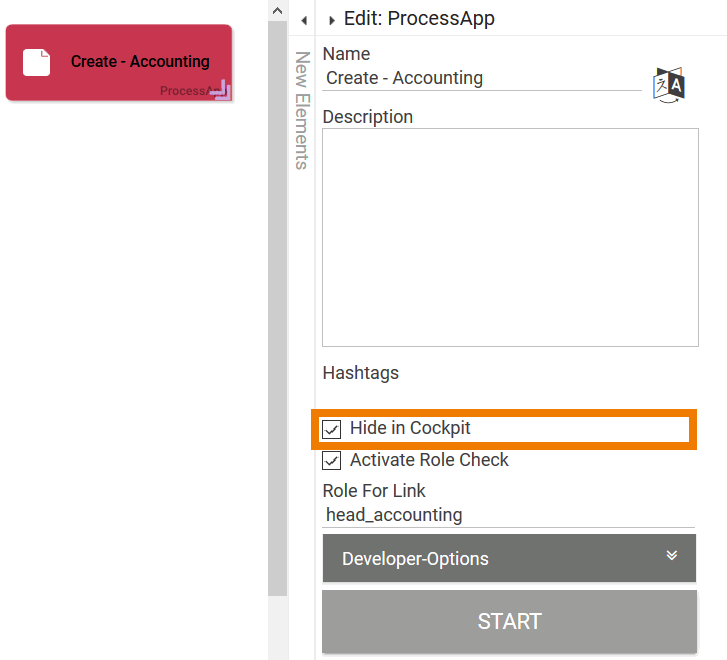
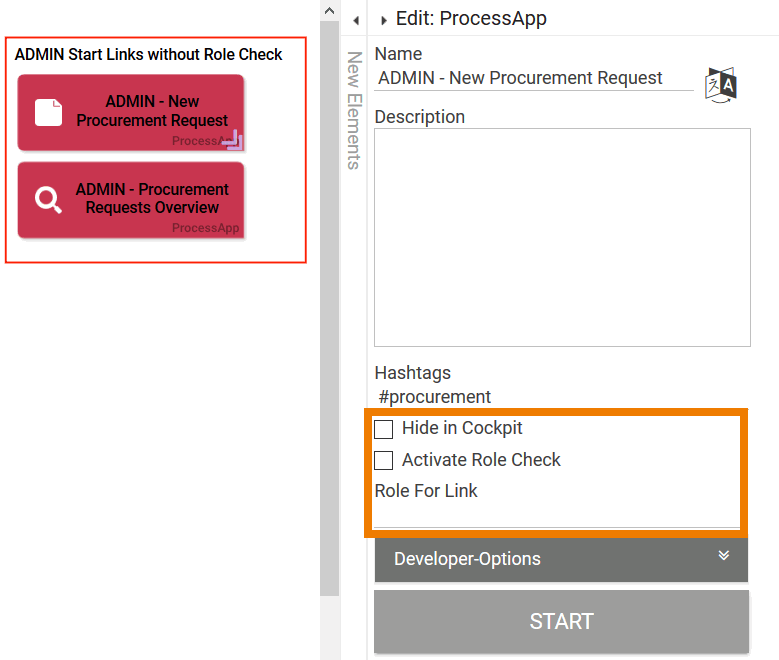
| For start links that are not to be used by app users, you can also activate the Hide in Cockpit option. Users are then not able to create tiles for these links in the cockpit. Example: The head of accounting should intervene only if requests exceed the credit limit and have to be approved. Requests that are waiting for approval are displayed in the overview of role head_accounting. The head of accounting therefore does not need the Process App - Create tile in his cockpit. Therefore Irene can activate the Hide in Cockpit option for the element Create - Accounting. | ||||||||||
|
|

Now Irene Adler has made all the necessary settings:
- She added roles to the process steps in her EPC model.
- She created Process Apps for each role.
- She activated the role check for all Process Apps.
- Within the Scheer PAS Administration she assigned users to the roles.
Now the role-based app can be used by the different role owners.
Roles and Sub-EPCs
If an entire sub-EPK is to be executed by only one role, it is not sufficient to add the role only to the function with the sub-EPC. Roles must always be modeled within the sub-EPC itself.
| For documentation purposes, you can append a role to the function on which the sub-EPC is attached. However, this is not decisive for execution. |
| The role check only takes effect if the role is appended to the functions in the sub-EPC. |


| Panel | ||
|---|---|---|
| ||
|
| Panel | ||
|---|---|---|
|
| Otp | ||||
|---|---|---|---|---|
|
| Panel | ||
|---|---|---|
| ||
|
Overview
Content Tools